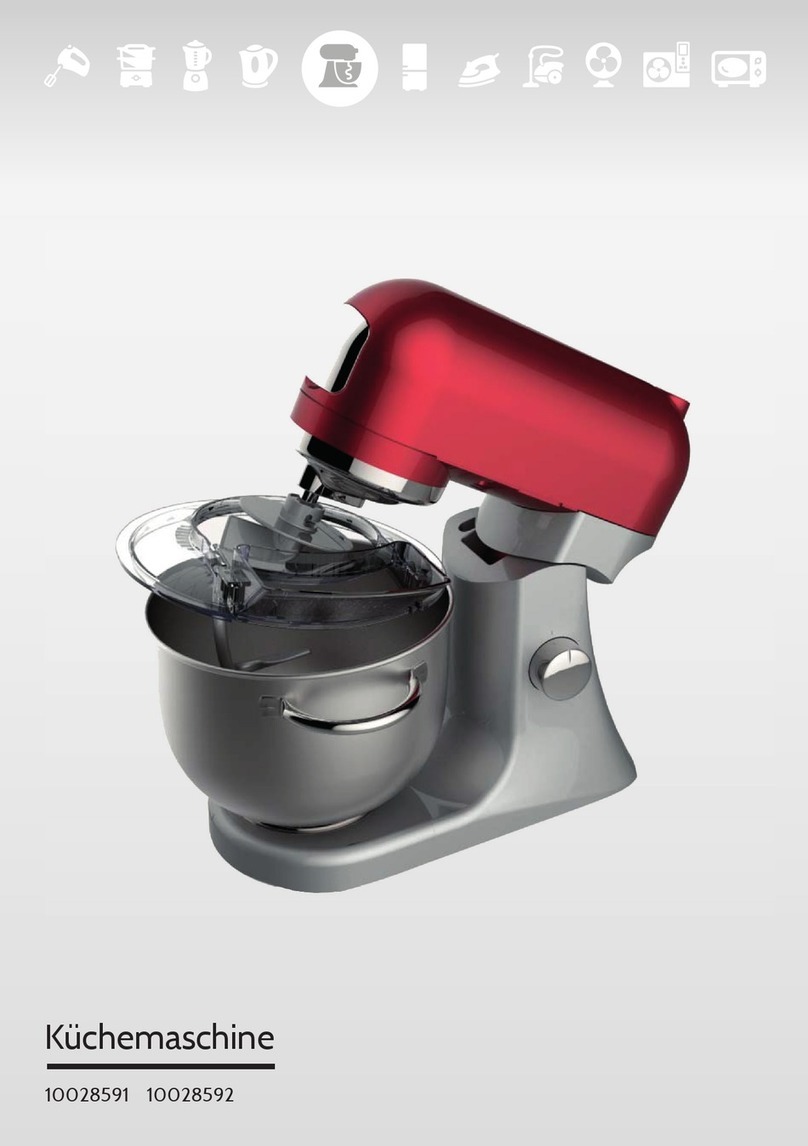
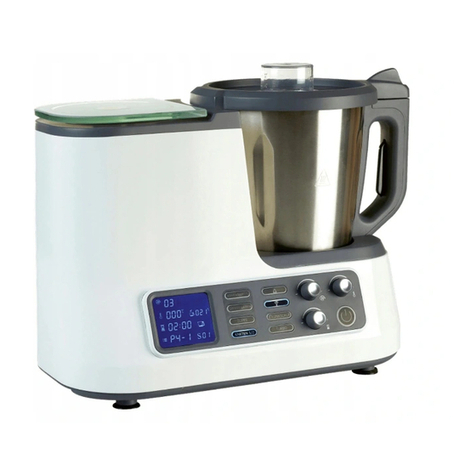
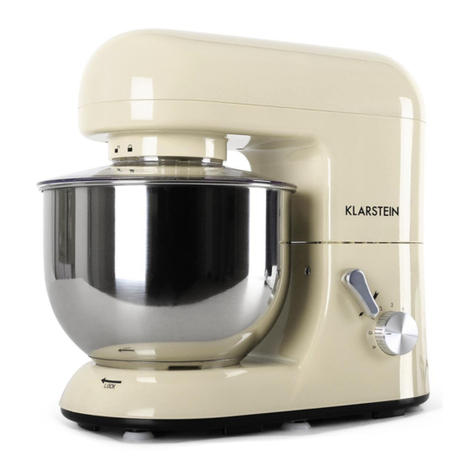
Klarstein 10028591 User manual

10028591 10028592
Kitcheneer
Küchenmaschine
Food Processor
Robot de cocina
Robot de cuisine
Robot da cucina


3
DE
Sehr geehrter Kunde,
wir gratulieren Ihnen zum Erwerb Ihres Gerätes. Lesen Sie
die folgenden Hinweise sorgfältig durch und befolgen Sie
diese, um möglichen Schäden vorzubeugen. Für Schäden,
die durch Missachtung der Hinweise und unsachgemäßen
Gebrauch entstehen, übernehmen wir keine Haftung. Scannen
Sie den folgenden QR-Code, um Zugriff auf die aktuellste
Bedienungsanleitung und weitere Informationen rund um das
Produkt zu erhalten.
INHALTSVERZEICHNIS
Sicherheitshinweise4
Geräteübersicht und Zubehör5
Vor dem ersten Gebrauch 5
Inbetriebnahme und Bedienung 6
Verarbeitungstabelle8
Reinigung und Pege 8
Hinweise zur Entsorgung9
TECHNISCHE DATEN
Artikelnummer 10028591, 10028592
Stromversorgung 220-240 V ~ 50/60 W
Leistung 1000 W
KONFORMITÄTSERKLÄRUNG
Hersteller:
Chal-Tec GmbH, Wallstraße 16, 10179 Berlin, Deutschland.
Dieses Produkt entspricht den folgenden Europäischen
Richtlinien:
2014/30/EU (EMV)
2014/35/EU (LVD)
2011/65/EU (RoHS)
English 11
Español 19
Français 27
Italiano 35

4
DE
SICHERHEITSHINWEISE
• Prüfen Sie vor der Benutzung die Spannung auf der Geräteplakette und schließen
Sie das Gerät nur an Steckdosen an, die der Spannung des Geräts entsprechen.
Wenn Sie sich nicht sicher sind, ob Ihre Anschlüsse den Anforderungen genügen
ziehen Sie einen Elektriker oder Ihren Stromanbieter zu Rate.
• Schalten Sie den Motor immer aus, bevor Sie den Stecker in die Steckdose stecken.
• Um Stromschlägen vorzubeugen, tauchen Sie die Gerätebasis nie komplett in
Wasser oder andere Flüssigkeiten.
• Falls das Netzkabel beschädigt ist, muss es vom Hersteller, einem autorisierten
Fachbetrieb oder einer ähnlich qualizierten Person ersetzt werden.
• Knicken Sie das Netzkabel nicht ab und lassen Sie es nicht über die Arbeitsäche
hängen, damit keiner daran hängenbleibt.
• Stellen Sie das Gerät nicht in die Nähe offener Herde, heißer Öfen oder leicht
entzündlicher Materialen, wie Vorhänge oder Textilien.
• Stellen Sie das Gerät vor der Benutzung auf eine stabile, ebene Oberäche.
• Kinder ab 8 Jahren, psychisch, sensorisch und körperlich eingeschränkte Menschen
dürfen das Gerät nur benutzen, wenn sie vorher von einer für sie verantwortlichen
Aufsichtsperson ausführlich mit den Funktionen und den Sicherheitsvorkehrungen
vertraut gemacht wurden und die damit verbundenen Risiken verstehen.
• Achten Sie darauf, dass Kinder nicht mit dem Gerät spielen.
• Stellen Sie das Gerät so nah wie möglich an die Stromquelle, damit Sie den Stecker
bei Bedarf schnell und leicht ziehen können.
• Überprüfen Sie das Netzkabel regelmäßig auf Schäden. Benutzen Sie das Gerät
nicht mit beschädigtem Netzkabel.
• Benutzen Sie das Gerät nur in Innenräumen und nur zum angegebenen
Verwendungszweck.
• Halten Sie Kinder vom Gerät fern und verstauen Sie es außerhalb der Reichweite
von Kindern.
• Benutzen Sie das Gerät nicht ohne Inhalt und nur unter Aufsicht.
• Fassen Sie während der Benutzung keine beweglichen Teile mit den Händen an.
• Bewahren Sie die Bedienungsanleitung auf und geben Sie das Gerät nur mit
Bedienungsanleitung weiter.
• Benutzen Sie nur Originalzubehör.
• Ziehen Sie den Stecker aus der Steckdose, bevor Sie das Gerät reinigen oder nicht
mehr benutzen.
• Schalten Sie das Gerät aus und ziehen Sie den Stecker, bevor Sie bewegliche Teile
wechseln oder entnehmen.
• Das Gerät enthält Teile, die dem Benutzer nicht zugänglich sind. Entfernen Sie keine
Abdeckungen und versuchen Sie nicht das Gerät selbst zu reparieren. Reparaturen
dürfen nur von qualizierten Fachkräften durch- geführt werden.
• Schließen Sie das Gerät nicht an Mehrfachsteckdosen, externe Timer oder
ferngesteuerte Steckdosen an.

5
DE
GERÄTEÜBERSICHT UND ZUBEHÖR
1 Geschwindigkeits-Regler
2 Entriegelungsknopf für
den Gerätekopf
4 Abdeckung für den
Fleischwolf-Anschluss
5 Fleischwolf-Anschluss
6 Schüsseldeckel
7 Schüssel aus Edelstahl
9 Entriegelungsknopf
für das Fleischwolf-
Gehäuse
10 Multifunktions-Kopf
11 Schneebesen
12 Knethaken
13 Mix-Aufsatz
VOR DEM ERSTEN GEBRAUCH
Um optimale Ergebnisse zu erzielen, sollten Sie vor dem ersten Gebrauch den Abstand
der Aufsätze anpassen. Dazu benötigen Sie einen Schlitzschraubendreher.
Entfernen Sie das komplette Verpackungsmaterial und suchen Sie nach der Schraube
am Drehgelenk (siehe Bild). Schließen Sie den Schneebesen, Knethaken oder Mix-
Aufsatz an und schließen Sie den Deckel. Überprüfen Sie wie groß der Abstand des
Aufsatzes zum Boden der Schüssel ist.
Falls der Aufsatz den Boden berührt, sollten Sie den Abstand erhöhen, indem Sie
die Schraube gegen den Uhrzeigersinn drehen, bis der Aufsatz genug Abstand zum
Boden der Schüssel hat. Falls der Abstand zu groß ist, drehen Sie die Schraube im
Uhrzeigersinn, um den Abstand zu verringern. Wenn Sie zufrieden mit der Höhe sind,
versichern Sie sich, dass sie für alle drei Aufsätze genügt.

6
DE
INBETRIEBNAHME UND BEDIENUNG
Aufsätze anbringen und anpassen
Ihr Gerät ist neben der Schraube mit einer weiteren Funktion ausgestattet, die eine
Feinanpassung der Aufsatz- Höhe vor jeder Benutzung erlaubt.
1. Drücken Sie auf die obere Entriegelungstaste (siehe Bild A.). Heben Sie den
Multifunktions-Kopf (10) an und befestigen Sie den Mix-Aufsatz, den Teighaken
oder den Schneebesen.
2. Halten Sie den Aufsatz in Position.
3. Senken Sie den Kopf (10) und halten Sie den oberen Entriegelungsknopf gedrückt
bis Sie ein Klicken hören.
4. Passen Sie die Höhe des Aufsatzes an, indem Sie am Schaft drehen, bis der
Abstand zum Schüsselboden perfekt ist.
5. Heben Sie den Kopf (10) an und halten Sie dabei den Mix-Aufsatz, Teighaken
oder Schneebesen in Position.
6. Reinigen Sie vor der ersten Benutzung alle Zubehörteile mit Seifenwasser. Spülen
Sie klar nach und trocknen Sie die Teile sorgfältig ab.
7. Stellen Sie das Gerät auf eine ebene, saubere und trockene Oberäche und
stecken Sie den Stecker in die Steckdose.

7
DE
Mixen/Kneten/Rühren/Mischen/Steifschlagen
Abhängig von den Zutaten können Sie in der Schüssel bis zu 2 kg Teig verarbeiten.
1. Drücken Sie auf den Entriegelungsknopf (2) und heben Sie den Kopf (10) ganz an.
2. Befestigen Sie die Schüssel (7), indem Sie sie drehen, bis sie fest sitzt. Wiegen Sie
die Zutaten ab und geben Sie sie in die Schüssel.
3. Drehen Sie den Deckel am Kopf, bis die Einfüllöffnung nach vorne zeigt.
4. Befestigen Sie den gewünschten Aufsatz (11, 12, 13) am Kopf, indem Sie ihn in den
Schaft schieben und mit einer viertel Umdrehung festziehen (siehe Bild B.).
5. Senken Sie den Kopf ab und drücken Sie auf den Entriegelungsknopf, bis sie ein
Klicken hören.
6. Während der Zubereitung können Sie weitere Zutaten durch die Einfüllöffnung
hinzugeben.
7. Um das Gerät anzuhalten, drehen Sie den Drehregler (1) auf die Position „0“
zurück.

8
DE
VERARBEITUNGSTABELLE
Aufsatz Lebensmittel Maximum Zubereitungs-
zeit
Geschwindig-
keit
Schneebesen Sahne
(38% Fett)
250 ml 10 Minuten 5-Max
Eiweiß 10 Stk.
(mind. 3 Stk.)
3 Minuten 5-Max
Knethaken Mehl 1000 g 10 Minuten Min-2
Salz 20 g
Hefe 10 g
Zucker 600 g
Wasser 600 g
Schmalz 20 g
Mix-Aufsatz Mehl 100 g 5 Minuten Min-4
Streuzucker 100 g
Margarine 100 g
Eier 2 Stk.
REINIGUNG UND PFLEGE
• Ziehen Sie den Stecker aus der Steckdose.
• Tauchen Sie die Gerätebasis niemals in Wasser und reinigen Sie sie nicht unter
ießendem Wasser. Reinigen Sie die Basis mit einem weichen, leicht feuchten
Lappen.
• Nehmen Sie die Aufsätze ab du reinigen Sie sie unter ießendem Wasser. Passen
Sie auf, dass Sie sich nicht an den scharfen Kanten verletzen.
• Falls sich das Zubehör durch Lebensmittel (Karotten oder Orangen) verfärbt hat,
reiben Sie es vorsichtig mit einem Küchentuch ab, das sie vorher in etwas Speiseöl
getunkt haben und reinigen Sie es dann ganz normal.

9
DE
HINWEISE ZUR ENTSORGUNG
Bendet sich die linke Abbildung (durchgestrichene Mülltonne
auf Rädern) auf dem Produkt, gilt die Europäische Richtlinie
2012/19/EU. Diese Produkte dürfen nicht mit dem normalen
Hausmüll entsorgt werden. Informieren Sie sich über die
örtlichen Regelungen zur getrennten Sammlung elektrischer
und elektronischer Gerätschaften. Richten Sie sich nach
den örtlichen Regelungen und entsorgen Sie Altgeräte nicht
über den Hausmüll. Durch die regelkonforme Entsorgung
der Altgeräte werden Umwelt und die Gesundheit ihrer
Mitmenschen vor möglichen negativen Konsequenzen
geschützt. Materialrecycling hilft, den Verbrauch von
Rohstoffen zu verringern.


11
EN
Dear Customer,
Congratulations on purchasing this equipment. Please read
this manual carefully and take care of the following hints to
avoid damages. Any failure caused by ignoring the items and
cautions mentioned in the instruction manual is not covered
by our warranty and any liability. Scan the QR code to get
access to the latest user manual and other information about
the product.
CONTENT
Safety Instructions12
Product Description and Accessory13
Before rst Use13
Use and Operation14
Processing Guide16
Cleaning and Care16
Hints on Disposal17
TECHNICAL DATA
Item number 10028591, 10028592
Power supply 220-240 V ~ 50/60 W
Power consumtion 1000 W
DECLARATION OF CONFORMITY
Producer:
Chal-Tec GmbH, Wallstraße 16, 10179 Berlin, Germany.
This product is conform to the following European
Directives:
2014/30/EU (EMC)
2014/35/EU (LVD)
2011/65/EU (RoHS)

12
EN
SAFETY INSTRUCTIONS
• Make sure that the voltage shown on the rating plate corresponds with that of the
mains supply. The rating plate can be found on the bottom of the motor block.
• The motor must always be switching off before the stand mixer is connected with the
mains supply.
• To avoid electric shocks, do not use this device in the vicinity of water. Do not
immerse the mains lead in water or other liquid.
• If the supply cord is damaged, it must be replaced by the manufacturer or its service
agent or a similarly qualied person in order to avoid a hazard.
• Do not kink or clamp the mains lead. To avoid any risk of stumbling, do not allow
the mains lead to hang over the edge of a table or a counter.
• This device should not be set up in close proximity to a naked ame, easily
ammable materials (curtains, textiles, etc.), a radiator, an oven or some other heat
source.
• Before use, place the device on a horizontal and at surface.
• This device may be only used by children 8 years old or older and persons with
limited physical, sensory and mental capabilities and / or lack of experience
and knowledge, provided that they have been instructed in use of the device by a
responsible person who understands the associated risks.
• Children should be supervised to ensure that they do not play with the appliance.
• Place this device as close as possible to the power source so that you can
disconnect the plug quickly and easily.
• If is recommended to check regularly the supply cord for any sign of possible
deterioration, and the appliance should not be used if the cable is damaged.
• Do not use outdoors. Only suitable for use indoors.
• The device should only be used for its intended purpose.
• This is not a toy! Keep away from children. The device should be used and stored
out of the reach of children.
• Careful supervision is required when the device is used by or in the vicinity of
children.
• Never operate empty and without supervision. During use, do not touch moving
parts with your ngers.
• Please note that when passing the device on to a third party, the operating
instructions must be included.
• Use only original accessories.
• Unplug the appliance when not in use or before cleaning.
• Switch off the appliance and disconnect from supply before changing accessories
or approaching parts which move in use.
• Do not attempt to repair the device yourself, since you will be exposed to
hazardous live components or other hazards by opening and removing the covers.
Repairs should only be carried out in a qualied workshop.
• The appliance is not intended to be operated by means of an external timer or a
separate remote-control system.

13
EN
PRODUCT DESCRIPTION AND ACCESSORY
1 Speed control switch
2 Release button for
multifunction head
4 Removable cover for
mincer power outlet
5 Power outlet for mincer
6 Bowl cover
7 Stainless steel bowl
9 Release button for Cutter
housing
10 Multifunction head
11 Whisk
12 Dough hook
13 Mixer blade
BEFORE FIRST USE
To achieve optimum performance from your Professional Stand Mixer you may wish to
alter the height of the attachments. To do this you will need to slotted screw driver.
Remove all packaging from the stand mixer and locate the screw in the hinge of the
machine (see diagram). Connect an attachment such as the whisk and chose the head of
the machine to check how much clearance there is between the bottom of the bowl and
the attachment.
If the attachment is touching the bowl then you should raise the attachment by turning the
screw in an anti- clockwise direction until there is sufcient clearance between bowl and
attachment. If there is too much clearance between attachment and bowl turn the screw
in a clockwise motion to reduce the distance.

14
EN
USE AND OPERATION
Adjusting the height of your attachments
Your attachments are equipped with a system for adjusting the height above the bottom
of the bowl for optimum results.
1. Press the release button (2) lift the multifunction head and in- sert the mixer blade,
dough hook or whisk.
2. Hold it in position.
3. Lower the head of the appliance (10) with the button (2) press until a click is heard.
4. Adjust the height by turning the shaft: adjust the accessories to the ideal position.
5. Lift the head (10) of the appliance again, hold the Mixer blade, Hook or whisk in
position.
6. Before using for the rst time, clean all parts of the accessories with soapy water
.rinse and dry.
7. Place the appliance on a at, clean and dry surface and then plug in your
appliance.

15
EN
Mixing/Kneading/Beating/Emulsifying/Whisking
Depending on the nature of the ingredients, the bowl (7) with its cover can be used to
prepare up to 2 kg of dough.
1. Press button (2) to the release the multifunction head (10) and raise it to a vertical
position.
2. Fit the bowl(7) onto the appliance by turning until it locks in position and place the
weighted ingredients in it.
3. Position the cover on the head with the lling opening at the front of the appliance
(see gure B).
4. Fit the desired accessory (11, 12, 13) in the power outlet ,pushing the shaft of the
accessory home and turn it a quarter turn towards you to lock it in position (see
gure B).
5. Lower the multifunction head of the appliance to horizontal position and press
button again (a click should be heard ).
6. During preparation, you can add ingredients through the opening the cover.
7. To stop the appliance, turn the knob (1) back to „0“.

16
EN
PROCESSING GUIDE
Accessory Food Maximum Operation
time
Speeds
Whisk Cream
(38% fat)
250 ml 10 minuten 5-Max
Egg white 10 pcs
(min.3 pcs)
3 minuten 5-Max
Dough hook Flour 1000 g 10 minuten Min-2
Salt 20 g
Yeast 10 g
Sugar 10 g
Water 600 g
Lard 20 g
Mixer blade Flour 100 g 5 minuten Min-4
Castor sugar 100 g
Margarine 100 g
Egg 2 pcs
CLEANING AND CARE
• Unplug the appliance.
• Never immerse the motor until in water or put it under running water wipe it with a
soft dry or slight damp cloth.
• For easier cleaning, quickly rinse the accessories after use. Completely dismantle
the mixer attachment. Handle the blades with care, as some have sharp cutting
edges.
• If your accessories are discoloured by food (carrots, oranges etc), rub them gently
with kitchen towel dipped in cooking oil and then clean in the usual way.

17
EN
HINTS ON DISPOSAL
According to the European waste regulation 2012/19/EU this
symbol on the product or on its packaging indicates that this
product may not be treated as household waste. Instead it should
be taken to the appropriate collection point for the recycling of
electrical and electronic equipment. By ensuring this product is
disposed of correctly, you will help prevent potential negative
consequences for the environment and human health, which
could otherwise be caused by inappropriate waste handling of
this product. For more detailed information about recycling of
this product, please contact your local council or your household
waste disposal service.


19
ES
Estimado cliente,
Le felicitamos por la adquisición de este producto. Lea
atentamente las siguientes instrucciones y sígalas para evitar
posibles daños. No asumimos ninguna responsabilidad por los
daños causados por el incumplimiento de las instrucciones y el
uso inadecuado. Escanee el siguiente código QR para obtener
acceso a la última guía del usuario y más información sobre el
producto.
ÍNDICE
Indicaciones de seguridad20
Vista general del aparato y accesorios21
Antes del primer uso21
Puesta en funcionamiento y uso22
Tabla de preparación24
Limpieza y cuidado24
Retirada del aparato25
DATOS TÉCNICOS
Número de artículo 10028591, 10028592
Suministro eléctrico 220-240 V ~ 50/60 W
Potencia 1000 W
DECLARACIÓN DE CONFORMIDAD
Fabricante:
Chal-Tec GmbH, Wallstraße 16, 10179 Berlín, Alemania.
Este producto cumple con las siguientes directivas
europeas:
2014/30/UE (EMC)
2014/35/UE (baja tensión)
2011/65/UE (refundición RoHS)

20
ES
INDICACIONES DE SEGURIDAD
• Antes de enchufar el aparato a la red, compruebe en la etiqueta indicativa que
la tensión del aparato y la de su red eléctrica coinciden. Si no está seguro o si las
características de su toma de red son distintas, contacte con un técnico o con la
compañia suministradora de electricidad.
• El motor debe estár siempre desconectado cuando enchufe el aparato a la red.
• Para evitar descargas eléctricas, no sumerja el aparato, ni el cable de
alimentación, ni el enchufe en agua ni en cualquier otro líquido.
• En caso de que el cable resulte dañado, encargue su reparación al fabricante o
llévelo a un taller con personal cualicado.
• No retuerza el cable. Procure que el cable no quede colgando de la supercie en
la que ha colocado la máquina para que nadie tropiece.
• No coloque el aparato cerca de hornos, supercies calientes o sustancias
fácilmente inamables como cortinas y otro tipo de tejidos.
• Coloque el aparato sobre una supercie plana y estable.
• Este aparato puede ser utilizado por niños mayores de 8 años y personas con
discapacidades físicas, sensoriales y mentales y/o con falta de experiencia y
conocimientos, siempre y cuando hayan sido instruidos sobre el uso del aparato y
comprendan los peligros y riesgos asociados.
• No permita que los niños jueguen con el aparato.
• Coloque el aparato tan cerca como sea posible de una toma de red para que en
caso de necesidad, pueda desenchufarse fácilmente.
• Compruebe regularmente que el cable está en perfecto estado. No utilice el
aparato si el cable tiene algún defecto.
• Utilice el aparato solamente en espacios cerrados y según el n para el que ha
sido fabricado.
• No deje que los niños se acerquen al aparato. Cuando guarde la máquina,
hágalo en un lugar al que los niños no puedan acceder.
• No utilice el aparato con el recipiente vacío. No deje el aparato desatendido
mientras está en funcionamiento.
• Mientras el aparato esté en funcionamiento, no acerque las manos ni ningún
utensilio de cocina a las partes móviles o a las cuchillas del aparato para no
resultar herido o causar daños en él.
• Conserve este manual de instrucciones y entréguelo también si va ceder el aparato
a otra persona.
• No utilice ningún accesorio que no haya sido autorizado por el fabricante.
• Desenchufe el aparato después de usarlo y tambien cuando lo limpie y cuando
monte o desmonte los accesorios.
• El aparato contiene partes no aptas para ser manipuladas por el usuario. No abra
la carcasa ni intente reparar el aparato usted mismo. La reparación del aparato
sólo debe ser llevada a cabo por personal cualicado.
• No enchufe el aparato a tomas múltiples ni a enchufes con temporizador.
Other manuals for 10028591
1
This manual suits for next models
1
Table of contents
Languages:
Other Klarstein Food Processor manuals

Klarstein
Klarstein 10028591 User manual

Klarstein
Klarstein 10032089 User manual

Klarstein
Klarstein BELLA User manual

Klarstein
Klarstein 10006255 User manual

Klarstein
Klarstein 10021682 User manual

Klarstein
Klarstein Bella Pico 2G User manual

Klarstein
Klarstein ARIA GRANDE SMART User manual

Klarstein
Klarstein BELLA User manual

Klarstein
Klarstein Lucia 10006254 User manual

Klarstein
Klarstein Luca User manual