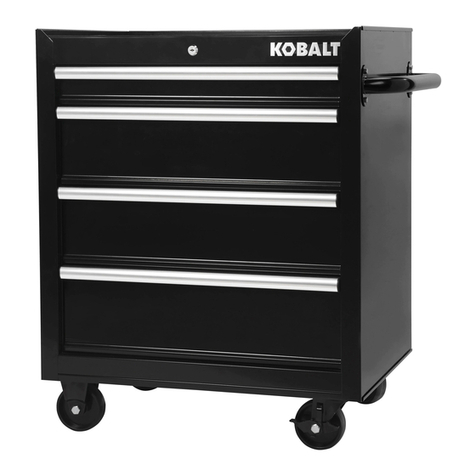
Kobalt 53278 User manual

Questions, problems, missing parts? Before returning to your retailer, call our customer service
department at 888-3KOBALT (888-356-2258), 8 a.m. - 8 p.m., EST, Monday - Sunday. You could
Serial Number _______________________ Purchase Date _________________________
ATTACH YOUR RECEIPT HERE
ITEM: #5266230, #5266838, #5266839, #5266840, #5266841, #5266842
4-DRAWER
TOOL CART
MODEL: #53278, #53285 #53286, #53287, #53288, #53289
Español p. 11
KOBALT and logo design are trademarks or registered
trademarks of LF, LLC. All rights reserved.
SS23475

2
TABLE OF CONTENTS
Safety Information.....................................................................................................................................
Package Contents.....................................................................................................................................
Preparation...............................................................................................................................................
Assembly Instructions............................................................................................................................
Care and Maintenance.............................................................................................................................
Warranty....................................................................................................................................................
3
4
5
5-8
9
9

3
SAFETY INFORMATION
Please read and understand this entire manual before attempting to assemble, operate or install
the product. If you have any questions regarding this product, please call customer service at
888-3KOBALT (888-356-2258), 8 a.m. - 8 p.m., EST, Monday - Sunday. You could also
•BE CAREFUL when opening drawers. Items inside may shift causing the unit to become
unstable and tip over, causing personal injury and/or product damage.
• To prevent personal injury and/or property damage, distribute the weight in this item evenly.
• APPLY caster brakes unless moving the item.
• DO NOT stand, sit or climb on this product. You may fall which could cause personal injury,
product or property damage.
• DO NOT mount this product on a truck bed or any other moving object. This may cause
personal injury, product or property damage.
• DO NOT alter this product in any manner. For example, do not weld external lock bars or
attach electrical equipment.
• The maximum weight for each drawer should NOT be exceeded.
• DO NOT open more than one drawer at once.
• Lid must be open for drawers to be unlocked.
• Before moving, close lid and lock to secure all drawers in place.
• DO NOT lift using the pull handle.
CAUTION
WARNING
Top Tray:
Bottom Tray:
Side Table:
Total loading capacity:
Drawer #1:
Drawer #2:
Drawer #3:
Drawer #4:
30.12 in 3.90 in
12.36 in
25.94 in
25.94 in
30 in
Drawer Location DepthWidth Height
1.73 in
1.73 in12.36 in
14.17 in
14.17 in
16 in
Load Capacity
2.52 in
3.70 in
3 in
14.17 in 15.75 in .35 in
14.17 in
14.17 in
16.06 in 88 lbs
22 lbs
22 lbs
77 lbs
242 lbs
22 lbs
550 lbs
77 lbs

4
PACKAGE CONTENTS
F
O
G
A
Description Qty
Frame Leg 4
Part
BFrame Cross support 2
CBottom Tray 1
DLocking Swivel Caster 2
ESwivel Caster 2
FChest 1
GHandle 1
HSide Table 1
Description Qty
Caster Bolt, M8x14 16
Caster Washer, M8 16
Caster Nut, M8 16
Nut, M8 40
Bolt, M8x12 38
Handle Bolt, M8x16 2
Gas Strut 2
I
Part
J
K
L
M
N
O
N
M
A
C
I
B
D
J
K
L
E
H

5
PREPARATION
ASSEMBLY INSTRUCTIONS
Hardware Used
Hardware Used
Before beginning assembly of this product, make sure all parts are present. Compare parts with
contents list. If any part is missing or damaged, do not attempt to assemble the product.
Tools required for assembly (not included): 12 mm, 13 mm and 14 mm socket, or 12 mm, 13 mm and
14 mm wrench.
1. Mount the two locking swivel casters (D) to
one side of the bottom tray (C) by inserting
four bolts (I) per caster from the underside of
the tray and then securing each bolt with a
caster washer (J) and a caster nut (K).
2. Mount the two swivel casters (E) to the other
side of the bottom tray by inserting four
caster bolts (I) per caster from the underside
of the tray (C) and then securing each bolt
with a caster washer (J) and a caster nut (K).
1
2
Caster bolt, M8x14
Caster washer, M8
Caster nut, M8
x 8
x 8
x 8
x 8
x 8
x 8
Caster bolt, M8x14
Caster washer, M8
Caster nut, M8
J
D
C
I
I
E
K
J
K

6
ASSEMBLY INSTRUCTIONS
4. Mount the frame leg assemblies into the
bottom tray by inserting bolts (M) into the
outside corners and securing with nuts (L).
Repeat for each corner.
5. With assistance, lift the chest (F) and mount it
between the frame leg assemblies so that the
bottom rests on the frame cross supports (B).
WARNING: Request assistance while mounting the chest to the posts. The chest is heavy.
WARNING: Lock the swivel casters before mounting the chest.
3. Attach a frame cross support (B) between
two frame legs (A) by inserting two bolts (M)
from the outside of the post and securing
with a nut (L) on the inside. Repeat with the
second frame cross support and remaining
pair of of frame legs.
3
4
5
Bolt, M8x12
Nut, M8
x 8
x 16
x 8
x 16
Hardware Used
Hardware Used
Bolt, M8x12
Nut, M8
M
B
F
M
L
AL
B

7
ASSEMBLY INSTRUCTIONS
6. Attach the handle (G) onto the chest (F)
on the same side as the locking swivel
casters (D). Insert two handle bolts (N)
from the exterior of the chest and secure
with with a nut (L).
7. Attach the side table (H) onto the chest (F)
opposite the pull handle (G). Insert four
bolts (M) from the exterior of the chest and
secure with four nuts (L).
AA
AA
6
7
Handle bolt, M8x16
Bolt, M8x12
Nut, M8
Nut, M8
x 2
x 4
x 2
x 4
Hardware Used
Hardware Used
N
G
F
F
G
D
L
M
L
H

8
ASSEMBLY INSTRUCTIONS
9. Tighten all hardware.
8. Secure the chest to the frame leg assemblies
by inserting bolts (M) through the posts and
into the chest and securing with a nut (L).
NOTE: On the same side as the pull handle,
only one bolt attachment will be used as the
handle uses the second position.
NOTE: Each corner of the chest has four
fasteners that will be installed when complete.
Bolt, M8x12
Nut, M8
x 10
x 10
Hardware Used
DD
8
M
L

9
CARE AND MAINTENANCE
WARRANTY
Water and other liquids spilled or splashed on the unit should be cleaned off immediately and
dried thouroughly.
Keeping your tool cart covered will protect it from dust and moisture that could potentially damage
the unit.
Lubricate drawer slides as needed.
Check for loose hardware and damaged parts.
Ensure caster wheels are swiveling and locking as intended.
This item carries a 3 - Year warranty from the date of purchase against defective parts and
workmanship. The warranty does not cover damage due to mishandling or abuse. This warranty gives
you specic legal rights, and you may have other rights that vary from state to state.

10

¿Preguntas, problemas, piezas faltantes? Antes de volver a la tienda, llame a nuestro
Departmento de Servico al Cliente al 1-888-3KOBALT (1-888-356-2258), de lunes a domingo de
Número de Serie ________________________ Fecha de Compra_________________________
ADJUNTE SE RECIBO AQUÍ
ARTÍULO: #5266230, 5266838, 5266839, 5266840, 5266841, 5266842
Carro de herramientas
con 4 cajones
MODELO: #53278, 53285 53286, 53287, 53288, 53289
Español p. 11
SS23475
KOBALT y el diseño del logotipo son marcas comerciales o marcas
registradas de LF, LLC. Todos los derechos reservados.

12
ÍNDICE
Información de seguridad..........................................................................................................................
Contenido del paquete..............................................................................................................................
Preparación..............................................................................................................................................
Instrucciones de ensamblaje..............................................................................................................
Cuidado y mantenimiento..........................................................................................................................
Garantía...................................................................................................................................................
13
14
15
15-18
19
19

13
INFORMACIÓN DE SEGURIDAD
Lea y comprenda completamente este manual antes de intentar ensamblar, usar o instalar el producto.
Si tiene preguntas relacionadas con este producto. llame al Departamento de Servicio al Cliente al
1-888-3KOBALT (1-888-356-2258), de lunes a domingo de 8 a.m. a 8 p.m., hora estándar del Este.
•BE Tenga cuidado cuando abra las gavetas. Los artículos en el interior pueden desplazarse y
hacer que la unidad sea inestable y se vuelque provocando lesiones o daños al producto.
• Para evitar cualquier lesión personal y/o daños materiales, distribuya el peso de este artículo
de manera uniforme.
• PONGA los frenos de las ruedas a menos que mueva el artículo.
• NO se pare, siente o suba sobre este producto. De lo contrario podría caerse y sufrir lesiones
personales, daños al producto o daños materiales.
• NO monte este producto sobre la plataforma de un camión ni sobre ningún objeto que se
desplace. Esto podría causar lesiones personales, daños al producto o daños materiales.
• NO modique este producto de ninguna manera. Por ejemplo, no suelde barras exteriores ni
je equipos eléctricos.
• NO se debe superar el peso máximo para cada gaveta.
• NO abra más de una gaveta al mismo tiempo.
• La tapa debe estar abierta para que se desbloqueen las gavetas.
• Antes del traslado, cierre la tapa y bloquee para asegurar todas las gavetas en su sitio.
• NO levante usando la manija para jalar.
PRECAUCĺON
ADVERTENCIA
Bandeja superior :
Bandeja inferior:
Capacidad de carga total:
Gaveta #1:
Gaveta #2:
Gaveta #3:
Gaveta #4:
76.50 cm 9.90 cm
31.39 cm
65.88 cm
65.88 cm
76.2 cm
35.9 cm
Ubicación de la gaveta ProfundidadAncho Altura
4.39 cm
4.39 cm31.39 cm
35.99 cm
35.99 cm
40.64 cm
40.01 cm
Capacidad de Carga
39.92 kg
9.98 kg
9.98 kg
34.92 kg
109.77 kg
249.47 kg
6.40 cm
9.39 cm
7.62 cm
.89 cm 9.98 kg
35.99 cm
35.99 cm
40.79 cm
34.92 kg
Mesa lateral:

14
CONTENIDO DEL PAQUETE
A
Descripción Cantidad
Patas del marco 4
Pieza
BSoporte transversal del marco 2
CBandeja inferior 1
DRueda giratoria con bloqueo 2
ERueda giratoria 2
FBaúl 1
GManija 1
HMesa lateral 1
Descripción
Perno de la rueda, M8x14 16
Arandela de la rueda, M8 16
Tuerca de la rueda, M8 16
Tuerca, M8 40
Perno, M8x12 38
Perno de la manija, M8x16 2
Puntal de gas 2
I
Pieza
J
K
L
M
N
O
Cantidad
F
O
G
N
M
A
C
I
B
D
J
K
L
E
H

15
PREPARACIÓN
INSTRUCCIONES DE ENSAMBLAJE
Antes de comenzar a ensamblar este producto, asegúrese de tener todas las piezas. Compare las
piezas con la lista del contenido. No intente ensamblar el producto si falta alguna pieza o si alguna
está dañada.
Herramientas necesarias para el ensamblaje (no se incluyen): dado de 12 mm, 13 mm y 14 mm o
llave de 12 mm, 13 mm y 14 mm.
Aditamentos utilizados
Perno de la rueda, M8x14
Arandela de la rueda, M8
Tuerca de la rueda , M8
x 8
x 8
x 8
x 8
x 8
x 8
1. Monte las dos ruedas giratorias de bloqueo
(D) a un lado de la bandeja inferior (C)
insertando cuatro pernos (I) por rueda desde
la parte inferior de la bandeja y asegurando
cada perno con una arandela (J) y una tuerca
para rueda (K).
2. Monte las dos ruedas giratorias (E) al otro
lado de la bandeja inferior insertando cuatro
pernos (I) de rueda por rueda desde la parte
inferior de la bandeja (C) y asegurando cada
perno con una arandela (J) y una tuerca para
rueda (K).
1
2
J
D
C
I
I
E
K
J
K
Perno de la rueda, M8x14
Arandela de la rueda, M8
Tuerca de la rueda , M8

16
INSTRUCCIONES DE ENSAMBLAJE
ADVERTENCIA: solicite asistencia durante el montaje del baúl en los postes. El baúl es pesado.
ADVERTENCIA: bloquee las ruedas giratorias antes de montar el baúl.
Aditamentos utilizados
Perno, M8x12
Tuerca, M8
x 8
x 16
x 8
x 16
Perno, M8x12
Tuerca, M8
4. Monte los conjuntos de patas del marco en la
bandeja inferior insertando pernos (M) en las
esquinas exteriores y jándolos con tuercas
(L). Repita para cada esquina.
5. Con ayuda, levante el baúl (F) y móntelo
entre los ensambles de las patas del marco
para que la parte inferior se apoye sobre los
soportes transversales (B).
3. Fije un soporte transversal del marco
(B) entre las dos patas del marco (A)
insertando dos pernos (M) desde el exterior
del poste y asegurando con una tuerca
(L) en el interior. Repita con el segundo
soporte transversal del marco y el par
restante de patas del marco.
3
4
5
M
B
F
M
L
AL
B

17
INSTRUCCIONES DE ENSAMBLAJE
Aditamentos utilizados
Perno de la manija, M8x16
Tuerca, M8
Tuerca, M8
Perno, M8x12
x 2
x 4
x 2
x 4
6. Fije la manija (G) en el baúl(F) en el
mismo lado que las ruedas giratorias
de bloqueo (D). Inserte dos pernos de
manija (N) desde el exterior del baúl y
asegúrelos con una tuerca(L).
7. Fije la mesa auxiliar (H) en el baúl (F)
opuesto al manija (G). Inserte cuatro
pernos (M) desde el exterior del baúl y
asegúrelos con cuatro tuercas (L).
AA
6
N
G
F
D
L
AA
7
F
G
M
L
H

18
INSTRUCCIONES DE ENSAMBLAJE
9. Apriete todos los aditamentos.
Aditamentos utilizados
Perno, M8x12
Tuerca, M8
x 10
x 10
8. Asegure el baúl a los ensambles de las patas
del marco insertando pernos (M) a través de
los postes y dentro del baúl y asegurándolos
con una tuerca (L).
DD
8
M
L
NOTA: en el mismo lado que el tirador,
solo se usará un accesorio de perno ya
que la manija usa la segunda posición.
NOTA: cada esquina del baúl tiene cuatro
sujetadores que se instalarán cuando
esté completo.

19
CUIDADO Y MANTENIMIENTO
Se debe limpiar y secar inmediatamente el agua y otros líquidos que se derramen sobre la unidad.
Mantener el carrito de herramientas cubierto lo protegerá del polvo y de la humedad que podrían
dañar la unidad.
Lubrique los deslizadores de gaveta según sea necesario.
Compruebe si hay aditamentos sueltos y piezas dañadas.
Asegúrese de que las ruedas giratorias giren y se bloqueen según lo previsto.
GARANTÍA
Este artículo cuenta con una garantía de 3 años desde la fecha de compra que lo garantiza contra
mano de obra y piezas defectuosas. La garantía no cubre los daños ocasionados por manipulación
inadecuada ni maltrato. Esta garantía le otorga derechos legales específicos, pero podría tener
también otros derechos que varían según el estado.

20
This manual suits for next models
11
Table of contents
Languages:
Other Kobalt Tools Storage manuals