manuals.online logo
Brands
  1. Home
  2. •
  3. Brands
  4. •
  5. Kohler
  6. •
  7. Bathroom Fixture
  8. •
  9. Kohler PATIO 20368T-CP/SC User manual

Kohler PATIO 20368T-CP/SC User manual

2015
2015
1279555-T01-B
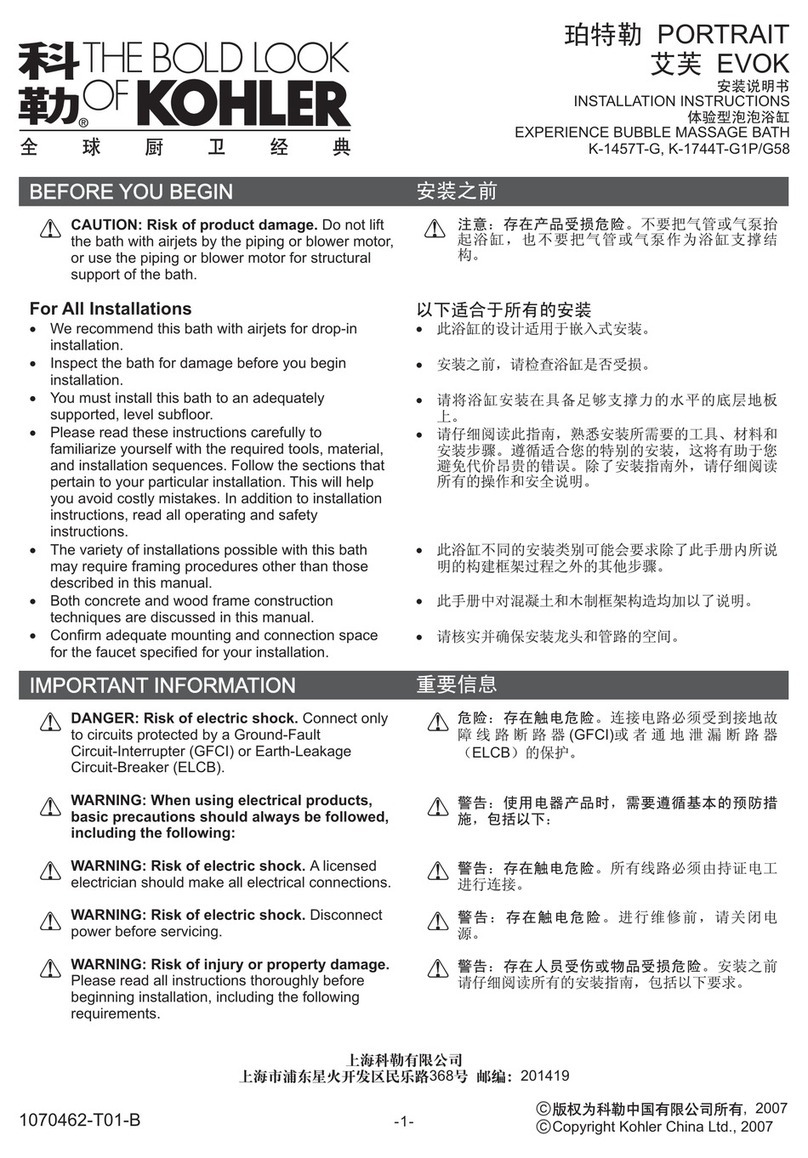
帕蒂欧(致巧版) PATIO
20368T-CP/SC(DC/直流型)
20369T-CP/SC(DC/直流型)
小便器感应器
NEW PATIO URINAL SENSOR(PLS)
科勒(中国)投资有限公司
中国上海市闸北区江场三路158号 邮编:200436
制造商:上海科勒电子科技有限公司
中国上海市宝山区丰翔路1955号 邮编:200444
5 8 5 8
20368T-CP/SC (0.5L/1L/DC) 20368T-CP/SC (0.5/1L/直流型)
20369T-CP/SC (3.0L/DC) 20369T-CP/SC(3.0L/直流型)
0.5 0.5 0.5
0.5
20368T-CP/SC
Water pressure at 0.18~0.55MPa,
no more than 1L
Water pressure at 0.1MPa,
no more than 1L
20368T-CP/SC
水压为 0.18~0.55MPa时,
不大于 1L
水压为0.1MPa时,不大于1L
20369T-CP/SC
Water pressure at 0.18~0.55MPa,
no more than 3L
Water pressure at 0.1MPa,
no more than 3L
20369T-CP/SC
水压为 0.18~0.55MPa时,
不大于 3L
水压为0.1MPa时,不大于3L
0.86 0.86
Flushing Mode Dual flushing(20369T-CP/SC)冲洗方式 两段冲洗 (20369T-CP/SC)
Flushing after used
(20368T-CP/SC)
使用后冲洗
(20368T-CP/SC)
1279555-T01-B
2
20368T-CP/SC 20368T-CP/SC
1279555-T01-B3
1045451-SP
1045450-SP
1242033-SP 1045448-SP
1039036-SP
1045449-SP
1045447-SP
1039038-SP 1045451-SP
1045445-SP
1045441-SP 1056053-SP 1100658-SP
16306T-NA 1060668-SP 1045459-SP
6767-SP
1045460-SP
1045458-SP
1045461-SP
1045456-SP 1056081-SP
1045457-SP
Hex Pan
2.5mm内六角扳手
1279555-T01-B
4
20368T-CP/SC 20369T-CP/SC
No
型号 /Model
0.5L 1L 3L
1 18645A-0
√
2 18645T-Y-0
√ √ √
3 4904T-ET/ER-0
√
4 4960T--ET/ER-0
√ √
54978T-ET/ER-0
√
64986T-ER-0
√
75016T-YET/YER-0
√ √ √
85777T-ET/ER-0
√ √ √
95889T-ET/ER-0
√ √
10 18645X-Y-0
√ √
11 4904X-ET/ER-0
√ √
12 4986X-ER-0
√ √
13 4991X-ER/ET-0
√ √ √
14 5016T-YER/YET
√ √
15 4904-ER/ET-0
√
K-4960T-ER
127
Spud
127
Spud
K-4978T-ET K-4978T-ER
127
Spud
127
Spud
Spud
Spud
K-4960T-ET
Spud
Spud
Spud
Spud
Spud
127 127
127 127
5
1279555-T01-B
127
Spud Spud
127
Spud
Spud
486 486
83
K-18645T-Y-0 K-4986T-ER 127
1/2" Spud
1/2" Spud
420 40
127
Spud
Spud
552
Spud
402
K-4904T-ET K-4904T-ER
127 127
Spud
Spud
77
520
523
523
Spud
Spud
Spud
Spud
2" N.P.S.
TAP
2" N.P.S.
TAP
127
127
127
127
127
127
61279555-T01-B
K-5777T-ET K-5777T-ER
127
127
420 40
420 40
545 545
*447 *447
K-5889T-ET K-5889T-ER
127
127
*380 *380 92
1/2" Spud
952 952
K-18645A-0
K-18645X-Y-0
127 127
420 40 420 40
Spud Spud
937
600
370
Spud
Spud
3/4" Spud
Spud
Spud
G1/2
Spud
Spud
Spud
3/4" Spud
Spud
Spud
Spud
Spud
Spud
Spud
127
127
127
127 127 127
7
1279555-T01-B
K-4904/4904X-ET-0 K-4904/4904X-ER-0
127 127
Spud
Spud
Spud
610 534 610
534
K-4991X-ET-0 K-4991X-ER-0
127
Spud
127
3/4" Spud
484
618
534 534
K-5016T-YER
K-5016T-YET
127
Spud
127
Spud
289
289
610 610
445 445
Spud
Spud
3/4"
Spud
2" NPT
Tap 2" NPT
Tap
Spud
Spud
Spud
3/4"Spud
520
2" NPT
Tap
2" NPT
Tap
Spud
Spud
3/4"
Spud
3/4"Spud
2"
TaNPT
p2"
TaNPT
p
127
127
127
127
127 127
81279555-T01-B
K-4986X-ER-0
83 1/2" Spud
1/2" Spud
3/4"Spud
552 356
600
402
2" NPT
Tap
127
127
注意:将本产品连接上供水管前,建议先冲洗干净供水管。
9
1279555-T01-B
need AC Power
产品需使用交流电源时,
NOTE: please clean the inside of water supply pipe before
connecting to the product.
gnihsubfodneehT
is not less than 5mm.
电工套管端面露出不
小于5mm
Connect control box while
installing AC Power
当使用交流电源时
接面板上的电控盒
10 1279555-T01-B
使用直流电源的情况时,从面板反面去下电池盒组件,用十字
螺丝刀旋开电池盒盖螺丝,装入2节7号碱性电池,拧紧电池盒
盖的螺丝后,将电池盒组件放回原处,然后连接电磁阀和控制
盒组件及电子按钮和电控盒组件的接插件,最后连接电源和控
制盒的接插件。
使用交流电源的情况时,连接电磁阀和控制盒组件的接插件,
最后连接交流电源和控制盒的接插件。
While using DC power ,take out the battery box from the
back side of cover . Loose the screws of the battery box assy
with a screw driver .Put 2 "AAA" size alkaline batteries and
tighten the battery box cover with the screws. Replace the
battery box.Then connect solenoid valve with control box
assy and connect button with control box assy.Connect
power supply to power unit at last.
While using AC power, connect solenoid valve with control
box assy, and connect button with control box assy.Connect
AC power supply to power unit at last.
Keep the connecter wire color is the same .
Put on clean gloves when install sensor cover
to avoid surface injury by cement or sand.
插头对应导线保持一
致。
电工套管
CAUTION:
a. Outlet of AC power unit upward prohibited.
b. Do not connect 220V C power supply to DC wiring
terminal.
c. Do not damage the covering of AC power unit or
remove screws to avoid leakage.
6.安装交流电源盒(仅限于交流型)
请选配16306T-NA交流电源盒,安装方式如下:
使用交流电源时须先断开直流电源,二者不能同
时供电。
警告:
a. 禁止将交流电源盒出线朝上安装。
b. 禁止将220V交流电源接入直流接线端。
c. 安装时严禁损伤交流电源盒外壳或移开电源盒盖螺
钉,以防止受潮漏电。
Outlet downwards
出线朝下安装 Outlet upwards
出线朝上安装
Connect to
sensor
接感应器
Connect to AC
Power supply
接交流电源
Connect to AC
Power supply
接交流电源
Connect to
sensor
接感应器
图 :交流电源盒连接方式一:
交流电源盒与电控盒直接相连。
A. Fig. #1: AC power unit connection way 1:
AC power unit is directly connected to electric control box.
Fig. #2: AC power unit connection way 2:
AC power unit is connected to electric control box by
connection wire.
1A.
图 :交流电源盒连接方式二:
交流电源盒通过连接线与电控盒相连。
2
AC
交流电源
Connector
接插件
16306T-NA
AC Power Unit
交流电源盒
AC
交流电源 Connector
接插件 Wire prepared
by customer
连接线用户自备
Connector
接插件
16306T-NA
AC Power Unit
交流电源盒 Connect with the same color wire,
and protect connect area by insulation tape.
请按电线颜色对接
连接处用绝缘胶布包好
Fig. #1
图1
Fig. #2
图2
B. When installing the AC power unit in cassette, please
layout the bushing according to Fig.#3, and thread the
wire through the bushing. Use of wires must be sheated.
Fig.#3: Connection sketch AC power unit install in cassette.
CAUTION: One AC power unit can supply two sensors
at most.
将电源盒放在阀盒中时,如图示安装电工套管,管内装入电
线。使用的电线必须是护套线。
图 :交流电源盒安装在阀盒内的连接示意图。
3
B.
警告:一个交流电源盒最多可连接两个感应器。
Bushing
Connect 220V AC
接220V交流电
Fig. #3
图3
1279555-T01-B11
6.Installation AC power unit(only for AC) Please
match 16306T-NA AC power unit . The way of
installation is as below.
When using AC power must be cut off DC power ,the
two can't power supply at the same time.
在电源接通前,
5
1279555-T01-B
12
5
Set Working Status
1. K-20369T-CP/SC(DC)
The working status is set as dual-flush.
13
1279555-T01-B
5
K-20369T-CP/SC(直流型)
工作状态为二段式冲洗状态。
1.
5 5 5 8
5 8
The default flush mold of sensor is 0.5 L, you can switch to the
1L flush mode with flushing control stick. Operate as follow:
after initial power on, during the first 5 minutes, you can switch
the flush mode by putting the flushing control stick near the
right part of the sensor lens. When the flushing control stick is
near the right part of the sensor lens for 5 seconds. There will
be one quick rinse and the indicator light flashes twice after
you complete the 1L flush mode setting. If you need to reset
the 0.5 L flush mold, you can cut off the power completely and
restart the sensor, during the first 5 minutes, you can switch
the flush mode by putting the flushing control stick near the
right part of the sensor lens. When the flushing control stick is
near the right part of the sensor lens for 5 seconds. There will
be one quick rinse and the indicator light flashes once after
you complete the 0.5 L flush mode setting.
0.5L&1L flush mode change
2. K-20368T-CP/SC(DC) 2. K-20368T-CP/SC(直流型)
5
1279555-T01-B
14
5
1. 1.
Battery indicating light
flashes every 2 seconds
and no flushing.
Battery indicating light
flashes every 6 seconds,
and the product works
properly.
Battery can be uses for 1 week. Replace batteriesl.
2. The manual unit is damaged. 2. Check the manual unit.
5
手动装置损坏 检查手动装置
电池指示灯每2秒闪烁一次
而不出水
电池指示灯每6秒闪烁一次,
但此时可以正常工作
电池可用一周时间左右 更换新电池
15
1279555-T01-B
1279555-T01-B
16

This manual suits for next models

1

Other Kohler Bathroom Fixture manuals

Kohler K-15815 User manual

Kohler

Kohler K-15815 User manual

Kohler K-1014-H2 Assembly instructions

Kohler

Kohler K-1014-H2 Assembly instructions

Kohler K-T949 User manual

Kohler

Kohler K-T949 User manual

Kohler K-8034 User manual

Kohler

Kohler K-8034 User manual

Kohler K-13680 Operating manual

Kohler

Kohler K-13680 Operating manual

Kohler NEW ELOSIS K-77218T-R User manual

Kohler

Kohler NEW ELOSIS K-77218T-R User manual

Kohler K-671 Assembly instructions

Kohler

Kohler K-671 Assembly instructions

Kohler K-2000 Assembly instructions

Kohler

Kohler K-2000 Assembly instructions

Kohler K-7435 Assembly instructions

Kohler

Kohler K-7435 Assembly instructions

Kohler KUMIN 18656IN-ND Series User manual

Kohler

Kohler KUMIN 18656IN-ND Series User manual

Kohler K-7223 User manual

Kohler

Kohler K-7223 User manual

Kohler K-6956 User manual

Kohler

Kohler K-6956 User manual

Kohler K-2315 Assembly instructions

Kohler

Kohler K-2315 Assembly instructions

Kohler NEW MEMOIRS K-76560T-L-SHP User manual

Kohler

Kohler NEW MEMOIRS K-76560T-L-SHP User manual

Kohler K-1224-HB Quick start guide

Kohler

Kohler K-1224-HB Quick start guide

Kohler K-2083 User manual

Kohler

Kohler K-2083 User manual

Kohler BEITOU 72830T-L User manual

Kohler

Kohler BEITOU 72830T-L User manual

Kohler 16359IN-A-CP User manual

Kohler

Kohler 16359IN-A-CP User manual

Kohler K-1160-H Quick start guide

Kohler

Kohler K-1160-H Quick start guide

Kohler K-8501 User manual

Kohler

Kohler K-8501 User manual

Kohler K-7143 User manual

Kohler

Kohler K-7143 User manual

Kohler K-852-H2 Assembly instructions

Kohler

Kohler K-852-H2 Assembly instructions

Kohler SKYLINE K-705880T-FM-SHP User manual

Kohler

Kohler SKYLINE K-705880T-FM-SHP User manual

Kohler K-2438 Assembly instructions

Kohler

Kohler K-2438 Assembly instructions

Popular Bathroom Fixture manuals by other brands

Franke HDTX806L Installation and operating instructions

Franke

Franke HDTX806L Installation and operating instructions

Glacier bay HD65415W-6201 Installation and care guide

Glacier bay

Glacier bay HD65415W-6201 Installation and care guide

BELLOSTA bellini 6309/1A Installation instruction

BELLOSTA

BELLOSTA bellini 6309/1A Installation instruction

KWC FRANKE ANIMA ANMX-S1 Installation and operating instructions

KWC

KWC FRANKE ANIMA ANMX-S1 Installation and operating instructions

DeLonghi OTTAVIO User instruction manual

DeLonghi

DeLonghi OTTAVIO User instruction manual

Toto TBP01301 Operation manual

Toto

Toto TBP01301 Operation manual

Hans Grohe WallStoris 27902 7 Series Instructions for use/assembly instructions

Hans Grohe

Hans Grohe WallStoris 27902 7 Series Instructions for use/assembly instructions

Wellis WZ00089 Instruction guide

Wellis

Wellis WZ00089 Instruction guide

Helvex Piura PIU-201 installation guide

Helvex

Helvex Piura PIU-201 installation guide

Bossini L00817 Instructions for installation, operation and maintenance

Bossini

Bossini L00817 Instructions for installation, operation and maintenance

ACO QuARTz Installation & operation

ACO

ACO QuARTz Installation & operation

Zitta PIMIL000-0003 instruction manual

Zitta

Zitta PIMIL000-0003 instruction manual

Hans Grohe Axor Citterio 39454821 Installation/User Instructions/Warranty

Hans Grohe

Hans Grohe Axor Citterio 39454821 Installation/User Instructions/Warranty

Hans Grohe Metris 14888000 Instructions for use/assembly instructions

Hans Grohe

Hans Grohe Metris 14888000 Instructions for use/assembly instructions

HMI TRU-FIT installation instructions

HMI

HMI TRU-FIT installation instructions

Sanela SLP 02K Instructions for use

Sanela

Sanela SLP 02K Instructions for use

Helvex Europeo MEP-2001-S/L installation guide

Helvex

Helvex Europeo MEP-2001-S/L installation guide

Fleurco Gemini G002 installation manual

Fleurco

Fleurco Gemini G002 installation manual

manuals.online logo
manuals.online logoBrands
  • About & Mission
  • Contact us
  • Privacy Policy
  • Terms and Conditions

Copyright 2025 Manuals.Online. All Rights Reserved.