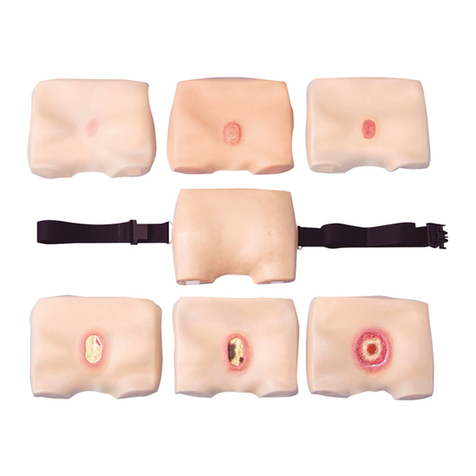
KOKEN LM-109M User manual

Male
Catheterization
and Enema
Simulator
LM-109M
Instruction Manual
Thank you for purchasing the Male Catheterization and Enema Simulator.
Please read this instruction manual carefully to ensure correct use of the product,
and store it in a safe place for easy access.
KOKEN CO., LTD.
1-4-14 Koraku, Bunkyo-ku, Tokyo 112-0004 JAPAN
URL:http://www.kokenmpc.co.jp
E-mail:[email protected]
© 2016-2020 KOKEN CO., LTD. C-1-1024-1-01-06

10000

1
Handling and Safety Precautions
These precautions should be strictly observed in order to ensure safe,
long-term use of the product.
The following precautions should be observed particularly strictly:
1. This simulator is made to have the same feel as that of a living body. Undue handling may cause
breakage of the simulator.
2. This model has a distinctive odor resulting from the materials it is made from however is not
harmful to the body or indicate any problem with quality. This distinctive odor will weaken over
time. The product is also coated in baby powder at the time of manufacture and the smell of
baby powder may remain on the product.
3. The simulator reproduces the resistance of the bulbar urethra.
When inserting the catheter, if the penis is lowered to an angle less than about 60 degrees, the
insertion of the catheter may be dicult. Accordingly, please hold the penis at an angle of about
60 degrees.
4. When you practice cleaning or disinfecting of the pubic area, please use water. Use of alcohol
may cause breakage of the simulator.
Use of colored disinfectant liquid may cause pigment to be fixed to the simulator so that the
pigment cannot be removed.
5. As for the lubricant, please use K-Ytm lubricating jelly. Please do not use K-Y® gel, as it may
increase the insertion resistance of the catheter.
6. Please do not use oily lubricant (olive oil etc.), alcohol lubricant, and lubricant containing organic
solvent. These may cause breakage of the simulator.
7. Please use catheters of 14Fr and 16Fr.
8. Please check the state of the catheter before inserting the catheter. Please do not use a catheter
that is degraded or deformed. Such a catheter is dicult to insert.
9. When inserting the catheter, please apply the lubricant each time.
10. If it is dicult to insert the catheter, please increase the amount of the lubricant to be applied
or use another catheter (firm silicone catheter or catheter with thinner baloon part etc). The
simulator may break if such a catheter is forced to be inserted.

2
11. When indwelling the catheter, please inate the balloon after inserting the catheter apart from
the balloon end portion by a distance equal to or greater than 23 cm. Indwelling of the catheter
in an intermediate of the valve causes the valve and the catheter to be broken.
12. If the insertion of the catheter is repeated a plurality of times, water may accumulate in the
urethral canal. If the simulator is used in such a state, water may leak through the urethral exit.
Please slant the simulator suitably to drain the water.
13. After use, please wash the simulator and the catheter well with water. If the lubricant dries and
hardens, it may interfere with the use of the simulator.
14. Please check the state of the valve at every use. If the valve is broken, it may cause a leakage of
water.
15. Oil components may come out of the genital skin. After use, please do not keep the genital skin
attached to the simulator. Please wrap it in cooking paper, gauze, etc., put it into an attached
reclosable poly bag, and keep it. For a detailed storage method, please refer to the washing
and storage methods on page 15.
16. Apply commercially available baby powder to reduce friction if you mind stickiness of the
genital skin or after it is washed with water following use.
17. Please check the state of the genital skin every three years as a reference, and exchange it
accordingly.
18. Please do not place objects on the simulator. Otherwise, the simulator may be deformed.
19. Please do not keep the simulator in contact with printed matter. Print, such as letters, may
transfer to the simulator and be xed there.
20. When storing the simulator, please select a place that is not subject to direct sunlight and
ultraviolet rays.
21. This product is intended for use in standard operating environments. Do not use it in heavy
industrial settings.
22. This model uses urethane foam for some of its parts, and may be susceptible to damage from
pests that are attracted to urethane foam (such as insects in the ant family).
When storing this model, ensure that thorough measures are taken to prevent pest damage
before storing. The company will not be involved with or held liable for pest damage that
occurs during storage.
1. The contents of this instruction manual are subject to change without notice.
2. This instruction manual may not be reproduced in part or in its entirety without permission.
3. Please contact the manufacturer in the event that any errors or omissions are found in the contents of
this instruction manual.
4. This product should be used only as described in this instruction manual. In particular, the product
should not be used in any way that contravenes the precautions noted in the instruction manual.
3
Table of Contents
1. Outline and Features
2. Components and Conguration
3. Handling Method
4. Washing and Storage Methods
5. Specications
6. Replacement Parts (Sold Separately)

4
1. Outline and Features
Outline
The simulator imitates the shape of the urethral canal peculiar to a male. A catheterization catheter
is inserted according to a suitable technique to reach the bladder. This causes urine (water) to
ow out. The feel of the penis is closely similar to that of a living body penis. Techniques such as
disinfecting of surroundings of the urethral exit and cleaning of the pubic area can be performed.
The main body can be separated at an exact middle so that the shape of the urethral canal, the
insertion state of the catheter, and the anatomical positional relationship can be studied.
Features
・ The simulator is of an actual size by which a catheterization and glycerine enema for an adult
male can be practiced.
・ Since soft and stretchable materials are used for the pubic area, the appearance and the feel
are realistic to give presence when practicing.
・ A series of techniques of catheterization, such as disinfecting of the pubic area, inserting, xing,
and removing of a catheter, can be practiced.
・ The simulator is shaped to imitate the bending of the scrotal-angled portion of the urethral
canal and the bulbar urethra. That is, the simulator is congured such that it is dicult to insert
the catheter if the penis is not appropriately raised.
・ Techniques, such as peeling of the foreskin, disinfecting and cleaning, can be performed.
・ The motion of the penis is also close to that of a living body penis. This enables the practice of
xing the penis.
・ The main body can be separated, and the urethral canal and bladder are transparent. This
enables instruction for checking the insertion state of the catheter into the urethral canal and
the balloon in the bladder.
・ By exchanging the prostate, the urethral stricture due to hypertrophy can be reproduced.
・ The attached a glycerine enemator can be inserted through the anus to the rectum. This
enables the practice for the glycerine enema.

5
2. Components and Conguration
-5-
2,部品名称と構成
①尿道部品
②陰部表皮
③陰部フレーム
④本体
⑤膀胱
⑥膀胱弁
⑦Oリング
⑧直腸プレート
⑨膀胱チューブ
⑩直腸接続コネクタ
⑪イルリガートルバッグ
⑫イルリガートルチューブ
⑬側臥位用スタンド
⑭前立腺(通常)
⑮前立腺(肥大)
⑯排液チューブ
⑰グリセリン浣腸専用器
収納バッグ
取扱説明書(本書)
①
②
③
④
⑤
⑥ ⑦
⑧
⑨
⑩
⑪
⑫
⑬
⑭
⑮
⑯
⑰
1. Urethral part
2. Male Genital skin
3. Pubic Area Frame
4. Main body
5. Bladder
6. Bladder Valve (Male/Female)
7. O-ring
8. Rectal plate
9. Bladder tube
10. Rectum connecting connector
11. Bag for irrigator
12. Tube for irrigator
13. Stand for lateral decubitus
14. Prostate (usual)
15. Prostate (hypertrophy)
16. Drain tube
17. Glycerine enemator
Storage bag
Instructions manual (this pamphlet)

6
3. Handling the Model
3-1 Assembly of Simulator
1. Please connect the bag for irrigator with the bladder tube, and put water into the bag for
irrigator. Please open a clamp, ll the bladder tube with water, close the clamp, and attach
the bladder valve to it.
2. Please attach the O-ring to a connector of a urethral part, and connect it to the bladder tube.

7
3. Please attach the genital skin to the pubic area frame.
4. Please apply lubricant to the distal end of the glans and insert it into the genital skin.
Please check whether or not the glans is twisted and then x the urethral part and the genital
skin with hook and loop fasteners.
5. Please separate the main body into right and left parts, and t and x the pubic area frame to
the right part of the main body.
Check whether
or not the glans
is twisted.

8
6. Please attach the bladder to the bladder tube, and t and x the bladder to the hook and
loop fasteners of the right part of the main body.
7. Please cover the connector for connecting the urethral part and the bladder tube with the
prostate. When covering the connector with the prostate (hypertrophy), please stretch and
extend a constricted portion of the prostate by hand, and attach the prostate such that the
prostate clamps the connector.
Stretch and expand the
constricted portion and
clamp the tube.

9
8. Please connect the rectum connecting connector with the drain tube.
9. Please insert the rectum connecting connector from the rear side of the genital skin.
10. Please t and x the rectal plate to the right part of the main body.
11. Please attach the right and left parts to close and x the main body, and check whether the
pubic area frame is xed to the main body.

10
12. When performing a catheterization, please hang the bag for irrigator at a position higher
than that of the simulator main body. If the bag is hung at a lower position,
water dose not ow out.
13. When performing an enema, please prepare a bucket etc. under a desk or a bed and put the
distal end of the drain tube in it.
3-2 Insertion of Catheterization Catheter
1. Please open the clamp of the tube for irrigator and check whether or not the water leaks
from the simulator.
2. Please lower the foreskin, expose the glans, and erect the penis at about 90 degrees.
* When practicing the cleaning or disinfecting of the pubic area, please use water instead of
disinfection liquid.

11
3. Please apply lubricant on the distal end of the catheter for about 4 to 5 cm and insert the
catheter. If you feel resistance, please slant the penis forward at about 60 degrees, and
advance the catheter such that you slightly draw the penis to yourself.
* Intermediate resistance reproduces resistance of the bulbar urethra.
* The simulator is congured such that it is dicult to insert the catheter if the penis is
lowered to an angle less than about 60 degrees.
* If it is dicult to insert the catheter, please check the techniques and insert it again. In this
case, please remove moisture from the catheter and increase the amount of the lubricant
to be applied. Also, please consider using other types of catheters (rm silicone catheter
or catheter with thinner baloon part etc). The simulator may be broken if the catheter is
forced to be inserted.
* If it is dicult to insert the catheter, please use water mixed with a small amount
(approx 5%) of surfactant (neutral detergent) as urine.
* If the insertion of the catheter is repeated a plurality of times, water may accumulate in the
urethral canal.
If the simulator is used in such a state, water may leak through the urethral exit. Please
slant the simulator suitably to drain the water through the external urethral exit.
4. Please check the outow of the urine (water). Please check the following if the urine does
not ow out.
・Does the catheter pass through the valve?
・Is the clamp of the tube for irrigator open?
・Has the amount of the water in the bag for irrigator decreased to a small amount?
5. When you check the insertion state of the catheter or the indwelling state of the balloon,
please separate the main body into the right and left parts to be used. In this case, please
check whether the pubic area frame is rmly xed to the right part of the main body.
about 60
degrees.

12
* When indwelling the catheter, please inate the balloon after inserting the catheter apart
from the balloon end portion by a distance equal to or greater than 23 cm. Inating the
balloon in an intermediate of the valve may cause the valve and the catheter to be broken.
6. Once the catheter is inserted, please remove the moisture from its wet tip, apply the lubricant
each time, and then insert the catheter.
If the lubricant is applied where water remains, the lubricant slides easily o of the catheter.
This makes it dicult to insert the catheter.
3-3 Enema
1. Please prepare a bucket etc. under a desk or a bed and put the distal end of the drain tube in it.
2. Please insert the stand for lateral decubitus in the groove of the left part of the main body,
and x the main body in the left lateral decubitus.
3. Please apply lubricant to the distal end of a glycerine enemator, insert it into the anus, and
pour enema liquid (water) into it. At this time, please lower the distal end of the drain tube
to a position below the anus. Otherwise, the enema liquid (water) may ow backward.

13
3-4 Removal
1. Please separate the main body and remove the rectal plate.
2. Please remove the pubic area frame from the main body, and remove the prostate, the
bladder, and the rectum connecting connector.
* Please pay attention to the outow of the water.
3. Please close the clamp of the tube for irrigator and remove the bladder tube.

14
4. Please remove the connector for connecting the bladder tube with the urethral part.
* At this time, please pay attention to a loss of the O-ring.
5. Please remove the bladder valve from the bladder tube, and drain the water in the tube.
6. Please remove the genital skin from the pubic area frame, and remove the urethral part from
the genital skin.
At this time, please remove slowly while holding the area of the hook and loop fastener so that
it does not peel o from the genital skin.

15
4. Washing and Storage Methods
1. Please ush the lubricant that has adhered to the urethral part, the bladder valve, the bladder
tube, etc. well with water. If the lubricant dries and hardens, it may interfere with the use of
the simulator.
2. Please remove moisture well, dry the simulator and then put it into a storage bag.
3. Oil components may come out of the genital skin. After using the simulator,
please do not keep the genital skin attached to the main body. Please wrap it in
cooking paper, gauze, etc., put it into an attached reclosable poly bag, and keep it therein.
Please wrap the genital skin gently such that wrinkles are not generated on it.
4. Please apply baby powder that is commercially available, if you mind stickiness of the genital
skin.
5. As for stains on the simulator, please use neutral detergent that is watered down and wipe
o the stains with wet gauze etc.
* Please do not use solvents such as thinner and benzene.

16
5. Specications
6. Replacement Parts (Sold Separately)
Length Width Height Weight
MainBody
StorageBag
Approx.25cm Approx.39cm Approx.21cm Approx.2.3kg
Approx.29cm Approx.53cm Approx.32cm
Productname
Bagforirrigator(3pcs/set) LM-025J
Tubeforirrigator(3pcs/set) LM-025H
Productname ProductNo.
MaleGenitalskin LM-109MB
BladderValve(Male/Female) LM-109V
Glycerineenemator(withcap/5pcs) LM-0686
Table of contents
Other KOKEN Science Education Product manuals

KOKEN
KOKEN Colonoscopy Lower GI Endoscopy Simulator Type... User manual

KOKEN
KOKEN LM-024 User manual

KOKEN
KOKEN LM-089 User manual

KOKEN
KOKEN LM-060 User manual

KOKEN
KOKEN LM-026M User manual

KOKEN
KOKEN LM-078 User manual

KOKEN
KOKEN LM-025 User manual

KOKEN
KOKEN LM-101B User manual

KOKEN
KOKEN LM-109FA User manual

KOKEN
KOKEN LM-095N User manual

KOKEN
KOKEN LM-103 User manual

KOKEN
KOKEN LM-068 User manual

KOKEN
KOKEN LM-017 User manual

KOKEN
KOKEN LM-113A User manual

KOKEN
KOKEN LM-074 User manual

KOKEN
KOKEN Western Features Baby User manual

KOKEN
KOKEN LM-092 User manual

KOKEN
KOKEN LM-101D User manual

KOKEN
KOKEN LM-094B User manual

KOKEN
KOKEN LM-114H-CE User manual