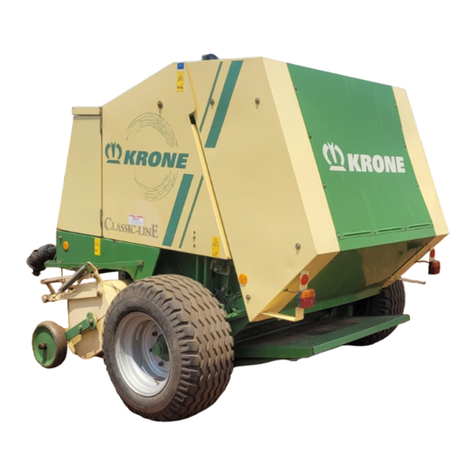
Krone Vario Pack 1510 User manual

Operating manual
No. 766-2 GB
Round Baler
Vario Pack 1510
Vario Pack 1810
(from machine no. 541 290)

Dear customer,
You have now received an operating manual for the KRONE
product which you have purchased.
This operating manual contains important information for the pro-
per use and safe operation of the machine.
If this operating manual should for any reason become wholly or
partially unusable, you can obtain a replacement operating
manual for your machine by stating the number given on the other
side.
Spelle, 01.10.2002
(Dr.-Ing. Dr. Josef Horstmann, Managing Director)
(ppa. Dr.-Ing. Klaus Martensen, Manager of the engineering and design dep.)
(Wolfgang Ungruh, Director of Quality Control)
We
declare in our sole responsibility that the product
to which this declaration refers, corresponds to the relevant basic health and safety requirements of
EC Directive 89/392/EEC; 3. amending directive of 22.7.93.
EC Declaration of Conformity
corresponding to EC directive 89/392/EEC
Maschinenfabriken Bernard Krone GmbH
Heinrich-Krone-Str. 10, D-48480 Spelle
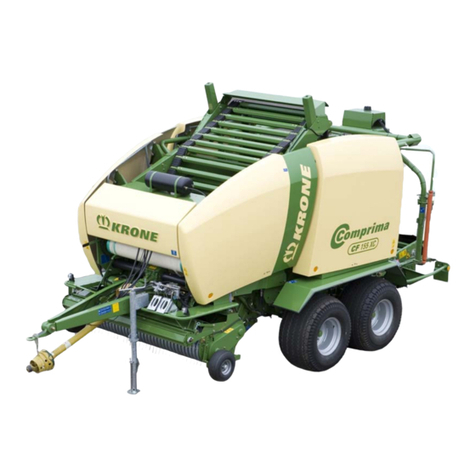
Krone Round Baler
Models: VarioPack 1510;Vario Pack1810

1
Contents
Contents
1 General Information ..........................................................................I -1
1.1 Intended Operation ..................................................................................................I-1
1.2 Technical Data ........................................................................................................I-1
2 Safety .................................................................................................II -1
2.1 Identifying Safety Instructions in the Operating Manual ..........................................II-1
2.2 Safety Instructions and Accident Prevent Regulations ...........................................II-1
2.3 Introduction.............................................................................................................II-5
3 Before and After Use....................................................................... III -1
3.1 Commissioning......................................................................................................III -1
3.2 Hitching .................................................................................................................III-2
3.3 Road Driving .........................................................................................................III-4
3.4 Unhitching .............................................................................................................III-5
4 Operation......................................................................................... IV -1
4.1 Adjustments Before Starting Work........................................................................ IV -1
4.2 Forward Speed and PTO Speed .......................................................................... IV -2
4.3 Filling the Bale Chamber...................................................................................... IV -2
4.4 Wrapping and Depositing Bales........................................................................... IV -3
4.5 After Baling ........................................................................................................... IV -3
5 Basic Settings and Operation........................................................ V -1
5.1 Pick-Up.................................................................................................................. V -1
5.2 Baffle Plate ............................................................................................................ V -2
5.3 Roll-type crop guard .....................................................................................................
(Special Equipment) .............................................................................................. V -2
5.4 Select baling pressure........................................................................................... V -3
5.5 Adjusting baling diameter...................................................................................... V -3
5.6 Attaching and Detaching the Bale Ejector ............................................................. V -4
5.7 Floor Conveyor Chain ........................................................................................... V -5
5.8 TwineWrapping / Twine and Net Wrapping .......................................................... V -6
5.9 Net Wrapping / Net and Twine Wrapping ............................................................ V -13
5.10 Bale Counter ....................................................................................................... V -18
5.11 Central Chain Lubrication Device........................................................................ V -19
5.12 Adjustment of the density indicators .................................................................... V -21
6 Control unit Basis (Electric twine starter) ................................... VI -1
6.1 General Information .............................................................................................. VI -1
6.2 Preparing for Use ................................................................................................. VI -2
6.3 Operation.............................................................................................................. VI -2
6.3.1 Actuating the Wrapping ......................................................................................... VI -2
7 Control unit Medium (Electro-Hydraulic).................................... VII -1
7.1 General Information ............................................................................................. VII-1
7.2 Preparing for Use ................................................................................................ VII -2
7.3 Operation............................................................................................................. VII-2

2
Contents
7.3.1 Selecting Wrapping Mode .................................................................................... VII -2
7.3.2 Adjusting baling size ............................................................................................ VII-3
7.3.3 Actuating the Wrapping (Manual Operation)......................................................... VII-3
7.3.4 Actuating the Wrapping (Automatic Mode) ........................................................... VII-3
7.4 Sensor Test ......................................................................................................... VII -4
8 Maintenance.................................................................................. VIII -1
8.1 Adjustments........................................................................................................ VIII-1
8.2 Adjusting the automatic floor conveyor shut-off .................................................. VIII -2
8.3 Adjusting the Sensors ........................................................................................ VIII -3
8.4 Maintenance Tasks ............................................................................................ VIII-4
8.5 Drive Chains....................................................................................................... VIII-7
8.6 Hydraulic System ............................................................................................. VIII-10
8.9 Shortening the floor conveyor chains ............................................................... VIII -12
8.7 Drawbar Ring Hitch .......................................................................................... VIII -13
8.8 Cleaning Tensioning Arm at floor conveyor rear .............................................. VIII -13
8.10 Lubrication........................................................................................................ VIII-15
9 Winter Storage ................................................................................ IX -1
9.1 General Information .............................................................................................. IX -1
10 Return to Service............................................................................. X -1
10.1 GeneralInformation ............................................................................................... X -1
10.2 Vent Overload Coupling on the PTO Shaft............................................................ X -2
11 Faults – Causes and Remedy....................................................... XI -1
11.1 General Faults, Causes and Remedy................................................................... XI -1
11.2 Faults, Causes and Remedy in the Central Chain Lubrication Device................. XI -4
A1 Commissioning ............................................................................... A -1
A1.1 Preparing for Commissioning ................................................................................ A -1
A1.2 Assembling the Bale Ejector ................................................................................. A -4
A1.3 Adjusting Drawbar Height ..................................................................................... A -8
A1.4 Attaching the PTO Shaft ........................................................................................ A -9
A1.5 Attaching the Hose Bracket ................................................................................. A -11
A1.6 Lighting System................................................................................................... A -12
A2 Electrical Circuit Diagram............................................................. A -13
A2.1 Electrical Circuit Diagram - Medium .................................................................... A -13

I - 1
General Information
1 General Information
This operating manual contains basic instructions to
follow for assembly, operation and maintenance.
For this reason, these operating instructions must be
read by operating personnel before commissioning
and use, and need to be available for easy reference.
Follow both the general safety instructions contained
in the section on safety and the specific safety
instructions contained in the other sections.
1.1 Intended Operation
The Vario Pack 1510 and Vario Pack 1810 round
balers are composite balers with variable bale
chambers.They compact agricultural baling materials
such as hay, straw or wilted silage into round bales.
The variable bale chambers of the Vario Pack 1510
make it possible to produce round bales with a
diameter of approximately 1.00 - 1.50 m; the Vario
Pack 1810 produces bales approximately 1.00 - 1.80
m in diameter. The width of the round bales is 1.20 m.
The round balers are equipped with a double twine
and / or a net wrapping device.
1.2 Technical Data
1.2.1General Information
This operating manual is valid for the Vario Pack 1510
and Vario Pack 1810 round balers starting with serial
number 541 290.
1.2.2Manufacturer's Address
Maschinenfabrik Bernard Krone GmbH
Heinrich-Krone-Straße 10
D-48480 Spelle (Germany)
Telephone: (49) 59 77/935-0
Fax: (49) 59 77/935-339
E-mail: [email protected]
1.2.3Certification
Declaration of Conformity (The requirements of EC
Machine Directive 89/392/EEC; 3. amending directive
from 22.7.93 have been fulfilled.)
See reverse side of title page
1.2.4Identification
Type
Year
Vehicle
ID No.
The entire identification plate
represents a legal document and
should not be altered or rendered
illegible!
1.2.5Data Required for Questions and
Orders
When making questions concerning the machine or
ordering replacement parts, be sure to provide type
designation, vehicle ID number and year of
manufacture.
Genuine replacement parts and
accessories authorized by the
manufacturer help ensure safety.
Use of other parts may void liability
for damage which results.
The machine data are listed on an identification plate
(1).This is located on the right-hand side of the
machine under the twine box.
Maschinenfabrik Bernard Krone GmbH
Heinrich-Krone-Str. 10 D-48480 Spelle
Made in
Germany

I - 2
General Information
1.2.6Operation in Accordance with
Intended Use
The Vario Pack 1510 and Vario Pack 1810 round balers
are designed for use only for standard use in
agricultural work (operation in accordance with intended
use).
Any use of the machine for other purposes is deemed
not to be in accordance with intended use. The
manufacturer shall not be held liable for any damage
which resulting from improper use, which is undertaken
at the operator's own risk.
Operation in accordance with intended use also
includes observing the operating, maintenance and
service instructions specified by the manufacturer.
Permissible baling material:
grass fodder such as hay, straw and silage.
The collection and baling of other
materials is permitted only with the
prior approval of the manufacturer.
The basic requirements in any case
are swath form loading of the baling
material and automatic lifting by the
pick-up.
1.2.7General Technical Data
• Road driving is permitted only when the bale
chamber is empty and closed.
• Permissible top speed: 40 km/h / 30 km/h
• For machines which have no brakes, the pulling
tractor's tare weight must correspond with the
permitted operating specifications, or at least have a
weight which corresponds with the baler's tare
weight.
• For machines which have an operating permit, follow
the conditions contained therein!
• When operating the baler in the field, a supporting
load of 600 kg (on the ring hitch) should not be
exceeded.
• Switch off the electrical operating control when
driving on roads!
The tailgate must only be operated if
the baler is attached correctly to the
tractor. If this is not respected there is
a risk of tipping to the rear.

I - 3
General Information
1.2.8Technical Data Vario Pack 1510 / Vario Pack 1810
Typ Vario Pack 1510 Vario Pack 1810
Width approx. 11.5/80-15 2570 2570
15.0/55-17 2570 2570
19.0/45-17 2670 2670
Permissible weights see information listed on the identification plate
Track width 2150 2150
Tyres 11.5/80-15.3/8PR
15.0/55-17/10 PR
19.0/45-17/10 PR
Length approx. 4370 4760
with bale ejector 5140 5140
Height approx. 2570 2850
Pick-up width (DIN) 1950
Bale dimensions diameter approx.
1000 - 1500 1000 - 1800
width approx. 1200
Power requirement approx. 36 kW (50 PS) 40 kW (55 PS)
Drive speed (PTO shaft) 540 U/min
Max. permissible operating
pressure of the hydraulic system 200 bar
Lighting 12 Volt - 7poliger Stecker
Control System
12 Volt - 3poliger Stecker (DIN 9680)
Twine
Open air storage synthetic twine 400 - 600 m / kg
Indoor storage sisal twine 150 - 300 m / kg
Net
Width 1250 ± 5mm
Sleeve length 1250 - 1270 mm
Sleeve diameter ø 75 - 80 mm
Roll diameter max. 310 mm (3000 m Rolle)
Overload protection (PTO shaft)
Friction clutch 1200 Nm
Electrical supply

I - 4
General Information

II - 1
Safety
2 Safety
2.1 Identifying Safety Instructions
in the Operating Manual
The safety instructions contained in this manual which
could result in personal injury if not followed are
identified by the general danger sign:
safety sign in accordance with DIN 4844 - W9
General function instructions are indicated as follows:
2.2 Safety Instructions and
Accident Prevent Regulations
2.2.1Personnel Qualification and
Training
Persons who use, service or repair the round baler
must be trained in its use and instructed as to the
risks connected with its operation. The operator must
define spheres of responsibility and monitoring of
personnel. Should personnel lack the required know-
ledge they must receive the required training and
instruction. The operator must ensure that the
contents of this operating manual have been fully
understood by personnel.
Repair work not described in this operating manual
should be completed by authorised service centres
only.
2.2.2Failure to Follow the Safety
Instructions
Failure to follow the safety instructions could result in
personal injury and environmental hazards as well as
damage to the machine. Failure to follow the safety
instructions could result in the forfeiture of any claims
for damages.
Failure to follow the safety instructions could result,
for example, in the following hazards:
– risk to persons by failure to secure the working
area
– breakdown of important machine functions
– failure of prescribed methods for repair and
maintenance
– risk to persons due to mechanical and chemical
effects
– damage to the environment due to leaking
hydraulic oil
2.2.3Working in a Safety Conscious
Manner
Follow the safety instructions included in this
operating manual, existing accident prevention rules
and any internal work, operating and safety rules set
out by the operator.
The safety and accident prevention regulations of the
responsible professional associations are binding.
The safety instructions provided by the vehicle manu-
facturer should also be observed.
Instructions which are attached to the machine need
to be followed and kept fully legible.

II - 2
Safety
Observe the applicable traffic laws when using public
roads (for example, in Germany, the Road Traffic
Type Approval Law and Road Traffic Law).
2.2.4Safety Instructions and Accident
Prevention Regulations
1. Please follow all generally applicable safety and
accident prevention regulations in addition to the
safety instructions contained in this manual!
2. The attached warning and safety signs provide
important information for safe operation. Pay
attention to these for your own safety!
3. When using public roads, make sure to observe
the applicable traffic regulations!
4. Make sure that you are familiar with all equipment
and controls as well as their functions before
you begin working with the machine. It is too
late to learn this when you are operating the
machine!
5. The user should wear tight fitting clothes. Avoid
wearing loose or baggy clothing.
6. Keep the machine clean to prevent the danger of
fire!
7. Before starting or moving the machine, make
certain that nobody is in the vicinity of the
machine! (Watch for children!) Make sure that
you have a clear view!
8. Carrying passengers during operation and
transport on the working implement is not
permitted.
9. Attach implements correctly! Attach and secure
implements to specified devices only!
10. When attaching or removing implements, place
the supporting devices in the correct positions!
11. Use extreme caution when attaching or detaching
implements onto or from the tractor!
12. Always attach ballast weights properly to the
fixing points provided!
13. Observe permitted axle loads, gross weight and
transport dimensions!
14. Check and attach transport equipment such as
lighting, warning devices and any protective
equipment!
15. Actuating mechanisms (cables, chains, linkages
etc.) for remote controlled devices must be
positioned in such a way that no movements are
unintentionally triggered at any transport or
working positions.
16. Ensure that implements are in the prescribed
condition for on-road travel and lock them in
place according to the manufacturer's
instructions!
17. Never leave the driver's seat when the vehicle is
moving!
18. Always drive at the correct speed for the
prevailing driving conditions! Avoid sudden
changes in direction when traveling uphill or
downhill or across a gradient!
19. Attached implements and ballast weights effect
the driving, steering and braking response of the
machine. Make sure that you are able to brake
and steer the machine as required!
20. Take into account the extension radius and/or
inertia of an implement when turning corners!
21. Start up implements only when all protective
devices have been attached and set in the
required position!
22. Keep clear of the working range of the machine at
all times!
23. Do not stand within the turning and slewing range
of the implement!
24. Never operate the hydraulic folding frames if
anyone is inside the slewing range!
25. Parts operated by external power (e.g.
hydraulics) can cause crushing and shearing
injuries!
26. Before leaving the tractor, lower the implement
onto the ground, switch off the engine and
remove the ignition key!
27. No one should stand between the tractor and the
implement unless the vehicle has been secured
against rolling by the handbrake and/or wheel
chocks!

II - 3
Safety
2.2.5Trailer Implements
1. Secure implements against rolling.
2. Observe the maximum supported load on the
trailer coupling, swing drawbar or hitch!
3. If a drawbar coupling is used, make certain that
there is enough play at the coupling point.
2.2.6Power Take-Off Operation
1. Use only PTO shafts specified by the
manufacturer!
2. The guard tube and guard cone of the PTO and
the PTO guard must be attached and in good
working condition (on the implement side, too)!
3. Make sure that the required tube covers are in
place for PTO shafts in transport and working
position!
4. Before installing or removing PTO shafts,
disengage the PTO, switch off the engine and
remove the ignition key!
5. When using PTO shafts with an overload safety
or free-running coupling which are not shielded by
the guard on the tractor, mount the overload
safety or free-running coupling on the implement
side!
6. Always make sure that the PTO shaft is properly
installed and secured!
7. Attach chains to prevent the PTO shaft guard
from rotating with the shaft!
8. Before engaging the PTO shaft, make sure that
the selected PTO shaft speed of the tractor
matches the permissible implement speed!
9. Before engaging the PTO shaft, make sure
that no one is in the hazard area around the
implement!
10. Never engage the PTO shaft if the engine is
switched off!
11. No one should be in the vicinity of the rotating
PTO shaft when it is in use.
12. Always switch off PTO shaft when the angle is
too large or the PTO shaft is not required!
13. Caution! The flywheel will continue to rotate for
some time even after the PTO shaft has been
disengaged! Keep clear of the implement during
this time. Do not do any work on the implement
until the machine has come to a complete
standstill and the flywheel has been secured
using the hand brake.
14. Disengage the PTO shaft, stop the engine and
remove the ignition key before cleaning,
lubricating and adjusting the PTO shaft driven
implements or the PTO shaft! Secure the fly-
wheel with the hand brake.
15. Place the disconnected PTO shaft onto the
bracket provided!
16. After removing the PTO shaft, attach the
protective cover to the PTO shaft end!
17. If damage occurs, correct this immediately before
using the implement!
2.2.7Hydraulic System
1. The hydraulic system is pressurized!
2. When connecting hydraulic cylinders and
engines, make sure that the hydraulic hoses are
connected correctly!
3. When connecting the hydraulic hoses to the
tractor hydraulics, make sure that the hydraulics
of both the tractor and the implement have been
depressurized!
4. In the case of hydraulic connections between
tractor and implement, the coupling sleeves and
plugs should be marked to ensure a proper
connection! If the connections are reversed, the
function will be reversed (e.g. raise/lower) - risk
of accidents!
5. Check the hydraulic hose lines at regular intervals
and replace them if damaged or worn! The new
hoses must fulfill the technical requirements set
by the manufacturer of the implement!
6. When searching for leaks, use suitable aids to
avoid the risk of injuries!

II - 4
Safety
7. Liquids escaping under high pressure (hydraulic
oil) can penetrate the skin and cause serious
injury! Seek medical help immediately should
injuries occur! Risk of infection!
8. Before working on the hydraulic system, lower the
implement, depressurize the system and switch
off the engine!
2.2.8Tyres
1. When working on the tyres, make sure that the
implement has safely lowered and secured
against rolling (wheel chocks).
2. Installing wheels and tyres requires adequate
knowledge and suitable tools!
3. Repair work on the tyres and wheels should be
done by specially trained personnel using
appropriate installation tools only!
4. Check tyre pressure regularly! Inflate the tyres to
the recommended pressures!
2.2.9 Maintenance
1. Always make certain that the drive and the
engine are switched off before doing any repairs,
maintenance or cleaning!
- Remove the ignition key! Secure the flywheel
with the hand brake.
2. Regularly check that nuts and bolts are properly
seated and tighten if necessary!
3. When doing maintenance work to a raised
implement, always use suitable means to secure
it against falling.
4. When replacing working tools with cutting edges,
use suitable tools and gloves!
5. Dispose of oils, greases and filters according
to regulations!
6. Always disconnect the power supply before
working on the electrical system!
7. If protective devices and guards are subject to
wear, check them regularly and replace them in
good time!
8. When doing electrical welding on the tractor and
attached implements, disconnect the alternator
and battery cables!
9. Replacement parts must at least comply with the
technical requirements set by the manufacturer
of the implements!
This is ensured by using genuine KRONE
replacement parts!
10. Only use nitrogen for filling pneumatic
accumulators - Risk of explosion!
2.2.10 Unauthorized Modification and
Manufacture of Replacement Parts
Modifications to the machine is permitted only with
the prior approval of the manufacturer. Genuine
replacement parts and accessories authorized by the
manufacturer ensure safe use. Use of other parts may
void liability for damage which results.
2.2.11 Prohibited Modes of Operation
The operational safety of the machine is guaranteed
only if it is used for its intended purpose in accordance
with the General Information chapter of the operating
manual. The limit values listed in the data charts
should not be exceeded under any circumstances.

II - 5
Safety
The KRONE round baler is equipped with all required safety devices (protective equipment). However, it is not
possible to eliminate all potential hazards on this machine as this would impair its full functional capability.
Corresponding danger notices attached to the machine warn against any dangers.
The safety instructions are provided in the form of so-called warning pictograms. Important information on the
location of these safety signs and what they mean is given below!
Familiarise yourself with the meaning of these warning signs. The text printed next to the
danger sign and its location on the machine indicate where specific hazards are located on the
machine.
2.3 Introduction

II - 6
Safety
left side of the machine
2.3.1Location of Safety Decals on the Machine
right side of the machine
RP00002
2
6
75
89
12
4
3
10
RP00001
9
3
6
7
5
8
9

II - 7
Safety
6
Order No. 939 520-1 (2x)
Danger from rotating auger.
7
Order No. 942 002-4 (2x)
Close the guard before
putting into operation.
4
Order No. 939 125-1 (1x)
Do not reach into the danger
area under the wrapping and
binding mechanism.
Danger from sharp blades!
Observe the operating
notes!
5
Order No. 939 521-1 (2x)
Do not step under the raised
tailgate. Before carrying out
any maintenance work close
the shut-off tap on the
cylinder.
1
Order No. 939 471-1 (1x)
Before puting the machine
into operation read and
observe the operating
instructions and notes on
safety.
2
The PTO shaft speed may not exceed ! The
hydraulic system operating pressure may
not exceed 200 bar!
Order No. 939 100-4 (1x)
939 100-4
MAX. 540/min
MAX. 200 bar
3
Order No. 939 407-1 (2x)
Never reach into the pick-up
area when the tractor engine
is running and the PTO shaft
is connected.
Order No. 939 529-0 (2x)
Accumulator is under gas and oil pressure.
Repairs can be carried out only in connection
with replacement of the complete unit.
8

II - 8
Safety
left side of the machine
right side of the machine
RP00002
2
6
75
89
12
4
3
10
RP00001
9
3
6
7
5
8
9

II - 9
Safety
9
Order No. 942 196-1 (2x)
While parts are moving,
never reach into areas
where there is a risk of
being crushed.
The tailgate must only
be operated if the baler
is attached correctly to
the tractor.
Order No. 942 360-1 (1x)
942 360-1
10

II - 10
Safety
2.3.2Location of General Information Labels on the Machine
right side of the machine
left side of the machine
RP200023
6
11 3
5
2
1
10
7
18
9
14
13
8
RP000024
8
12
3
RE/LI 6
17

II - 11
Safety
The information labels indicate special features of
the machine which must be observed in order to
ensure troublefree function.
123
939 155-2 (1x) 939 194-1 (2x)939 147-2 (1x)
567 8942 111-0 (1x) 942 132-0 (1x)
441 071-2 3,0 bar
441 072-2 3,5 bar
441 074-2 4,5 bar
(2x)
942 274-0 (2x)
942274-0
13 279 985-1 (1x)
123456
942 215-0
18 942 215-0 (1x)
9939 428-2 (1x)
14 279 120-0 (1x) 15 924 573-0 (2x) 16 924 574-0 (2x)
939 145-1 (1x)
40
17
278-393-1
10 278 393-1 (1x) 11 942 356-2 (1x)
9
942 356-2
95
12 942 357-1 (1x)
942 357-1
QS
Kontrolle frei
Datum Unterschrift:
939 428-2

II - 12
Safety
This manual suits for next models
1
Table of contents
Other Krone Lawn And Garden Equipment manuals

Krone
Krone Comprima CF 155 XC User manual

Krone
Krone AX 250 L User manual

Krone
Krone Fortima F 1250 MC User manual

Krone
Krone KR 130-MINISTOP User manual

Krone
Krone Fortima V 1500 User manual

Krone
Krone 835 525 Installation instructions

Krone
Krone COMPRIMAF F 125 Installation instructions

Krone
Krone Fortima F 1250 MC User manual

Krone
Krone Comprima F 125 Installation instructions

Krone
Krone Comprima F 155 XC User manual