manuals.online logo
Brands
  1. Home
  2. •
  3. Brands
  4. •
  5. Landoll
  6. •
  7. Farm Equipment
  8. •
  9. Landoll 4620-24 User manual

Landoll 4620-24 User manual

®
LANDOLL COMPANY, LLC
1900 North Street
Marysville, Kansas 66508
(785) 562-5381
800-428-5655 ~WWW.LANDOLL.COM
‘
Folding Seeder
Model 4620-24
Operator’s Manual
F-886-0322
Manuals for 4620-24 Folding Seeder
Manual Number Manual Type
F-886 Operator’s Manual
F-885 Parts Manual
DANGER
Failure to comply with this warning may result
in serious injury or possibly death.
DO NOT operate or perform any maintenance tasks on this
equipment until you have completed the following:
1. Receive proper training to operate this equipment safely.
2. Read and understand the operator’s manual.
3. Be thoroughly trained on inspection and repair procedures.
i
Table of Contents
1 Safety Information
Introduction . . . . . . . . . . . . . . . . . . . . . . . . . . . . . . . . . . . . . . . . . . . . . . . . . . . . 1-1
Description of Unit . . . . . . . . . . . . . . . . . . . . . . . . . . . . . . . . . . . . . . . . . . . . 1-1
Owner Assistance. . . . . . . . . . . . . . . . . . . . . . . . . . . . . . . . . . . . . . . . . . . . . 1-1
Warranty Registration . . . . . . . . . . . . . . . . . . . . . . . . . . . . . . . . . . . . . . . . . . 1-1
Safety . . . . . . . . . . . . . . . . . . . . . . . . . . . . . . . . . . . . . . . . . . . . . . . . . . . . . . . . 1-2
Understanding Safety Statements . . . . . . . . . . . . . . . . . . . . . . . . . . . . . . . . 1-2
High Power Magnet . . . . . . . . . . . . . . . . . . . . . . . . . . . . . . . . . . . . . . . . . . . 1-2
Transporting Safety . . . . . . . . . . . . . . . . . . . . . . . . . . . . . . . . . . . . . . . . . . . 1-3
Safety Instructions for Towing Vehicles . . . . . . . . . . . . . . . . . . . . . . . . . . . . 1-3
Attaching, Detaching and Storage . . . . . . . . . . . . . . . . . . . . . . . . . . . . . . . . 1-3
Maintenance Safety . . . . . . . . . . . . . . . . . . . . . . . . . . . . . . . . . . . . . . . . . . . 1-3
Protective Equipment . . . . . . . . . . . . . . . . . . . . . . . . . . . . . . . . . . . . . . . . . . 1-3
Tire Safety . . . . . . . . . . . . . . . . . . . . . . . . . . . . . . . . . . . . . . . . . . . . . . . . . . 1-3
Chemical Safety . . . . . . . . . . . . . . . . . . . . . . . . . . . . . . . . . . . . . . . . . . . . . . 1-4
Prepare for Emergencies . . . . . . . . . . . . . . . . . . . . . . . . . . . . . . . . . . . . . . . 1-4
High Pressure Fluid Safety . . . . . . . . . . . . . . . . . . . . . . . . . . . . . . . . . . . . . . 1-4
Decals . . . . . . . . . . . . . . . . . . . . . . . . . . . . . . . . . . . . . . . . . . . . . . . . . . . . . . . . 1-5
2 Assembly
Hydraulic System . . . . . . . . . . . . . . . . . . . . . . . . . . . . . . . . . . . . . . . . . . . . . . . 2-1
Seeder Undercarriage Assembly to Wing Arm Installation . . . . . . . . . . . . . . . . 2-2
Tool Storage . . . . . . . . . . . . . . . . . . . . . . . . . . . . . . . . . . . . . . . . . . . . . . . . . 2-3
Brillion Elite Mini Monitor. . . . . . . . . . . . . . . . . . . . . . . . . . . . . . . . . . . . . . . . . . 2-4
Brillion Elite Mini Monitor - Single Seed Box Sensor Schematic . . . . . . . . . 2-5
Brillion Elite Mini Monitor - Seed Shaft Sensor . . . . . . . . . . . . . . . . . . . . . . . 2-6
Brillion Elite Mini Monitor - Bin Level Sensor . . . . . . . . . . . . . . . . . . . . . . . . 2-7
Brillion Elite Mini Monitor - Ground Speed Sensor . . . . . . . . . . . . . . . . . . . . 2-8
Console w/Clutch Control Tractor Installation . . . . . . . . . . . . . . . . . . . . . . . . . 2-10
LED Warning Lamps Installation. . . . . . . . . . . . . . . . . . . . . . . . . . . . . . . . . . . 2-12
Coil Tine Harrow Installation . . . . . . . . . . . . . . . . . . . . . . . . . . . . . . . . . . . . . . 2-14
3 Operation
Tractor Preparation . . . . . . . . . . . . . . . . . . . . . . . . . . . . . . . . . . . . . . . . . . . . . . 3-2
Folding Seeder Preparation . . . . . . . . . . . . . . . . . . . . . . . . . . . . . . . . . . . . . . . 3-2
Attaching Folding Seeder to the Tractor . . . . . . . . . . . . . . . . . . . . . . . . . . . . . . 3-2
Detaching the Folding Seeder from Tractor . . . . . . . . . . . . . . . . . . . . . . . . . . . 3-3
Hydraulic System . . . . . . . . . . . . . . . . . . . . . . . . . . . . . . . . . . . . . . . . . . . . . . . 3-3
Hydraulic Lift System . . . . . . . . . . . . . . . . . . . . . . . . . . . . . . . . . . . . . . . . . . . . 3-4
Hydraulic Fold and Wing Lock System . . . . . . . . . . . . . . . . . . . . . . . . . . . . . . . 3-4
General Operation. . . . . . . . . . . . . . . . . . . . . . . . . . . . . . . . . . . . . . . . . . . . . . . 3-6
Transport Locks . . . . . . . . . . . . . . . . . . . . . . . . . . . . . . . . . . . . . . . . . . . . . . . . 3-6
ii F-886-0322
TABLE OF CONTENTS
Seed Rate Adjustment . . . . . . . . . . . . . . . . . . . . . . . . . . . . . . . . . . . . . . . . . . . 3-7
Seed Rate Chart. . . . . . . . . . . . . . . . . . . . . . . . . . . . . . . . . . . . . . . . . . . . . . . . 3-8
Calibration for Unlisted Seeds . . . . . . . . . . . . . . . . . . . . . . . . . . . . . . . . . . . . . 3-9
Clutch Operation. . . . . . . . . . . . . . . . . . . . . . . . . . . . . . . . . . . . . . . . . . . . . . . 3-10
Brillion Elite Mini Monitor . . . . . . . . . . . . . . . . . . . . . . . . . . . . . . . . . . . . . . . . 3-11
Console w/Clutch Control . . . . . . . . . . . . . . . . . . . . . . . . . . . . . . . . . . . . . . . . 3-11
Coil Tine Harrow. . . . . . . . . . . . . . . . . . . . . . . . . . . . . . . . . . . . . . . . . . . . . . . 3-12
Transporting the Folding Seeder . . . . . . . . . . . . . . . . . . . . . . . . . . . . . . . . . . 3-13
4 Brillion Elite Mini Monitor
Overview. . . . . . . . . . . . . . . . . . . . . . . . . . . . . . . . . . . . . . . . . . . . . . . . . . . . . . 4-1
Main Screen Layout . . . . . . . . . . . . . . . . . . . . . . . . . . . . . . . . . . . . . . . . . . . . . 4-1
Speed & Icon Selection . . . . . . . . . . . . . . . . . . . . . . . . . . . . . . . . . . . . . . . . 4-1
Field & Total Acres . . . . . . . . . . . . . . . . . . . . . . . . . . . . . . . . . . . . . . . . . . . 4-1
Alarms . . . . . . . . . . . . . . . . . . . . . . . . . . . . . . . . . . . . . . . . . . . . . . . . . . . . . 4-1
Settings Menu - Speed Settings . . . . . . . . . . . . . . . . . . . . . . . . . . . . . . . . . . . . 4-2
Speed Source . . . . . . . . . . . . . . . . . . . . . . . . . . . . . . . . . . . . . . . . . . . . . . . 4-2
Speed Source Displays . . . . . . . . . . . . . . . . . . . . . . . . . . . . . . . . . . . . . . . . . . 4-3
Speed Source Icon Features . . . . . . . . . . . . . . . . . . . . . . . . . . . . . . . . . . . . . . 4-3
Pulses Per Revolution . . . . . . . . . . . . . . . . . . . . . . . . . . . . . . . . . . . . . . . . . 4-3
Wheel Pulses Per 400FT . . . . . . . . . . . . . . . . . . . . . . . . . . . . . . . . . . . . . . . 4-3
Radar Pulses Per 400FT . . . . . . . . . . . . . . . . . . . . . . . . . . . . . . . . . . . . . . . 4-3
Speed (Simulated Speed) . . . . . . . . . . . . . . . . . . . . . . . . . . . . . . . . . . . . . . 4-3
Speed Calibration. . . . . . . . . . . . . . . . . . . . . . . . . . . . . . . . . . . . . . . . . . . . . 4-4
Implement Switch. . . . . . . . . . . . . . . . . . . . . . . . . . . . . . . . . . . . . . . . . . . . . 4-4
Implement Switch Setup . . . . . . . . . . . . . . . . . . . . . . . . . . . . . . . . . . . . . . . 4-4
Settings Menu - Clutch Setting . . . . . . . . . . . . . . . . . . . . . . . . . . . . . . . . . . . . . 4-4
Settings Menu - Install Setup . . . . . . . . . . . . . . . . . . . . . . . . . . . . . . . . . . . . . . 4-5
Learn New System. . . . . . . . . . . . . . . . . . . . . . . . . . . . . . . . . . . . . . . . . . . . 4-5
Remove A Sensor . . . . . . . . . . . . . . . . . . . . . . . . . . . . . . . . . . . . . . . . . . . . 4-5
Add A Sensor . . . . . . . . . . . . . . . . . . . . . . . . . . . . . . . . . . . . . . . . . . . . . . . . 4-5
Settings Menu - Shaft Settings . . . . . . . . . . . . . . . . . . . . . . . . . . . . . . . . . . . . . 4-6
Seed Shaft Settings . . . . . . . . . . . . . . . . . . . . . . . . . . . . . . . . . . . . . . . . . . . 4-6
Ground Speed . . . . . . . . . . . . . . . . . . . . . . . . . . . . . . . . . . . . . . . . . . . . . . . 4-6
Settings Menu - Diagnostics. . . . . . . . . . . . . . . . . . . . . . . . . . . . . . . . . . . . . . . 4-6
Settings Menu - GPS Settings . . . . . . . . . . . . . . . . . . . . . . . . . . . . . . . . . . . . . 4-7
GPS Status . . . . . . . . . . . . . . . . . . . . . . . . . . . . . . . . . . . . . . . . . . . . . . . . . 4-7
GPS Baudrate . . . . . . . . . . . . . . . . . . . . . . . . . . . . . . . . . . . . . . . . . . . . . . . 4-7
GPS Speed Correction. . . . . . . . . . . . . . . . . . . . . . . . . . . . . . . . . . . . . . . . . 4-7
Settings Menu - Display Settings . . . . . . . . . . . . . . . . . . . . . . . . . . . . . . . . . . . 4-7
Brightness . . . . . . . . . . . . . . . . . . . . . . . . . . . . . . . . . . . . . . . . . . . . . . . . . . 4-7
Volume . . . . . . . . . . . . . . . . . . . . . . . . . . . . . . . . . . . . . . . . . . . . . . . . . . . . . 4-7
Units . . . . . . . . . . . . . . . . . . . . . . . . . . . . . . . . . . . . . . . . . . . . . . . . . . . . . . . 4-7
Clock (Date & Time). . . . . . . . . . . . . . . . . . . . . . . . . . . . . . . . . . . . . . . . . . . 4-7
System Update. . . . . . . . . . . . . . . . . . . . . . . . . . . . . . . . . . . . . . . . . . . . . . . 4-8
F-886-0322 iii
TABLE OF CONTENTS
Update App. . . . . . . . . . . . . . . . . . . . . . . . . . . . . . . . . . . . . . . . . . . . . . . . . . 4-8
Factory Reset . . . . . . . . . . . . . . . . . . . . . . . . . . . . . . . . . . . . . . . . . . . . . . . . 4-8
Service And Technical Support. . . . . . . . . . . . . . . . . . . . . . . . . . . . . . . . . . . . . 4-8
5 Maintenance
General Torque Specifications . . . . . . . . . . . . . . . . . . . . . . . . . . . . . . . . . . . . . 5-1
Hydraulic Fitting Torque Specifications. . . . . . . . . . . . . . . . . . . . . . . . . . . . . . . 5-2
Fasteners . . . . . . . . . . . . . . . . . . . . . . . . . . . . . . . . . . . . . . . . . . . . . . . . . . . . . 5-2
Tires . . . . . . . . . . . . . . . . . . . . . . . . . . . . . . . . . . . . . . . . . . . . . . . . . . . . . . . . . 5-3
Wheel Hub Bearing Maintenance . . . . . . . . . . . . . . . . . . . . . . . . . . . . . . . . . . . 5-3
Lubrication Maintenance . . . . . . . . . . . . . . . . . . . . . . . . . . . . . . . . . . . . . . . . . . 5-3
Hydraulic Maintenance . . . . . . . . . . . . . . . . . . . . . . . . . . . . . . . . . . . . . . . . . . . 5-4
Hose Identification. . . . . . . . . . . . . . . . . . . . . . . . . . . . . . . . . . . . . . . . . . . . . . . 5-4
Front and Rear Roller Adjustment. . . . . . . . . . . . . . . . . . . . . . . . . . . . . . . . . . . 5-4
Roller Clamp Tightening . . . . . . . . . . . . . . . . . . . . . . . . . . . . . . . . . . . . . . . . . . 5-5
Servicing Seed Shaft Assembly . . . . . . . . . . . . . . . . . . . . . . . . . . . . . . . . . . . . 5-5
Seed Meter Adjustment. . . . . . . . . . . . . . . . . . . . . . . . . . . . . . . . . . . . . . . . . . . 5-6
LED Warning Lamps . . . . . . . . . . . . . . . . . . . . . . . . . . . . . . . . . . . . . . . . . . . . . 5-7
Storage . . . . . . . . . . . . . . . . . . . . . . . . . . . . . . . . . . . . . . . . . . . . . . . . . . . . . . . 5-7
6 General Reference and Specifications
iv F-886-0322
TABLE OF CONTENTS
F-886-0322 1-1
TABLE OF CONTENTS Chapter 1
Safety Information
Introduction
The implement described in this manual has been
designed with care and built by skilled workers using
quality materials and processes. Proper assembly and
maintenance will provide you with satisfactory use for
seasons to come.
DANGER
DANGER
Description of Unit
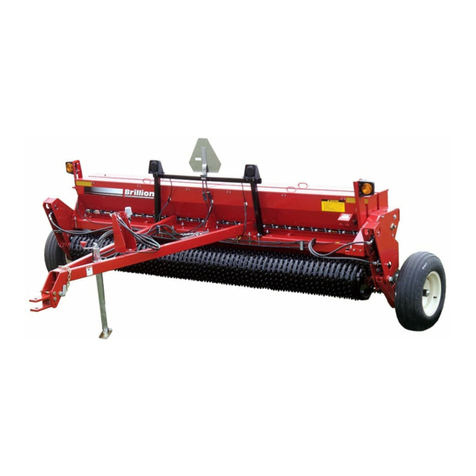
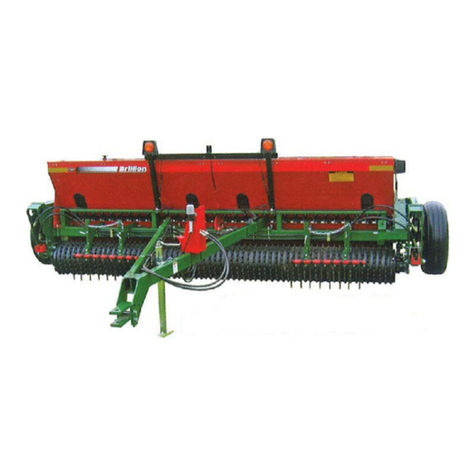
The 4620-24 Folding Seeder folds forward for narrow
transport width under 14 feet and seeds 24 feet per pass.
Each seeder section features a 15-bushel capacity Seed
Box with proven Micro-Meter Seed Metering System. The
Seeder Wings float 5 degrees left to right and 5 degrees
front to rear on torsion springs to follow the ground’s
contours. The Seeder Sections are ground driven and are
equipped with an electric clutch. The tractor mounted
controller allows the operator to control clutch
engagement, view planted acreage, and monitor seed
shaft rotation along with minimum seed box levels.
Using this Manual
This manual will familiarize you with safety, assembly,
operation, adjustment, and maintenance. Read this
manual and follow the recommendations to help ensure
safe and efficient operation.
• The information in this manual is current at time of
printing. Some parts may have changed to assure
top performance.
• Location reference: Right and Left designations in
this manual are determined by facing the direction
the implement will travel during field operation,
unless otherwise stated.
Owner Assistance
If customer service or repairs are needed, contact your
Brillion dealer. They have trained personnel, parts and
service equipment specially designed for Brillion
products. Your implement’s parts should only be
replaced with Brillion parts. If items covered in this
manual are not understood, contact your local Brillion
Dealer.
Warranty Registration
Brillion Farm Equipment, by Landoll, shall have no
warranty obligation unless each product is registered
within 10 days of retail purchase, using the Landoll
Company, LLC Ag Products on-line registration process.
Please refer to the Ag Products Policy and Procedures
Manual, accessible at www.landoll.com for step by step
instructions regarding product registration.
Enter your product information below for quick reference.
_____________________________________________
MODEL NUMBER
_____________________________________________
SERIAL NUMBER
_____________________________________________
DATE OF PURCHASE
Refer to the ID plate shown below. See Figure 1-1.
Figure 1-1: ID Plate
Read this entire manual before attempting to
assemble, adjust or operate this implement.
Failure to comply with this warning can result in
personal injury or death, damage to the
implement or its components and inferior
operation.
MODEL #
SERIAL #
MADE IN USA 1-573-010006
Landoll Company, LLC
Marysville, Kansas
www.landoll.com
1-2 F-886-0322
SAFETY INFORMATION
TABLE OF CONTENTS
Safety
NOTE
Investigation has shown that nearly 1/3 of all farm
accidents are caused by careless use of machinery. Insist
that all people working with you or for you abide by all
safety instructions.
Understanding Safety Statements
You will find various types of safety information on the
following pages and on the implement decals (signs)
attached to the implement. This section explains their
meaning.
NOTICE
CAUTION
WARNING
DANGER
DANGER
NOTE
You should read and understand the information
contained in this manual and on the implement decals
before you attempt to operate or maintain this equipment.
• Examine safety decals and be sure you have the
correct safety decals for the implement. See
Figure 1-2.
• Order replacement decals through your Brillion dealer.
• Keep these signs clean so they can be observed
readily. It is important to keep these decals cleaned
more frequently than the implement. Wash with soap
and water or a cleaning solution as required.
• Replace decals that become damaged or lost. Also,
be sure that any new implement components
installed during repair include decals which are
assigned to them by the manufacturer.
• When applying decals to the implement, be sure to
clean the surface to remove any dirt or residue.
Where possible, sign placement should protect the
sign from abrasion, damage, or obstruction from
mud, dirt, oil etc.
DANGER
DANGER
High Power Magnet
The Brillion Elite Mini Monitor uses very powerful
Neodymium Magnets. Read all the warnings before
operating the machine.
WARNING
Special notice - read and thoroughly understand.
Proceed with caution. Failure to heed caution
may cause injury to person or damage product.
Proceed with caution. Failure to heed warning
will cause injury to person or damage product.
Proceed with extreme caution. Failure to heed
notice will cause injury or death to person and/or
damage product.
• Do not allow anyone to ride on the tractor or
implement. Riders could be struck by foreign
objects or thrown from the implement.
• Never allow children to operate equipment.
• Keep bystanders away from implement during
operation.
1. Neodymium Magnets are brittle; they can be
broken or can splinter in a collision. One
should wear gloves and protective glasses
when handling these magnets, because
splinters and/or spacers could disengage and
fly from the magnets.
2. Normal Neodymium Magnets will lose their
magnetic properties if heated above 175°F
(80° C).
3. The strong magnetic fields of Neodymium
Magnets can damage items such as
televisions, computer monitors, credit cards,
bank cards, computers, diskettes and other
data carriers, video tapes, mechanical
watches, hearing aides, loud speakers and
VCRs. Pace-Makers may be damaged or
switch to “Test Mode” in the presence of a
strong magnetic force, if a Pace-Maker or
other electrical body implant is in use, Keep a
Minimum of 3 Feet Distance.
4. Children should not be allowed to handle
Neodymium Magnets as they can be
dangerous. Small magnets pose a choking
hazard and should never be swallowed or
inserted into any part of the body.
5. Under no circumstances should you try to cut,
saw or drill the Neodymium Magnet! Not only
would the magnet break, but the resulting dust
from the magnet is very flammable.
Neodymium Magnets should never be burned,
as burning them will create toxic fumes.
SAFETY INFORMATION
F-886-0322 1-3
TABLE OF CONTENTS
Transporting Safety
IMPORTANT
It is the responsibility of the owner/operator to
comply with all state and local laws.
• When transporting the implement on a road or
highway, use adequate warning symbols, reflectors,
lights and slow moving vehicle sign as required. Slow
moving tractors and towed implements can create a
hazard when driven on public roads. They are
difficult to see, especially at night.
• Do not tow an implement that, when fully loaded,
weighs more than 1.5 times the weight of the towing
vehicle.
• Carry reflectors or flags to mark the tractor and
implement in case of breakdown on the road.
• Do not transport at speeds over 20 MPH under good
conditions. Never travel at a speed which does not
allow adequate control of steering and stopping.
Reduce speed if towed load is not equipped with
brakes.
• Avoid sudden stops or turns because the weight of
the implement may cause the operator to lose control
of the tractor. Use a tractor 1.5 times heavier than the
implement.
• Use caution when towing behind articulated steering
tractors; fast or sharp turns may cause the implement
to shift sideways.
• Keep clear of overhead power lines and other
obstructions when transporting. Know the transport
height and width of your implement. See Figure 6-1.
Safety Instructions for Towing
Vehicles
The maximum travel speed is the lesser of
• The limit of the road conditions;
• The maximum specified ground speed;
— for towing operations as indicated in this manual
or SIS;
— of the towed vehicle as indicated in its operator’s
manual, SIS, or information sign;
• The maximum ground speed of the towed equipment
combination shall be limited to the lowest specified
ground speed of any of the towed machines. This
speed is the ground speed limitation.
EXAMPLE: If the tractor is capable of 25 mph, the first
implement has a SIS for 19 mph, and the last
implement’s operator’s manual states its specified
ground speed is 15 mph, the towed equipment
combination ground speed limitation is 15 mph.
Attaching, Detaching and Storage
• Do not stand between the tractor and implement
when attaching or detaching implement unless both
are blocked from moving.
• Before applying pressure to the hydraulic system, be
sure all connections are tight and that hydraulic
hoses are not damaged.
• Block implement so it will not roll when unhitched
from the tractor.
• Relieve pressure in hydraulic circuit before
uncoupling hydraulic hoses from tractor.
NOTE
To relieve hydraulic pressure: Depending on tractor
hydraulic system, some can be relieved by actuating
control lever after engine is stopped. If tractor has electric
over hydraulic controls, it may be necessary to move the
control lever to the float position. Refer to tractor’s
operator’s manual.
Wear protective gloves and safety glasses or goggles
when working with hydraulic systems.
Maintenance Safety
• Block the implement so it will not roll when working
on or under it to prevent injury.
• Do not make adjustments or lubricate the machine
while it is in motion.
• Make sure all moving parts have stopped.
• Understand the procedure before doing the work.
Use proper tools and equipment.
Protective Equipment
• Wear protective clothing & equipment appropriate for
the job. Avoid loose fitting clothing.
• Because prolonged exposure to loud noise can
cause hearing impairment or hearing loss, wear
suitable hearing protection, such as earmuffs or
earplugs.
Tire Safety
Tire changing can be dangerous and should be
performed by trained personnel using correct tools and
equipment.
• When inflating tires, use a clip-on chuck and
extension hose long enough to allow you to stand to
one side, not in front of or over the tire assembly.
Use a safety cage if available.
• When removing and installing wheels use
wheel-handling equipment adequate for the weight
involved.
1-4 F-886-0322
SAFETY INFORMATION
TABLE OF CONTENTS
Chemical Safety
Agricultural chemicals can be dangerous. Improper use
can seriously injure persons, animals, plants, soil &
property.
• Read chemical manufactures instructions and store
or dispose of unused chemicals as specified. Handle
chemicals with care & avoid inhaling smoke from any
type of chemical fire.
• Store or dispose of unused chemicals as specified by
the chemical manufacturer.
Prepare for Emergencies
• Keep a First Aid Kit and Fire Extinguisher handy
• Keep emergency numbers for doctor, ambulance,
hospital and fire department near phone.
High Pressure Fluid Safety
Escaping fluid under pressure can be nearly invisible and
have enough force to penetrate the skin causing serious
injury. Use a piece of cardboard, rather than hands, to
search for suspected leaks.
Any fluid injected into the skin must be surgically
removed within a few hours or gangrene may result.
Avoid the hazard by relieving pressure before
disconnecting hydraulic lines.
NOTE
Relieve hydraulic pressure by shifting the control valve
lever to float.
Wear protective gloves and safety glasses or goggles
when working with hydraulic systems.
SAFETY INFORMATION
F-886-0322 1-5
TABLE OF CONTENTS
Decals
Figure 1-2: Decals
ITEM 1
2-573-010198
ITEM 2 - PLACARD
MODEL #
SERIAL #
MADE IN USA 1-573-010006
Landoll Company, LLC
Marysville, Kansas
www.landoll.com
CAUTION
MOVING MACHINES CAN CAUSE INJURY. KEEP AWAY!
1. KEEP AWAY FROM MOVING TRACTORS OR IMPLEMENTS.
KEEP OTHERS AWAY.
2. DO NOT RIDE OR ALLOW OTHERS TO RIDE ON TRACTOR
OR IMPLEMENT.
3. BLOCK IMPLEMENT TO PREVENT MOVEMENT WHEN
UNHITCHED FROM TRACTOR.
4. KEEP ALL GUARDS AND SHIELDS IN PLACE WHILE
MACHINE OR PARTS ARE IN MOTION. 8J309
ITEM 3
8J309
WARNING
DO NOT GO NEAR LEAKS
High pressure oil easily punctures
skin causing serious injury,
gangrene or death.
If injured, seek emergency medical
help. Immediate surgery is
required to remove oil.
'RQRWXVHÀQJHUVRUVNLQWR
check for leaks.
Lower load or relieve hydraulic
SUHVVXUHEHIRUHORRVHQLQJÀWWLQJV
218265
ITEM 4
3K706
DANGER
To prevent serious injury or death
from pinching:
Keep all persons and objects clear
while any part of this machine is in
motion.
2-573-010335
ITEM 5
2-573-010335
ITEM 17
528933
ITEM 18
528938
ITEM 6
528934
FARM EQUIPMENT
MANUFACTURERS
ASSOCIATION
MEMBER
A LANDOLL PRODUCT
ITEM 7
170509
SEEDMETER SHAFT
ROTATION
218254 CALIBRATION
CRANK
15 TOOTH
CLUTCH SHAFT
12 TOOTH
PLANTING RATES FOR 4620, 15 BU MICROMETER, GROUND DRIVE IN POUNDS PER ACRE
CALIBRATION
MACHINE MAY BE CALIBRATED FOR UNLISTED SEED AS FOLLOWS:
SEED SHAFT TURNS 163 REVOLUTIONS PER ACRE SEEDED.
1.
RAISE MACHINE AND LOCK IN TRANSPORT POSITION.
2.
PLACE A CANVAS OR TARP UNDER MACHINE TO CATCH SEED.
3.
DISENGAGE CLUTCH. TURN 3/4 HEX ON TRANSMISSION SHAFT
4.
163 REVOLUTIONS COUNTER-CLOCKWISE(CCW) WITH PROVIDED
CRANK. 41 TURNS MAY BE USED IF RESULTS ARE ADJUSTED AS
SHOWN IN STEP 5.
WEIGH SEED FOR APPROXIMATE PLANTING RATE IN LBS/ACRE
5.
MULTIPLY WEIGHT BY 4 IF ONLY 41 TURNS WERE USED.
* WILL CRACK SOME SEEDS AT THESE SETTINGS
NOT RECOMMENDED: LENTILS, SORGHUM, SUDAN GRASS
RATES ARE INTENDED AS A GUIDE ONLY. VARIATIONS IN SIZE AND CLEANLINESS WILL
AFFECT RATES. CHECK ACREAGE AND POUNDS OF SEED USED FOR BEST RESULTS.
218279
ITEM 8
218279
LOCK INNER/REAR
STEPS IN RAISED
POSITION BEFORE
UNFOLDING SEEDER
ITEM 9
218288
ITEM 10
203668
20
mile/h
144193
ITEM 11
144193
HOSE IDENTIFICATION
155523
BLUE - LIFT WHEELS
YELLOW - WING FOLD
BLACK - AUXILIARY
ITEM 12 - 155523
OPEN
CLOSED
9K788
ITEM 13
9K788
ITEM 14
2P151
WARNING
MOVING PART HAZARD
TO PREVENT SERIOUS INJURY FROM
MOVING PARTS:
KEEP COVERS CLOSED DURING OPERATION.
DO NOT ALLOW ANYONE TO RIDE OR CLIMB
MACHINE DURING OPERATION.
KEEP OBSERVERS AWAY.
2K123
ITEM 15
2K123
ITEM 16
218260
218260
FOLDING
SEEDER
P/N: 234507
ITEM 19
234507
ITEM 20 - 9J429
1-6 F-886-0322
SAFETY INFORMATION
TABLE OF CONTENTS
Figure 1-3: Decal Locations (1 of 3)
6
7
4
5
4
5
Right Side View
Left Side View
6745
5
5
5
1
234
19 5
SAFETY INFORMATION
F-886-0322 1-7
TABLE OF CONTENTS
Figure 1-4: Decal Locations (2 of 3)
Left Side View
4620-24 DecalSide
Right Side View
1
25
7
5
5
66
7
8
9
33
8
9
45
45
4
5
45
34
19
1-8 F-886-0322
SAFETY INFORMATION
TABLE OF CONTENTS
Figure 1-5: Decal Locations (3 of 3)
4618-24 DecalFront-Rear
Rear View
Front View
7
7
10
11
12
10
13 13 13 13
16
16
55
14
15
15
15
15
8
15
17
17
17
18
17 18
18 18 17
17
20 20
F-886-0322 2-1
TABLE OF CONTENTS Chapter 2
Assembly
CAUTION
WARNING
CAUTION
The 4620-24 Folding Seeder is almost completely
assembled prior to shipping. If some components need
removed or adjusted follow the below instructions.
NOTE
Refer to the repair parts manual F-885 for identification of
parts and for the approximate relationship of the parts in
assembly.
To ensure alignment of assemblies, leave the nuts loose
until completion of final assembly. Use lock washers or
flat washers as specified. Spread all cotter pins.
After completion of final assembly, tighten all nuts evenly
to prevent misalignment, distortion or binding. Tighten all
screws and nuts to the recommended torques.
IMPORTANT
• If pre-assembled parts or fasteners are temporarily
removed, remember where they go. It is best to keep
parts separated.
• Check that all working parts move freely, bolts are
tight and cotter pins spread.
• Refer to the Torque Table for proper torque valves.
Note the different torque requirements for bolts with
lock nuts. See Page 5-1.
“Left” and “Right” refer to directions seen as if standing
behind the machine and facing in the direction of forward
travel.
The 4620-24 Folding Seeder Frame comes assembled.
Attach a Seeder Undercarriage Assembly to each Wing
Arm and connect the Wing Lock Hydraulic Circuit. Install
the Brillion Elite Mini Monitor System, Coil Tine Harrows,
and Warning Lamp RH and LH Lamp Brackets.
• Prepare Tractor for Operation. See “Tractor
Preparation” on page 3-2.
• Prepare Folding Seeder. See “Folding Seeder
Preparation” on page 3-2.
• Attach Folding Seeder to Tractor. See “Attaching
Folding Seeder to the Tractor” on page 3-2.
Do not work on or under this machine unless
securely blocked and supported by a hoist or
tractor or by other sufficient means.
Do not attempt to lift heavy parts manually. Use a
hoist or a fork lift to move these parts into
position.
Secure the Seeder Hitch to a tractor and unfold the
wings of the hitch when attaching seeder unit(s).
This will provide stability and ease attachment of
the seeder unit(s).
2-2 F-886-0322
ASSEMBLY
TABLE OF CONTENTS
Hydraulic System
NOTE
It is good practice to purge the Hydraulic System before
installing the Seeder Undercarriage Assemblies onto the
Folding Seeder Frame Wing Arms to ensure that the
circuits are functioning properly.
4620-24 hydraulic system consists of 3 separate circuits.
Lift Circuit – Blue
• Folding Seeder raised requires approximately
2.3 gallons hydraulic oil
• Folding Seeder lowered requires approximately
2.0 gallons hydraulic oil
Fold/Unfold Circuit – Yellow
• Folding Seeder Folded requires approximately
2.3 gallon hydraulic oil
• Folding Seeder Unfolded requires approximately
2.7 gallons hydraulic oil
Wing Lock Circuit – Black
• Wing Lock engaged/disengaged requires
approximately 1.1 gallons hydraulic oil
Tightening Procedure for JIC 37 degree Swivel
Female Nuts.
1. Check Fitting Flare and seat for defects.
2. Lubricate the connection.
3. Install Hydraulic Hoses without twists.
4. Hand Tighten until connections bottoms.
5. Using 2 wrenches to prevent twisting, rotate the
Swivel Nut 2 wrench flats (1/3 turn).
6. For reassembly, follow the same procedure but
tighten only 1 wrench flat (1/16 turn).
Tightening Procedure for Swivel O-Ring Fittings.
1. Lubricate O-Ring and install the Fitting until the Metal
Washer which backs up the O-Ring contacts the face
of the boss.
2. Orient the Fitting by turning counterclockwise up to 1
turn.
3. Tighten the Locknut using 50-60 Ft-Lbs of torque. See
“Hydraulic Fitting Torque Specifications” on
page 5-2.
Seeder Undercarriage
Assembly to Wing Arm
Installation
WARNING
1. With Wing Arms partially unfolded, to clear the
folding seeder frame, position a Seeder
Undercarriage Assembly behind each Wing Arm.
Align the mounting hole on the undercarriage with
the Wing Arm mounting hole. See Figure 2-3.
2. Place 1/2" Nylon Thrust Washer onto Spindle Carrier
and insert into Wing Arm. Place 3/4" Nylon Thrust
Washer between Wing Arm and Undercarriage
Frame and onto the Spindle Carrier.
3. Slide Seeder Undercarriage onto the Spindle Carrier.
4. Insert the Threaded Pin through the Spindle Carrier.
Install Slotted Nut onto the Threaded Pin. Do Not
tighten.
5. Connect Pivot Lock Links to the Seeder
Undercarriage Assembly Tie Rods with 3/4-10 x
2-1/2 Bolts and secure with Locknuts.
6. Tighten Slotted Nut using 3" Hex Wrench, align holes
on Threaded Pin. Insert 3/8-16 x 3-3/4 Bolt with Flat
Washer secure with Flanged Locknut.
7. Connect the Left and Right Hand Wing Hydraulic
Hoses to the Bulkhead Tee. See Figure 2-1.
Figure 2-1: Wing Hydraulic Connection
Do not attempt to lift heavy parts manually. Use a
hoist or a fork lift to move these parts into position.
Bulkhead Tee
Seeder Undercarriage
Assembly
Connect Hydraulic
Hoses
Wing Arm
ASSEMBLY
F-886-0322 2-3
TABLE OF CONTENTS
Figure 2-2: Wing Arm Assembly, Top View
Figure 2-3: Seeder Undercarriage Assembly to Wing Arms
LH Wing Arm
RH Wing Arm
Seeder Undercarriage
Assembly
Folding Seeder
Frame
Seeder Undercarriage
Assembly
Bolt,
3/4-10 x 2-1/2
Locknut,3/4-10
Pin,
Threaded w/Retainer
Locknut,3/4-10
Bolt,
3/4-10 x 2-1/2
Nylon,Thrust
Washer,3/4
Nylon,Thrust
Washer,1/2
Spindle Carrier
Bolt,
3/8-16 x 3-3/4
Wrench,3" Hex
Washer,Flat,3/8
Nut,Slotted
2-4-1/2
Flanged Locknut,
3/8-16
Seeder Undercarriage
Assembly
Wing Arm
Pivot Lock Link
Tie Rod
2-4 F-886-0322
ASSEMBLY
TABLE OF CONTENTS
Brillion Elite Mini Monitor
IMPORTANT
The Brillion Elite Mini Monitor System by Loup
utilizes a MUX communication line. Sensors must be
learned into the Monitor. Location of each pre-learned
Smart Shaft Sensor or Bin Level Sensor is important
for proper Monitor display. Each Sensor utilizes 3
wires (+, -, MuxBus) to connect to the system. The
Harnesses do not require a specific Sensor
connection points. Each Sensor is identified in the
Monitor by its own signal.
Refer to Brillion Elite Mini Monitor Single Box Schematic.
See Figure 2-5.
WARNING
IMPORTANT
All Harnesses must be firmly attached to Machine
Frame members so they do not sag or become torn
loose by field debris.
1. Lay out the Seeder Harnesses on the front of each
Seeder section ensuring that the Electric Clutch 2-Pin
Connector is on the left side.
2. Rear RH side of each Seeder Section has a Sensor
Mount mounted on two Seed Cups. Install a Smart
Shaft Sensor to the Sensor Mount with sensor
provided hardware and #8-32 Flange Locknuts.
Adjust the Smart Shaft Sensor so that it is 1/8" Max
away from the pre-assembled Spacer w/Magnet on
the Seed Shaft. See Figure 2-6. Connect the Smart
Seed Shaft Sensor to the Seeder Harness.
3. Each Seeder Section has a Bin Level Sensor Bracket
on the inside at either end. See Figure 2-7.
Determine the desired level for the alarm to be
indicated on the Brillion Elite Mini Monitor and
assemble the Bin Level Sensors to Bin Level Sensor
Brackets with sensor provided hardware and #8-32
Flange Locknuts. If more adjustment is needed, the
Bin Level Sensor Brackets can also be raised or
lowered to the desired seed level. Install Cord Grips
from the inside of the Seed Box out and secure with
supplied Locknut on the outside of the Seed Box. To
get the Sensor Connector outside the Seed Box, feed
the terminals through the Cord Grip. Install the
terminals into the 3-Pin Shroud labeled “A”, “B” and
“C” as follows “A” White, “B” Black, “C” Green. Inside
the Seed Box, add enough slack to the Bin Level
Sensor Cord to allow for future adjustment of the
Sensor. Secure the Bin Level Cord by tightening the
Cord Grip Compression Nut. Connect both Bin Level
Sensors to the Seeder Harness. See Figure 2-4.
Figure 2-4: Bin Level Sensor Bracket Wire Detail
4. LH Seeder Only, Install Pickup Switch Bracket with
the Clutch Shaft Bearing Carriage Bolts, Lock Washer
and Nut. See Figure 2-8. Place Actuator Assembly
onto the Clutch Shaft, secure with Actuator Assembly
Set Screw. Assemble Smart Shaft Sensor onto the
Pickup Switch Bracket with sensor provided hardware
and #8-32 Flange Locknuts. Adjust the Smart Shaft
Sensor so that it is an 1/8" Max away from the
Actuator Assembly. Connect the Ground Speed
Smart Shaft Sensor to the Seeder Harness.
5. RH Seeder Section does not require a Ground Speed
Smart Shaft Sensor, seal RH Seeder Section Seeder
Harness Connector with a 3-Pin Shroud and Cavity
Plugs to protect the Seeder Harness from the
environment.
6. Unused Main Harness 6 Pin Connector and both
unused Seeder Harnesses RH 3 Pin Connectors
need to be sealed with 6-Pin and 3-Pin Shrouds and
Cavity Plugs to protect the Harnesses from the
environment.
7. Orient the Main Harness so that the single 6-Pin
connector is to the front and the three 6-Pin
connectors are to the rear of the Folding Seeder
Frame. Route the Main Harness inside the Folding
Seeder Frame Main Tube.
8. Install Brillion Elite Mini Monitor on Tractor.
9. If not already installed, install Smart Clutch Relay into
Elite Mini Tractor Harness 3-Pin Connectors.
10. Connect the Elite Mini Tractor Harness 14-Pin
Connector to Brillion Elite Mini Monitor, 3-Pin Power
Plug to 12 Volt Tractor Convenience Outlet and 6-Pin
Connector to the Main Harness. 4-Pin Connector is
not used at this time.
11. Connect a 240" Extensions Harness to the RH and LH
Seeder Harnesses and connect both 240" Extension
Harnesses to the Main Harness.
12. Bundle and secure all Harnesses along the Seeder
Section Frames and Folding Seeder Frame with Tie
Wraps.
13. Program Bin Level Sensors and Smart Shaft Sensors
if not already pre-programmed. See "Brillion Elite
Mini Monitor" Chapter.
High Power Magnet in use. See “High Power
Magnet” on page 1-2.
White Wire
Black Wire
Green Wire
Terminal
3 Pin Shroud
Shroud
Pin ID
Seal

This manual suits for next models

1

Other Landoll Farm Equipment manuals

Landoll VT PLUS 7430 User manual

Landoll

Landoll VT PLUS 7430 User manual

Landoll 302D-B User manual

Landoll

Landoll 302D-B User manual

Landoll 2512 Series User manual

Landoll

Landoll 2512 Series User manual

Landoll Brillion X108 User manual

Landoll

Landoll Brillion X108 User manual

Landoll 5210 User manual

Landoll

Landoll 5210 User manual

Landoll WEATHERPROOFER II 2320 FOLD Series User manual

Landoll

Landoll WEATHERPROOFER II 2320 FOLD Series User manual

Landoll 2110 User manual

Landoll

Landoll 2110 User manual

Landoll 850 FINISHOLL User manual

Landoll

Landoll 850 FINISHOLL User manual

Landoll 6230 User manual

Landoll

Landoll 6230 User manual

Landoll ICON 6510 Building instructions

Landoll

Landoll ICON 6510 Building instructions

Landoll BRILLION TURFMAKER II SL User manual

Landoll

Landoll BRILLION TURFMAKER II SL User manual

Landoll F-847-0316 Manual

Landoll

Landoll F-847-0316 Manual

Landoll Brillion WFPD38-52 User manual

Landoll

Landoll Brillion WFPD38-52 User manual

Landoll SOIL MASTER II 1200 Series User manual

Landoll

Landoll SOIL MASTER II 1200 Series User manual

Landoll Brillion BH1020 User manual

Landoll

Landoll Brillion BH1020 User manual

Landoll Brillion SCP-51 User manual

Landoll

Landoll Brillion SCP-51 User manual

Landoll SSB-8 User manual

Landoll

Landoll SSB-8 User manual

Landoll 2210 User manual

Landoll

Landoll 2210 User manual

Landoll 8530 User manual

Landoll

Landoll 8530 User manual

Landoll 1230 Series User manual

Landoll

Landoll 1230 Series User manual

Landoll D5P Series Product manual

Landoll

Landoll D5P Series Product manual

Landoll 7833 User manual

Landoll

Landoll 7833 User manual

Landoll Weatherproofer III 2310 Series User manual

Landoll

Landoll Weatherproofer III 2310 Series User manual

Landoll 6250 User manual

Landoll

Landoll 6250 User manual

Popular Farm Equipment manuals by other brands

GSi Design III Series owner's manual

GSi

GSi Design III Series owner's manual

Schmeiser Varitrak SVT-16R Operation and parts manual

Schmeiser

Schmeiser Varitrak SVT-16R Operation and parts manual

Montag GEN 2 - 2218 Operation manual

Montag

Montag GEN 2 - 2218 Operation manual

Agrio Mamut 21 Instructions for use

Agrio

Agrio Mamut 21 Instructions for use

Posch SpaltFix S-415 Multi operating instructions

Posch

Posch SpaltFix S-415 Multi operating instructions

CONCORD PRECISION SHANK DRILL Assembly manual

CONCORD

CONCORD PRECISION SHANK DRILL Assembly manual

TTI WeedControl 12VSPT-TTI INSTRUCTIONS FOR ASSEMBLY, OPERATION, SERVICING & STORAGE

TTI

TTI WeedControl 12VSPT-TTI INSTRUCTIONS FOR ASSEMBLY, OPERATION, SERVICING & STORAGE

H&S FORAGE BOX Operator's manual

H&S

H&S FORAGE BOX Operator's manual

Arrowquip EASY FLOW product manual

Arrowquip

Arrowquip EASY FLOW product manual

BEFCO RS2-04R Operator's manual

BEFCO

BEFCO RS2-04R Operator's manual

DALBO CULTILIFT 300 manual

DALBO

DALBO CULTILIFT 300 manual

New Leader L5034 G4 Assembly/operators/parts manual

New Leader

New Leader L5034 G4 Assembly/operators/parts manual

Monosem Valoterra operating manual

Monosem

Monosem Valoterra operating manual

Shivvers Circu-Lators II installation manual

Shivvers

Shivvers Circu-Lators II installation manual

RHINO RHINO 2409 Assembly manual

RHINO

RHINO RHINO 2409 Assembly manual

REIST INDUSTRIES RR72 Operator and parts manual

REIST INDUSTRIES

REIST INDUSTRIES RR72 Operator and parts manual

Raven SmarTrax installation manual

Raven

Raven SmarTrax installation manual

Goldacres ATV75 Operator's & parts manual

Goldacres

Goldacres ATV75 Operator's & parts manual

manuals.online logo
manuals.online logoBrands
  • About & Mission
  • Contact us
  • Privacy Policy
  • Terms and Conditions

Copyright 2025 Manuals.Online. All Rights Reserved.