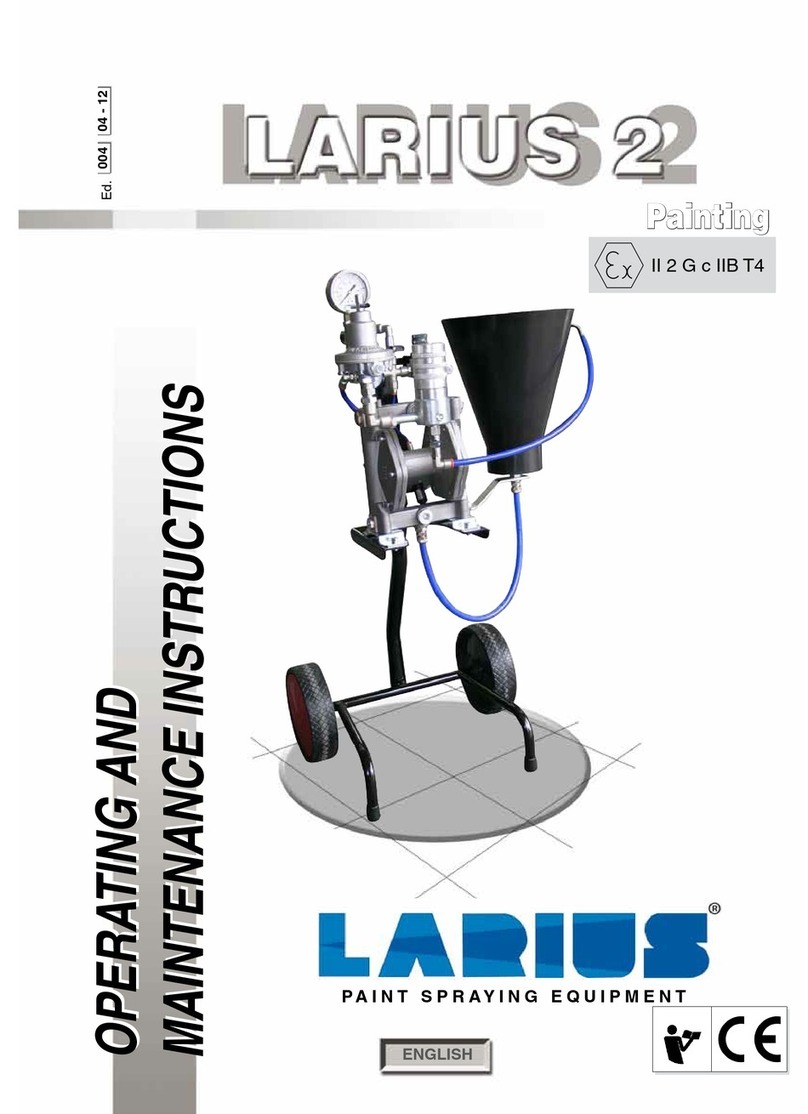
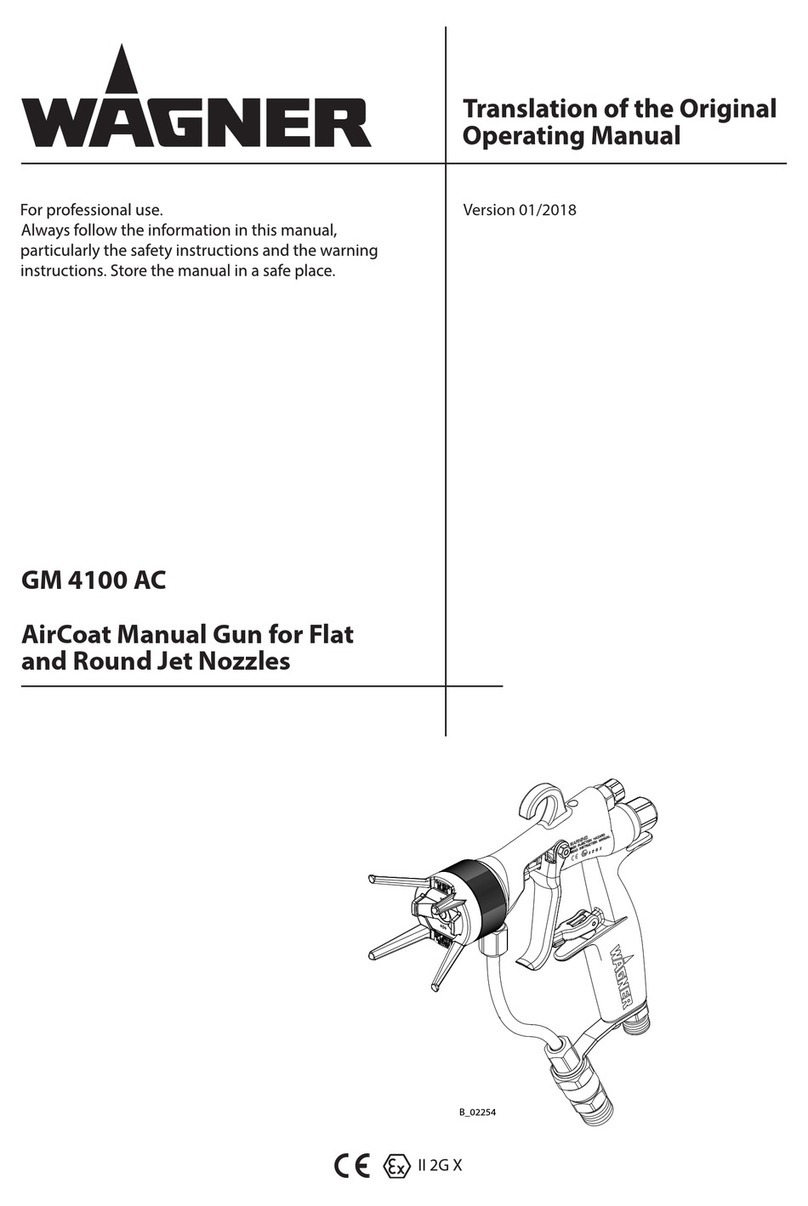
Larius MIST-LESS 09 Manual

ENGLISH
PAINTING EQUIPMENT
MIST-LESS "09"
OPERATING AND
MAINTENANCE INSTRUCTIONS
OPERATING AND
MAINTENANCE INSTRUCTIONS


1
MIST-LESS GUN
English
MIST-LESS GUN
MIST-LESS GUN
INTRODUCTION .................................................p.1
WARNINGS .........................................................p.2
WORKING PRINCIPLE .......................................p.3
TECHNICAL DATA..............................................p.4
DESCRIPTION OF THE EQUIPMENT ...............p.5
TRANSPORT AND UNPACKING .......................p.6
SAFETY RULES..................................................p.6
FLUID INJECTION HAZARD ..............................p.8
PRESSURE RELIEF PROCEDURE ...................p.8
EQUIPMENT MISUSE HAZARD.........................p.9
HOSE SAFETY ...................................................p.9
FIRE OR EXPLOSION HAZARD ........................p.9
Grounding .......................................................p.10
MOVING PART HAZARD ....................................p.10
SETTING-UP.......................................................p.10
Connecting of the flexible hose to the gun ......p.10
Connecting the product delivery hose.............p.11
OPERATION........................................................p.11
Starting the spraying operations .....................p.12
Adjusting - Spraying nozzle.............................p.12
PROBLEMS AND SOLUTIONS ..........................p.13
TRIGGER LOCK .................................................p.14
Trigger lock engaged.......................................p.14
Trigger lock disengaged ..................................p.14
ROUTINE MAINTENANCE .................................p.15
Inspecting the valve for obstructions
or damge.........................................................p.15
Valve needle and seal service.........................p.15
EXPLODED DIAGRAM OF MANUAL MIST-LESS
07 SPRAYGUN....................................................p.16
PNEUMATIC PUMPS FOR MIST-LESS SPRAY
PAINTING ............................................................p.18
APPLICATIONS...................................................p.19
VERSIONS ..........................................................p.20
WE ADVISE THE USE OF THIS EQUIPMENT ONLY BY PROFESSIONAL OPERATORS.
ONLY USE THIS MACHINE FOR USAGE SPECIFICALLY MENTIONED IN THIS MANUAL.
Thank you for choosing a LARIUS S.R.L. product.
As well as the product purchased,
you will receive a range of support services
enabling you to achieve the results desired,
quickly and professionally.
A
B
C
D
E
F
G
H
I
L
M
P
Q
R
S
T
U
V
O
N

2
MIST-LESS GUN
English
Read this operator’s manual carefully before using the equipment.
An improper use of this machine can cause injuries to people or things.
Do not use this gun when under the influence of drugs or alcohol.
Do not modify the gun under any circumstances.
Use products and solvents that are compatible with the various parts of the gun, and read the manufacturer’s warnings
carefully.
See the Technical Details for the equipment given in the Manual.
Check the equipment for worn parts once a day. If any worn parts are found, replace them using ONLY original spare parts.
Keep children and animals away from work area.
Comply with all safety standards.
WARNINGS The table below provides the meaning of the symbols used in this manual in relation to using, earthing,
operating, maintaining, and repairing of this equipment.
It indicates an accident risk or serious damage to equipment if this warning is not followed.
It indicates important recommendations about disposal and recycling process of products in accordance with the envi-
ronmental regulations.
Report any risk of chemical reaction or explosion if this warning has not been given.
There is a risk of injury or serious lesion related to contact with the jet from the spray gun. If this should occur, IMME-
DIATELY contact a doctor, indicating the type of product injected.
Do not spray before the guard has been placed over the nozzle and the trigger on the spray gun.
Do not put your fingers in the spray gun nozzle.
Once work has been completed, before carrying out any maintenance, complete the decompression procedure explained
in this manual.
Report any danger of electric shock if the warning and presence of live electrical parts has not been indicated.
Store in a dry place and do not expose to the rain.
Check that the cables are in good condition.
Switch off the equipment and discharge any electricity before cleaning or maintaining the equipment.
Mark any clamps attached to earth cables.
Use ONLY 3-wire extension cords and grounded electrical outlets.
Before starting work make sure that the electrical system is earthed and that it complies with safety standards.
FIRE AND EXPLOSION HAZARD
Solvent and paint fumes in work area can ignite or explode.
To help prevent fire and explosion:
- Use equipment ONLY in well ventilated area.
-
Eliminate all ignition sources, such as pilot lights, cigarettes and plastic drop cloths (potential static arc).
- Ground equipment and conductive objects.
- Use only grounded hoses.
- Do not use trichloroethane, methylene chloride, other halogenated hydrocarbon solvents or fluids containing such
solvents in pressurized aluminium equipment. Such use can cause serious chemical reaction and equipment rupture,
and result in death, serious injury, and property damage.
If electrical shocks or discharges are encountered the operation being carried out using the equipment must be stopped
immediately.
Keep a fire extinguisher at hand in the immediate vicinity of the work area.

3
MIST-LESS GUN
English
A
WORKING PRINCIPLE
MIST-LESS painting combines the qualities of airless technology
with those of low-pressure application providing superior quality
finishing with less material waste.
The MIST-LESS sprayguns allows:
- 15-35% product saving
- Overspray reduced to the minimum
- High quality finishing
The MIST-LESS sprayguns are equipped with a self-cleaning
nozzle with the following advantages:
- Reduced maintenance
- Long working life
- The nozzle does not have to be removed for cleaning, but simply
turned 180°, based on the same principle as Fast-Clean.
INJECTION HAZARD
High-pressure fluid from gun, hose leaks, or ruptured components will pierce skin.
To help prevent injection, always:
- Engage trigger lock when not spraying.
- Do not put your hand over the spray tip. Do not stop or deflect leaks with your hand, body or other.
- Do not point gun at anyone or at any part of the body.
- Never spray without tip guard.
-
Do pressure relief if you stop spraying or being servicing sprayer and before any maintenance operations.
- Do not use components rated less than sprayer Maximum Working Pressure.
- Never allow children to use this unit
- Brace yourself; gun may recoil when triggered.
If high pressure fluid pierces your skin, the injury might look like "just a cut", but it is a serious wound! Get
immediate medical attention.
0
0 BAR 0 PSI
It is obligatory to wear suitable clothing as gloves, goggles and face shield.
Wear clothing that complies with the safety standards in force in the country in which the equipment is used.
Do not wear bracelets, earrings, rings, chains, or anything else that may hinder the operator’s work.
Do not wear clothing with wide sleeves, scarves, ties, or any other piece of clothing that could get tangled up in moving
parts of the equipment during the work, inspection, or maintenance cycles.

4
MIST-LESS GUN
English
B
*Available on request
PARTS OF THE SPRAYGUN IN CONTACT WITH THE MATERIAL Stainless steel, AISI 420B, PTFE,
Aluminium, Inox AISI 303, Tungsten carbide
TECHNICAL DATA
AUTOMATIC Version
MAX. OPERATING PRESSURE
ATOMIZATION AIR INLET
OPENING CONTROL AIR INLET
INLET PORT SIZE
WEIGHT
140 bar (2030 psi)
ø 8
ø 6
Gj 1/4" (M)
550 g 2002A
600 g 2002PLC
MIST-LESS GUN
MANUAL Version
MAX. OPERATING PRESSURE
AIR INLET
INLET PORT SIZE
WEIGHT
140 bar (2030 psi)
Gj 1/4" (M)
M16x1.5 (M)*
STANDARD Gj 1/4" (M)
1/4" NPS (M)*
590g
MIST-LESS GUN
PARTS OF THE SPRAYGUN IN CONTACT WITH THE MATERIAL Stainless steel, AISI 420B, PTFE,
Aluminium, Inox AISI 303, Tungsten carbide
WIDTH
HEIGHT
(A) ~155 mm
(B) ~225 mm
MIST-LESS GUN
A
B

5
MIST-LESS GUN
English
CDESCRIPTION OF THE EQUIPMENT
POS.
1
2
3
4
POS.
Nozzle
Closing ring nut
Trigger lock
Gun body
Description Description
5
6
7
8
Spraygun air adjustment screw
Spraygun air inlet fitting
Trigger
Material inlet fitting
13
7
2
1
3
5
5
4
6
8

6
MIST-LESS GUN
English
C
D
TRANSPORT AND
UNPACKING
SAFETY RULES
• THE EMPLOYER SHALL TRAIN ITS EMPLOYEES ABOUT
ALLTHOSERISKSSTEMMING FROMACCIDENTS,ABOUT
THE USE OF SAFETY DEVICES FORTHEIR OWN SAFETY
AND ABOUT THE GENERAL RULES FOR ACCIDENT
PREVENTION IN COMPLIANCE WITH INTERNATIONAL
REGULATIONS AND WITH THE LAWS OF THE COUNTRY
WHERE THE PLANT IS USED.
• THE BEHAVIOUR OF THE EMPLOYEES SHALL
STRICTLY COMPLY WITH THE ACCIDENT PREVEN-
TION AND ALSO ENVIRONMENTAL REGULATIONS
IN FORCE IN THE COUNTRY WHERE THE PLANT
IS INSTALLED AND USED.
The disposal of packaging materials is a custo-
mer’s competence and must be performed in
accordance with the regulations in force in the
country where the plant is installed and used.
It is nevertheless sound practice to recycle
packaging materials in an environment-friendly
manner as much as possible.
•
The manufacturer will not be responsible for the unloading
operations and transport to the workplace of the machine.
• Check the packing is undamaged on receipt of the equi-
pment. Unpack the machine and verify if there has been
any damage due to transportation.
In case of damage, call immediately LARIUS and the
Shipping Agent. All the notices about possible damage or
anomalies must arrive timely within 8 days at least from
the date of receipt of the plant through Registered Letter
to the Shipping Agent and to LARIUS.
Read carefully and entirely the following instruc-
tions before using the product.
Please save these instructions in a safe place.
The unauthorised tampering/replacement of one
or more parts composing the machine, the use of
accessories,tools, expendable materials other than
those recommended by the manufacturer can be
a danger of accident.
The manufacturer will be relieved from tort and
criminal liability.
• KEEPYOUR WORK PLACE CLEAN AND TIDY. DISORDER
WHERE YOU ARE WORKING CREATES A POTENTIAL
RISK OF ACCIDENTS.
• ALWAYS KEEP PROPER BALANCE AVOIDING UNUSUAL
STANCE.
• BEFORE USING THE TOOL, ENSURE THERE ARE NOT
DAMAGED PARTS AND THE MACHINE CAN WORK PRO-
PERLY.
• ALWAYS FOLLOW THE INSTRUCTIONS ABOUT SAFETY
AND THE REGULATIONS IN FORCE.
• KEEP THOSE WHO ARE NOT RESPONSIBLE FOR THE
EQUIPMENT OUT OF THE WORK AREA.
• NEVER EXCEED THE MAXIMUM WORKING PRESSURE
INDICATED.
• NEVER POINT THE SPRAY GUN AT YOURSELVES OR AT
OTHER PEOPLE.THE CONTACTWITHTHE CASTING CAN
CAUSE SERIOUS INJURIES.
• IN CASE OF INJURIES CAUSED BY THE GUN CASTING,
SEEK IMMEDIATE MEDICAL ADVICE SPECIFYING THE
TYPE OF THE PRODUCT INJECTED. NEVER UNDER-
VALUE A WOUND CAUSED BY THE INJECTION OF A
FLUID.
• ALWAYS DISCONNECT THE SUPPLY AND RELEASE THE
PRESSURE INTHE CIRCUIT BEFORE PERFORMING ANY
CHECK OR PART REPLACEMENT OF THE EQUIPMENT.
• NEVER MODIFY ANY PART IN THE EQUIPMENT. CHECK
REGULARLY THE COMPONENTS OF THE SYSTEM.
REPLACE THE PARTS DAMAGED OR WORN.
• TIGHTEN AND CHECK ALLTHE FITTINGS FOR CONNEC-
TION BETWEEN PUMP, FLEXIBLE HOSE AND SPRAY GUN
BEFORE USING THE EQUIPMENT.
• ALWAYS USE THE FLEXIBLE HOSE SUPPLIED WITH
STANDARD KIT. THE USE OF ANY ACCESSORIES OR
TOOLING OTHER THAN THOSE RECOMMENDED IN
THIS MANUAL, MAY CAUSE DAMAGE OR INJURE THE
OPERATOR.
• THE FLUID CONTAINED IN THE FLEXIBLE HOSE CAN
BE VERY DANGEROUS. HANDLE THE FLEXIBLE HOSE
CAREFULLY. DO NOT PULL THE FLEXIBLE HOSE TO
MOVE THE EQUIPMENT. NEVER USE A DAMAGED OR
A REPAIRED FLEXIBLE HOSE.
7
MIST-LESS GUN
English
• DO NOT USE METAL TOOLS TO CLEAN THE NOZZLES,
SINCETHEY MAY BE SCRATCHED AND CAUSE UNEVEN
SPRAYING.
• DO NOT RUB THE SPRAYGUN WITH CLOTHS SOAKED
IN SOLVENT.
• DO NOT IMMERSE THE SPRAYGUN IN SOLVENT.
The high speed of travel of the product in the hose
can create static electricity through discharges
and sparks. It is suggested to earth the equipment.
The pump is earthed through the earth cable of
the supply.
The gun is earthed through the high pressure
flexible hose.
All the conductors near the work area must be
earthed.
• NEVER SPRAY OVER FLAMMABLE PRODUCTS OR
SOLVENTS IN CLOSED PLACES.
• NEVER USE THE TOOLING IN PRESENCE OF POTEN-
TIALLY EXPLOSIVE GAS.
Always check the product is compatible with the
materials composing the equipment (pump, spray
gun, flexible hose and accessories) with which it
can come into contact. Never use paints or sol-
vents containing halogen hydrocarbons (as the
methylene chloride).
If these products come into contact with aluminium
parts can provoke dangerous chemical reactions
with risk of corrosion and explosion.
IF THE PRODUCT TO BE USED IS TOXIC, AVOID
INHALATION AND CONTACT BY USING PRO-
TECTION GLOVES, GOGGLES AND PROPER
FACE SHIELDS.
TAKE PROPER SAFETY MEASURES FOR THE
PROTECTION OF HEARING IN CASE OF WORK
NEAR THE PLANT.
• WHENEVER YOU STOP DISPENSING, EVEN FOR A MO-
MENT, ALWAYS SET THE GUN TRIGGER LOCK. FULLY
RELEASE THE TRIGGER AND ROTATE THE TRIGGER
LOCK FORWARD (see page 9).
• USE EXTREME CAUTION WHEN CLEANING OR CHAN-
GING THE FLUID NOZZLE. IF THE NOZZLE CLOGS
WHILE DISPENSING, FULLY RELEASE THE TRIGGER
IMMEDIATELY.ALWAYS FOLLOWTHE PRESSURE RELIEF
PROCEDURE, BELOW, BEFORE WIPING OFF BUILD-UP
AROUND THE NOZZLE OR REMOVING THE NOZZLE TO
CLEAN IT.
• DO NOT DIRECT THE SPRAYGUN UPWARDS DURING
CLEANING.

8
MIST-LESS GUN
English
• Shut off the supply pump.
• Hold a metal part of the gun rmly to the side of a grounded
metal waste container.
• Disengage the trigger lock by rotating the trigger lock backward.
Trigger the gun to relieve fluid pressure.
• Fully release the gun trigger and set the gun trigger lock by
rotating the trigger lock forward.
• Open the pump drain valve to help relieve uid pressure
in the pump, hose, and gun. Have a container ready into
which to drain the material, then pull the trigger to release
the pressure.
• Leave the drain valve open until you are ready to dispense
again.
E
Never put hand or fingers over the nozzle.
Never wipe off build-up around the fluid nozzle
until pressure is fully relieved and the gun trigger
lock is engaged.
Never try to stop or deflect leaks with your hand
or body.
This is a high pressure dispensing gun.
Fluid dispensed under high pressure could
be injected through your skin and into your
body. This could cause extremely serious
injury, including the need for amputation.
Also, fluid injected or splashed into the
eyes or on the skin can cause serious
damage.
FLUID INJECTION HAZARD
Always follow the Pressure Relief Procedure, at right, before
cleaning or removing the fluid nozzle or servicing any system
equipment.
FPRESSURE RELIEF
PROCEDURE
To reduce the risk of serious injury, including fluid injection, splashing
in the eyes or on skin, always follow this procedure whenever the
dispensing equipment is shut off, when checking or servicing any
part of system, when installing, cleaning or changing nozzles and
whenever you stop dispensing.
• Fully release the gun trigger and set the gun trigger lock by
rotating the trigger lock forward.
MEDICAL ALERT – FLUID INJECTION WOUNDS
If any fluid appears to penetrate your skin, get EMERGENCY
MEDICAL CARE AT ONCE. DO NOT TREAT AS A SIMPLE CUT.
Tell the doctor exactly what fluid was injected
Injection into the skin is a traumatic injury. It is
important to treat the injury surgically as soon as
possible.Do not delay treatment to research toxicity.
Toxicity is a concern with some exotic materials
injected directly into theblood stream.Consultation
with a plastic surgeon may be advisable.
Safety Stop locked
Safety Stop released

9
MIST-LESS GUN
English
If you suspect that the nozzle or hose is clogged or
that pressure has not been fully relieved, after
following the steps above, very slowly loosen the
hose end coupling and relieve pressure gradually;
then loosen completely. Now clear the nozzle or
hose obstruction.
H
EQUIPMENT MISUSE HAZARD
Any misuse of the dispensing equipment or accessories, such as
overpressurizing, modifying parts, using incompatible chemicals
and fluids, or using worn or damaged parts, can cause them to
rupture and result in serious injury, including fluid injection and
splashing fluid in the eyes or on the skin, or in fire, explosion or
property damage.
The maximum working pressure of the gun is
140 bar. Do not exceed the maximum Working
pressure.
IHOSE SAFETY
High pressure fluid in the hoses can be very dangerous.If the hose
develops a leak, split or rupture due to any kind of wear, damage
or misure, the high pressure fluid emitted from it can cause a fluid
injection injury or other serious injury or property damage.
Be sure that all dispensing equipment and accessories are properly
rated to withstand the pressures developed by your system. Never
exceed the maximum working pressure of your gun model.
Be sure all fluids and solvents used are chemically
compatible with the “WETTED PARTS” shown in
the TECHNICAL DATA. Always read the fluid and
solvent manufacturer’s literature before using any
fluid or solvents in your system.
Before each use, check the entire hose for cuts,
leaks, abrasion, bulging cover, or damage or
movement of the hose couplings.
• Do not try to recouple high pressure hose or mend it with
tape or any other device. A repaired hose cannot contain the
high pressure fluid.
• Handle and route hoses carefully.
• Tighten all uid connections securely before each use. High
pressure fluid can dislodge a loose coupling or allow high
pressure fluid to be emitted from the coupling
• Never use a damaged hose. If any of these conditions exist,
replace the hose immediately.
Do not pull on hoses to move equipment.
Do not use fluids or solvents which are not
compatible with the inner tube and cover of the
hose.
Do not expose hose to extreme temperatures;
check with your hose supplier to determine
temperature tolerance.
Proper hose grounding continuity is essential to maintaining a
grounded dispensing system.Check the electrical resistance of your
fluid hoses at least once a week. If your hose does not have a tag
on it which specifies the maximum electrical resistance, contact the
hose supplier or manufacturer for the maximum resistance limits.
Use a resistance meter in the appropriate range for your hose to
check the resistance. If the resistance exceeds the recommended
limits, replace it immediately. An ungrounded or poorly grounded
fluid hose can make your system hazardous.
L
FIRE OR EXPLOSION HAZARD
Static electricity is created by the flow of fluid through the pump
and hose. If every part of the equipment is not properly grounded,
sparking may occur, and the system may become hazardous.
Sparks may also occur when plugging in or unplugging a power
supply cord. Sparks can ignite fumes from solvents and the fluid
being dispensed, dust particles and other flammable substances,
whether you are pumping indoors or outdoors, and cause a fire
or explosion, serious injury, and property damage.

10
MIST-LESS GUN
English
Do not plug in or unplug any power supply cords
in the dispensing area when there is any chance
of igniting fumes still in the air.
If you experience any static sparking or feel even a
slight shock while using this equipment, STOP
DISPENSING IMMEDIATELY. Check for proper
grounding of the entire system. Do not use the
system again until the cause of the problem is
identified and corrected.
Before flushing, be sure the entire system and
flushing pails are properly grounded. Refer to
GROUNDING, above.
Always use the lowest possible fluid pressure,
and maintain firm metal-to-metal contact between
the gun and grounded metal pail during flushing
to reduce the risk of fluid injection injury, static
sparking and splashing.
MMOVING PART HAZARD
Moving parts can pinch or amputate your fingers or other body
parts. Keep clear of moving parts when starting or operating
your system.
Before checking or servicing the gun, pump, or any other system
component follow the PRESSURE RELIEF PROCEDURE (see
page 8) to prevent the pump from starting
accidentally.
GROUNDING
To reduce the risk of static sparking, ground the pump and all
other equipment used or located in the dispensing area. Check
your local electrical code for detailed grounding instructions for
your area and type of equipment and be sure to ground all of the
following equipment.
• Pump: ground the pump by connecting a grounding wire from
the pump’s grounding lug to a true earth ground.
• Air compressor or hydraulic power supply: ground according
to local code and manufacturer’s recommendations.
• Fluid hoses: use only grounded hoses with a maximum of
150 mt.Combined hose length to ensure grounding continuity.
Refer to hose grounding continuity, above.
• Flo-gun: obtain grounding through connection a properly
grounded fluid hose and pump.
• Fluid supply container: according to local code.
• All solvent pails used when ushing: according to local code.
Use only metal pails.Do not place the pail on a non-conductive
surface, such as paper or cardboard, which interrupts the
grounding continuity.
• To maintain grounding continuity when ushing or relieving
pressure always hold a metal part of the gun firmly to the
side of a grounded metal pail, then trigger the gun.
NSETTING-UP
CONNECTION OF THE FLEXIBLE HOSE TO THE GUN
•
Connect the flexible hose (N1) to the gun air pressure gauge
coupling (N2) of the pump.
•
Connect the flexible hose (N1) to the gun coupling (N3).
N1
N2
N1
N3

11
MIST-LESS GUN
English
CONNECTING THE PRODUCT DELIVERY HOSE
• Connect the exible product delivery hose (N4) to the delivery
coupling (N5) of the pump.
Lock the nut (N6) using the dedicated wrench (N7).
NEVER use sealants on fittings’ threads.
It is recommended to use the hose provided with the
standard kit.
NEVER use a damaged or a repaired flexible hose.
•
Connect the flexible product delivery hose (N4) to the gun
(N8).
Lock the nut (N6) using the dedicated wrench (N7).
Fluid flow rate is controlled at the pump.
Adjust the pump pressure to obtain the desired flow rate; use
lowest pressure necessary.
The pressure adjustment will depend on hose length, the viscosity
of the fluid, and the nozzle size.
To dispense fluid with the gun, start the supply pump, disengage
the trigger lock, and squeeze the trigger in all the way.
Fluid flow beings with the slightest pressure and stops when
trigger is released.
OOPERATION
To reduce the risk of serious injury, including fluid
injection or splashing in the eyes or on skin,always
follow the PRESSURE RELIEF PROCEDURE (on
page 8) whenever the dispensing equipment is
shut off, when checking or servicing any part of
system, when installing or changing nozzles and
whenever you stop dispensing.
Always engage the trigger lock when the flo-gun
is not in use to prevent accidental triggering of
the gun.
N7
N5 N4
N8
N6
N9
N7
N4
Product delivery hose
Air hose

12
MIST-LESS GUN
English
NEVER direct the gun towards yourself or
others.
Contact with the jet of paint may cause serious
injury. In case of injury, immediately see a doctor
specifying the product injected.
Symmetrical trace of spraying a fluid using air.
No tail-end is formed.
Trace of spraying a fluid at low-pressure without using air.
• At this point, the product will ow until reaching the gun and
you can start working.
STARTING THE SPRAYING OPERATIONS
Before starting the pump it is important that
a small amount of atomizing air is sent to the
spraygun.
ADJUSTING - SPRAYING NOZZLE
• The spraying nozzle can be adjusted according to need by
setting the pump operating pressure and the atomization
pressure until reaching the required operating conditions.
• For proper spraying of the product, the air and paint coming
out of the gun must leave a spraying trace without tails.
• Use the tooling after performing all the SETTING UP operations
above described.
• If spraying is incorrect, adjust the amount of air.
A
B

13
MIST-LESS GUN
English
PROBLEMS AND SOLUTIONS
P
Solution
Cause
Problem
• Pulling the trigger, the pressure
drops considerably
• Material flows from the cap
•
Fluid leakage from the gun
•
Fluid in air passages
•
Fluid flow stops or it comes out
slowly
•Material leaks from the gasket
pressing screw
• Atomization imperfect
• Spraying jet irregular
• Spraying jet streaky
• Uneven paint spreading
• Pulling the trigger, the fluid does
not flow out
• The nozzle is too large or worn;
• The product is too dense;
• The mesh of the filter in the gun is too
fine;
• Material leakage from the sealing O-
ring;
• Gaskets worn;
• Product viscosity too low;
• Fluid rod damaged or worn;
• Leaks from the gaskets;
• Nozzle dirty or clogged;
• Gasket loosened or worn;
• Nozzle worn;
• Insufficient fluid feed;
• Air in the paint feed line;
• Nozzle worn;
• Nozzle partially clogged;
• Nozzle worn or partially clogged;
• Nozzle clogged;
• Filter clogged or worn.
• Replace with a smaller one;
• If possible, dilute the product;
• Replace with a filter with larger
mesh;
• Replace the O-ring;
• Replace the gaskets;
• Change to a more suitable pro-
duct;
• Check and replace if necessary;
• Replace the gaskets;
• Clean or replace it;
• Tighten the gasket pressing screw
or change the gasket;
• Replace it;
• Adjust the fluid outflow or fill the fluid
feed can;
• Check and bleed the paint line air;
• Replace it;
• Clean or replace it;
• Clean or replace it.
Incorrect spreading of the product is caused by incorrect adjustment between the air and the fluid.

14
MIST-LESS GUN
English
Q
TRIGGER LOCK DISENGAGED
To disengage the trigger lock (Q1), rotate the trigger lock
backward.
TRIGGER LOCK
TRIGGER LOCK ENGAGED
To engage the trigger lock, release the trigger and rotate the
trigger lock (Q1) forward.
Q1
Q1
Trigger locked Trigger released

15
MIST-LESS GUN
English
ROUTINE MAINTENANCE
R
To reduce the risk of serious injury, including fluid
injection or splashing the eyes or on the skin:
• Always follow the PRESSURE RELIEF PROCE-
DURE (see page 8) before checking, adjusting,
cleaning or repairing the gun or any part of the
system.
• After adjusting or servicing the gun, if uid does
flow, the gun is not assembled properly or the
trigger lock is damaged, reassembled the gun
or return it to your nearest distributor. Do not
use the gun until the problem is corrected.
• When removing the gun from the hose, be sure to
hold the inlet fitting securely to avoid loosening
from the gun body.
INSPECTING THE VALVE FOR OBSTRUCTIONS OR DAMGE
PLEASE NOTE: for details see the exploded diagram on page 16.
If fluid continues to flow after the trigger is released, the gun valve
may be obstructed or need adjustment. The valve stem (34) or
valve seat (10) may be worn or damaged. Adjust or replace parts
as instructed below. To reduce the risk of serious injury, do not
use the gun until the problem is corrected.
• Follow the Pressure Relief Procedure (see page 8) and
disconnect the gun from the hose.
• Disassemble the gun as instructed, then clean and inspect
the parts.
• Replace any worn or damaged parts and reassemble the
gun as instructed.
VALVE NEEDLE AND SEAL SERVICE
PLEASE NOTE: for details see the exploded diagram on page 16
If fluid flows beyond the seal, the gaskets (8) or the rod (34) might
be damaged or worn.
To replace them, follow the procedure described below:
•
Be sure to read the WARNING (see page 6).
• Follow the Pressure Relief Procedure (see page 8) and
disconnect the gun from the hose.
• Loosen the spring adjustment fitting (9) and remove the spring
(22).
• Unscrew the sleeve (10), clean or replace it if necessary.
• Remove the needle (34),clean it and, if necessary, replace
it.
• Remove the gasket pressing screw (17) and the gasket (16a).
Replace the gaskets.
• Fit the gasket pressing screw.
• Insert the needle (34).
• Screw the coupling sleeve (10) with the dedicated washer
(11) into the gun body (18).
The needle (34) and the coupling sleeve (10) must
be accurately fitted: during the last turn of the
screwing coupling sleeve (10) must compress the
needle (34) to provide the proper seal.
If thematerial will leak from the valne while ope-
rating the gun:
• proceed with the pressure release as discribed
at page 8
• Disassemble the coupling sleeve(10) and turn
the needle (34) anticlockwise. In this way the
spring (22) compression will be increased and
seal will be more accurate.

16
MIST-LESS GUN
English
SEXPLODED DIAGRAM OF MANUAL MIST-LESS 07 SPRAYGUN
WARNING: Always indicate code and quantity for each part required
2
1
3
4
11
12
105
11
15
6
29
27
26
28
30
31 42
25 45
19
21
20
43
18
8
8
13
14
11
16
16A
17
41
36
35
34
33
32
22
9
37
38
39
40
7
23
24
46

17
MIST-LESS GUN
English
Pos.
Complete manual Mist-Less spraygun
Ring nut
Head
Gasket
Gasket
Nozzle (see list)
Seal
Complete air adjustment screw
Gasket
Spring adjustment fitting
Sleeve with ball seat
Washer
Fluid passage head
O-Ring
O-Ring
Union
Lock nut
Spacer
Gasket pressing screw
Gun body
Trigger pin
Trigger screw
Trigger
Spring
Filter (100 MESH)
19970
11966/1
11963/1
11972
11971
-
11995
11968/1
11955
11918
11959/M
7021
11936
11986
11988
11976
11973
11816
11935
11957/1
11981
11979
11975
11923
270
-
1
2
3
4
5
6
7
8
9
10
11
12
13
14
15
16
16A
17
18
19
20
21
22
23
Code Description
23
24
25
26
27
28
29
30
31
32
33
34
35
36
37
38
39
40
41
42
43
44
45
46
Pos. Code Description
Filter (60 MESH)
Sleeve
Air fitting
Air valve screw
O-Ring
Air valve seat
Gasket
Air valve
Spring
Rod holder
Lock nut
Fluid rod
Complete fluid rod
O-Ring
Elastic ring
Bush
O-Ring
Air adjustment screw
Bushing
Material hose
Spraygun cap
Elastic ring
Union rapid
Swivel connection
271
14039/1
11931
12211
4077
12209
12208
12207
12206
11925
11926
11612/M
11906/M
33013/3
12103
11987/1
33013/7
11967/1
11917
11970/1
12202
12471
11781
11155
Art.
1501/M
1502/M
1503/M
1504/M
1506/M
1507/M
1508/M
1510/M
1511/M
1512/M
1514/M
1515/M
1516/M
1517/M
NOZZLE TABLES
MIST-LESS
Size
5 - 20
5 - 40
7 - 20
7 - 40
9 - 20
9 - 40
9 - 60
11 - 20
11 - 40
11 - 60
13 - 20
13 - 40
13 - 60
15 - 20
Art.
1518/M
1519/M
1521/M
1522/M
1523/M
1525/M
1526/M
1527/M
1530/M
1531/M
1532/M
1534/M
1535/M
-
Size
15 - 40
15 - 60
17 - 20
17 - 40
17 - 60
21 - 20
21 - 40
21 - 60
25 - 20
25 - 40
25 - 60
31 - 40
31 - 60
-
Art.
19029
19030
19031
19014
19017
19032
19033
19034
19035
19036
19037
19038
19039
19040
MIST-CLEAN
Size
9/30
9/40
9/65
11/30
11/40
11/65
13/30
13/40
13/65
15/30
15/40
15/65
18/30
18/40
Art.
19041
19042
19043
19044
19045
19046
19047
19048
19049
19050
19051
19052
19053
19054
Size
18/65
21/30
21/40
21/65
23/30
23/40
23/65
26/30
26/40
26/65
31/30
31/40
31/65
35/40

18
MIST-LESS GUN
English
VEGA 23:1
Art. 91507
Art. 91509 Inox
VEGA 15:1
Art. 91400
Art. 91405 Inox
GHIBLI 30:1
Art. 96135
Art. 96137 Inox
TPNEUMATIC PUMPS FOR MIST-LESS SPRAY PAINTING
Table of contents
Other Larius Paint Sprayer manuals

Larius
Larius STAR 3001S User manual

Larius
Larius Excalibur Liner Operating manual

Larius
Larius L400 Series User manual

Larius
Larius PLA K11421 User manual

Larius
Larius ZEFIRO Operating manual

Larius
Larius Zeus Operating manual

Larius
Larius CH 200 AD Operating manual

Larius
Larius TORNADO 2 Series Manual

Larius
Larius Sirio 27:1 User manual

Larius
Larius K-2 Operating manual
Popular Paint Sprayer manuals by other brands

Carlisle
Carlisle DeVilbiss PROLite Series Service manual

Milwaukee
Milwaukee M18 Original instructions

Nordson
Nordson Universal Series Customer product manual

Toro
Toro Spray Master Series Operator's manual

WAGNER
WAGNER Paint Crew HIGH PERFORMANCE AIRLESS SPRAYER owner's manual

Graco
Graco C Series Instructions-parts list