13a 3b
2
A.
B.
4
WARRANTY*
LEGACY MANUFACTURING COMPANY (“LEGACY”) warrants that this equipment, ( NOT including couplers, whip
hoses, and wear items such as seals ), will be free from defects in material and workmanship for a period of five (5) years
from the date of purchase, under normal use.* LEGACY’S sole obligation under this warranty is limited to replacing or
repairing, free of charge, equipment that proves to be defective under normal conditions and use according to the
recommendations of LEGACY. LEGACY will NOT warrant this product under conditions of misuse or abuse. This
warranty is void in cases where the product has been modified and/or tampered with. To obtain repair or replacement, the
equipment must be shipped to a LEGACY authorized Warranty and Service Center during the warranty period,
transportation charges prepaid, with proof of date of purchase. In the event of repair or replacement, the warranty period
shall not be extended beyond the original warranty period.
While necessary maintenance or repairs on your Legacy equipment can be performed by any company, we recommend
that you use only authorized Legacy service centers. Improper or incorrectly performed maintenance or repair voids this
warranty
.
Contact
us
at
[email protected] or
www
.legacymfg.com
for
ordering,
installation
instructions.
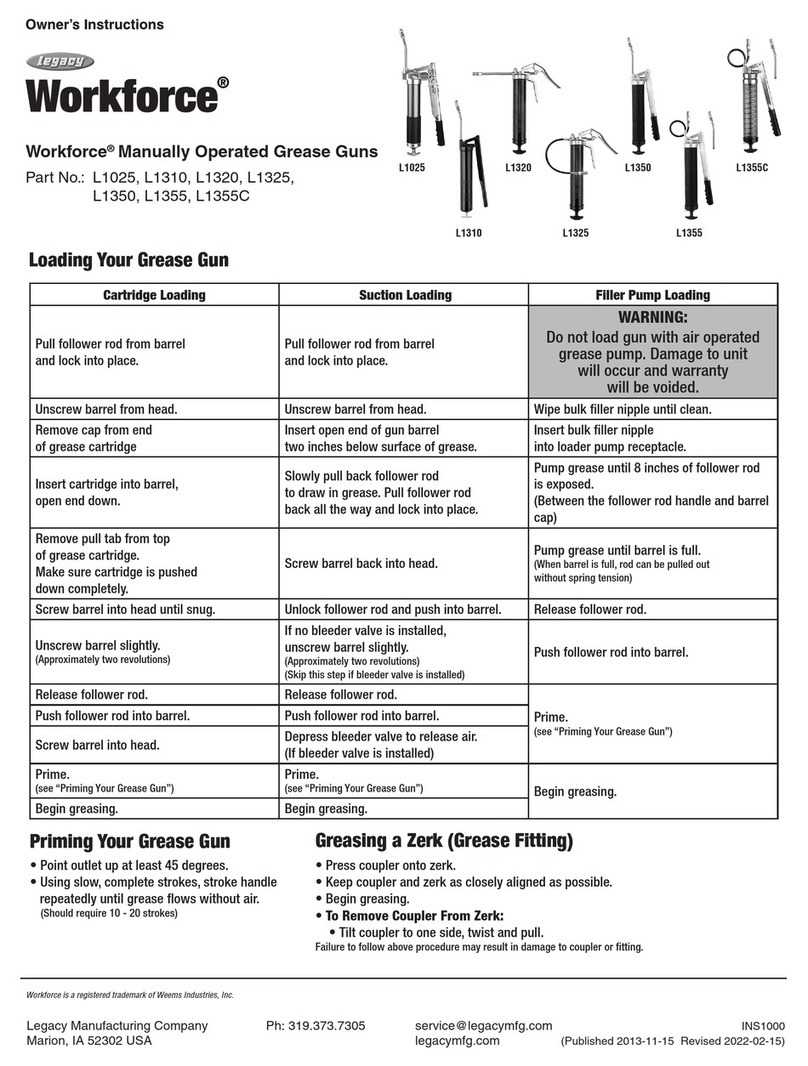
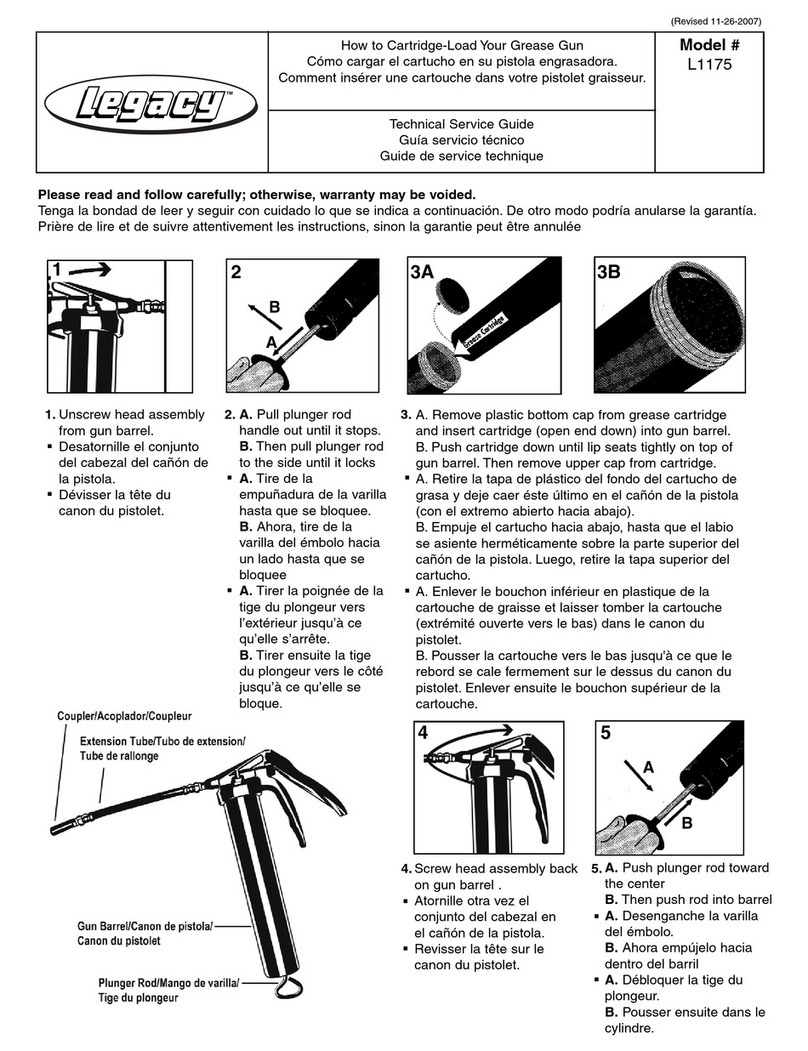
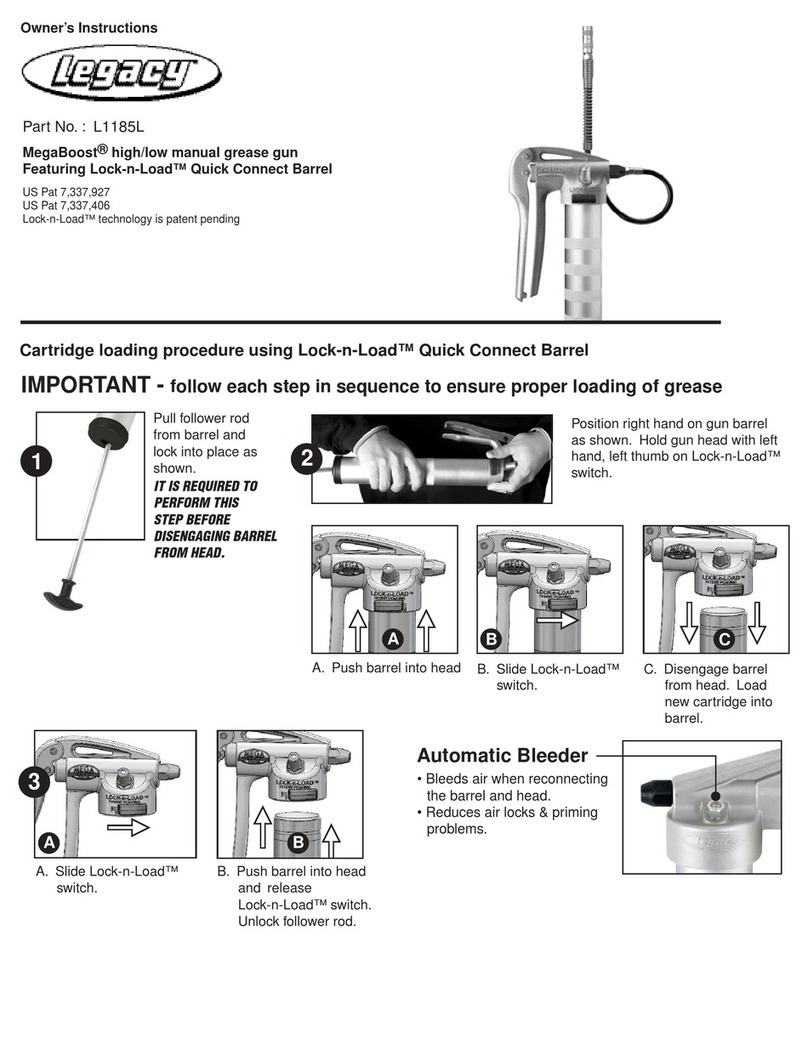
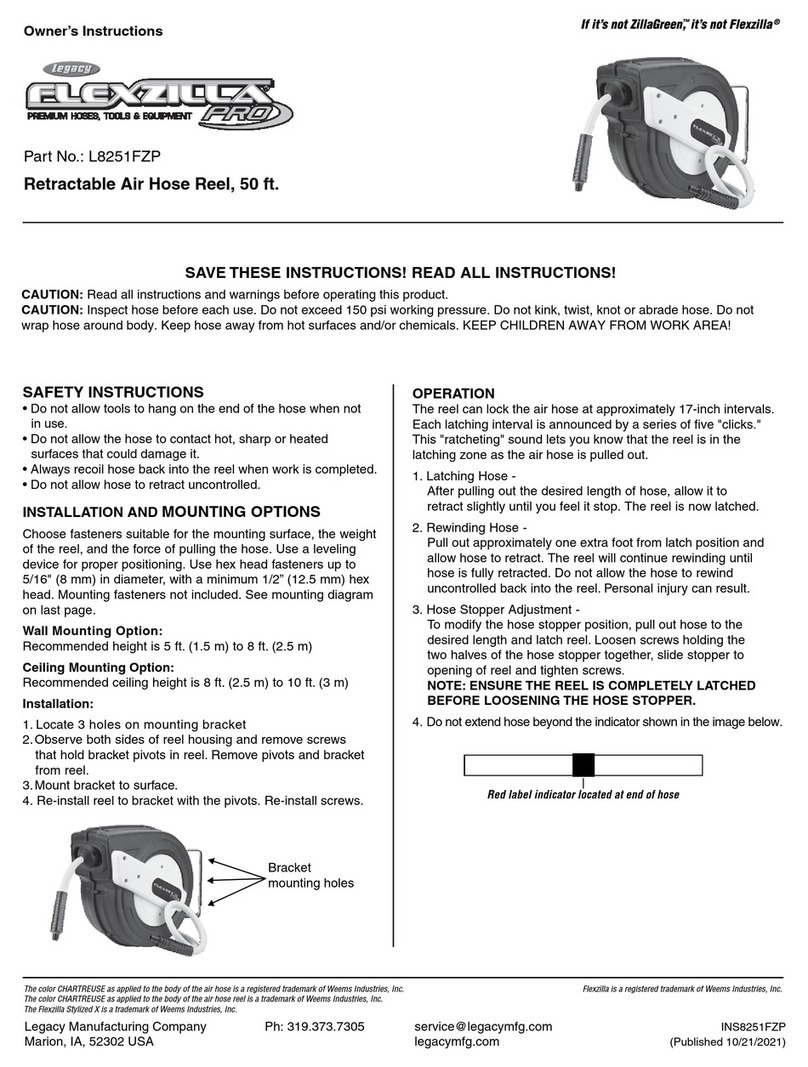
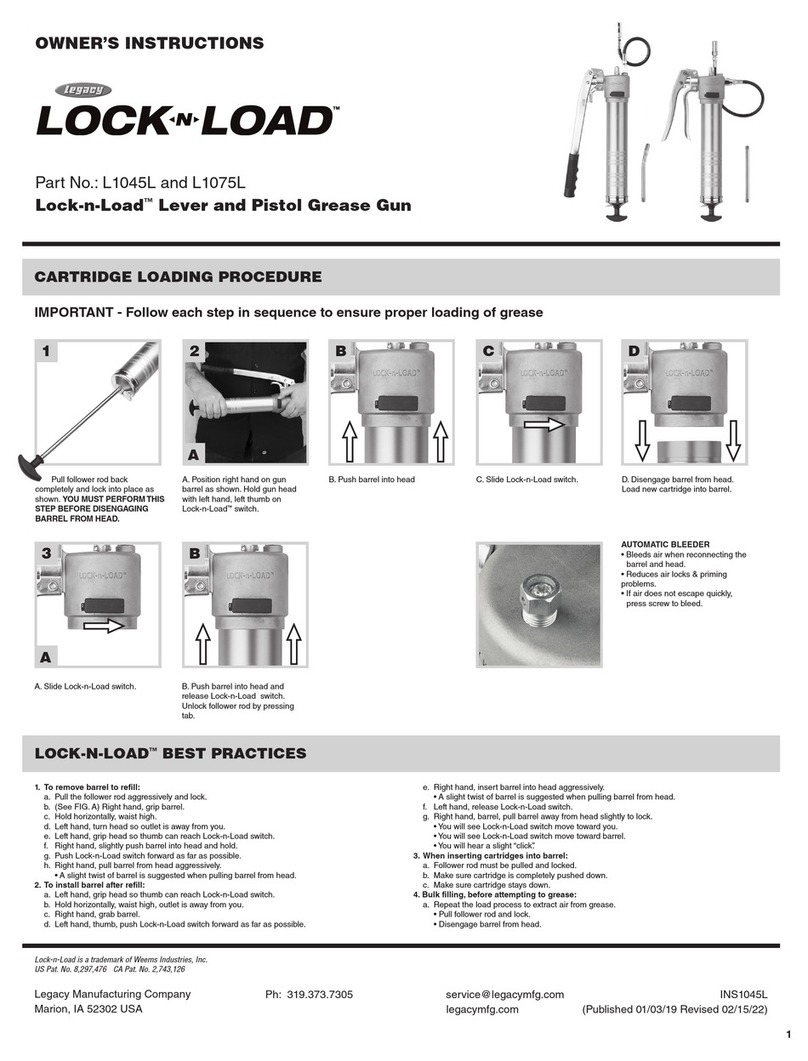
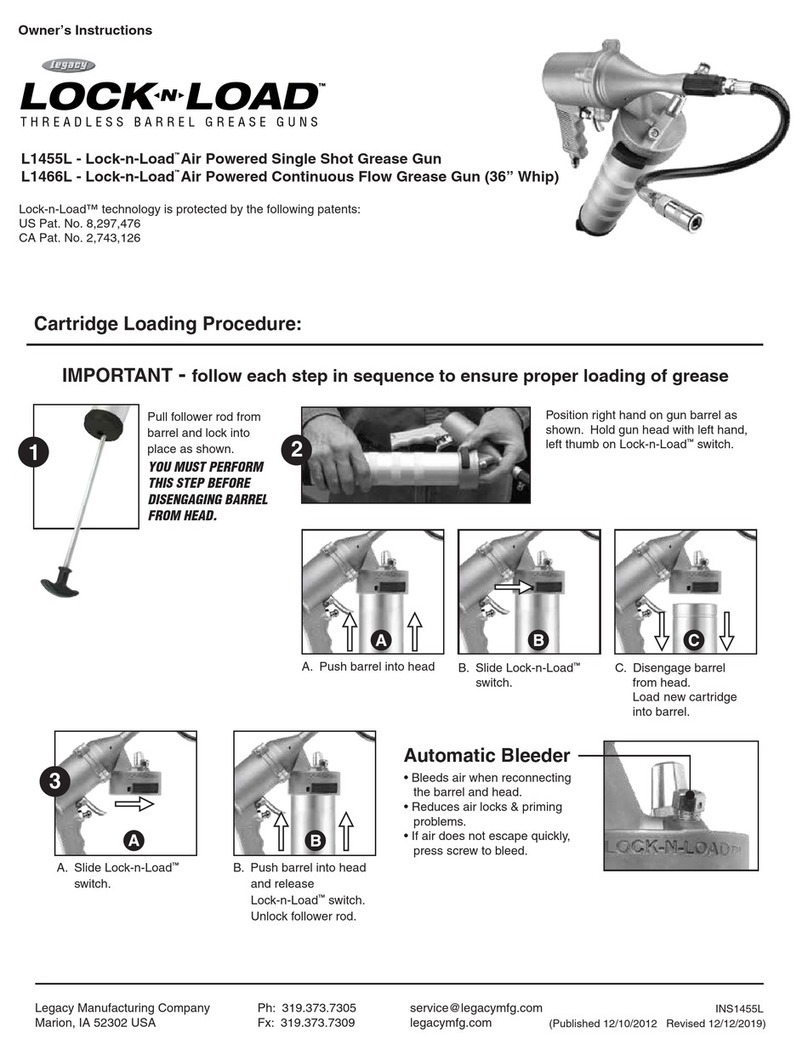
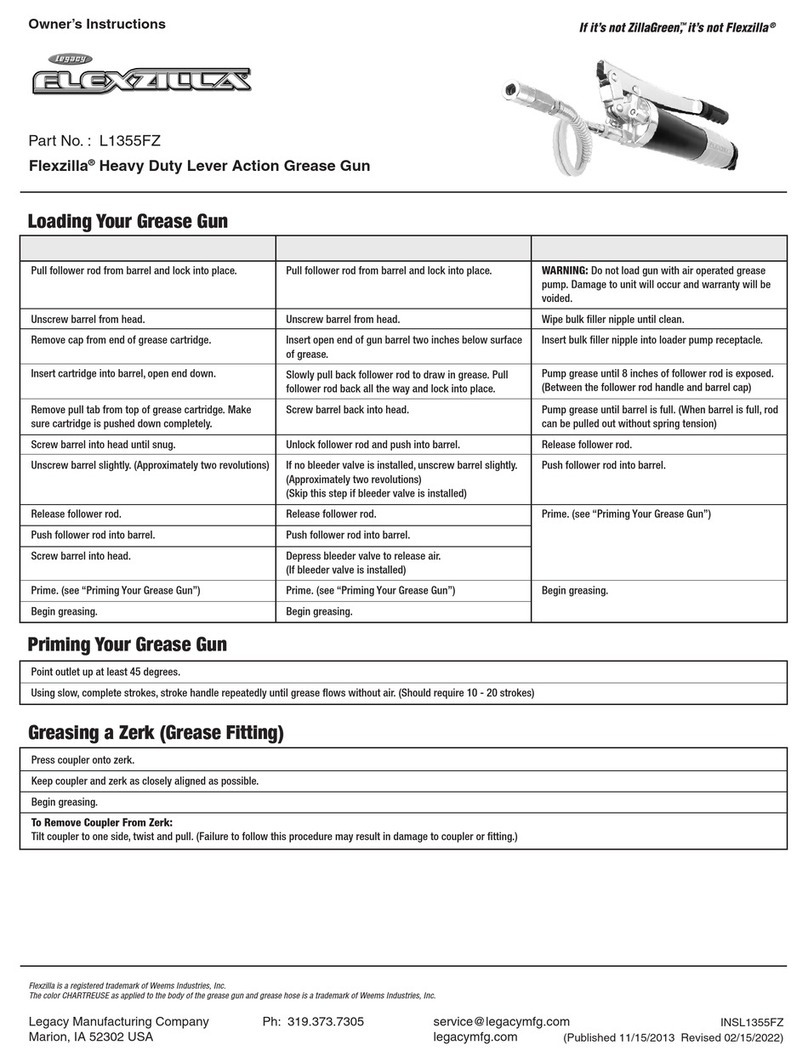
CARTRIDGE LOADING PROCEDURE
FIGURE 1
Unscrew gun barrel from head assembly.
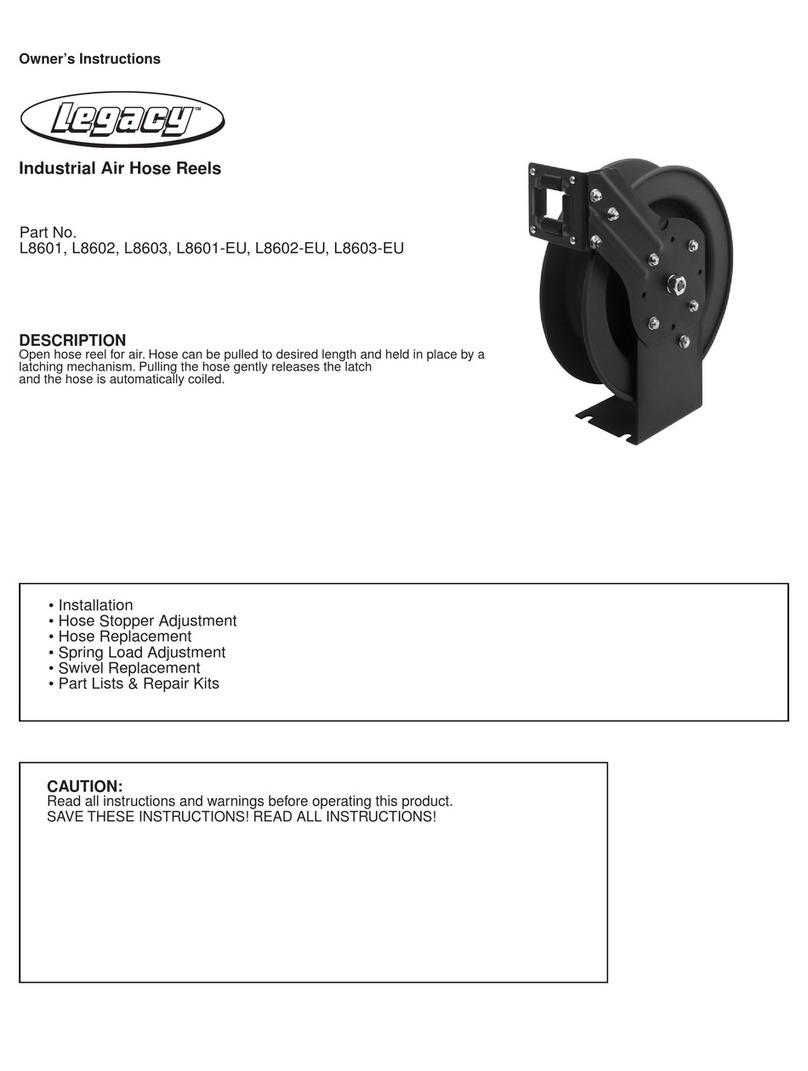
FIGURE 2
A. Pull plunger rod handle out until it stops.
B. Then pull plunger rod to the side until it locks.
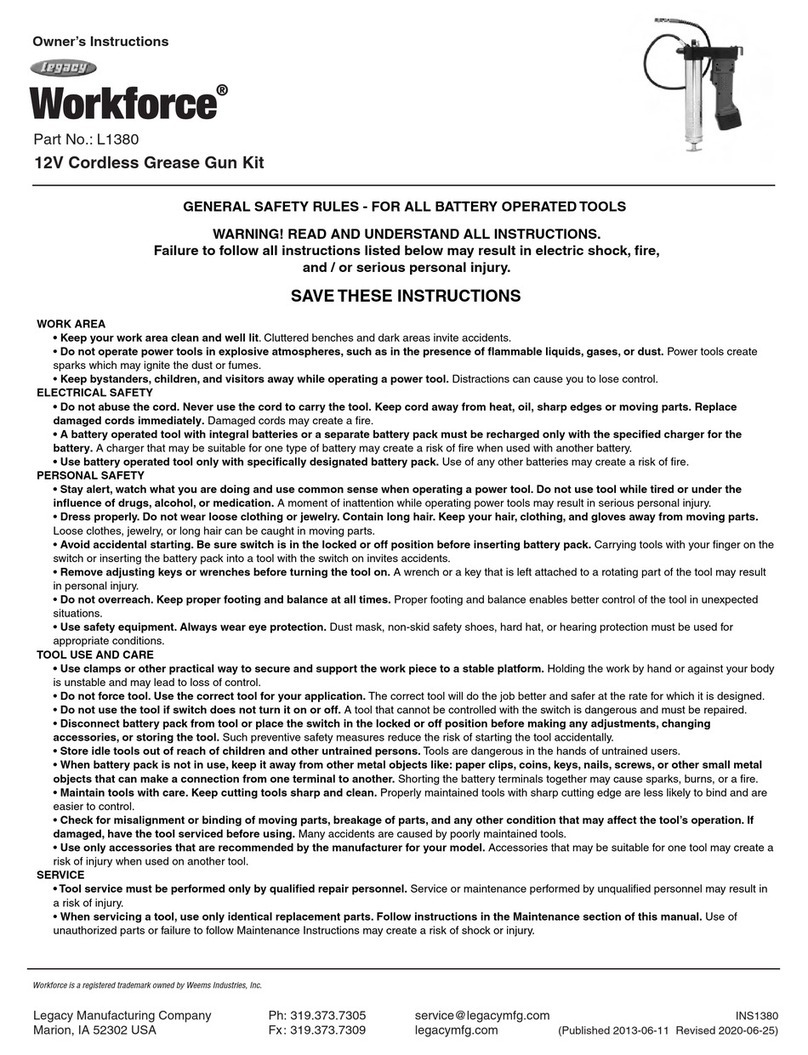
FIGURE 3
A. Remove plastic bottom cap from grease cartridge and drop
cartridge (open end down) into gun barrel.
B. Push cartridge down until lip seats against top of gun barrel.
Pull ring tab to remove seal from end of grease cartridge.
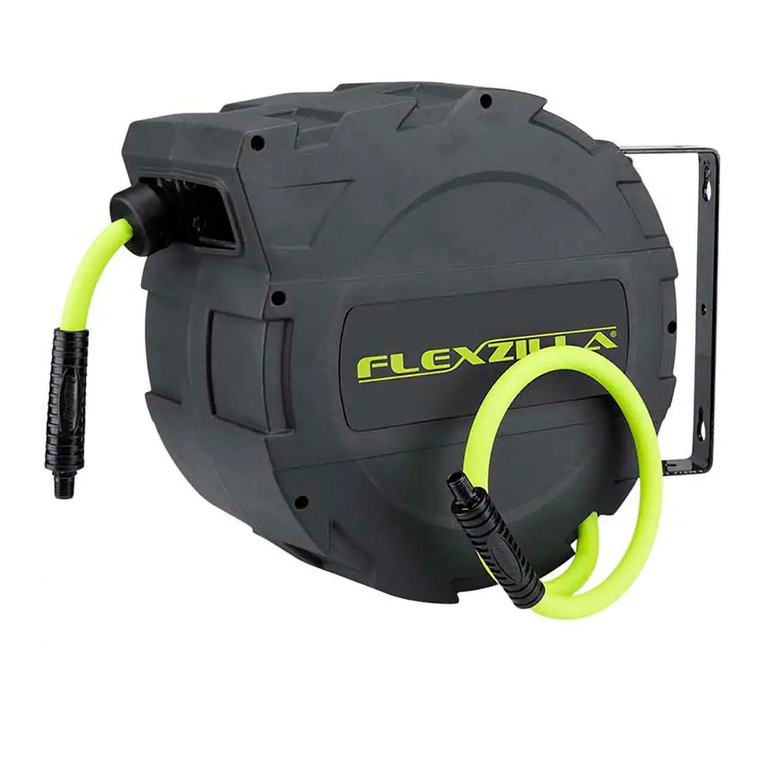
FIGURE 4
Screw gun barrel back on head assembly.
FIGURE 5
A. Push plunger rod toward the center.
B. Then push into barrel.
A.
B.
56
SUCTION LOADING PROCEDURE
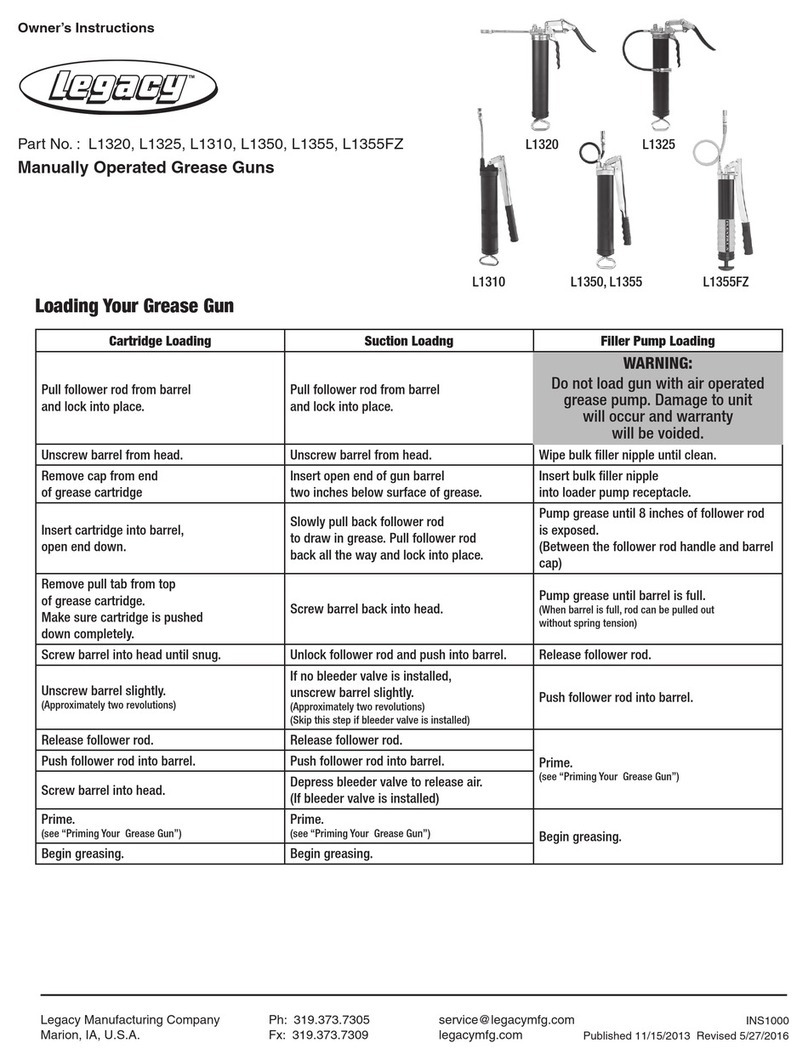
FIGURE 6
Unscrew gun barrel from head assembly. Insert open end of
gun barrel two inches below surface of grease. Slowly pull
back plunger rod handle (drawing in grease). Screw gun barrel
back on head assembly. Move follower rod handle to the center
to unlock it & push into barrel. Use Air Pocket Valve to release
trapped air. Follow priming instructions below.
MANUAL GREASE FILLER PUMP LOADING PROCEDURE
• Wipe grease filler nipple clean.
• Insert gun head loader fitting into valve of loader pump.
• Pump grease until gun is filled. When barrel is full, the rod will
be fully extended, without spring tension. Push rod into barrel.
TO PRIME
Unscrew the air pocket valve located on the top of the gun
in a counter-clockwise motion until grease begins to appear
from the hole. Keep in this position until all air bubbles are out.
Retighten valve when finished. Operate the gun trigger until
grease flows from the coupler. If necessary, repeat air-bleeding
steps to purge trapped air pockets from grease.
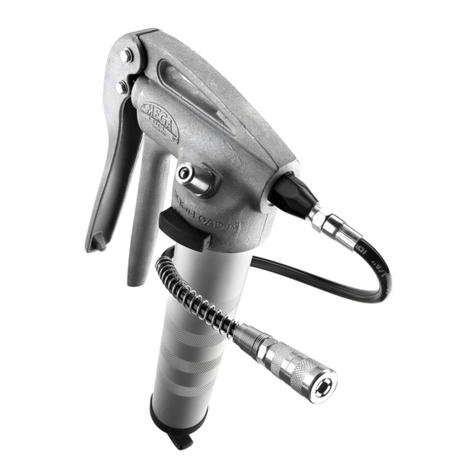
L2810SP MegaBoost® High Pressure Flesxible Extension
RP004082 Grease Filler Nipple
RP009001 MegaBoost® Piston & Seals Assembly
RP009006 Barrel & Assembly
L2015 MegaBoost® High Pressure 4-Jaw Coupler
L2430 Rigid Extension
L2465 Air Bleed Valve
Replacement Parts:
