manuals.online logo
Brands
  1. Home
  2. •
  3. Brands
  4. •
  5. Legacy
  6. •
  7. Tools
  8. •
  9. Legacy Workforce 1380 User manual

Legacy Workforce 1380 User manual

GENERAL SAFETY RULES - FOR ALL BATTERY OPERATED TOOLS
WARNING! READ AND UNDERSTAND ALL INSTRUCTIONS.
Failure to follow all instructions listed below may result in electric shock, fire,
and / or serious personal injury.
SAVE THESE INSTRUCTIONS
WORK AREA
• Keep your work area clean and well lit. Cluttered benches and dark areas invite accidents.
•Do not operate power tools in explosive atmospheres, such as in the presence of flammable liquids, gases, or dust. Power tools create
sparks which may ignite the dust or fumes.
•Keep bystanders, children, and visitors away while operating a power tool. Distractions can cause you to lose control.
ELECTRICAL SAFETY
• Do not abuse the cord. Never use the cord to carry the tool. Keep cord away from heat, oil, sharp edges or moving parts. Replace
damaged cords immediately. Damaged cords may create a fire.
• A battery operated tool with integral batteries or a separate battery pack must be recharged only with the specified charger for the
battery. A charger that may be suitable for one type of battery may create a risk of fire when used with another battery.
• Use battery operated tool only with specifically designated battery pack. Use of any other batteries may create a risk of fire.
PERSONAL SAFETY
• Stay alert, watch what you are doing and use common sense when operating a power tool. Do not use tool while tired or under the
influence of drugs, alcohol, or medication. A moment of inattention while operating power tools may result in serious personal injury.
•Dress properly. Do not wear loose clothing or jewelry. Contain long hair. Keep your hair, clothing, and gloves away from moving parts.
Loose clothes, jewelry, or long hair can be caught in moving parts.
•Avoid accidental starting. Be sure switch is in the locked or off position before inserting battery pack. Carrying tools with your finger on the
switch or inserting the battery pack into a tool with the switch on invites accidents.
•Remove adjusting keys or wrenches before turning the tool on. A wrench or a key that is left attached to a rotating part of the tool may result
in personal injury.
•Do not overreach. Keep proper footing and balance at all times. Proper footing and balance enables better control of the tool in unexpected
situations.
•Use safety equipment. Always wear eye protection. Dust mask, non-skid safety shoes, hard hat, or hearing protection must be used for
appropriate conditions.
TOOL USE AND CARE
• Use clamps or other practical way to secure and support the work piece to a stable platform. Holding the work by hand or against your body
is unstable and may lead to loss of control.
•Do not force tool. Use the correct tool for your application. The correct tool will do the job better and safer at the rate for which it is designed.
•Do not use the tool if switch does not turn it on or off. A tool that cannot be controlled with the switch is dangerous and must be repaired.
•Disconnect battery pack from tool or place the switch in the locked or off position before making any adjustments, changing
accessories, or storing the tool. Such preventive safety measures reduce the risk of starting the tool accidentally.
•Store idle tools out of reach of children and other untrained persons. Tools are dangerous in the hands of untrained users.
•When battery pack is not in use, keep it away from other metal objects like: paper clips, coins, keys, nails, screws, or other small metal
objects that can make a connection from one terminal to another. Shorting the battery terminals together may cause sparks, burns, or a fire.
•Maintain tools with care. Keep cutting tools sharp and clean. Properly maintained tools with sharp cutting edge are less likely to bind and are
easier to control.
•Check for misalignment or binding of moving parts, breakage of parts, and any other condition that may affect the tool’s operation. If
damaged, have the tool serviced before using. Many accidents are caused by poorly maintained tools.
•Use only accessories that are recommended by the manufacturer for your model. Accessories that may be suitable for one tool may create a
risk of injury when used on another tool.
SERVICE
• Tool service must be performed only by qualified repair personnel. Service or maintenance performed by unqualified personnel may result in
a risk of injury.
•When servicing a tool, use only identical replacement parts. Follow instructions in the Maintenance section of this manual. Use of
unauthorized parts or failure to follow Maintenance Instructions may create a risk of shock or injury.
Part No.: L1380
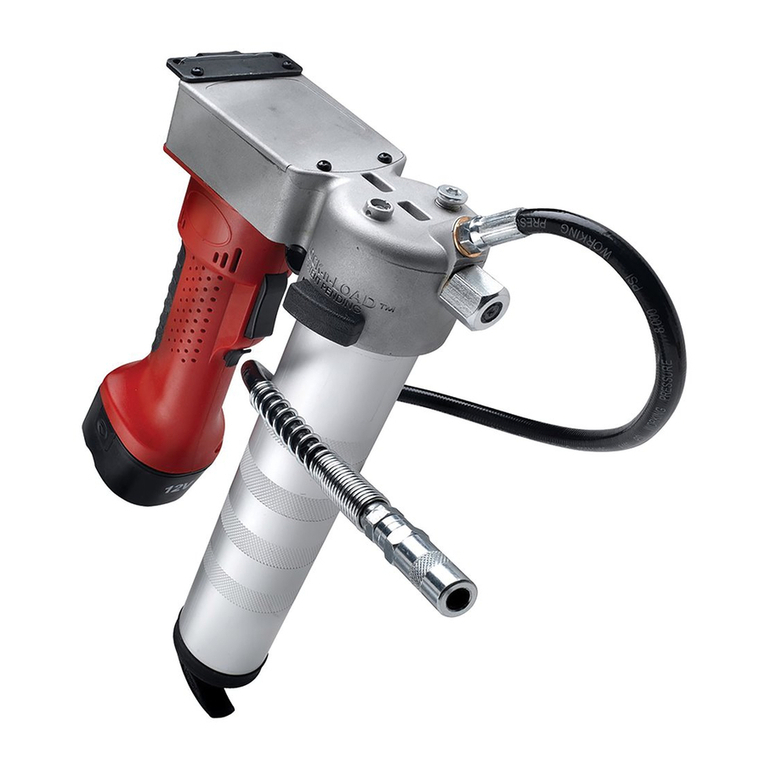
12V Cordless Grease Gun Kit
Owner’s Instructions
Ph: 319.373.7305
Fx: 319.373.7309
[email protected]
legacymfg.com
INS1380
(Published 2013-06-11 Revised 2020-06-25)
Workforce is a registered trademark owned by Weems Industries, Inc.
Legacy Manufacturing Company
Marion, IA 52302 USA
• DANGER: Because of the high working pressures developed by this gun, the possibility of grease injection into the flesh, or an eye, is a
potential hazard. Never allow any part of the human body to come in front of, or in direct contact with a grease discharge outlet or potential
hose rupture. Never point the nozzle of the gun at yourself or toward anyone else. If accidental grease injection should occur seek immediate
emergency medical attention. DO NOT try to treat the injury yourself! If injection occurs provide grease product information to medical per-
sonnel. Be certain that any and all system components will withstand the pressures being developed. Never exceed the pressure rating of any
component in the system. Inspect all hoses and fittings before each use. Weak, worn, or damaged hoses are a hazard.
• WARNING: Before each use inspect hoses for signs of wear,leaks,or loose fittings. Inspect and tighten all fluid connections regularly
and replace weak or damaged hose. Do not use any defective,unmarked, or damaged hoses. Do not repair the grease whip hose. Replace if
damaged. Most injections occur because of component rupture. Any cuts or sharp bends in hose can rupture and cause personal injury. Use
only components that will withstand the pressures being developed.
• WARNING: Do not adjust relief pressure above ,000 psi.
• WARNING: Wear safety goggles or other eye protection. Grease gun can develop high pressure- up to 000 psi (413 bar). Use safety glasses
and gloves for protection during operation. Grease leaks under pressure can penetrate the eyes and skin. Keep grease products away from
eyes. Consult grease product labeling for safety precautions.
• CAUTION: Keep hands and fingers clear of the exposed rubber or plastic portion of hose. Extreme pressure may cause nozzle extension or
hose to burst.
• CAUTION: Wipe up any dripped or spilled grease residue and keep work area clean. Grease on floor surfaces can be slippery and cause loss of
footing and possible injury.
SPECIFIC SAFETY RULES
ADDITIONAL SAFETY RULES
BEFORE USING THE BATTERY PACK AND CHARGER, READ AND UNDERSTAND ALL OF THE SAFETY
INSTRUCTIONS BELOW.
• Do not incinerate the battery pack even if it is severely damaged or is completely worn out.The battery pack can explode in a fire.
•A small leakage of liquid from the battery pack cells may occur under extreme usage or temperature conditions. If this leakage gets on your
skin:
a. Wash quickly with soap and water.
b. Neutralize with a mild acid such as lemon juice or vinegar.
c. If battery liquid gets into your eyes, flush them with clean water for a minimum of 15 minutes and seek
immediate medical attention. Medical note: The battery cells are rechargeable nickel-cadmium type.
•A battery operated tool with integral batteries or a separate battery pack must be recharged only with the specified charger for the battery. A
charger that may be suitable for one type of battery may create a risk of fire when used with another battery.
•Use battery operated tool only with specifically designated battery pack. Use of any other batteries may create a risk of fire. DO NOT substitute or
modify another battery to use with your grease gun. When ordering replacement battery packs, be sure to indicate the specific part number for your tool.
•Disconnect battery pack from tool or place the switch in the locked or off position before making any adjustments, changing accessories, or
storing the tool. Such preventive safety measures reduce the risk of starting the tool accidentally.
• When battery pack is not in use, keep it away from other metal objects like: paper clips, coins, keys, nails, screws, or other small metal objects that can
make a connection from one terminal to another. Shorting the battery terminals together may cause sparks, burns, or a fire.
• Charge battery pack only in a Legacy charger made for this specific tool model.
•Do not splash battery pack or charger with water or other liquids. Do not use or attempt to charge any battery pack that has become wet or that
has had water splashed or dripped on to it.
•Do not store or use the tool and /or battery pack in locations where the temperature may reach 105° F (such as outside sheds or metal
buildings in summer).
•DANGER! Electrocution hazard! Never attempt to open the battery pack for any reason. If battery pack case is cracked or damaged, do not
insert into charger. Electric shock or electrocution may result. Damaged battery packs should be taken to a battery service center for
recycling.
•WARNING: Fire hazard. Do not store or carry battery packs so that metal objects can contact exposed battery terminals. Do not place battery
pack in aprons, pockets, tool boxes, product kit boxes, drawers, etc., along with other metal objects. Battery pack terminals could be short-circuited
causing severe burns or fire, as well as causing damage to the battery pack.
WARNING: Do not transport batteries unless exposed battery contacts are protected and insulated from materials that could contact them
and cause a short circuit.
• CAUTION: Battery pack must be securely attached to tool. If battery pack is detached, personal injury may result.
• IMPORTANT: Dispose of expended or damaged battery packs properly by returning to a local battery service dealer or contact your local
recycling agencies for proper disposal information. Under various state and local laws it may be illegal to dispose of this battery into the
municipal waste stream.
The battery pack Is not fully charged out of the carton. Read and understand all
of the safety instructions, then follow the battery charging instructions that follow.
Important Safety Instructions for Battery Pack:
NOTE: The battery pack is not fully charged out of the carton. Read and understand all of the safety instructions, and then follow the battery
charging instructions that follow.
Before using the battery pack and charger, read and understand all of the safety instructions below, and observe all of the cautionary mark-
ings on charger, battery pack, and the product using the battery pack.
• DANGER! Electrocution hazard. 120 volts are present at charger cord terminals. Do not probe with conductive objects. Electric shock or
electrocution may result.
• WARNING: Shock hazard. Do not allow any liquid to get inside charger. Electric shock may result.
• CAUTION: Burn hazard. To reduce the risk of injury, charge only Legacy 12 V battery packs that fit the charger included with this tool.
Do not attempt to charge any other battery types with this charger. Other types of batteries may burst causing personal injury and damage.
• CAUTION: Keep foreign objects out of the battery pack cavity on the charger. Metallic objects in the battery pack cavity can short the
exposed charging contacts when the charger is plugged into the power supply. Always unplug the charger when there is no battery pack in the
cavity. Unplug charger before attempting to clean.
• CAUTION: Charger is intended for use indoors only. Do not expose charger to rain, snow, or frost. Do not place charger on any wet
surfaces. Do not place charger in any location where water may drip or splash on the charger or on the surface where the charger rests.
• Pull by plug rather than by cord to remove from power supply connection to reduce risk of damage to electric plug and cord. Do not use
charger or plug charger cord into power supply if cord or plug is damaged. Have damaged cord, plug, or strain reliever replaced immediately . Do
not attempt to repair power cord or plug.
• Make sure cord is located so that it will not be stepped on, tripped over, or otherwise subjected to stress or damage.
• Do not use extension cord unless it is absolutely necessary. Use of improper extension cord could result in risk of fire, electric shock, or
electrocution. If an extension cord must be used, make sure the extension cord is properly wired and in good electrical condition. The extension
cord must have adequate wire size (AWG or American Wire Gauge) for safety. The smaller the gauge number of the wire, the greater the capacity
of the cable. For example, a 16 gauge has more capacity than 18 gauge cord.
Minimum Recommended Wire Size for Extension cords
For Total Length of Cord: 25ft (7.6m) to 50ft (15.2 m) --use 18 gauge minimum cord size.
75 ft (22.9 m) to 1 00 ft (30.5 m) -- use 16 gauge minimum cord size.
125ft (38.1 m) to 150ft (45.7 m)- use 14 gauge minimum cord size.
175ft (53.3 m)- use 12 gauge minimum cord size.
•The charger is designed to operate on standard 120 V AC electrical power. Do not attempt to use it on any other voltage.
• Do not place any object on top of charger or place the charger on a soft surface that might interfere with proper air
circulation around and under the charger to avoid excessive internal heat. Place the charger in a position away from any
heat source.
•Do not operate the charger if it has received a sharp blow, been dropped, or otherwise damaged in any way. Replace
the charger or take it to an authorized service center.
Important Safety Instructions for Charger:
Symbols
DC ........ .. ........ direct current
.. ............ .. ... direct current symbol
V .. ........ .. .. .... .. volts
Hz .......... .. .. .. .. hertz
psi. .. .... .. ...... .. .. pounds per square inch (units of pressure)
AC ... .... .... .. .... . alternating current
UL .. ......... ...... . Underwriter’s Laboratories listing on charger
+ .. ........... .. .. .... Positive terminal on battery pack and charger
-.... .......... .. .. ..... Negative terminal on battery pack and charger
UL745-3 ................... UL Standard for Safety for Battery-Operated Tools
This product is listed in lntertek's
Directory of listed US Products
Specifications
nuGesaerGderewoP-yrettaBCDV210831L:ledoM
Maximum Operating Pressure:
Continuous pressure: 4000 psi
Intermittent pressure: 6000 psi
Grease Reservoir Capacity:
14.5 oz cartridge
16 oz bulk
Lubricant (grease): Up to NLGI #2
Battery Capacity: 1300 milliamp hours
Battery Quick Charge: 1 hour
Charger Input Power Source: 120 V AC
Functional Description
The Legacy Workforce 12V DC battery-powered, cordless grease gun allows convenient high-pressure greasing at grease pressures up to 6000 psi,
without an air hose, utilizing a motor and set of gears to develop pressure for dispensing grease as a single-action, positive displacement pump. The
gun is operated (after grease loading) by squeezing the trigger to dispense grease either freely from the grease nozzle (standard zerk coupler) or by
engaging the grease couple onto standard grease zerk fittings on equipment and machinery for high-pressure greasing. The gun is equipped with a
pressure-relief valve to limit grease pressure to 6000 psi to reduce risk of motor overload and tool damage. Additionally, a manually-operated air
pocket valve helps bleed trapped air in the grease barrel to make priming faster and easier. Do not exceed specifications or alter gun to perform
beyond ratings. Suchmisuse will void warranty.
311253 4
READ AND FOLLOW ALL INSTRUCTIONS BEFORE USE.
SAVE THESE INSTRUCTIONS FOR FUTURE USE.
AIR POCKET VALVE (see Figure 1):
• Air pockets in the grease barrel will cause the gun to lose prime.
• Unscrew the air pocket valve located on the top of gun head assembly in a counter-clockwise motion until grease begins to be
expelled from the air pocket valve side hole.
• Keep air pocket valve in this position until all the air bubbles are out.
• Retighten valve when finished bleeding trapped air.
• If necessary, repeat air-bleeding steps to purge trapped air pockets from grease barrel.
UTILITY HANG HOOK: (see Figure 2):
This hook enables the gun to hang when not being used for convenient storage.
SHOULDER STRAP (see Figure 3):
Attach strap by latching each end into the two holes located on either side of the hang hook.
COUPLER HOLSTER (see Figure 4):
Insert the grease coupler end of the grease hose into the loop hole located on the top of the gun head assembly when gun is
not in use.
PRESSURE RELIEF VALVE (see Figure 5):
CAUTION: Never allow any part of the human body to come in front of, or in direct contact with a grease discharge outlet. Direct the air
pocket valve away from yourself and other persons in the vicinity. Never point the nozzle of the gun at yourself or toward anyone
else. Pressure relief is factory preset at 6500 psi +/- 500 psi. If back pressure in the grease line exceeds the preset limit, grease will then be
expelled from this valve to reduce risk of motor overload and limit excessive grease pressure in grease hose. Do not exceed specifications or
alter gun to perform beyond ratings. Such misuse will void warranty and can cause possible injury.
•WARNING: Do not adjust relief pressure above 6,000 psi.
Figure 1
Figure 3
Figure 5
Figure 2
Figure 4
Assembly
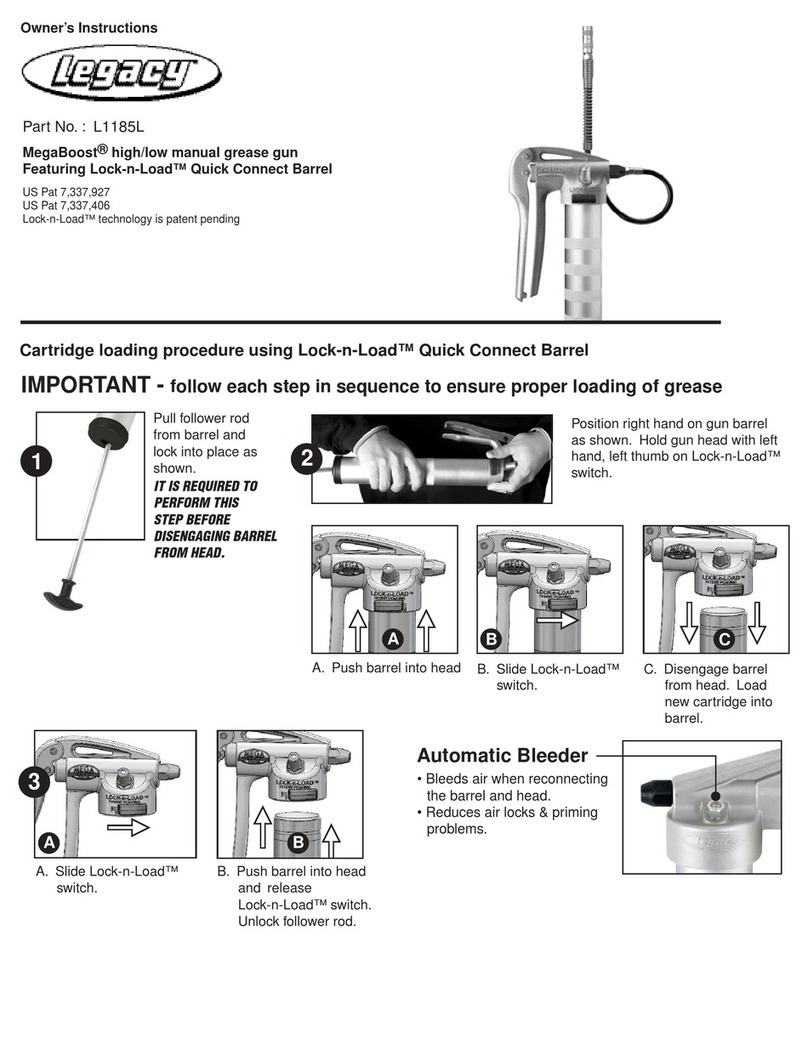
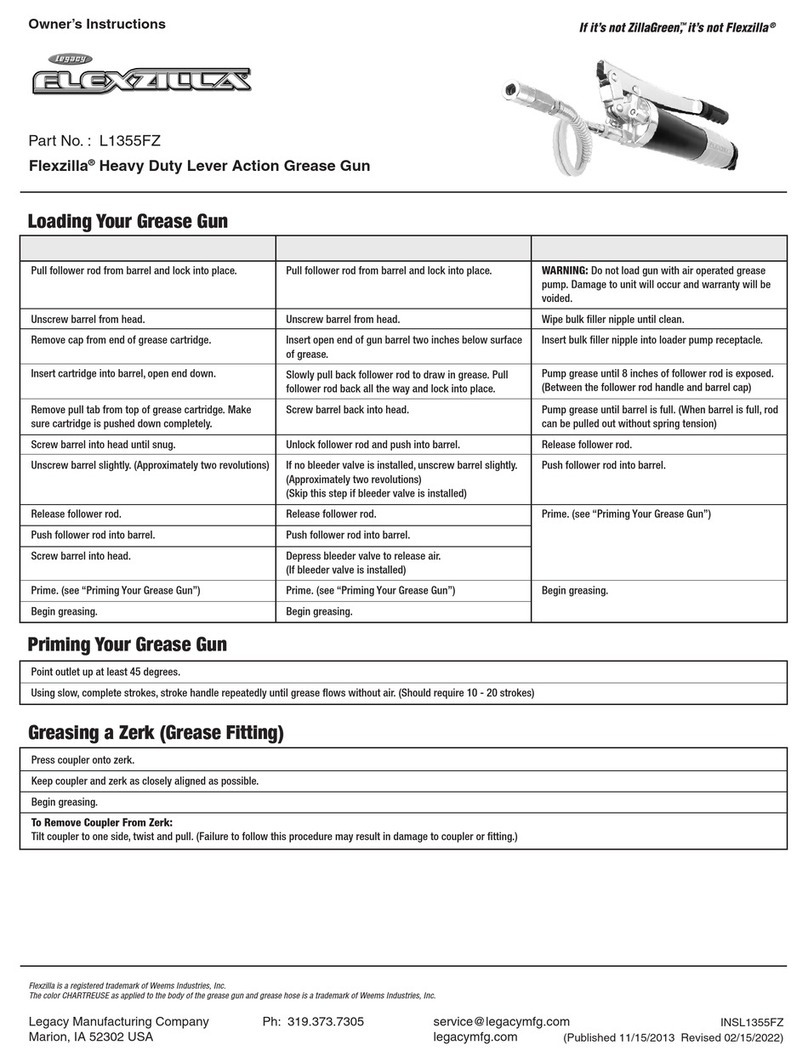
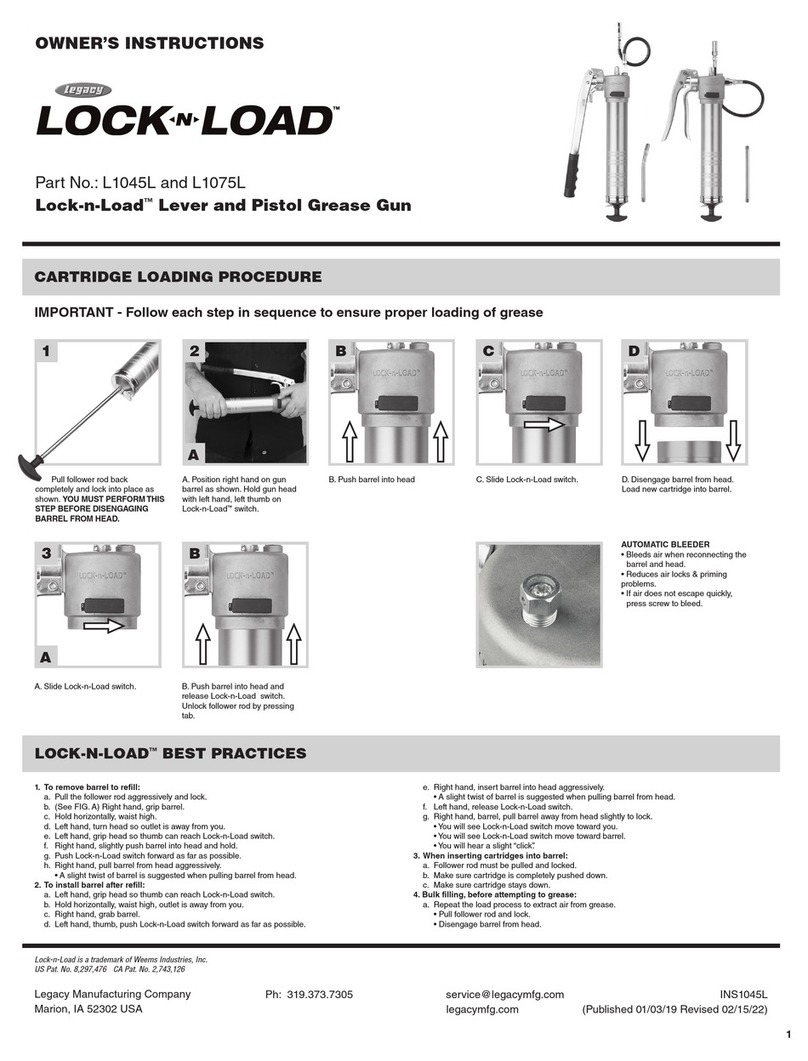
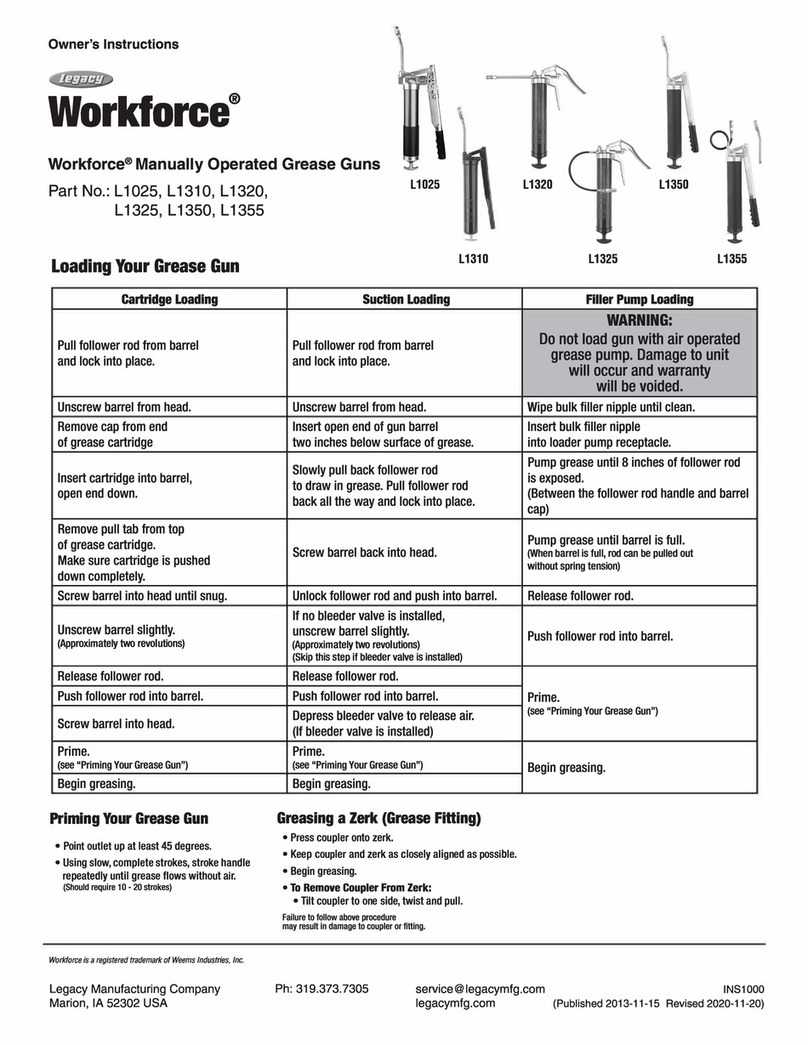
CARTRIDGE LOADING:
Removing empty grease cartridge:
a. Pull back on follower handle until the follower rod is fully extended and latch the follower rod notch into the slot on the grease barrel end
cap.
b. Unscrew the grease barrel assembly from the pump head assembly in a counter-clockwise manner.
c. Carefully release the follower handle to eject the empty grease cartridge from the grease barrel.
Installing grease cartridge:
a. Pull back on the follower handle until the follower rod is fully extended and latch the follower rod notch into the slot in the grease barrel end
cap.
b. Remove the plastic cap from the grease cartridge that has been stored above 50˚ F, and insert cartridge into the grease barrel, being
certain that cartridge goes in all the way, twisting the cartridge as necessary to completely insert rubber follower into end of grease cartridge.
c. Remove the sealed end of the grease cartridge by pulling on the pull tab. Screw grease barrel into pump head assembly.
d. Release follower rod from slot, and push follower rod into barrel assembly.
e. Follow priming instructions below.
BULK LOADING:
• Remove grease barrel from pump head assembly.
• Insert the open end of the grease barrel into lubricant in bulk container. Slowly pull the follower handle back while pushing the
grease barrel deeper into the lubricant to prevent air pockets from being pulled into the grease barrel assembly.
• When the follower rod is fully extended, pull it sideways to latch the rod notch into the slot in the grease barrel end cap.
• Assemble the grease barrel into the pump head. Release the follower rod from slot. Push the follower rod into the grease barrel.
• Follow priming instructions below.
FILLER PUMP LOADING:
Replace the plug in the head of the grease gun with a 1/8” MNPT filler nipple for loading with a manually-operated grease transfer pump. Follow
filler pump instructions also.
• Insert the gun filler nipple into the filler pump socket.
• Operate the filler pump to fill the grease barrel. When the follower rod can be pulled out without effort and the rod notch is exposed, the
grease barrel is filled. The follower rod will be extended approximately 8” (20.3 cm)
• Push the follower rod into the grease barrel assembly.
• Follow priming instructions below.
PRIMING:
Unscrew the air pocket valve located on the top of the gun in a counter-clockwise motion until grease begins to appear from the side hole. Keep
in this position until all air bubbles are out. Retighten valve when finished. Operate the gun trigger until grease flows from the hose. If necessary,
repeat air-bleeding steps to purge trapped air pockets from grease barrel.
DANGER! Never operate product in an explosive atmosphere. Electric power tools and battery powered tools can create sparks,
which may ignite flammable liquids, dusts, or fumes.
DANGER! Because of the high working pressures developed by this gun, the possibility of grease injection into the flesh, or an
eye, is a potential hazard. Never allow any part of the human body to come in front of, or in direct contact with a grease dis-
charge outlet or potential hose rupture. Never point the nozzle of the gun at yourself or toward anyone else. If accidental grease
injection should occur, seek immediate emergency medical attention. DO NOT try to treat the injury yourself! If injection occurs,
provide grease product information to medical personnel. Be certain that any and all system components will withstand the
pressures being developed. Never exceed the pressure rating of any component in the system. Inspect all hoses and fittings
before each use. Weak, worn, or damaged hoses are a hazard. Do not use any defective, unmarked, or damaged hoses. Do not
WARNING: Grease gun can develop high pressure – up to 6000 psi (413 bar). Use safety glasses and gloves for protection
during operation. Keep hands clear of the exposed rubber or plastic portion of hose. Extreme pressure may cause nozzle
extension or grease hose to burst.
CAUTION: Inspect and tighten all fluid connections regularly and replace weak or damaged hoses or other components with
suitable replacements that will withstand the pressures developed.
CAUTION: Release trigger if blocked line causes grease gun to stall. Continued operation could damage the motor.
Make sure power cord circuit voltage is the same as that shown on the charger. Connect charger to the power source.
Place battery pack in charger cavity. Do not force. The slot in the charger must align with the raised boss on the battery pack. When proper
contacts are made, the green light will appear.
Press the SET button; the green light will go out and the red light will glow, indicating the charger has switched to quick-charge mode.
Charge the battery for one full hour including quick-charge time prior to initial use.
When the battery pack is fully charged, the red light will go out and the green light will glow. The battery pack will continue to receive a
trickle charge. Remove the battery pack from the charger.
Disconnect charger power cord from the power source when not charging battery pack.
Important: Battery pack temperature will increase during and shortly after use. The battery pack may not accept a full charge if charged
immediately after use. For best results, allow the battery pack to cool to room temperature before charging.
Operation
•
•
repair the grease whip hose. Replace if damaged.
•
•
•
•
•
•
•
•
•
CHARGER OPERATION:
The battery pack is not fully charged out of the carton. Read and understand all of the safety instructions, and then follow the battery
charging instructions that follow.
Insert fully-charged battery pack into the end of the grease gun handle by aligning the slot in the handle with the matching boss on the
battery pack. Do not force objects. Make certain battery pack is fully engaged into handle cavity and snaps into place on both sides at battery
pack latch buttons. Depress tool switch momentarily to check battery pack connection to tool. To release battery from tool handle, depress both
battery pack latch buttons simultaneously until battery will release and can be withdrawn straight out from cavity in tool handle. Do not allow
metal objects to contact battery pack terminals while battery is not in charger or tool.
Priming: Unscrew the air pocket valve located on the top of the gun in a counter-clockwise motion until grease begins to appear from the hole.
Keep in this position until all air bubbles are out. Retighten valve when finished. Operate the gun trigger until grease flows from the hose. If
necessary, repeat air-bleeding steps to purge trapped air pockets from grease barrel.
Connect grease coupler to standard grease zerk fitting on equipment or machinery to be greased. Release trigger to stop grease flow. To
disconnect grease coupler from zerk, angle the coupler and use a twisting motion. If the coupler will not disengage, the tip sleeve of the coupler
can be loosened with tools to allow adjustment in the tension of the coupler gripping the grease zerk fitting. Retighten the coupler sleeve to
prevent coupler leaking.
Operate the switch to dispense grease. The switch must be continuously depressed to dispense grease. If back pressure in the grease line
exceeds the 6000 psi limit, grease will then be expelled from the pressure relief valve to limit the pressure in order to reduce risk of motor
overload and limit excessive grease pressure in grease hose. Do not exceed specifications or alter gun to perform beyond ratings. Such misuse
will void warranty and can result in possible injury.
GREASE GUN OPERATION:
•
•
•
•
PRIMING:
Unscrew the air pocket valve located on the top of the gun in a counter-clockwise motion until grease begins to appear from
the hole. Keep in this position until all air bubbles are out. Retighten valve when finished. Operate the gun trigger until
grease flows from the hose. If necessary, repeat air-bleeding steps to purge trapped air pockets from grease barrel.
Maintenance
battery pack. If the tool still does not work properly, contact an authorized service facility for assistance.
Clean excessive grease buildup from tool exterior.To reduce the risk of injury and damage, wipe grease
from tool exterior surfaces. It may become difficult to operate the tool and handle in a safe manner if tool surfaces
become grease covered. Disconnect charger from power source and allow to cool before cleaning. Wipe surfaces
Inspect grease hose for damage, excessive bending, cracks, and cuts. Do not use damaged or worn hoses.
Replace worn or damaged hoses immediately. Use only replacement hoses that are marked and designed for the
pressures this tool can develop. Do not use any defective, unmarked, or damaged hoses. Do not repair the grease
Replace worn or damaged grease fittings. Replacement fittings must be capable of withstanding the pressures
developed.
•
•
WARNING: To reduce the risk of personal injury, always unplug the charger and remove the battery pack from the charger or
tool before performing any maintenance. Never disassemble the tool, battery pack, or charger. Refer to an authorized service
facility for all repairs.
WARNING: To reduce the risk of personal injury and damage, never immerse your tool, battery pack, or charger in liquid or
allow a liquid to flow inside them or be splashed on them.
Maintaining Tool:
If the tool does not start or operate at full power with a fully charged battery pack, clean the contacts on the
with dry toweling to remove grease. Do not use water or any cleaning solvents on tool, charger or battery pack.
whip hose. Replace if damaged.
Replacement Parts and Accessories
12 V DC Ni-Cad Battery Pack L1380-B
1-Hour Quick Charger L1380-C
Grease Barrel Plunger RP004080
Flexible Grease Extension w/ Spring Guard & Coupler RP004087
Grease Barrel Assembly - Complete RP004088
Optional grease cartridge storage box
Rigid polypropylene container for storing and transporting twelve standard 14 oz grease cartridges, shoulder strap attached
GCB12
READ AND FOLLOW ALL INSTRUCTION BEFORE USE.
SAVE THESE INSTRUCTION FOR FUTURE USE
WARRANTY*
LEGACY MANUFACTURING COMPANY (“LEGACY”) warrants that this equipment will be free from defects in material and workmanship for a period
of one (1) year from the date of purchase, under normal use.* LEGACY’S sole obligation under this warranty is limited to replacing or repairing, free of
charge, any equipment that proves to be defective under normal conditions and use according to the recommendations of LEGACY. To obtain repair
or replacement, the equipment must be shipped to a LEGACY authorized Warranty and Service Center during the warranty period, transportation
charges prepaid, with proof of date of purchase. In the event of repair or replacement, the warranty period shall not be extended beyond the original
warranty period.
* If this equipment contains a hose, the hose is warranted for ninety (90) days only. The remaining portions of this equipment are warranted for one (1)
year, as described above. While necessary maintenance or repairs on your Legacy equipment can be performed by any company, we recommend that
you use only authorized Legacy service centers. Improper or incorrectly performed maintenance or repair voids this warranty. Contact us at service@
legacymfg.com or www.legacymfg.com for ordering or installation instructions.
•

Other Legacy Tools manuals

Legacy Workforce L8602 User manual

Legacy

Legacy Workforce L8602 User manual

Legacy L1310 User manual

Legacy

Legacy L1310 User manual

Legacy L1355FZ User manual

Legacy

Legacy L1355FZ User manual

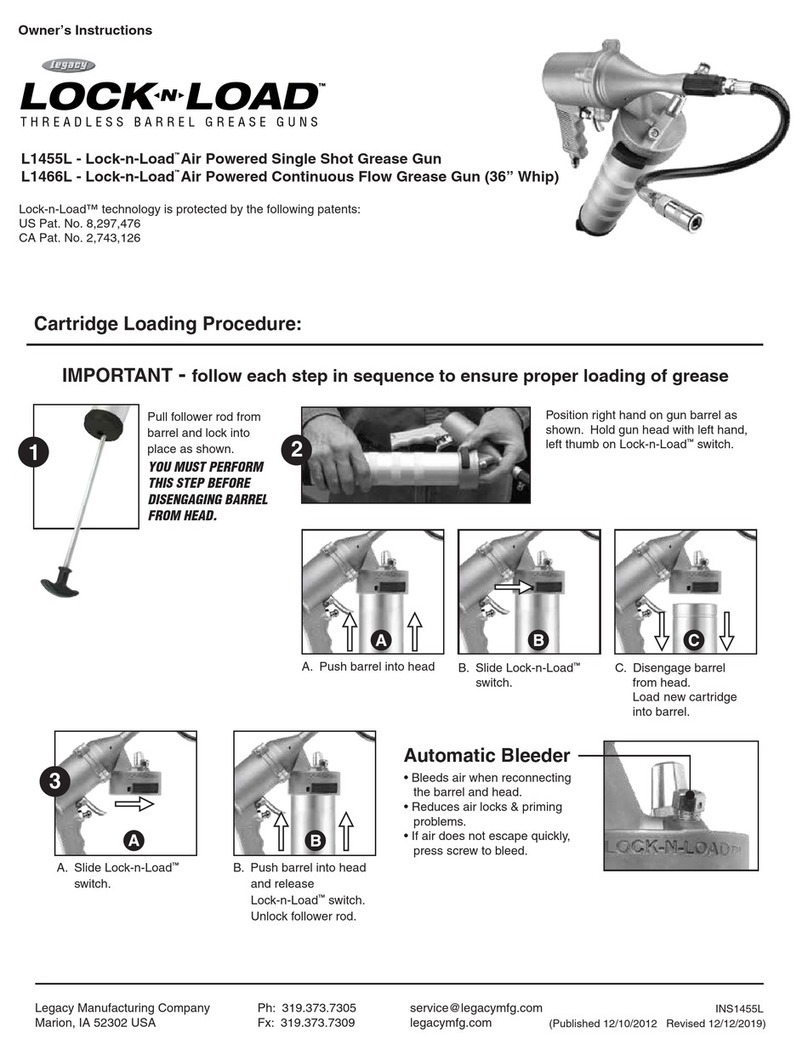
Legacy Lock-n-Load L1455L User manual

Legacy

Legacy Lock-n-Load L1455L User manual

Legacy Flexzilla L8232FZ User manual

Legacy

Legacy Flexzilla L8232FZ User manual

Legacy WorkForce L8250 User manual

Legacy

Legacy WorkForce L8250 User manual

Legacy L8611 User manual

Legacy

Legacy L8611 User manual

Legacy MEGABOOST User manual

Legacy

Legacy MEGABOOST User manual

Legacy Flexzilla L1388LFZ User manual

Legacy

Legacy Flexzilla L1388LFZ User manual

Legacy L1320 User manual

Legacy

Legacy L1320 User manual

Legacy FLEXZILLA PRO User manual

Legacy

Legacy FLEXZILLA PRO User manual

Legacy L8710 User manual

Legacy

Legacy L8710 User manual

Legacy MegaBoost L1185L User manual

Legacy

Legacy MegaBoost L1185L User manual

Legacy Lock-n-Load L1045L User manual

Legacy

Legacy Lock-n-Load L1045L User manual

Legacy L1175 User manual

Legacy

Legacy L1175 User manual

Legacy Lock-n-Load L1175L User manual

Legacy

Legacy Lock-n-Load L1175L User manual

Legacy Lock-n-Load L1380L User manual

Legacy

Legacy Lock-n-Load L1380L User manual

Legacy Flexzilla L8011FZ User manual

Legacy

Legacy Flexzilla L8011FZ User manual

Legacy L8601 User manual

Legacy

Legacy L8601 User manual

Legacy Levelwind L8305 User manual

Legacy

Legacy Levelwind L8305 User manual

Legacy FLEXZILLA L8603FZ User manual

Legacy

Legacy FLEXZILLA L8603FZ User manual

Legacy L8611 User manual

Legacy

Legacy L8611 User manual

Legacy L1310 User manual

Legacy

Legacy L1310 User manual

Popular Tools manuals by other brands

JessEm Tool 07100 user manual

JessEm Tool

JessEm Tool 07100 user manual

GF JRG Sanipex MT Operating and maintenance instructions

GF

GF JRG Sanipex MT Operating and maintenance instructions

Redback RB202 Instruction & maintenance manual

Redback

Redback RB202 Instruction & maintenance manual

Klein Tools 53732 instructions

Klein Tools

Klein Tools 53732 instructions

BGS technic 6679 instruction manual

BGS technic

BGS technic 6679 instruction manual

Atlas Copco PB 14 D quick start guide

Atlas Copco

Atlas Copco PB 14 D quick start guide

Dollken Kerbstanze 2001 instruction manual

Dollken

Dollken Kerbstanze 2001 instruction manual

DOYLE 58778 Owner's manual & safety instructions

DOYLE

DOYLE 58778 Owner's manual & safety instructions

CRU Media WhiteBlocker quick start guide

CRU

CRU Media WhiteBlocker quick start guide

Nile MR-30A instruction manual

Nile

Nile MR-30A instruction manual

Makita BV17-177 instruction manual

Makita

Makita BV17-177 instruction manual

USAG 1547 instruction manual

USAG

USAG 1547 instruction manual

Ripley Utility Tool WS6-M operating instructions

Ripley

Ripley Utility Tool WS6-M operating instructions

SUHNER UBK 6-R operating instructions

SUHNER

SUHNER UBK 6-R operating instructions

Haussmann PNT210-B Operator's manual

Haussmann

Haussmann PNT210-B Operator's manual

Cornwell Tools blue POWER CAT851XLR operating instructions

Cornwell Tools

Cornwell Tools blue POWER CAT851XLR operating instructions

Meec tools 018722 operating instructions

Meec tools

Meec tools 018722 operating instructions

Crossfer PowerCLAMP user manual

Crossfer

Crossfer PowerCLAMP user manual

manuals.online logo
manuals.online logoBrands
  • About & Mission
  • Contact us
  • Privacy Policy
  • Terms and Conditions

Copyright 2025 Manuals.Online. All Rights Reserved.