manuals.online logo
Brands
  1. Home
  2. •
  3. Brands
  4. •
  5. LEGRAND
  6. •
  7. Accessories
  8. •
  9. LEGRAND HPM D643/WES User manual

LEGRAND HPM D643/WES User manual

2
1
Features
Specificaton
Specificaton
Warranty
Legrand Australia warrants this product for a period of 3
years from the date of purchase.
These goods come with guarantees that cannot be excluded
under the Australian and New Zealand Consumer Laws. You
are entitled to a replacement or a refund for a major failure
and for compensation for any other reasonably foreseeable
loss or damage. You are also entitled to have the goods
repaired if the goods fail to be of acceptable quality and the
failure does not amount to a major failure.
See the Warranty card enclosed with this product for further
details.
Customer Service
For all Customer Service and Technical Support
please call Monday to Friday during business hours.
02/2022
Legrand Australia
1300 369 777
www.hpm.com.au
Legrand New Zealand
0800 476 009
www.hpm.co.nz
ABN: 31 000 102 661
Please read all instructions carefully before installation and use.
LE11034AC
■Radio operating range: 200 m free field
■Receiver sound power: 80 dB @ 1m
■Frequency band: 433.05 - 434.79 MHz
■RF power level: < 10 mW
■Degree of protection: IP54 (Transmitter), IP20 (Receiver)
■Receiver installation: Wall mounted/Free standing
■Transmitter installation: Wall mounted/Adhesive/Free standing
Battery requirement:
■Battery for transmitter: 1 x 3 V (CR2032) lithium battery included
■Battery for receiver: 3 x 1.5 V AA batteries (not included)
Do not use rechargeable batteries.
■Battery operated / Wireless operation
■Range 200m in free field
■30 melodies
■Name tag insert
■Slimline
■Easy to install - no wires or cables
■No signal interference for neighbours
■Can be used as a door bell or panic switch
8Product Notes
H
J
I
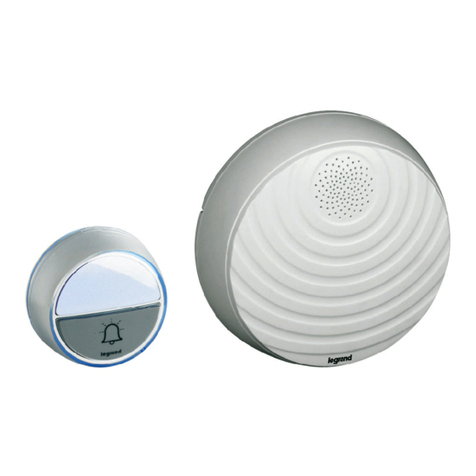
Wireless Door Bell - Serenity
Battery Operated
Cat. No. D643/WES, D643/ALS,D643/BPWES
Instruction Manual
A. Speaker
B. Melody selection (30 melodies available and MP3)
C. Volume control
D. Additional transmitter pairing
E. Light indicator setting
F. Micro USB socket
G. Indicator light (LED)
H. Name Plate
I. Light indicator
J. Weatherproof button
-20° C
+50° C
1. Suitable for indoor installation only. 2. Handle the door bell gently and carefully. Dropping it can damage the
circuit boards and can cause the door bell to work improperly. 3. Keep the door bell away from dust and dirt, which can
cause premature wear of parts. 4. Use only fresh batteries of the recommended size and type. Always remove old or weak
batteries. They can leak chemicals that can destroy electronic circuits. 5. Modifying or tampering with the door bell’s
internal components can cause a malfunction and might invalidate its warranty. 6. This product contains no serviceable
parts and no attempt should be made to repair this product. If the product is faulty it should be discarded. 7. The material
in this product may vary in colour from batch to batch. Colour matching from one batch to another cannot be guaranteed.
8. Legrand reserves the right to modify the specifications of this product at any time. 9. This product utilises intellectual
property in the form of registered designs, trademarks, and/or patents.Such intellectual property remains the property of
Legrand in all cases.
6Door Bell operation
Press the button on the bell press transmitter.The door bell will sound and the indicator light on the
unit will flash.
Flashing Mode
Slow
Fast Someone rings
Alternate Low receiver battery
B
C
D
G
F
A
E
Box contents:
■1 x Bell press
■1 x Door bell receiver
■3 x Wall plugs and 3 x Screws
■2 x Wall plugs and 2 x Screws
(D643/BPWES only)
■2 x Double sided tape
■1 x USB type A cable
■1 x 3 V battery
■Warranty Card
■Instruction Manual
1. Do not use rechargeable batteries, do not mix old and new batteries or different types. Alkaline batterie are
recommended in the receiver for a longer operating life. 2. The operation and range of your wireless door bell depends on
location, temperature and battery condition. 3. Do not expose the unit to rain or immerse either unit in water. 4. Avoid
locations where the bell press transmitter is exposed to direct summer sunlight. 5. Do not leave exhausted batteries
in door bell receiver or bell press transmitter. 6. Clean only with a damp cloth and mild detergent. Do not use solvents.
7Important Notes Before First Time Use
Warning
9
Paper
THIS PRODUCT CONTAINS A COIN BATTERY
If swallowed, a lithium coin battery can
cause severe or fatal injuries within 2 hours.
Keep batteries out of reach of children.
If you think batteries may have been
swallowed or placed inside any part of the
body, seek medical attention immediately.
!
WARNING
1. Ensure the device’s battery compartment is secured
with a screw provided. 2. Do not use if the battery
compartment is not secure. 3. Dispose of used button/
coin batteries immediately by placing sticky tape around
both sides of the battery and dispose of it immediately in
an outside bin, out of reach of children, or recycle safely.
2. Click on the icon to launch the software
3.
3
4
Before Installation
Installation
A. DOOR BELL RECEIVER
B. DOOR BELL TRANSMITTER
ADDITIONAL TRANSMITTER PAIRING
ADDIING MP3 MELODIES
1. Wall mount with screws
2. Free standing
Receiver
3. Free standing
2.With adhesive
USB type A cable
5Operating Instructions
BATTERY REPLACEMENT Transmitter
x 3 x 1
x 3
Ding
Ding
> 5 s
Ding
Ding
Ding
1 x
or > 15 s
■Test the location of both units to ensure satisfactory operation before permanently fixing either unit in place.
■Do not mount the bell press transmitter on metal or near a metal door frame, security door or in close
proximity to any metal outdoor furniture. The range of the unit may be substantially reduced.
6. Set the duration of your melody by selecting
the beginning and the end and click
7. The software asks you to confirm where to
save the new MP3 file: Receiver memory.
8. To set the MP3 melody, select it with the B button.
TRANSMITTER UNPAIRING
1. Remove batteries of receiver.
2. Hold Receiver pairing button and load in batteries at the same time, and keep holding pairing
button till you hear ding dong. All transmitter pairing are cleared.
4. Click + to import an MP3 melody in the selection
window.
5. Select the melody and press play (mandatory 1
time).
1.Install the software on a computer using USB
cable supplied,from the internal memory of
the door bell.
■If using first time, pull out
the plastic film to activate
the battery.
Battery cover must be fixed using
screws as shown.

This manual suits for next models

2

Other LEGRAND Accessories manuals

LEGRAND 572 250 User manual

LEGRAND

LEGRAND 572 250 User manual

LEGRAND HPM XLP917WEWE User manual

LEGRAND

LEGRAND HPM XLP917WEWE User manual

LEGRAND WIREMOLD deQuorum KP Series User manual

LEGRAND

LEGRAND WIREMOLD deQuorum KP Series User manual

LEGRAND 0 942 24 User manual

LEGRAND

LEGRAND 0 942 24 User manual

LEGRAND Wattstopper PW-302 User manual

LEGRAND

LEGRAND Wattstopper PW-302 User manual

LEGRAND Valena Life LE-753186 User manual

LEGRAND

LEGRAND Valena Life LE-753186 User manual

LEGRAND Excel Life EM803PIR User manual

LEGRAND

LEGRAND Excel Life EM803PIR User manual

LEGRAND Wattstopper FSP-301 User manual

LEGRAND

LEGRAND Wattstopper FSP-301 User manual

LEGRAND Wattstopper DW-100-24 User manual

LEGRAND

LEGRAND Wattstopper DW-100-24 User manual

LEGRAND 6 946 80 User manual

LEGRAND

LEGRAND 6 946 80 User manual

LEGRAND TV/SAT User manual

LEGRAND

LEGRAND TV/SAT User manual

LEGRAND Wattstopper UW-200 User manual

LEGRAND

LEGRAND Wattstopper UW-200 User manual

LEGRAND Wattstopper LMDW-102 User manual

LEGRAND

LEGRAND Wattstopper LMDW-102 User manual

LEGRAND adorne ARUSB User manual

LEGRAND

LEGRAND adorne ARUSB User manual

LEGRAND Celiane 675 41 User manual

LEGRAND

LEGRAND Celiane 675 41 User manual

LEGRAND HPM D643/WEC User manual

LEGRAND

LEGRAND HPM D643/WEC User manual

LEGRAND Pass & Seymour RW3U600 User manual

LEGRAND

LEGRAND Pass & Seymour RW3U600 User manual

LEGRAND 787 52 User manual

LEGRAND

LEGRAND 787 52 User manual

LEGRAND Wattstopper PW-311-I User manual

LEGRAND

LEGRAND Wattstopper PW-311-I User manual

LEGRAND 5 742 00 User manual

LEGRAND

LEGRAND 5 742 00 User manual

LEGRAND C2G 50190 User manual

LEGRAND

LEGRAND C2G 50190 User manual

LEGRAND 0 488 05 User manual

LEGRAND

LEGRAND 0 488 05 User manual

LEGRAND WattStopper DW-100 User manual

LEGRAND

LEGRAND WattStopper DW-100 User manual

LEGRAND Wattstopper LMDL-600 User manual

LEGRAND

LEGRAND Wattstopper LMDL-600 User manual

Popular Accessories manuals by other brands

Quincy lab 140AE-1 operating manual

Quincy lab

Quincy lab 140AE-1 operating manual

HomePro ZIR000 user manual

HomePro

HomePro ZIR000 user manual

DOL 20SCR Technical user guide

DOL

DOL 20SCR Technical user guide

RAB Smart Task installation manual

RAB

RAB Smart Task installation manual

Kemppi KMS 300 quick guide

Kemppi

Kemppi KMS 300 quick guide

Stearns 57,500 Series Installation and service instructions

Stearns

Stearns 57,500 Series Installation and service instructions

iGuzzini TWILIGHT COPENAGHEN manual

iGuzzini

iGuzzini TWILIGHT COPENAGHEN manual

Adelaide Annexe & Canvas Avan Deluxe installation guide

Adelaide Annexe & Canvas

Adelaide Annexe & Canvas Avan Deluxe installation guide

OHAUS 5000 instruction manual

OHAUS

OHAUS 5000 instruction manual

HOME8 WLS1300 quick start guide

HOME8

HOME8 WLS1300 quick start guide

MAXBOTIX MaxSonar quick start guide

MAXBOTIX

MAXBOTIX MaxSonar quick start guide

ioSmart iSmart56 Installation and user guide

ioSmart

ioSmart iSmart56 Installation and user guide

Focusrite Scarlett 18i8 user guide

Focusrite

Focusrite Scarlett 18i8 user guide

Velleman ED38105 user manual

Velleman

Velleman ED38105 user manual

JumpSport SkyBounce user manual

JumpSport

JumpSport SkyBounce user manual

Prima-Temp PRIYA Instructions for use

Prima-Temp

Prima-Temp PRIYA Instructions for use

Tefcold BC85I-BC85I W user manual

Tefcold

Tefcold BC85I-BC85I W user manual

Vaisala WMS302 user guide

Vaisala

Vaisala WMS302 user guide

manuals.online logo
manuals.online logoBrands
  • About & Mission
  • Contact us
  • Privacy Policy
  • Terms and Conditions

Copyright 2025 Manuals.Online. All Rights Reserved.