Leica FSC User manual

1
Leica FS C
Operating Manual
Bedienungsanleitung
Manuel d’utilisation

2
Phone +49 (0) 64 41-29 22 61
Fax +49 (0) 64 41-29 22 55
E-Mail [email protected]
Published 2003 by:
Herausgegeben 2003 von:
Publié en 2003 par:
Leica Microsystems Wetzlar GmbH
Ernst-Leitz-Strasse
D-35578 Wetzlar (Germany)
Responsible for contents:
Verantwortlich für den Inhalt:
Responsable du contenu:
Katja Peter, Karin Schwab
Marketing CM, Compound Microscopy, Product Management,
Marketing CM, Compound Microscopy, Productmanagement,
Marketing CM, Compound Microscopy, Product Management ,
In case of questions, please contact:
Bei Fragen wenden Sie sich bitte an:
Pour toute question, contacter:

3
Leica FS C
Operating Manual

4
Copyrights
Copyrights
All rights to this documentation are held by
Leica Microsystems Wetzlar GmbH. Reproduc-
tion of text or illustrations (in whole or in part) by
print, photocopy, microfilm or other method (in-
cluding electronic systems) is not allowed with-
out express written permission from Leica
Microsystems Wetzlar GmbH.
The term “Windows” can be used in the follow-
ing text without further identification. It is a reg-
istered trademark of the Microsoft Corporation.
Otherwise, no inference with regard to the free
usability of product names may be drawn from
the use of those names.
The instructions contained in the following doc-
umentation reflect state-of-the-art technology
and knowledge standards. We have compiled
the texts and illustrations as accurately as pos-
sible. Nevertheless, no liability of any kind may
be assumed for the accuracy of this manual’s
contents. Still, we are always grateful for com-
ments and suggestions regarding potential mis-
takes within this documentation.
The information in this manual is subject to modi-
fication at any time and without prior notification.

5
Contents
Contents
1. Important Notes about this Manual ...... 6
2. Safety Notes ............................................... 7
2.1. General Safety Notes ............................... 7
2.2. Electrical Safety ........................................ 7
2.3 Weights ....................................................... 7
3. Field of Application .................................. 9
4. Installation Site ......................................... 10
5. Unpacking the Macroscope ................... 11
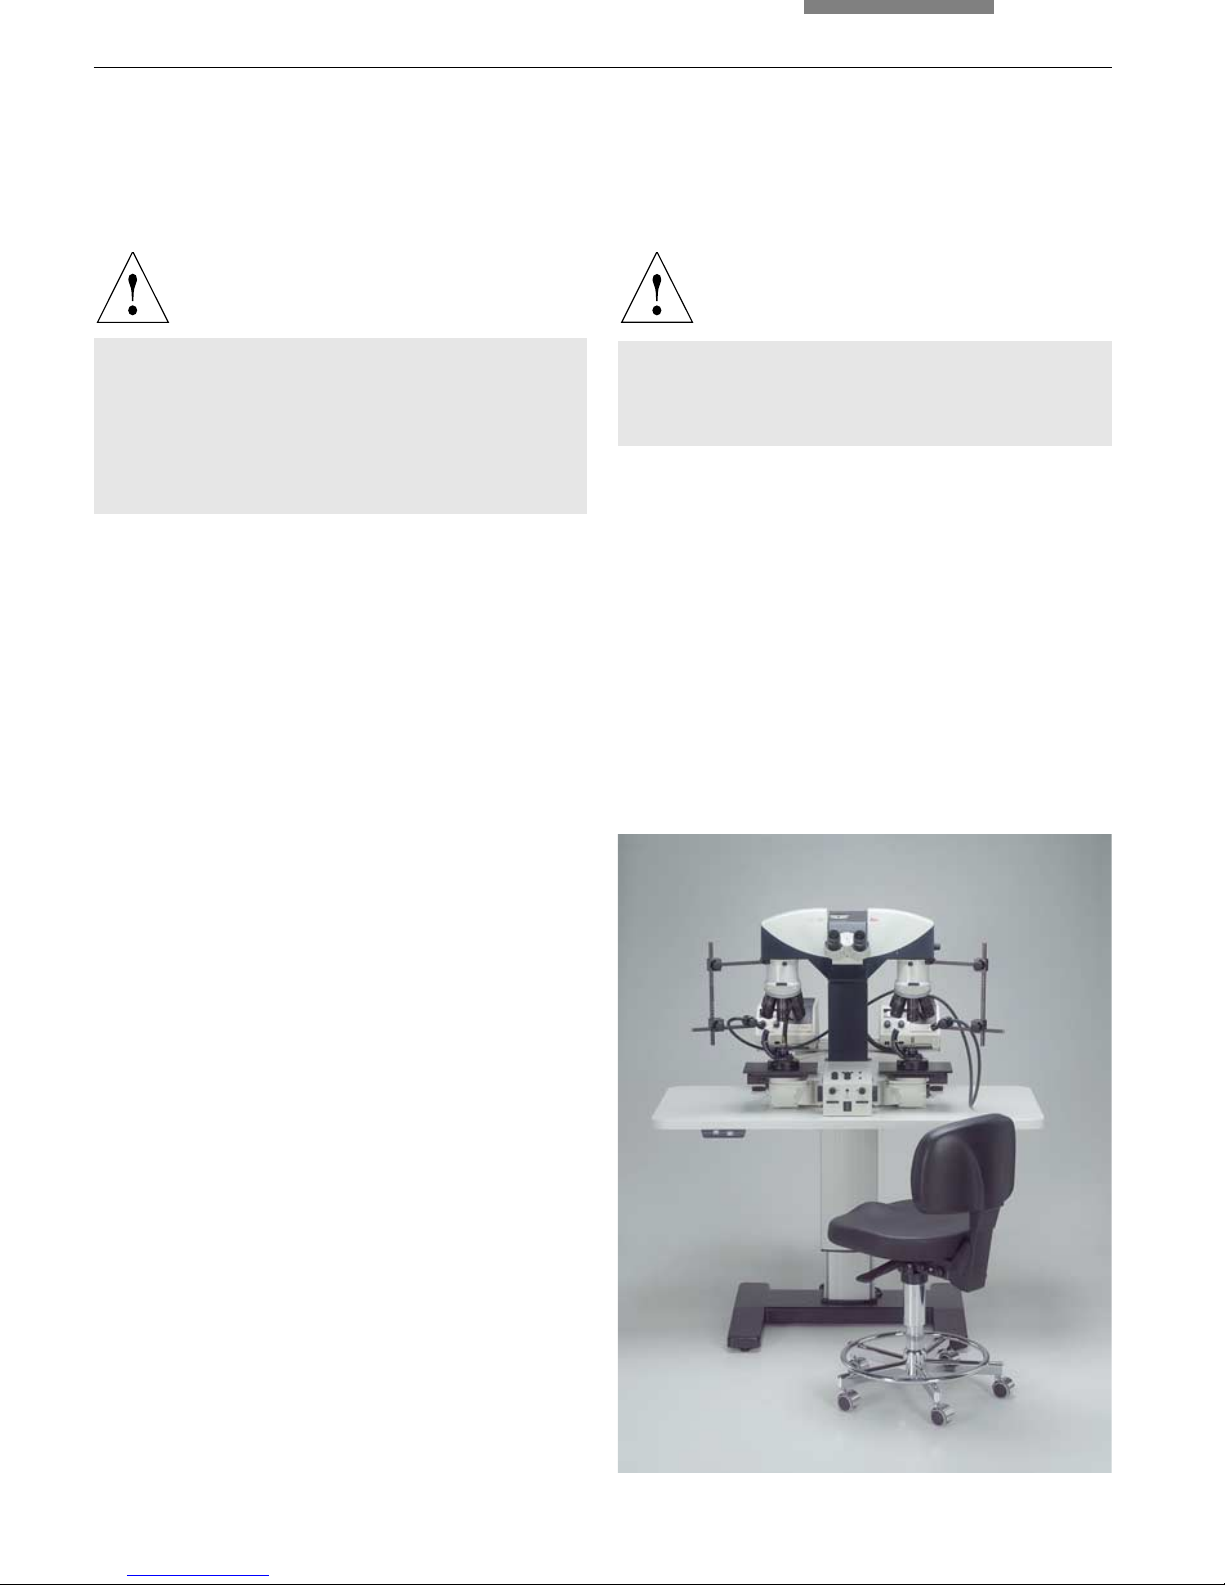
6. Overview of the Instrument .................... 13
7. Assembly .................................................... 14
7.1 Comparison Bridge ................................... 14
7.2 Illumination ................................................. 14
7.3 Eyepieces.................................................... 18
7.4 Objectives ................................................... 18
7.5 Cabling ......................................................... 19
8. Operation .................................................... 21
8.1 Switching on the Macroscope ............... 21
8.2 Stages .......................................................... 22
8.3 Tube ............................................................ 22
8.4 Eyepieces.................................................... 23
8.5 Brightness Setting..................................... 23
8.6 Focusing ...................................................... 23
8.7 Objectives ................................................... 24
8.8 Magnification Changer............................. 24
8.9 Diaphragm Setting .................................... 24
8.10 The Smart Move Control Panel............... 25
8.11 Adjusting the Height of the Stand .......... 25
8.12 Magnification Calibration ........................ 25
8.13 Oblique Incident Illumination .................. 26
8.14 Coaxial Incident Illumination................... 26
8.15 Transmitted Light Illumination................. 28
8.16 UV Illumination ........................................... 29
9. Accessories ............................................... 30
9.1 Motorized Work Table .............................. 30
9.2 Stackable Stages ...................................... 31
9.3 Slide Holder ................................................ 33
9.4 Rotating Mechanism for
Toolmark Examination .............................. 41
9.5 Light Panel .................................................. 41
9.6 Filter for Color Contrast ............................ 42
9.7 Polarization Devices ................................. 43
9.8 Stage Scales
and Calibration Standard ......................... 44
10. Technical Data ......................................... 45
11. Care of the Comparison Macroscope .... 48
11.1 Dust Cover .................................................. 48
11.2 Cleaning....................................................... 48
11.3 Handling Acids and Alkalines ................. 49
12. Wear and Spare Parts .............................. 50
13. EU Declaration of Conformity................. 51

6
1. Important Notes about this Manual
(1.2)
→ page 20
!
*
Numbers in parentheses such as (1.2), corre-
spond to illustrations (in the example, Figure 1,
Item 2).
Numbers with pointer arrows (for example
→ page 20), point to a certain page of this manual.
Special safety instructions are indicated
with the triangle symbol shown here, and
have a gray background.
Caution! The macroscope and accessories can
be damaged when operated incorrectly.
Danger due to hot surface.
Explanatory note.
Item not contained in all configurations.
Text symbols and their meanings:
Caution!
This operating manual is an essential com-
ponent of the Leica FS C Comparison Macro-
scope, and must be read carefully before the
macroscope is put into operation or used.
1. Important Notes about this Manual
This operating manual contains important in-
structions and information for the operational
safety and maintenance of the comparison mac-
roscope and accessories. Therefore, it must be
kept and taken care of.

7
2. Safety Notes
2. Safety Notes
2.2. Electrical Safety
General Specifications
For indoor use only.
Supply voltage:
Frequency:
Power input:
Fuse (power supply):
Fuse (power pack):
Ambient temperature:
Relative humidity:
Overvoltage category:
Pollution degree:
2.3 Weights
Comparison bridge:
Macro stand with stage:
Motorized work table:
90-250 V~
50-60 Hz
maximum 125 VA
F 6,3 A L 250 V -UL-
T 16 A L 250 V
10-36°C
maximum 80% to 30°C
II
2
15 kg
32 kg
50 kg
2.1 General Safety Notes
This safety class 1 device is constructed
and tested in accordance with EN 61010-1/IEC
1010-1, safety regulations for electrical measur-
ing, control, and laboratory devices.
Caution!
In order to maintain this condition and to en-
sure safe operation, the user must follow the
instructions and warnings contained in this
operating manual.
Caution!
The devices and accessories described in
this operating manual have been tested for
safety and potential hazards.
The responsible Leica affiliate or the main
plant in Wetzlar must be consulted whenev-
er the device is altered, modified or used in
conjunction with non-Leica components that
are outside of the scope of this manual.
Unauthorized alterations to the device or
noncompliant use shall void all rights to any
warranty claims!

8
2. Safety Notes
Caution!
The comparison macroscope’s electrical
accessory components are not protected
against water. Water can cause electric
shock.
Do not assemble the comparison macro-
scope and its accessory components in the
immediate vicinity of a water connection or
other areas where the possibility of water
exposure exists.
Caution!
Protect the comparison macroscope from
excessive temperature fluctuations. Such
fluctuations can lead to the accumulation of
condensation, which can damage the elec-
trical and optical components.
Caution!
Before exchanging the fuses or lamps, be
absolutely certain to switch-off the main
power switch and remove the power cable.
Caution!
The power plug may only be plugged into an
outlet equipped with a grounding contact.
Do not interfere with the grounding function
by using an extension cord without a ground
wire. Any interruption of the ground wire in-
side or outside of the device, or release of
the ground wire connection, can cause the
device to become hazardous. Intentional
ground interruption is not permitted!
Caution!
By connecting them to ground, ancillary de-
vices providing their own and/or separate
power supplies and which are connected to
the comparison macroscope can be con-
nected to the same ground wire potential.
For connections without a ground connec-
tor, Leica Service must be consulted.
Caution!
Never use any fuses as replacements other
than those of the types and the current rat-
ings listed here. Using patched fuses or
bridging the fuse holder is not permitted.

9
3. Field of Application
Comparisons of small surfaces or profiles need
to be performed with sufficient precision, if the
objects of comparison can be observed simulta-
neously.
If only a macroscope with just one image beam
input is available for such comparisons, then,
depending on the interruption of observation by
a change of objective, high demands are made
on the memory of the observer. Therefore, it is
impossible to rule out incorrect interpretation in
the case of objects with very minor differences
in the surface or profile.
The Leica FS C (Forensic Solution Comparison)
Macroscope with two image beam inputs is de-
signed for comparing structures of items such
as those listed below in split images and com-
posite images in forensic laboratories, docu-
ment printing facilities, mints and banks, and
documenting the results on photographs and
videos:
–Evidence on fired ammunition pieces
–Toolmarks
–Manufacturing traces on adhesive tape
–Playback traces on magnetic tape
–Documents
–Writing samples
–Banknotes
–Stamps
–Coins
–etc.
Illumination equipment are available for incident
light (including UV light) and transmitted light.

10
4. Installation Site
Caution:
Ensure that the workplace area is free of oil
and chemical fumes. Vibrations, direct sun-
light and strong temperature fluctuations in-
terfere with measurements as well as micro-
photography and image documentation.
The basic prerequisite is a stable instrument ta-
ble of optimum height (70–80 cm). Combined
with an ergonomically correct, adjustable chair,
these are the basic requirements for fatigue-
free microscopy.
Allowable ambient conditions
Temperature 10–36 °C
Relative humidity max. 80% up to 30°C
Macroscopes in warm and warm-damp climatic
zones require special care in order to prevent
the build up of fungus.
For additional instructions, see the chapter enti-
tled “Care of the Comparison Macroscope”
→
page 48.
Caution:
Electrical components must be assembled at
least 10 cm from the wall and away from
flammable substances.
Fig. 1 Leica FS C with adjustable-height work table and
ergonomic working chair

11
5. Unpacking the Macroscope
The stand is delivered in a solid box with pack-
aging inserts.
The delivery includes the following compo-
nents:
•Stand with base and control panel, as well as
the stages, which are already installed. The
stand is equipped with two carrying handles.
•Comparison bridge with integrated tube
•One or two cold light sources
•Accessory case with slide holder
•Optical accessories
•Oblique incident illuminator
•Optional accessories
5. Unpacking the Macroscope
!
When unpacking the equipment, follow these in-
structions:
•After opening the box, first remove the com-
parison bridge and then the cardboard boxes,
which hold the accessories.
•Lift the stand out of the carton by its carrying
handles (2.1).
Caution!
When lifting the macroscope out of the pack-
aging, and when transporting it to its installa-
tion site, carry it by its handles only.
Caution:
Note that the stand weighs approx. 32 kg.
Two people are required to lift it out if its
packaging and carry it to its installation site.
Later, the carrying handles can be unscrewed
and removed from the upper part of the mac-
roscope. Then, seal the threaded holes using
seal plugs.
Fig. 2 Stand with carrying handles
1Removable carrying handle
2Transport anchors
11
22

12
5. Unpacking the Macroscope
!
• Carefully remove all components from the
transportation and packaging materials.
Caution!
If at all possible, avoid touching the lens sur-
faces of the objectives. If fingerprints do ap-
pear on the glass surfaces, remove them with
a soft leather or linen cloth. Even small traces
of finger perspiration can damage the surfac-
es of optical surfaces in a short time. For addi-
tional instructions, see the chapter entitled
“Care of the Comparison Macroscope”
→
page 48.
•Check the delivery carefully against the pack-
ing list, delivery note or the invoice. We highly
recommend keeping a copy of these docu-
ments with the manual in order to have deliv-
ery date and delivery package information
available when (for example) placing repeat
orders or making service calls. Please make
sure that no small parts are lost in the pack-
aging materials.
Note:
Keep the packaging materials for storage pur-
poses and transportation of the individual com-
ponents.
Caution:
Do not yet connect the comparison macro-
scope and peripherals to the power supply
at this point!

13
6. Overview of the Instrument
Fig. 3 Leica FSC with motorized work table
1Comparison bridge
2Special articulated arms for oblique incident illuminator
3Universal cold light source
4Motorized work table
5Control unit
6Transmitted light illuminator
7Motorized stage
8Objective turret with objectives
9Tube with eyepieces
1
2
3
4
5
9
8
7
6

14
7. Assembly
7. Assembly
For instructions for assembling the stackable
stages and various slide holders, please refer to
Chapter “9. Accessories” →
page 31 ff.
Caution!
The stages and slide holders have to be mount-
ed before screwing in the objectives.
Only a few commonly used screwdrivers and
keys are necessary for assembly, which are in-
cluded in the delivery package.
Caution!
First, remove the transport anchors (4.1).
!
7.1 Comparison Bridge
•From above, set the comparison bridge onto
the dovetail guide (4.2) and push the bridge
downwards until the upper end of the dovetail
guide is tightly fastened.
•Fasten the comparison bridge using the side
clamping screw.
7.2 Illumination
Either one or two cold light sources can be
used. We recommend using the same cold light
source for both sides based on the illumination
method being used. A double-armed, flexible
light line is included for this purpose. The sec-
ond cold light source should then be used for
another illumination method.
Fig. 4 Stand with carrying handles
1Transport anchors
2Dovetail guide
!
11
2

15
7. Assembly
Fig. 5 Special articulated arms for oblique incident illumi-
nation
1Fastening screws for the articulated arm
2Receptacle for light guide
Fig. 8 Cold light illuminator KL2500 LCD
1Connection for light guide
Oblique Incident Illumination
•Screw the special articulated arms onto the
left and right of the macroscope carrier (5.1).
•Screw the light guide with ø 4.5 mm (Fig. 6)
onto the cold light illuminator (8.1).
•Place the cold light source next to the stand
or onto the shelf that is to be screwed onto
the base of the comparison macroscope (7.1).
•Insert both light guide ends into the left and
right receptacles of the special articulated
arms (5.2) and tighten them using an Allen
wrench.
•Mount and fasten the focusing optics (6.1).
Fig. 7 Shelf for the cold light illuminator
1Fastening screws for the shelf
Fig. 6 Light guide ø 4.5 mm
1Focusing optics
1
2
1
1
1

16
7. Assembly
Coaxial incident light
•Remove the cover plates (9.1) to the rear left
and right on the macroscope carriers.
•In their place, screw on the coaxial
illuminator (11.1)
•Screw the light guide with ø 9 mm (Fig. 12)
onto the cold light illuminator (8.1).
•Place the cold light source next to the stand
or onto the shelf that is to be screwed onto
the base of the comparison macroscope (7.1).
•Insert the polarization filter cube (Fig. 10).
To do so, attach the filter cube onto the side
and push it into the holder (11.2).
Fig. 9 Fastening the coaxial illuminator
1Fastening screws for the cover plate
Fig. 11 Coaxial illuminator
1Fastening screws for the coaxial illuminator
2Filter cube inserted
3Receptacle for light guide
Fig. 10 Polarizing
filter cube
1From the rear
2From the front
11
2
3
12
•Insert the two light guide ends into the left and
right receptacles on the coaxial illuminator
(11.3).
Note:
If, after installation, point-like objects are ap-
pear in the image, the light guide must be pulled
1 to 2 mm out of the coaxial illuminator. The
point-like objects are caused by the fibers of the
light guide.

17
7. Assembly
Transmitted Light
The transmitted illuminator is pre-installed in the
factory.
•Screw the light guide with ø 9 mm (Fig. 12)
onto the cold light illuminator (8.1).
•Place the cold light source next to the stand
or onto the shelf that is to be screwed onto
the base of the comparison macroscope (7.1).
Fig. 12 Light guide ø 9 mm
Fig. 13 Transmitted light illuminator
1Connection for light guide
•Insert the two light guide ends into the left and
right receptacles on the transmitted light illu-
minator (13.1).
•Connect the cables of the transmitted light il-
luminator on both sides with the rear side of
the stand (17.2, 17.3).
UV Illumination
•Screw the holder for UV lamps (14.1) onto the
comparison bridge.
•Insert the UV lamps (14.3) into this holder.
Align them with the object and screw them
tight.
Fig. 14 Assembly of the UV illuminator
1Holder for UV lamps
2Rod for fastening a UV lamp
3UV lamp
1
3
1
2

18
7. Assembly
7.3 Eyepieces
•The eyepieces are inserted into the eyepiece
tubes on the tube.
7.4 Objectives
The position of the individual objectives is pre-
set at the factory. The object turret eyes are
numbered.
•Screw the objective into the objective turret
(Fig. 15).
Eye Objective
No. 1 0.4x
No. 2 1x
No. 3 2x
No. 4 4x
Fig. 16 Objective turret with objectives
1Filter receptacle
Fig. 15 Objective turret from below
1

19
7. Assembly
7.5 Cabling
The connector panel is labeled.
•Connect the left and right stage cables to ter-
minals (17.4) and (17.6).
•Terminal (17.5) on the rear of the stand is con-
nected to terminal (18.1) on the rear side of
the comparison bridge. For this purpose, use
the 25-pin bridge cable.
•The remote control cables of the cold light
sources are connected to terminals (17.9) and
(17.10). When using a cold light source, select
the corresponding terminal.
Fig. 17 Stand connector panel
1Power supply
2Transmitted light condenser lens, right
3Transmitted light condenser lens, left
4Stage, right
5Comparison bridge
6Stage, left
7Serial interface 1 (PC)
8Serial interface 2
9Cold light source, right
10 Cold light source, left
11 Serial interface 3 (Smart Move)
Fig. 18 Rear side
of the comparison bridge
1Connection
•If you have not already done so when install-
ing the transmitted light illuminator, connect
the cables for the transmitted light condenser
to terminal (17.2) and/or (17.3).
•The optional Smart Move control panel is con-
nected to the serial interface 3 (17.11).
•The RS232C interface (17.7) is intended for
connecting a PC.
•Finally, connect the comparison macroscope
and the cold light illuminator to the power
supply using the power cable.
1
123 4 5 6
7891011

20
7. Assembly
•UV illumination:
The UV lamps are rated for a 230 V/50 Hz pow-
er supply.
Caution:
If this voltage supply is not available, a pre-
transformer must be used.
For further details, please refer to the spe-
cial instructions included with the UV lamps.
Caution:
Wear safety goggles when working with UV
lamps!
This manual suits for next models
1
Table of contents
Languages:
Other Leica Microscope manuals

Leica
Leica DM750 P User manual

Leica
Leica TCS SP5 X User manual

Leica
Leica S Series User manual

Leica
Leica MC170 HD User manual

Leica
Leica SP8-X User manual

Leica
Leica TCS SP2 Reference guide

Leica
Leica DMS300 User manual

Leica
Leica DM500 User manual

Leica
Leica M500 OH3 User manual

Leica
Leica M60 B User manual