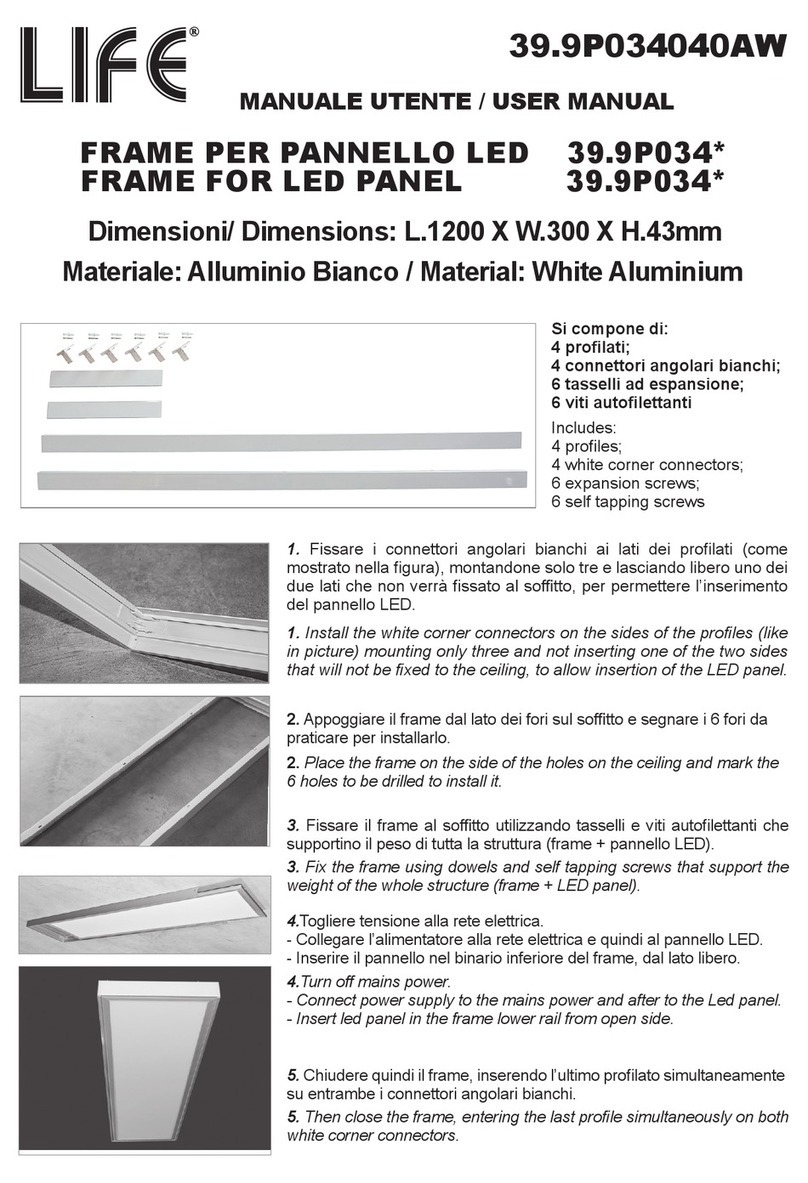
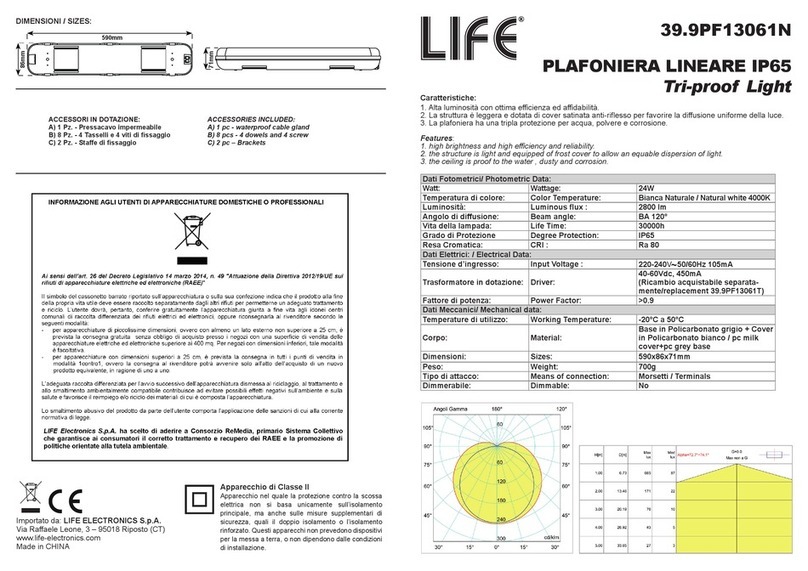
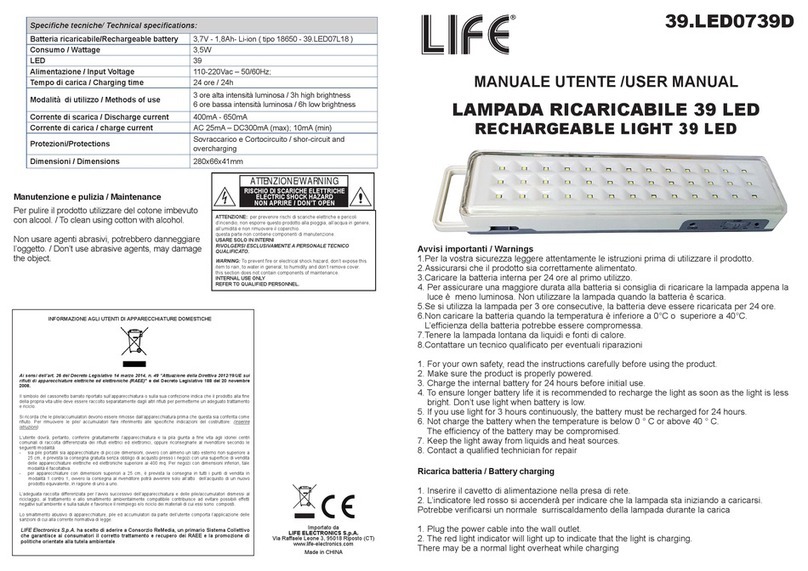
Life 39.9FA103F User manual

39.9FA103F
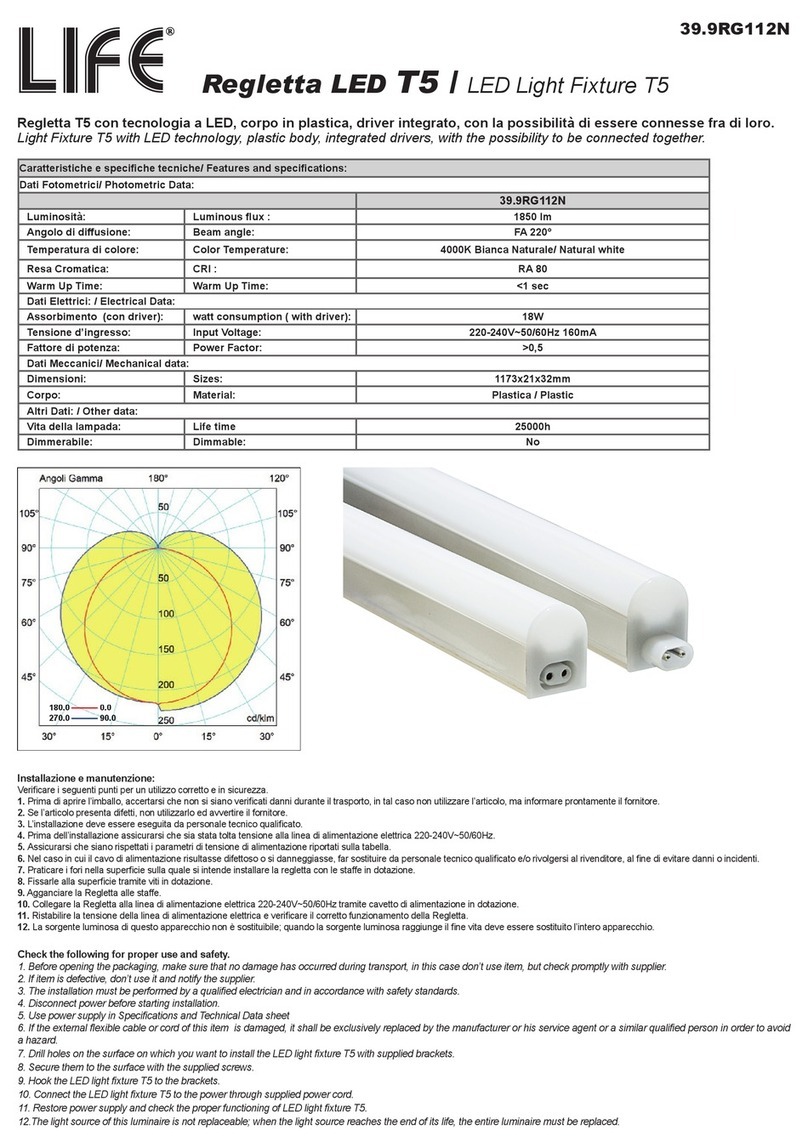
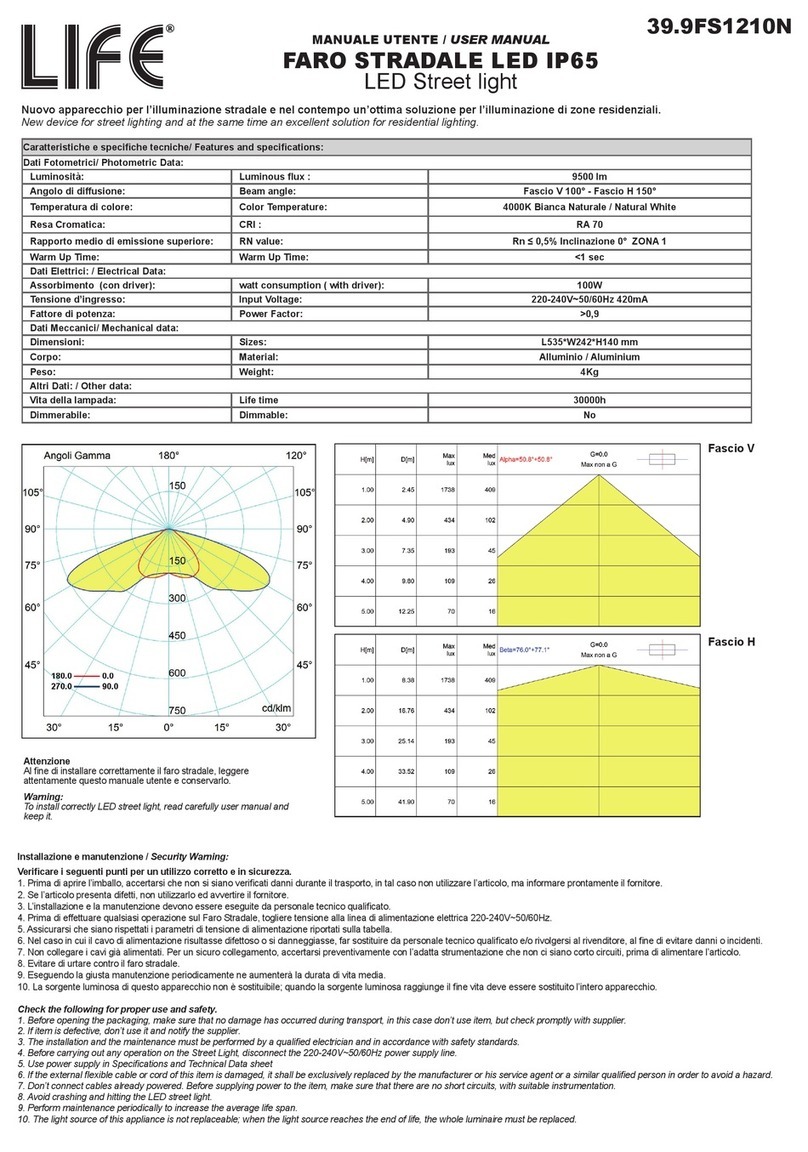
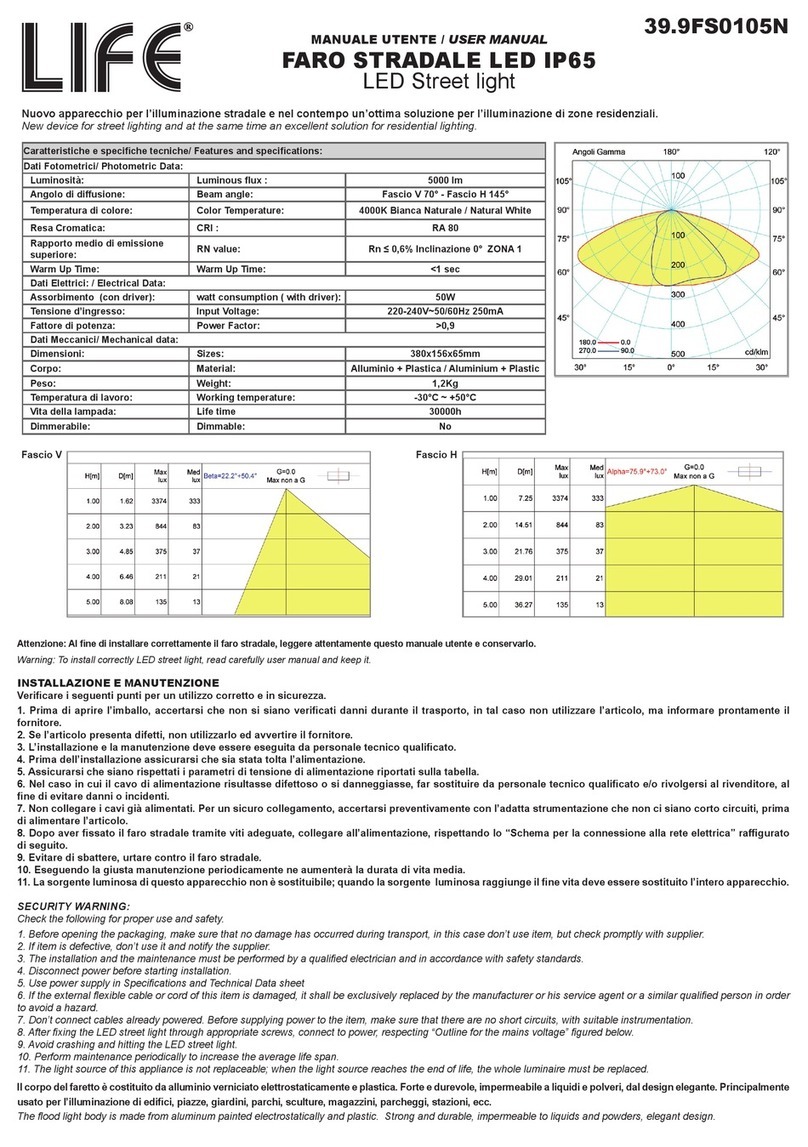
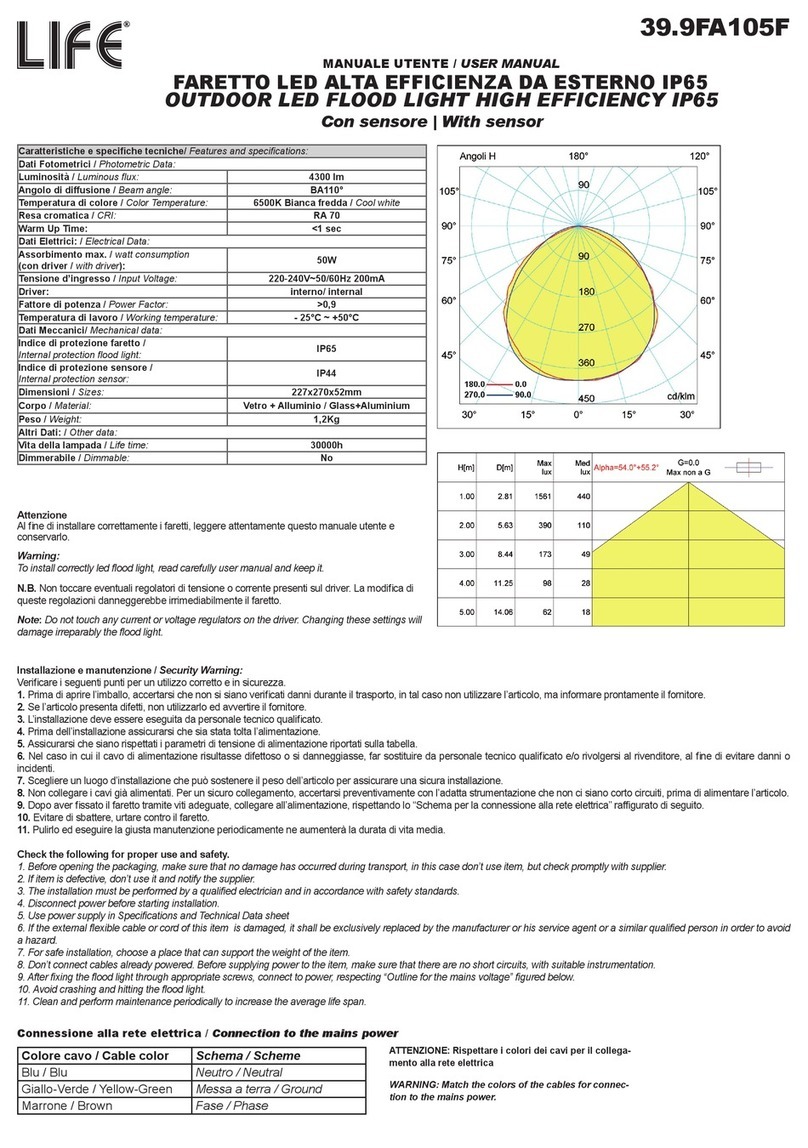
Caratteristiche e speciche tecniche/ Features and specications:
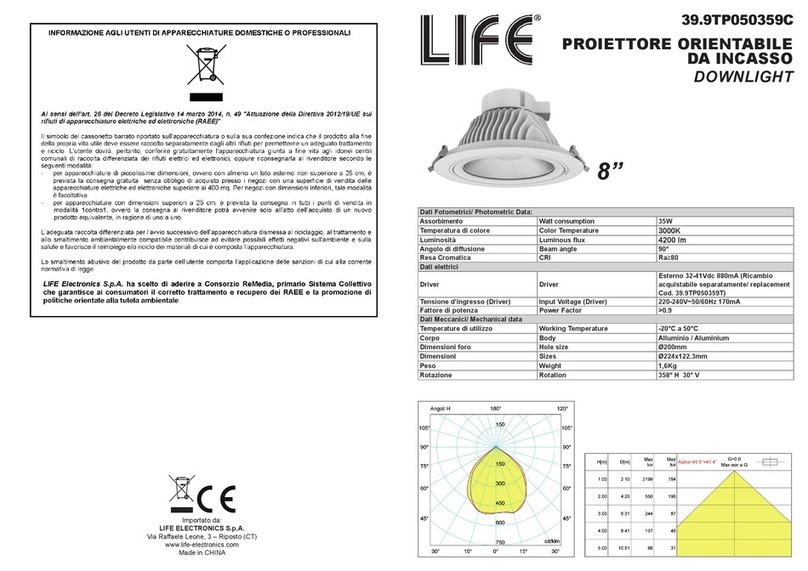
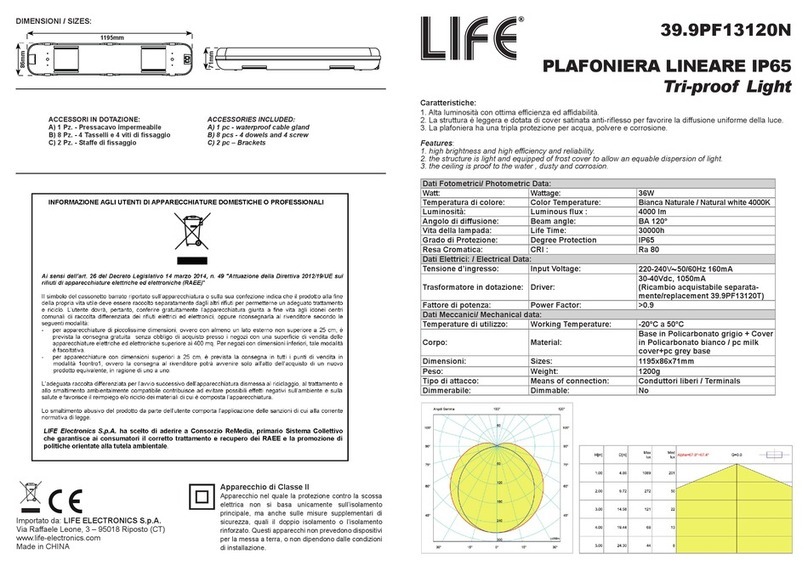
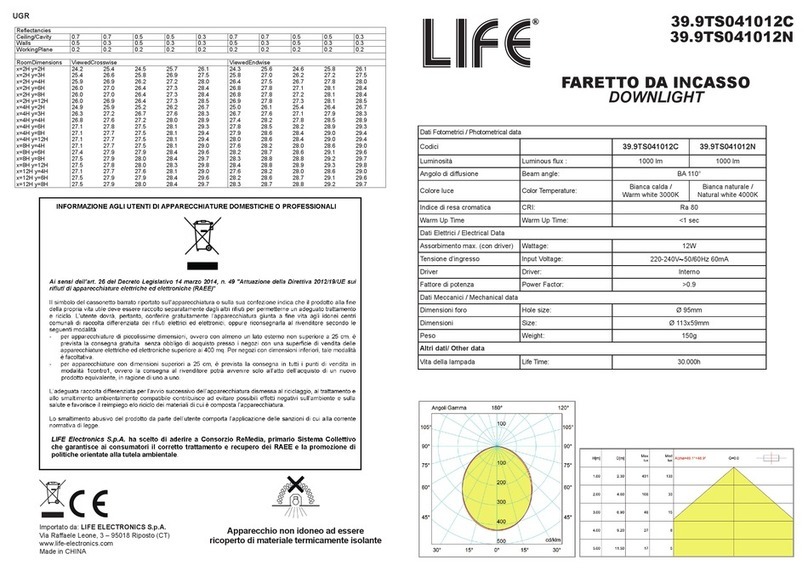
Dati Fotometrici / Photometric Data:
Luminosità / Luminous ux: 2650 lm
Angolo di diusione / Beam angle: BA110°
Temperatura di colore / Color Temperature: 6500K Bianca fredda / Cool white
Resa cromatica / CRI: RA 70
Warm Up Time: <1 sec
Dati Elettrici: / Electrical Data:
Assorbimento max. / watt consumption
(con driver / with driver): 30W
Tensione d’ingresso / Input Voltage: 220-240V~50/60Hz 145mA
Driver: interno/ internal
Fattore di potenza / Power Factor: >0,9
Temperatura di lavoro / Working temperature: - 25°C ~ +50°C
Dati Meccanici/ Mechanical data:
Indice di protezione faretto /
Internal protection ood light: IP65
Dimensioni / Sizes: 180x50x220mm
Corpo / Material: Vetro + Alluminio / Glass+Aluminium
Peso / Weight: 730g
Altri Dati: / Other data:
Vita della lampada / Life time: 30000h
Dimmerabile / Dimmable: No
180.0
270.0
0.0
90.0
Attenzione
Al ne di installare correttamente i faretti, leggere attentamente questo manuale utente e
conservarlo.
Warning:
To install correctly led ood light, read carefully user manual and keep it.
N.B. Non toccare eventuali regolatori di tensione o corrente presenti sul driver. La modica di
queste regolazioni danneggerebbe irrimediabilmente il faretto.
Note: Do not touch any current or voltage regulators on the driver. Changing these settings will
damage irreparably the ood light.
Informazioni di sicurezza:
Vericare i seguenti punti per un utilizzo corretto e in sicurezza.
1. Prima di aprire l’imballo, accertarsi che non si siano vericati danni durante il trasporto, in tal caso non utilizzare l’articolo, ma informare prontamente il fornitore.
2. Se l’articolo presenta difetti, non utilizzarlo ed avvertire il fornitore.
3. L’installazione deve essere eseguita da personale tecnico qualicato.
4. Prima dell’installazione assicurarsi che sia stata tolta la tensione dalla linea di alimentazione elettrica.
5. Assicurarsi che siano rispettati i parametri di tensione di alimentazione riportati sulla tabella.
6. Nel caso in cui il cavo di alimentazione risultasse difettoso o si danneggiasse, far sostituire da personale tecnico qualicato e/o rivolgersi al rivenditore, al ne di evitare danni o incidenti.
7. La sorgente luminosa di questo apparecchio non è sostituibile; quando la sorgente luminosa raggiunge il ne vita deve essere sostituito l’intero apparecchio.
8. Il driver di questo apparecchio non è sostituibile; quando il driver subisce un guasto deve essere sostituito l’intero apparecchio.
Safety informations.
1. Before opening the packaging, make sure that no damage has occurred during transport, in this case don’t use item, but check promptly with supplier.
2. If item is defective, don’t use it and notify the supplier.
3. The installation must be performed by a qualied electrician and in accordance with safety standards.
4. Disconnect power before starting installation.
5. Use power supply in Specications and Technical Data sheet
6. If the external exible cable or cord of this item is damaged, it shall be exclusively replaced by the manufacturer or his service agent or a similar qualied person in order to avoid a
hazard.
7. The light source of this appliance is not replaceable; when the light source reaches the end of life, the whole luminaire must be replaced.
8. The driver of this device is not replaceable; when the driver suers a fault the whole appliance must be replaced.
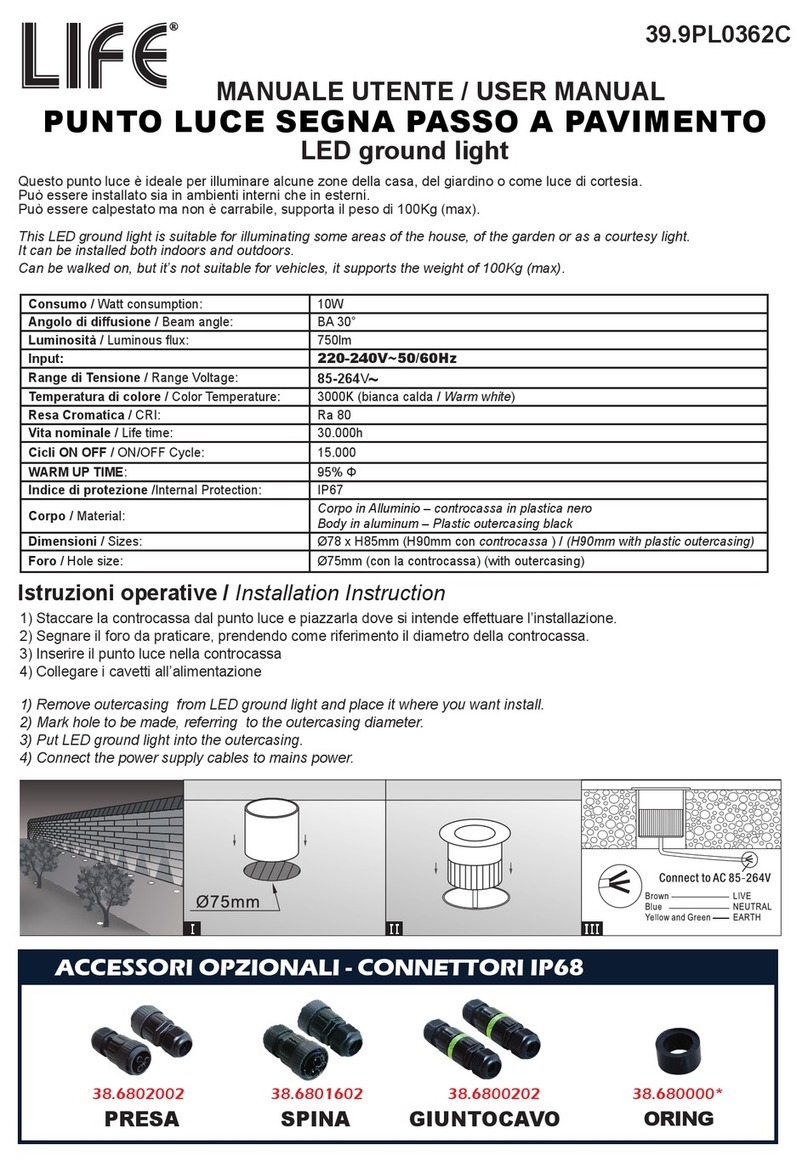
Installazione
1. Scegliere una parete non soggetta a vibrazioni per installare il faretto e togliere tensione alla rete di alimentazione elettrica.
2. Rimuovere la staa del faretto, svitandone le viti laterali.
3. Poggiare la staa sulla parete scelta e segnare i fori da praticare. Successivamente forare la parete.
4. Fissare la staa sulla parete con apposite viti di ssaggio.
5. Riagganciare la staa al faretto.
6. Eettuare i collegamenti alla linea di alimentazione elettrica.
Per assicurare un collegamento alla linea di alimentazione elettrica rispettando i requisiti di sicurezza è opportuno utilizzare un giunto cavo IP68 codice Life Electronics S.p.A. 38.6800202
(non in dotazione) ed un cavo di alimentazione in gomma con sezione compresa tra 1,5mm2 e 2,5mm2.
Inserire ai morsetti a vite, di un’estremità del giunto cavo, Fase, Neutro e Messa a terra del faretto con sensore da esterno.
Sguainare e spelare il cavo della linea di alimentazione elettrica ed eettuare la stessa operazione nell’altra estremità del giunto cavo.
Installing
1. Choose a stable wall to install ood light and cut AC power.
2. Remove the ood light bracket, unscrewing the side screws.
3. Place the bracket on the wall chosen and mark the holes to be drilled. After drill the holes.
4. Fix the bracket on the wall with xing screws.
5. Hang up the bracket to the ood light.
6. Make connections to the power supply line.
To ensure a connection to the power supply line in compliance with the safety requirements, it is recommended to use an IP68 cable joint, code Life Electronics S.p.A. 38.6800202
(not supplied), and a power cable with a cross-section between 1.5mm2 and 2.5mm2. Insert one end of the cable joint, Phase, Neutral and Earth of the outdoor ood light to the screw
terminals.
Unsheath and strip the power supply cable and perform the same operation on the other end of the cable joint
ATTENZIONE: rispettare lo schema di collegamento ed il colore dei cavi
Attention: follow the connection diagram and match the colors of the cables
MANUALE UTENTE / USER MANUAL
FARETTO LED ALTA EFFICIENZA DA ESTERNO IP65
OUTDOOR LED FLOOD LIGHT HIGH EFFICIENCY IP65
Con sensore | With sensor
Importato da: LIFE ELECTRONICS S.p.A.
Via Raaele Leone, 3 - 95018 Riposto (CT)
www.life-electronics.com
Made in CHINA
Nota: durante il test di giorno, ricordarsi di ruotare
la manopola LUX al massimo.
Note: when testing in daylight, please turn LUX
knob to (SUN) position, otherwise the sensor lamp
could not work!
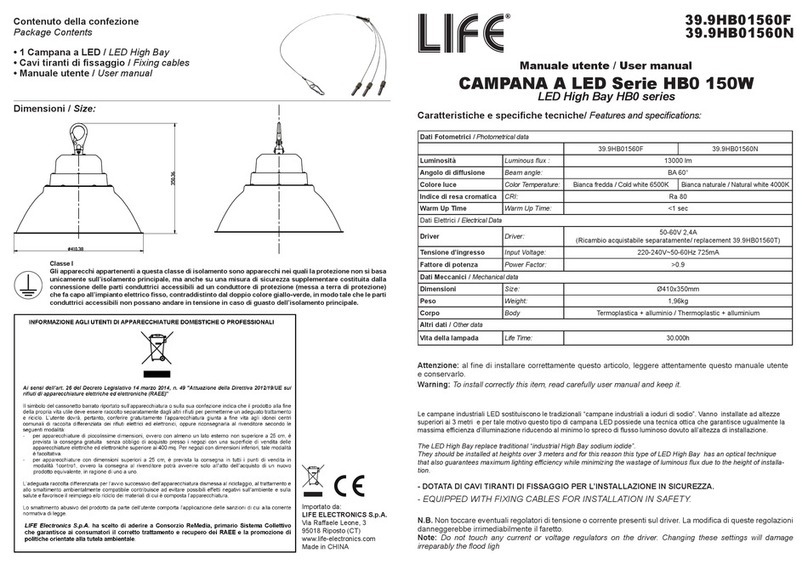
Contenuto della confezione / Package Contents
• 1 faretto a LED / LED Flood light
• Manuale utente / User manual
Test:
Girare la manopola SENS in senso orario sul massimo, girare la manopola TIME in senso antiorario sul minimo, girare la manopola LUX in senso orario sul massimo ( ).
Turn the SENS knob clockwise on the maximum, turn the TIME knob anti-clockwise on the minimum, turn the LUX knob clockwise on the maximum ( ).
Congurazione sensore PIR:
1- Impostazione di accensione:
Impostando il selettore Lux su ( ) il faretto è attivo 24h su 24h.
Impostando il selettore Lux su ( ) il faretto si attiva solo nelle ore notturne
2- Impostazione intervalli di tempo di accensione: è possibile selezionare l’intervallo di tempo di accensione da un massimo di 7±2min. ad un minimo di 10±3sec.
3- Impostazioni sensibilità: è possibile scegliere il grado di sensibilità del sensore per l’accensione su rilevazione di movimento
Setup PIR Sensor:
FUNCTION:
1- Can identify day and night: The consumer can adjust work ambient light.
It can work in the daytime and at night when it is adjusted on the “sun ” ( ) position (max).
It can work in the ambient light less than 3LUX when it is adjusted on the “moon” ( ) position (min). As for the adjustment pattern, please refer to the testing pattern.
2- Time-delay adjustment: It can be set according to the consumer’s desire. The minimum time is 10sec±3sec. The maximum is 7min±2min.
3- SENS adjustable: It can be adjusted according to using location; low sensitivity with 5m for detection distance; high sensitivity with 12m, it ts for large room
CLASSE I
Gli apparecchi appartenenti a questa classe di isolamento sono
apparecchi nei quali la protezione non si basa unicamente
sull’isolamento principale, ma anche su una misura di sicurezza
supplementare costituita dalla connessione delle parti conduttrici
accessibili ad un conduttore di protezione (messa a terra di protezione)
che fa capo all’impianto elettrico sso, contraddistinto dal doppio
colore giallo-verde, in modo tale che le parti conduttrici accessibili
non possano andare in tensione in caso di guasto dell’isolamento
principale.
Simbolo / Schema Cavo
L = Fase Marrone
N = Neutro Blu
= Terra Giallo-Verde
Riavvitare gli oring ed i serra cavi .
Per assicurare un adeguato isolamento durante l’installazione, anche le guaine dei cavi di alimentazione devono essere
inserite all’interno del giunto cavo.
Screw the o’ring and the cable clamps.
To ensure adequate insulation during installation, the sheaths of the power cables must also be inserted inside the cable joint.
7. Solo dopo aver ultimato le operazioni di connessione alla linea di alimentazione elettrica, mantenendo, su tutta la linea di alimentazione, un adeguato isolamento, rista-
bilirne la tensione e testare il funzionamento del faretto. Regolare l’angolo di irradiazione in base alle condizioni di utilizzo.
8. Per le regolazioni ed il funzionamento del sensore riferirsi ai paragra Congurazione e Speciche del sensore PIR.
7. Only after completing the connection operations to the power supply line, keeping adequate insulation on the whole power line, re-establishing the voltage and testing the operation
of the ood light. Adjust the irradiation angle according to the conditions of use.
8. For adjustments and sensor operation refer to the PIR sensor Conguration and Specications sections.
Il faretto si attiverà dopo circa 30 secondi dalla rilevazione del primo movimento. Successivamente il faretto si riattiva tramite rile-
vazione di movimento, entro 5 – 15 sec.
Riprovare nuovamente dopo 5 – 10 sec. Il faretto si accenderà appena rileverà dei movimenti all’interno del range di rilevazione.
Girare la manopola LUX in senso antiorario sul minimo ( ). Di giorno il faretto ed il sensore non dovrebbero funzionare, essendo
regolato a 3 Lux. Coprendo il sensore, il faretto si accenderà. Ma se non rileverà alcun movimento, si spegnerà automaticamente
entro 5 – 15 sec.
When you switch on the power, the controlled load is not working.Preheat 30 seconds later, when the sensor gets the induction
signal,the load will be turned on. After the load is turned o, it will be turned on again when the sensor gets induction signal within
5~15 sec.
After the rst is out, make it sense again after 5~10sec. The load should work. When there is no induction signals in the sensor, the
load should be stopped working.
Turn LUX knob anti-clockwise on the minimum. If it is adjusted in the less than 3LUX ( ),the load and sensor should not work
when testing in daylight. If you cover the detection window with the opaque objects (towel etc), the load work. Under no induction
signal condition, the load should stop working within 5-15sec
Speciche Sensore PIR:
Angolo di rilevamento : 180°
Distanza di rilevamento: 5~12m regolabile ( < 24°C)
Durata di accensione: 10sec +/- 3sec ~ 7 +/-2 min (Regolabile)
Umidità di lavoro: <93%RH
Sensibilità Luce ambientale: 3Lux ~ 2000Lux (Regolabile)
Altezza installazione: 1,8m~2,5m
PIR Sensor Specication:
Detection Range: 180°
Detection Distance: 5-12m (<24°C) (adjustable)
Time-Delay: min: 10sec±3sec max: 7min±2min
Working Humidity: <93%RH
Ambient Light: 3-2000LUX (adjustable)
Installation Height: 1.8m~2.5
Table of contents
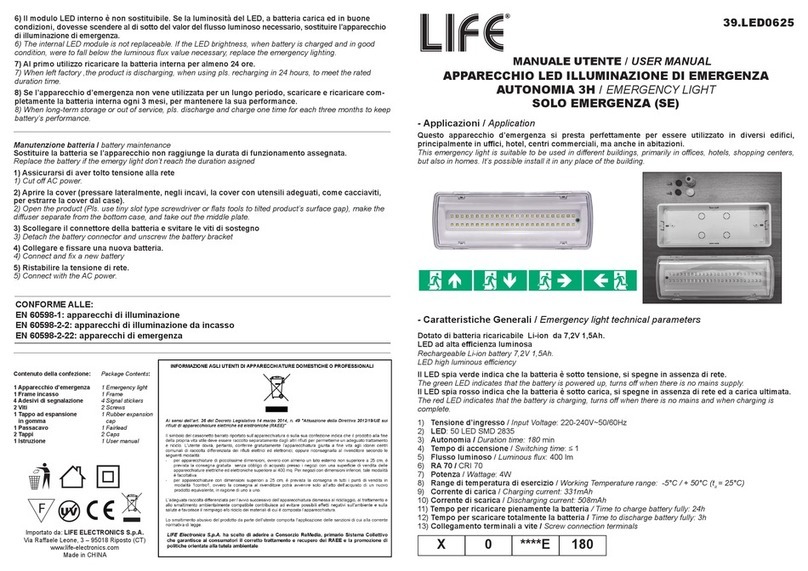
Other Life Lighting Equipment manuals

Life
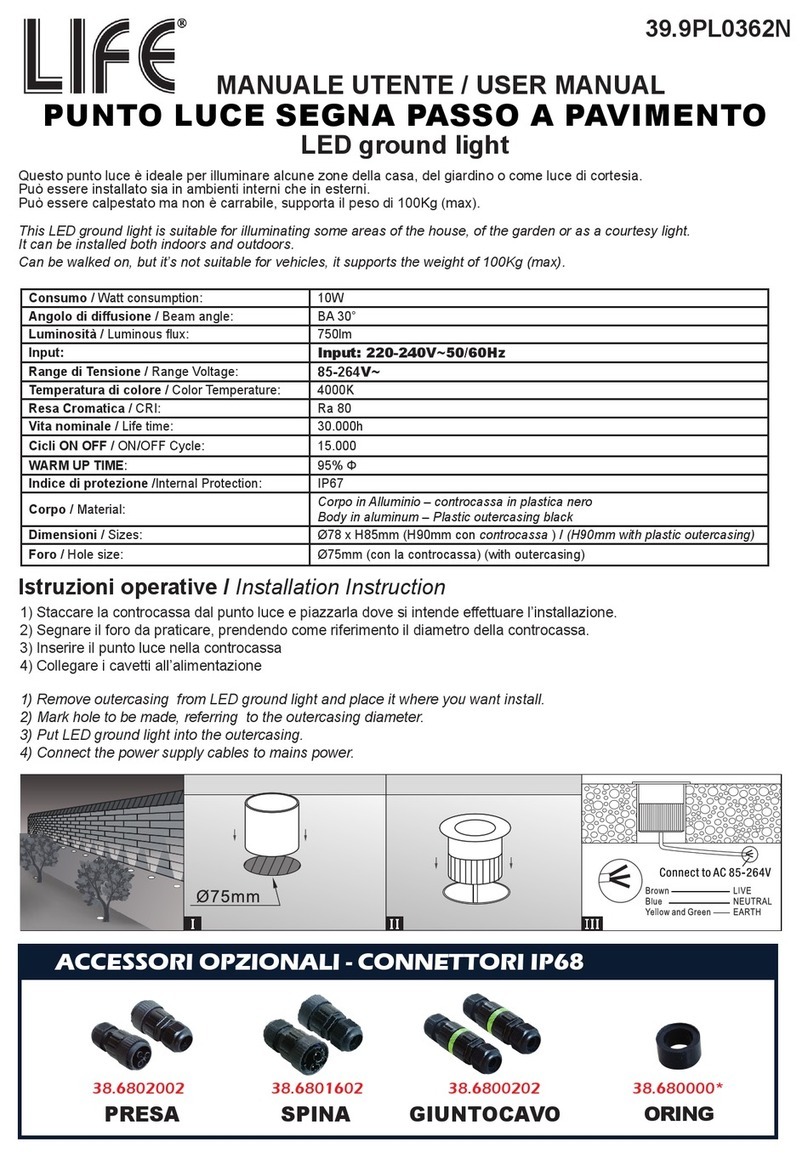
Life 39.9PL0362N User manual

Life
Life HB0 Series User manual

Life
Life FLOOD ULTRA SLIM User manual

Life
Life 39.9FS1210N User manual

Life
Life 39.9TS030006C User manual

Life
Life 39.9RG112N User manual

Life
Life PL-C 4-2G11 User manual

Life
Life 39.9TP050253C User manual

Life
Life 39.LED0739D User manual

Life
Life 39.9TS041010C User manual

Life
Life 39.9TSS0518N User manual

Life
Life 39.9TP040354N User manual

Life
Life 39.9PL0410C User manual

Life
Life 39.9TS041015C User manual

Life
Life 39.9PL1120C User manual

Life
Life HB0 Series User manual

Life
Life 39.9FS0105N User manual

Life
Life CIRCOLINA G10q T9 User manual

Life
Life 39.9TS030012C User manual

Life
Life 39.9PF2023C User manual