Lilin NDR104 User manual

Summary
NDR series are designed to meet the demands for full D1 real-time pure hybrid IP cameras
and/or analog cameras recording systems.
NDR series adopt high compression rate H.264 full D1 real-time engine for both analog and IP
camera streaming. Each channel can be configured as for IP camera or analog camera at full
D1 or CIF resolution and different frame rate. Region of interest (ROI) is supported at 5X and
9X zoom capacity along.
HDMI and VGA engines are built-in 3D intellectual motion adoptive refinement with vivid image
enhancement algorithm to provide best video quality. TV wall design allows NDRs to be
cascaded via TCP/IP network for easy-cabling configuration. IP cameras and analog cameras
can be controlled by 3D joystick keyboard(s). Master and slave NDRs design, pre-
programmed IP cameras and NDR access tables can be automatically distributed to slave
NDRs for quick addressing purpose. WS-Discovery protocol allows quick IP address setup for
IP cameras and NDRs.
NDR series provide various backup features include USB DVD/RW, USB flash disk, HTTP
download, and Backup Manager for multiple NDRs’ files download. Mobile phone device
remote monitoring is also supported. Browser based remote live monitoring and video
playback features are provided. NDR self-diagnostic monitoring feature monitors NDR internal
temperature, cooling fan failure detection, HDD I/O speed, and network status via health check
report.
NDR series provide real-time D1 recording and playback, various backup, quick camera and
NDR IP addressing, multiple self-diagnostic monitoring, easy-cabling, easy-to-use, and easy-
setup features. NDR series are the only choice for moving towards IP cameras recording
systems.
Major Features
Full D1 real-time H.264 recording and playback.
Pure hybrid, IP camera or analog camera configurable for each channel.
Up to 4-channel IP cameras recording and playback.
HDMI compliant & VGA outputs at 1080P, built-in 3D intellectual motion adoptive
refinement and vivid image enhancement engines.
HTTP web-based interface including NDR configuration, PTZ control, playback, and live
monitoring.
NDRs cascaded are allowed for controlling via TCP/IP network for easy-cabling
configuration by PIH-931D keyboard.
Master and slave NDRs design allows distributed quick accessing tables for pre-
programmed IP cameras and NDRs.
3G mobile phone solutions provided (iPhone, iPad, Android mobile phone).
Resolution, frame rate, and video quality configurable for each channel.
WS-Discovery for quick IP setup of IP cameras and NDRs.
Changeable the camera name with Chinese.
Power saving design.

NDVR User Manual 1
Trademarks and registered trademarks
Microsoft, Windows 2000, Windows XP, Internet Explorer are registered trademarks of
Microsoft Corporation in the U.S. and/or other countries.
Adobe and Adobe PDF are registered trademarks of Adobe Systems Incorporated in the U.S.
and/or other countries.
JavaScript and all Java-based trademarks and logos are trademarks or registered trademarks
of Sun Microsystems, Inc. in the U.S. and/or other countries.
Linux, Macintosh, Mozilla, and Netscape Navigator are registered trademarks of the respective
holders.
Pelco is a trademark of Pelco - Clovis, CA, and may be registered in certain jurisdictions.
Other names of companies and their products mentioned in this manual may be trademarks or
registered trademarks of their respective owners.
Caution
•Do not drop or strike this equipment
•Do not install the equipment near any naked flames or heat sources
•Do not expose this unit to rain, moisture, smoke or dust environment
•Do not cover the opening of the cabinet with cloth and plastic or to install this unit
in poor ventilated places. Allow 10cm between this unit and its surroundings
•Do not continue to operate the unit under abnormal conditions such as detection
of smoke, strange smell or no display on screen while power is turned on
•Do not touch the power connection with wet hands
•Do not damage the power cord or leave it under pressure
•Do not operate this unit near magnet, speaker system, etc., to avoid unnecessary
magnetic interference
•Connection cables should be grounded properly
CAUTION
RISK OF EXPLOSION IF BATTERY IS REPLACED
BY AN INCORRECT TYPE.
DISPOSE OF USED BATTERIES ACCORDING
TO THE INSTRUCTIONS

NDVR User Manual 2
TABLE OF CONTENTS
CHAPTER 1. SYSTEM OVERVIEWS...................................................................................... 6
Chapter 1-1. Front Panel.................................................................................................... 6
Chapter 1-2. Rear View...................................................................................................... 7
Chapter 1-3. System LED Status Panel............................................................................. 7
Chapter 1-4. Remote controller.......................................................................................... 8
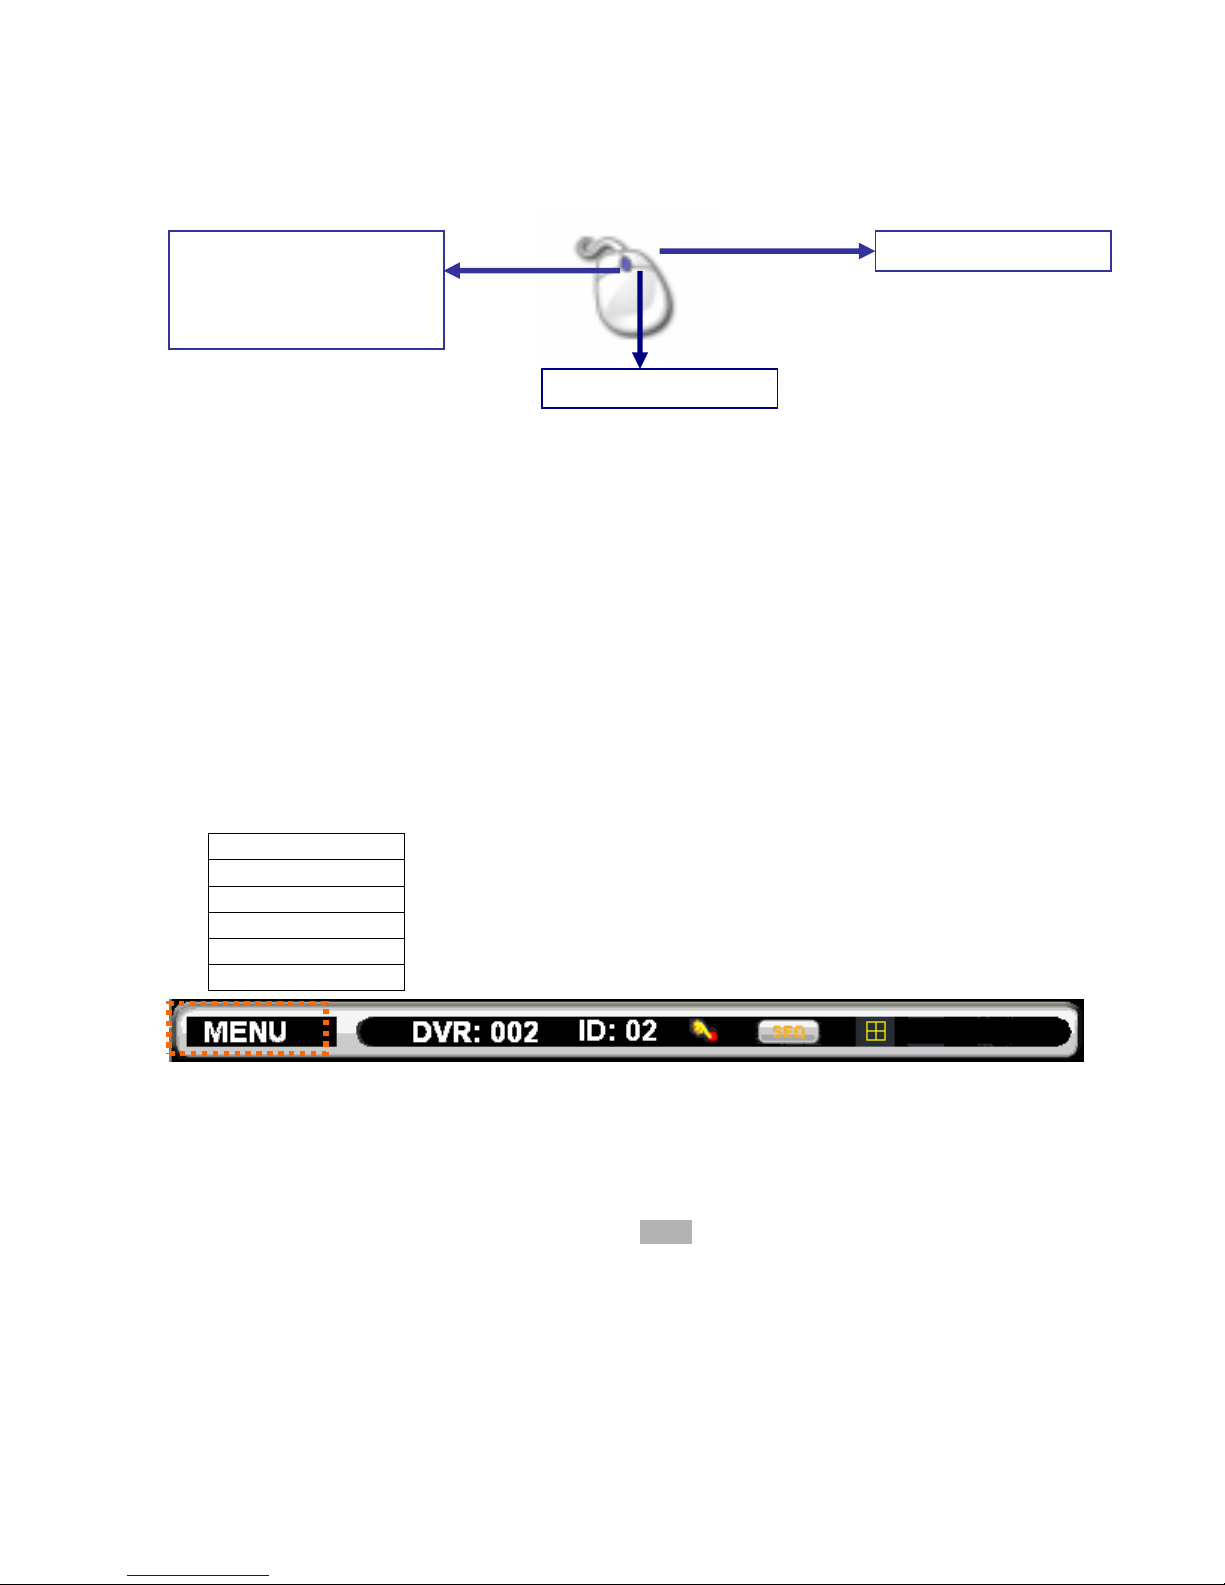
Chapter 1-5. Mouse System .............................................................................................. 9
Chapter 1-5-1. Mouse Menu........................................................................................ 9
Chapter 1-6. Active Camera............................................................................................... 9
CHAPTER 2. NDR OPERATIONS ..........................................................................................11
Chapter 2-1. Sequential Display .......................................................................................11
Chapter 2-2. Freeze ..........................................................................................................11
Chapter 2-3. ROI Mode.....................................................................................................11
Chapter 2-4. CH+ & CH- .................................................................................................. 12
Chapter 2-5. Audio & Mute............................................................................................... 12
Chapter 2-6. Addressable NDR Control Button ............................................................... 12
Chapter 2-7. NTSC/PAL................................................................................................... 12
Chapter 2-8. Language .................................................................................................... 12
Chapter 2-9. ESC/Shutdown Procedure .......................................................................... 13
Chapter 2-10. OK/Cancel Button ..................................................................................... 13
Chapter 2-11. Page +/-..................................................................................................... 13
CHAPTER 3. PTZ CONTROL ................................................................................................ 14
Chapter 3-1. Instant PTZ Controllable Mode ................................................................... 14
Chapter 3-2. Remote Controller & PTZ............................................................................ 14
Chapter 3-3. Recall Presets ............................................................................................. 14
CHAPTER 4. RECORDING ................................................................................................... 15
Chapter 4-1. Start Recording ........................................................................................... 15
Chapter 4-2. Manual Recording....................................................................................... 15
Chapter 4-3. Schedule Recording.................................................................................... 15
Chapter 4-4. Alarm Switch Activation Recording ............................................................. 15
Chapter 4-5. Motion Detection Recording........................................................................ 15
CHAPTER 5. PLAYBACK ...................................................................................................... 16
Chapter 5-1. Time Search ................................................................................................ 16
Chapter 5-2. Event Search............................................................................................... 16
Chapter 5-3. REC Search ................................................................................................ 17
Chapter 5-4. Time Search ................................................................................................ 17
Chapter 5-5. Other Playback Features ............................................................................ 17
CHAPTER 6. MENU SYSTEM ............................................................................................... 19
Chapter 6-1. Setup Menu................................................................................................. 19
Chapter 6-2. Camera Setup ............................................................................................. 19
Chapter 6-2-1. Camera Name................................................................................... 19

NDVR User Manual 3
Chapter 6-2-2. Camera Disable (Secured Recording Channel)................................ 20
Chapter 6-2-3. Video Setup....................................................................................... 20
Chapter 6-3. Monitor Setup.............................................................................................. 21
Chapter 6-3-1. Video Advance ................................................................................... 21
Chapter 6-3-2. Output Resolution............................................................................... 23
Chapter 6-3-3. Backlight Saving................................................................................. 23
Chapter 6-3-4. Monitor Standby Mode ....................................................................... 23
Chapter 6-3-5. Monitor Standby Time......................................................................... 23
Chapter 6-3-6. Main Alarm Switching ......................................................................... 23
Chapter 6-3-7. Main Monitor SEQ Time .................................................................... 23
Chapter 6-3-8. Spot Monitor Switching....................................................................... 24
Chapter 6-3-9. Spot Sequence Time .......................................................................... 24
Chapter 6-4. Record Setup .............................................................................................. 24
Chapter 6-4-1. Record Quality................................................................................... 24
Chapter 6-4-2. Frame Rate ....................................................................................... 24
Chapter 6-4-3. Recording Mode ................................................................................ 24
Chapter 6-4-4. Audio ................................................................................................. 24
Chapter 6-4-5. Post-alarm Recording ....................................................................... 25
Chapter 6-4-6. Resolution ......................................................................................... 25
Chapter 6-4-7. GOP .................................................................................................. 25
Chapter 6-4-8. Schedule ........................................................................................... 25
Chapter 6-4-9. HDD Overwritten ............................................................................... 25
Chapter 6-4-10. Limited Recording ........................................................................... 26
Chapter 6-5. Alarm Setup................................................................................................. 26
Chapter 6-5-1. Alarm Input Type ............................................................................... 26
Chapter 6-5-2. Motion Enable ................................................................................... 26
Chapter 6-5-3. Sensitivity .......................................................................................... 26
Chapter 6-5-4. Motion Area Set................................................................................. 26
Chapter 6-5-5. Alarm Time ........................................................................................ 27
Chapter 6-5-6. Alarm Output Time............................................................................. 27
Chapter 6-5-7. Buzzer Enable ................................................................................... 27
Chapter 6-5-8. Button Sound..................................................................................... 27
Chapter 6-5-9. SMTP Setup ...................................................................................... 27
Chapter 6-6. System Setup.............................................................................................. 27
Chapter 6-6-1. Date/Time .......................................................................................... 28
Chapter 6-6-2. HDD Information................................................................................ 28
Chapter 6-6-3. Password/Access.............................................................................. 29
Chapter 6-6-4. LOG View .......................................................................................... 30
Chapter 6-6-5. Factory Reset .................................................................................... 30
Chapter 6-6-6. NDR ID for Remote Control .............................................................. 30

NDVR User Manual 4
Chapter 6-6-7. Video System .................................................................................... 30
Chapter 6-6-8. Firmware Update............................................................................... 30
Chapter 6-6-9. Language .......................................................................................... 31
Chapter 6-6-10. Live Audio........................................................................................ 31
Chapter 6-7. Network ....................................................................................................... 32
Chapter 6-7-1. IP Mode ............................................................................................. 32
Chapter 6-7-2. HTTP & Video Port Numbers ............................................................ 32
Chapter 6-7-3. FTP Port Number .............................................................................. 32
Chapter 6-7-4. DDNS ................................................................................................ 33
Chapter 6-7-5. Master NDR Setup ............................................................................ 33
Chapter 6-7-6. Send Table to Master NDR ............................................................... 33
Chapter 6-7-7. Keyboard ID and NDR Table Setup .................................................. 33
Chapter 6-7-8. MAC .................................................................................................. 34
Chapter 6-8. PTZ Setup ................................................................................................... 34
Chapter 6-8-1. PTZ Transport and PTZ Protocol ...................................................... 34
Chapter 6-8-2. PTZ Model & Baud Rate ................................................................... 35
Chapter 6-8-3. Preset Setup...................................................................................... 35
Chapter 6-8-4. Preset ................................................................................................ 36
Chapter 6-8-5. Dwell.................................................................................................. 36
Chapter 6-8-6. Speed ................................................................................................ 36
Chapter 6-8-7. Position.............................................................................................. 36
Chapter 6-8-8. IRIS & Auto IRIS................................................................................ 36
Chapter 6-8-9. Focus & Auto Focus .......................................................................... 36
Chapter 6-8-10. Save Presets ................................................................................... 36
Chapter 6-8-11. Clear All Preset................................................................................ 37
Chapter 6-8-12. Direct Keyboard Access .................................................................. 37
Chapter 6-9. Backup ........................................................................................................ 37
Chapter 6-9-1. FTP Download................................................................................... 37
Chapter 6-9-2. HTTP File Download ......................................................................... 38
CHAPTER 7. FILE PLAYBACK.............................................................................................. 39
Chapter 7-1. Play H.264 Files .......................................................................................... 39
Chapter 7-2. Play H.264 Audio ........................................................................................ 39
Chapter 7-3. Manage NDRs Download ........................................................................... 39
Chapter 7-4. Connect to NDR’s FTP Service. ................................................................. 40
Chapter 7-5. Start to Download NDR’s Files.................................................................... 40
Chapter 7-6. Play local NDR’s files. ................................................................................. 41
CHAPTER 8. NETWORK ....................................................................................................... 43
Chapter 8-1-1. Configuration ..................................................................................... 43
Chapter 8-1-2. Internet Ports..................................................................................... 43
Chapter 8-2. Access the NDR via Internet Browser.......................................................... 44

NDVR User Manual 5
Chapter 8-2-1. Before Using Internet ........................................................................ 44
Chapter 8-2-2. Logon ................................................................................................ 45
Chapter 8-2-3. Hyper Link Panel ............................................................................... 45
Chapter 8-2-4. Playback Over Network..................................................................... 45
Chapter 8-2-5. Save JPEG file .................................................................................. 46
Chapter 8-2-6. Network Audio ................................................................................... 47
Chapter 8-3. Configure the NDR via Web page............................................................... 47
Chapter 8-3-1. Camera Setting ................................................................................. 47
Chapter 8-3-2. Recording Setting.............................................................................. 47
Chapter 8-3-3. Recording Schedule Table ................................................................ 48
Chapter 8-3-4. Alarm Setting ..................................................................................... 48
Chapter 8-3-5. Alarm E-mail ...................................................................................... 48
Chapter 8-3-6. Network Setting ................................................................................. 49
Chapter 8-3-7. System Setting .................................................................................. 50
Chapter 8-3-7-1. Timer........................................................................................ 50
Chapter 8-3-7-2. User Setting............................................................................. 50
Chapter 8-3-7-3. System Status.......................................................................... 51
Chapter 8-3-7-4. Firmware update...................................................................... 52
CHAPTER 9. KEYBOARD CONNECTION ............................................................................ 54
Chapter 9-1. Connection between a NDR and a RS-485 Keyboard ............................... 54
Chapter 9-2. Connections of multiple LAN NDRs and a RS-485 Keyboard .................... 54
Chapter 9-3. Connections between a NDR and multiple RS-485 PTZs ........................... 55
Chapter 9-4. Connections between a NDR and an IP PTZs ............................................ 56
Chapter 9-5. Operating a Keyboard for Controlling NDRs and PTZs ............................. 56
Chapter 9-5-1. Switch to NDR Control Mode ............................................................. 56
Chapter 9-6. Control NDR’s Multiplexer Features ........................................................... 56
Chapter 9-7. Control NDR’s Menu Setup......................................................................... 57
Chapter 9-7-1. OK or Cancel button in Submenu System ........................................ 58
Chapter 9-8. Control NDR Playback ................................................................................ 58
Chapter 9-9. Control PTZ................................................................................................. 58
Chapter 9-10. Control a NDR’s Spot Monitor................................................................... 59
APPENDIX............................................................................................................................... 60
Appendix A. Alarm I/Os and RS485 for PTZ ..................................................................... 60
Appendix B. RS485 Input and Output Pin Assignment..................................................... 60
Appendix C. Hard Disk Drive Support List ........................................................................ 60
Appendix D. Supported USB-DVD/RW............................................................................. 61
Appendix E. Supported USB Flash Disk........................................................................... 61
Appendix F. Hard Disk Recording Table ........................................................................... 61
Specification ............................................................................................................................ 62

NDVR User Manual 6
CHAPTER 1. SYSTEM OVERVIEWS
Chapter 1-1. Front Panel
1. LED status panel 11. Right button
Please see system LED status panel. a. Move cursor right in menu.
2. Split-display/camera buttons b. Pan right at PTZ control mode.
a. 4 split-display c. Increase a value.
b. Camera selection mode 12. Down button
3. SEQ button a. Move cursor down at menu mode.
4. EJECT button b. Tilt down at PTZ control mode.
5. ESC/shutdown button 13. Menu button
6. Left button 14. Backup button
a. Move cursor left at menu setup. 15. Rec button
b. Pan left at PTZ control mode. Start recording operation or stop the
c. Decrease a value. recording task.
7. Enter button 16. Fast forward button
a. Enter operation in menu setup. a. Video fast forward
b. Instant PTZ camera selection at live mode.
b. Next event page
c. Camera active mode 17. Play button
8. Up button a. Invoke playback selection menu.
a. Move cursor up in menu. b. Replay after FF, FR, Pause, stepping
b. Tilt up at PTZ control mode. when playing video.
9. Remote control IR receiver 18. Pause button
10. USB 2.0 connector 19. Stop video playback button
Live: freeze video, playback: pause video
a. USB flash disk
b. USB DVD/RW
20. Fast reverse button
a. Video fast reverse
b. Previous event page

NDVR User Manual 7
Chapter 1-2. Rear View
1. External IR receiver (RCA) 8. eSATA connector
2. Main monitor 9. VGA output
10. Network RJ-45 connector
11. RS-485
For PTZ connection
3. Spot monitor
a. Spot monitor accessible by
keyboard.
b. Each spot output can be
programmable for alarmed camera
display and sequence display.
12. Alarm I/Os
Alarm input switches, 1 N/O alarm
output, and 1 N/C alarm output
4. Camera inputs
Analog camera BNC inputs
13. Keyboard connector
5. Audio inputs
Four RCA audio connectors
14. Fan
6. Audio output 15. Power switch
7. HDMI output 16. DC 12V input
Chapter 1-3. System LED Status Panel
System LEDs are meaningful while operating the NDR. The status of each LED is described
as in the following table:
Item
LED Description Color
1 BACKUP Backup LED indicator Green (blinking)
2 POWER NDR power on/off indicator Yellow
3 HDD 1 Master HDD recording indicator Green (blinking)
4 ALARM External alarm switches indicators when
motioned or alarmed
Red
5 REC Recording indicator Yellow
6 HDD 2 Slave HDD recording indicator Green (blinking)

NDVR User Manual 8
Chapter 1-4. Remote controller
The button arrangement of the remote controller is designed for easy-to-use purposes.
Buttons are separated in regions based on their features including NDR operational keys,
pan, tilt, and zoom camera device (PTZ) keys, numerical keys, and PTZ buttons.
NDR operational keys
MENU Setup menu
ESC Escape/exit/stop buzzer
ZOOM Digital video 5X or 9X zooming
REC Record/stop recording
FREEZE Live video freeze
Pause
Playback
Stop
Fast forward
Fast rewind
Next single channel
Previous single channel
4 split display
8 split display
9 split display
13 split display
16 split display
SEQ Sequential display
AUDIO Audio/mute
BACKUP Video backup
DVR/NDR Addressable NDR control
NTSC/PAL Video system
LANGUAGE Language selection
Page +/- Change page of a list.
Auto Pan Perform auto pan feature Move up/tilt up
Zoom in Zoom in of a fast dome camera Move down/tilt down
Zoom out Zoom out of a fast dome camera Move left/pan left
Preset Call preset of a fast dome camera Move right/pan right
Enter/set
0 to 9 Numerical keys

NDVR User Manual 9
Chapter 1-5. Mouse System
The NDR has both USB mouse interface. General mouse operations are described as
below:
Left mouse click—In mouse menu system, mouse click can select a menu item. In window-
division mode, click on a camera that is to select the camera in activation mode (active camera).
Left mouse double click-- In window division mode, click on a camera that can call the
camera in full screen mode.
Mouse drag—In motion area setup mode, mouse drag can setup a motion area.
Mouse scroll—In setup menu, mouse scroll can increase or decrease a value.
Right mouse click—Popup a submenu system or return to live in main menu.
Chapter 1-5-1. Mouse Menu
For using mouse menu, please use the mouse click on Menu item. The mouse menu shows
on the screen for more system features.
SETUP
PLAYBACK
ZOOM
PTZ
AUDIO ON/OFF
SHUTDOWN
Chapter 1-6. Active Camera
Active camera is shown as checked at camera name/number. Once a camera is activated,
the camera can be controlled for PTZ operation or for camera audio. Moving the active
camera sequentially, one can simply press the Enter button on the remote controller, the
keypad, or keyboard(s).
Right mouse click
Mouse scroll
Left mouse click/
Left mouse double click/
mouse drag

NDVR User Manual 10
Chapter 1-7. Symbols & Icons
The NDR adopts symbols and icons for graphical user interface (GUI) design. These
symbols and icons contain useful information in operating the NDR. All the symbols and
icons are discussed in the rest of the chapter.
Task bar
The task bar shows up on bottom of the main monitor for indicating the operation status of
the NDR while operating the remote controller, the mouse, the keypad, or a keyboard.
The icons of the NDR are described in the follow table:
Mouse menu
Controlled NDR ID/RS-485 ID
The NDR’s ID/RS-485 ID address
Manual recording mode
Schedule recording mode
Zoom mode
Sequence mode

NDVR User Manual 11
CHAPTER 2. NDR OPERATIONS
Most of the time, NDR is operated at the surveillance/live mode. In live monitoring mode,
the information of screen layout and symbols are described in this section.
SCREEN LAYOUT
REC 2007/06/22 11:03:50 HDD 9%
1 2
3
4
5
① Recording indicator
② Date
③ Time
④ HDD recording percentage
⑤ Task bar
Chapter 2-1. Sequential Display
The NDR provides multiplexer feature displaying each camera in full screen
sequentially in specific time period. To perform sequential display, simply press
SEQ button on the remote controller or a keyboard. The sequence icon shows on
the task bar for indicating the NDR is in sequence status. To perform sequence
using mouse, please click on Mouse Menu->Sequence.
Chapter 2-2. Freeze
In live monitoring and playback modes, the NDR provides screen-freezing feature
in which suspicious individuals can be determined. To freeze the screen, press
Freeze button on the remote controller. Press the button again to cancel this
operation.
Chapter 2-3. ROI Mode
The NDR provides 5X and 9X digital zooming (ROI) capability live monitoring and
video playback modes. To perform this feature, press Zoom button on the remote
controller. Once the NDR is in zooming status, press Up, Down, Left, or Right
buttons to move the zooming window around to view other portion of the channel.
Press the Zoom button. It can perform 5X digital zoom, 9X digital zoom, and
normal view screen in sequence.

NDVR User Manual 12
To perform ROI feature using a mouse, please first perform mouse drag for zoom mode. Once
the video is in zoom mode, scroll mouse can perform 5X digital zoom, 9X digital zoom, and
normal view screen.
5X digital zoom 9X digital zoom
Chapter 2-4. CH+ & CH-
In case of scanning through cameras in full screen, channel buttons, CH+ & CH- can
be used to monitor all cameras.
Chapter 2-5. Audio & Mute
Once the audio channel is properly setup, the NDR can output the live audio.
To enable live audio, press Audio button. To disable live audio, one can press
Audio button.
Chapter 2-6. Addressable NDR Control Button
To control one of the NDRs using only one remote controller, please press on
the addressable NDR control button followed by the NDR ID. The rest of the
NDRs are in sleeping mode until one of the NDRs gets called.
Chapter 2-7. NTSC/PAL
To change video system, press on NTSC/PAL button. Password is required if a
user presses on this button.
Chapter 2-8. Language
The NDR provides multi-language on screen display (OSD) support. To change
from one language to another, simply press on Language button.

NDVR User Manual 13
Chapter 2-9. ESC/Shutdown Procedure
To properly shutdown the NDR, please press ESC/Shutdown button for a second. A
password dialog box shows up. Please provide administrator password to perform the task.
Power off the NDR without proper shutdown procedure that it may corrupt a video file. File
recovery procedure may start to recovery the video file when booting up the system.
Chapter 2-10. OK/Cancel Button
The NDR has OK/Cancel operation in menu/submenu system. To perform this operation,
the user can press Menu for OK or ESC for cancel on the keypad or the remote controller.
For keyboard, please press SET button for OK or CANCEL button for cancel.
Chapter 2-11. Page +/-
A user can use page+/- or fast reverse (FR) or fast forward (FF) for changing the page of
Log view, playback event list, WS-Discovery, and table setup

NDVR User Manual 14
CHAPTER 3. PTZ CONTROL
PTZ device can be controlled in live monitoring mode and PTZ setup mode via the keypad
and/or the remote controller. The rest of the chapter describes the ways of controlling PTZ
devices using the keypad and a remove controller.
Chapter 3-1. Instant PTZ Controllable Mode
Instantly controllable PTZ camera (active camera) is shown in yellow color in live monitoring
mode indicating that the camera can be instantly controlled for PTZ operations. Moving the
active camera sequentially, one can simply press the Enter button on the remote controller.
Once a camera is in active mode (text in yellow), major PTZ features can be easily
performed.
Chapter 3-2. Remote Controller & PTZ
PTZ buttons are framed in yellow that contain auto panning, zooming, and zooming out.
Other PTZ and NDR buttons are shown in blue on remote controller. The details are
described as below:
① Tilting the PTZ device up
② Tilting the PTZ device down
③ Panning the PTZ device left
④ Panning the PTZ device right
⑤ Perform auto panning of the PTZ device
⑥ Perform zooming in of the PTZ device
⑦ Perform zooming out of the PTZ device
⑧ Calling presets
Chapter 3-3. Recall Presets
To call a preset, please follow the following instructions:
Press Preset button to enable the calling preset mode.
In Preset mode, preset 01 to 64 directly to recall preset points of the PTZ
device.
5
6
7
2
3
4
8
1

NDVR User Manual 15
CHAPTER 4. RECORDING
Chapter 4-1. Start Recording
The NDR automatically performs recording task after power on. Press REC button on the
keypad or the remote controller that it can change the recording mode from schedule
recording to manual recording. Press REC button again. NDR returns back to schedule
recording again.
Chapter 4-2. Manual Recording
Manual recording is equivalent to emergency recording. In manual recording mode, the
NDR records all the cameras based on recording frame rate. In many cases, there might be
a situation. A user might want to record all the cameras for suspicious events. Manual
recording can now be used for an emergency. If there are motion triggerings or alarm
switches set for the NDR, the events can be recorded in the NDR’s event log.
Chapter 4-3. Schedule Recording
For storage consideration, there are many applications that may be required to record video
after motion triggering or alarm activations. Schedule recording can be used that the NDR
records video based on motion or alarm triggering for certain hours. The schedule table can
be preprogrammed to meet the recording requirement.
Chapter 4-4. Alarm Switch Activation Recording
Recording operation can be triggered by an external alarm switch. An external alarm switch
can activate the NDR for recording. Proper settings such as Alarm Rec Duration and
activation type (N/O or N/C) should be configured before operation. Once one of the alarm
switches gets triggered, the alarm icon (bell) shows at the bottom of each camera channel.
Chapter 4-5. Motion Detection Recording
Motion detection is very useful feature of the NDR that the intrusion detection of a camera
can be detected. Motion detection recording sensors motion variation, and it triggers the
NDR to perform recording task. Once motion detection is activated, the motioned channel
shows an alarm icon (little man) on the screen to inform users.

NDVR User Manual 16
CHAPTER 5. PLAYBACK
To playback, please press Play button on the remote controller, a keyboard, or the keypad.
A playback message box shows up for searching video clips. The details are described in
the following sections:
Chapter 5-1. Time Search
Time search feature can perform date and time search based on recorded video data. This
feature is very easy-to-use, and it allows a user to perform video searching task throughout
hard disk drives. To perform time search operation, simply press Left or Right button on the
highlighted date or time field. To change the date and time, please press Up or Down button.
Chapter 5-2. Event Search
Event list contains information including date, time, event type, and camera channel for the
event. There are external alarm event and motion alarm event that can be found in event list.
To filter out events, please set starting and ending time in the event search dialog box. To
view operation log, please see System->Log View for detail.
PLAYBACK
TIME SEARCH
EVENT SEARCH
RECORD SEARCH
DATE SEARCH
EVENT SEARCH
RECORD TIME EVENT
05/07/04 13:40:4 ALARM CH01
05/07/04 13:40:42 ALARM CH01
05/07/04 13:40:35 ALARM CH01
TIME SEARCH
DATE 2007/09/11
TIME 19/54/00

NDVR User Manual 17
To select an event list item, press Up or Down button.
Press Enter button to play the video clips
To select next page, please press FF or FR button
Chapter 5-3. REC Search
REC SEARCH contains the list when a user presses REC button to activate manual
recording operation. To play the REC Search list, please select Record Search item. A list
of start recording shows up accordingly. Press Up or Down button to select list item for
playback.
Chapter 5-4. Time Search
User can also use calendar and time for performing video search feature.
Chapter 5-5. Other Playback Features
Once one of above playback features is performed, features such as fast forward (FF), fast
rewind (FR), pause, stop, step, and re-play can then be used.
FF: Press Right button, shuttle ring right on the front panel, or FF key on the
remote controller to fast forward the playing video. The speed of fast forwarding
is range from 2X ~ 6X of the original playback speed.
RECORD SEARCH
RECORD TIME
2007/07/04 13:39:47 MANUAL
2007/07/04 13:3 :42 MANUAL

NDVR User Manual 18
FR: Press Left button, shuttle right left on the front panel, or FR key on the
remote controller to fast rewind the playing video. The speed of fast rewinding is
range from 2X ~ 6X of the original playback speed.
PAUSE & STEPPING: press Pause button while playing video that can pause
the video. Once the video is in pausing mode, one can press Left or Right
button on the NDR’s keypad or the remote controller to play the video step-by-
step.
STOP: To stop video playback, press Stop button on the keypad or the remote
controller. The NDR’s screen switches back to playback main menu for other
playback operations. Press ESC button again that it returns to live monitoring
mode.

NDVR User Manual 19
CHAPTER 6. MENU SYSTEM
Chapter 6-1. Setup Menu
Setup menu contains menu settings for camera, monitor, record, alarm, system, network,
PTZ, and backup. The details of all the setup menu items are described in the rest of the
chapters.
Chapter 6-2. Camera Setup
A user can setup camera settings at camera setup option. Camera name, video setup, IP
camera or analog camera setting, WS-Discovery, and camera table can be found at this
option.
Chapter 6-2-1. Camera Name
A user can edit up to 12 characters for a camera name. To setup the camera name, please
type the character using visual keyboard and press Enter button.
CAMERA
CAMERA SELECT 1
CAMERA NAME CAM01
CAMERA DISABLE OFF
VIDEO SETUP
V.LOSS DETECTION ON
CAMERA SOURCE ANALOG
IP CAM ADDRESS 192.16 .0.200
IP CAM SETUP
WS-DISCOVERY
SELECT CAM TABLE
Record
This manual suits for next models
1
Table of contents
Other Lilin DVR manuals

Lilin
Lilin PDR-2160A User manual

Lilin
Lilin DVR216C User manual

Lilin
Lilin DHD204A User manual

Lilin
Lilin DVR004S User manual

Lilin
Lilin PDR 6164 User manual

Lilin
Lilin DVR508 User manual

Lilin
Lilin DVR216B User manual

Lilin
Lilin PDR-400 User manual

Lilin
Lilin PDR-6040 A User manual

Lilin
Lilin DVR304 User manual