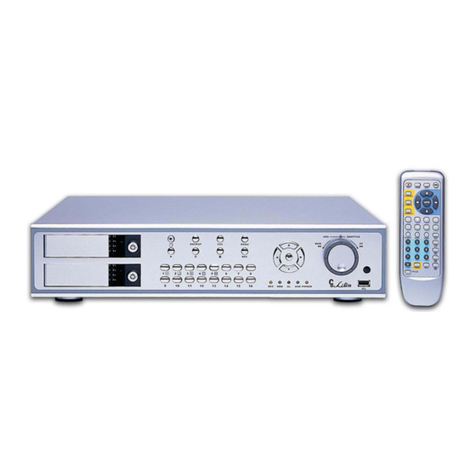
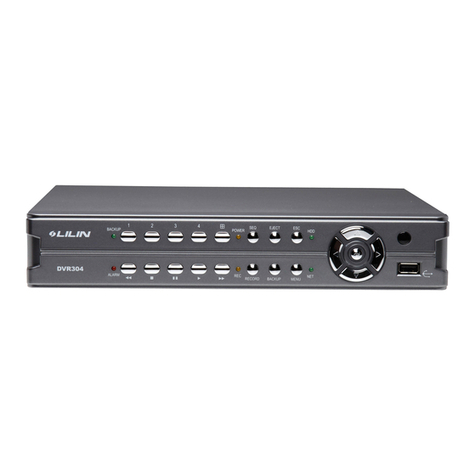
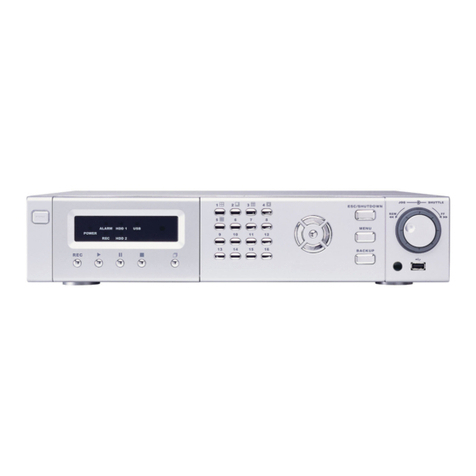
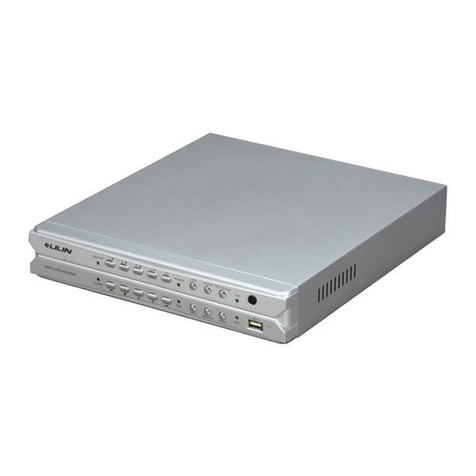
Lilin PDR-2160A User manual

16-CH DVR CD-RW
PDR-2160A/2160S
INSTRUCTION MANUAL
MERIT LI-LIN ENT. CO., LTD
http://www.meritlilin.com 66-2160CSE

Executive Summary
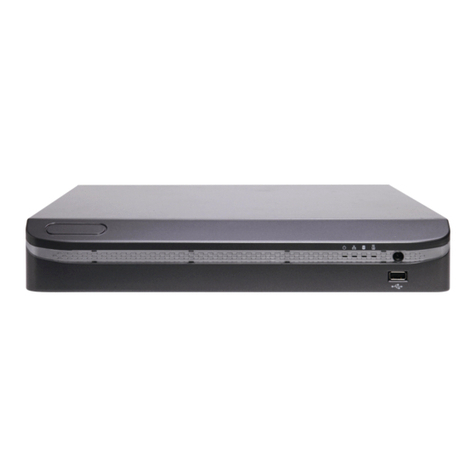
The new PDR-2160 is a high performance standalone 16 Channel Digital Video Recorder (DVR)
designed to perform multiple features such as recording, playback and remote surveillance
simultaneously. Offering unbeatable costs per channel, the network ready PDR-2160 is compact
and simple to use. It can be operated through the on-screen menu, front panel and fully
operational IR remote controller. The unique portable USB drive and the built-in CD-RW further
enhances the DVR, enabling the user download recorded images and upgrade firmware.
Featuring real time display at 480/400 frames per second, the PDR-2160 delivers incredible
performance and functionality. There is the option to have two internal hard drives, one of which
will is hot swappable, allowing it to be easily changed to increase storage without stopping live
monitoring. There are also two external SATA II ports, which are capable of being used in
conjunction with SATA II RAID, providing a maximum storage capacity of 4TB.
Providing network connectivity via Internet Explorer or the supplied propriety software,
management and security staff can view all live and recorded images from a remote location.
Also, the additional benefit of the jog and shuttle feature provides a quick and intuitive way to
search the recordings.
Designed to meet the latest security requirements, features such as the extra watchdog timer
protection, two level user authentication and spot camera switching display provides piece of
mind for the user.
With individual camera setup, users can define features, such as zoneable motion detection,
scheduled recording, external alarm control and user authentication. Complete with advanced
image compression technology ensuring high quality resolution, the new standalone digital video
recorder provides a versatile solution.

Major Features
Built-in CD-RW for backup
ISO-9660 compatible CD, with plug and play
HTTP web-based interface including remote PTZ, playback, and live monitoring
16-channel video inputs up to 480(NTSC) / 400(PAL) frames per second
Up to 120 CIF playback speed
7 days, 24hours grid scheduling for alarm/motion, continuous, and stop recording.
VGA output up to 1280 * 1024 resolution (PDR-2160A)
4 matrix spot outputs (PDR-2160A) with OSD support
2 main outputs with built-in multiple features for split monitoring
1-channel audio input and output for recording
Simultaneous recording, playback, CD-RW backup, network, and live monitoring
Two SATA II HDD, one hot swappable SATA II HDD and one internal SATA II HDD
2 external SATA II ports for external SATA II RAID up to 4TB recording capability
16x12 motion detection grids programmable for each channel
Portable USB 2.0 flash disk and external USB 2.0 CD-RW backup
Easy-to-use jog, shuttle, and 3D joystick controlling setup and playback menus
Trademarks and Registered Trademarks
Microsoft, Windows 2000, Windows XP, Internet Explorer are registered trademarks of Microsoft
Corporation in the U.S. and/or other countries.
Adobe、Adobe PDF are registered trademarks of Adobe Systems Incorporated in the U.S. and/or
other countries.
JavaScript and all Java-based trademarks and logos are trademarks or registered trademarks of
Sun Microsystems, Inc. in the U.S. and/or other countries.
FrogAspi API driver © 2005, at www.forgaspi.org. All rights reserved.
Linux is registered trademarks of the respective holders.
Other names of companies and their products mentioned in this manual may be trademarks or
registered trademarks of their respective owners.
PDR-2160 Instruction Manual 1

Caution
• Do not drop or strike this equipment
• Do not install the equipment near any naked flames or heat sources
• Do not expose this unit to rain, moisture, smoke or dust environment
• Do not cover the opening of the cabinet with cloth and plastic or to install this unit
in poor ventilated places. Allow 10cm between this unit and its surroundings
• Do not continue to operate the unit under abnormal conditions such as detection
of smoke, strange smell or no display on screen while power is turned on
• Do not touch the power connection with wet hands
• Do not damage the power cord or leave it under pressure
• Do not operate this unit near magnet, speaker system, etc., to avoid unnecessary
magnetic interference
• Connection cables should be grounded properly
CAUTION
RISK OF EXPLOSION IF BATTERY IS REPLACED
BY AN INCORRECT TYPE.
DISPOSE OF USED BATTERIES ACCORDING
TO THE INSTRUCTIONS
PDR-2160 Instruction Manual 2

Table of Contents
Chapter 1. Systems Overview ................................................................................................ 7
Chapter 1-1. Before Using PDR-2160........................................................................... 10
Chapter 1-2. PTZ Control Mode .................................................................................... 10
Chapter 1-3. Hot Swappable HDD................................................................................. 12
Chapter 1-4. Connect to External SATA II RAID .......................................................... 13
Chapter 1-5. Surveillance Mode.................................................................................... 14
Chapter 2. PTZ Controls....................................................................................................... 17
Chapter 2-1. Instant PTZ Controllable Mode ............................................................... 17
Chapter 2-2. Remote Controller & PTZ......................................................................... 17
Chapter 2-3. Recall Presets........................................................................................... 17
Chapter 3. Recording ...........................................................................................................18
Chapter 3-1. Start Recording......................................................................................... 18
Chapter 3-2. Stop Recording......................................................................................... 18
Chapter 3-3. Emergency Recording ............................................................................. 18
Chapter 3-4. Motion Detection Recording ................................................................... 18
Chapter 3-5. Schedule Recording................................................................................. 18
Chapter 4. Playback.............................................................................................................. 19
Chapter 4-1. Time Search (M+S)...................................................................................19
Chapter 4-2. Event Search............................................................................................. 20
Chapter 4-3. REC Search............................................................................................... 20
Chapter 4-4. Play Entire HDD........................................................................................ 21
Chapter 4-5. Other Playback Features.........................................................................21
Chapter 5. System Start-up.................................................................................................. 22
Chapter 6. Menu System...................................................................................................... 23
Chapter 6-1. Setup Menu............................................................................................... 23
Chapter 6-2. Camera Setup ........................................................................................... 23
Chapter 6-2-1. Camera Name.................................................................................. 24
Chapter 6-2-2. Enable Name ................................................................................... 24
Chapter 6-2-3. Channel Enable............................................................................... 25
Chapter 6-2-4. Video Setup.....................................................................................25
Chapter 6-2-5. Sequence......................................................................................... 26
Chapter 6-2-6. Boarder Color.................................................................................. 26
Chapter 6-2-7. Mode ................................................................................................ 26
Chapter 6-2-8. V/H Adjust........................................................................................ 27
PDR-2160 Instruction Manual 3

Chapter 6-3. Monitor Setup ........................................................................................... 27
Chapter 6-3-1. VGA Setup ....................................................................................... 27
Chapter 6-3-2. VGA V/H SYNC................................................................................ 28
Chapter 6-3-3. Main Monitor Alert .......................................................................... 28
Chapter 6-3-4. Spot Monitor.................................................................................... 28
Chapter 6-3-5. Alerted Camera ............................................................................... 28
Chapter 6-3-6. Enable Sequence............................................................................. 28
Chapter 6-3-7. Caption Enable ................................................................................ 28
Chapter 6-3-8. Set Spot Sequence .......................................................................... 28
Chapter 6-4. Record Setup............................................................................................ 29
Chapter 6-4-1. Schedule.......................................................................................... 29
Chapter 6-4-2. Recording Mode ............................................................................. 29
Chapter 6-4-3. Recording Speed ............................................................................ 30
Chapter 6-4-4. Recording Quality........................................................................... 30
Chapter 6-4-5. Playback Speed ............................................................................. 30
Chapter 6-4-6. Recording Cannel Enable............................................................. 30
Chapter 6-4-7. Audio Channel ............................................................................... 30
Chapter 6-5. Alarm Setup .............................................................................................. 31
Chapter 6-5-1. Camera Select................................................................................. 31
Chapter 6-5-2. Alarm Enable................................................................................... 31
Chapter 6-5-3. Motion Enable ................................................................................. 31
Chapter 6-5-4. Sensitivity........................................................................................ 31
Chapter 6-5-5. Motion Area Set .............................................................................. 32
Chapter 6-5-6. Buzzer Time..................................................................................... 32
Chapter 6-5-7. Alarm Recording Time ................................................................... 32
Chapter 6-5-8. Buzzer Enable................................................................................. 32
Chapter 6-5-9. Alarm Email ..................................................................................... 32
Chapter 6-6. System Setup............................................................................................ 33
Chapter 6-6-1. Date/Time......................................................................................... 33
Chapter 6-6-2. HDD Format..................................................................................... 34
Chapter 6-6-3. HDD Information ............................................................................. 34
Chapter 6-6-4. Factory Reset.................................................................................. 35
Chapter 6-6-5. Video System.................................................................................. 35
Chapter 6-6-6. DVR/485 ID....................................................................................... 36
Chapter 6-6-7. Language......................................................................................... 36
PDR-2160 Instruction Manual 4
Chapter 6-6-8. Password......................................................................................... 36
Chapter 6-6-9. Firmware Update............................................................................. 37
Chapter 6-7. Network Setup .......................................................................................... 39
Chapter 6-7-1. Network Enable............................................................................... 39
Chapter 6-8. PTZ Setup.................................................................................................. 40
Chapter 6-8-1. Camera Select................................................................................. 40
Chapter 6-8-2. Fast Dome Type.............................................................................. 40
Chapter 6-8-3. Preset Adjust................................................................................... 40
Chapter 6-8-4. Preset............................................................................................... 41
Chapter 6-8-5. Dwell ................................................................................................ 41
Chapter 6-8-6. Speed............................................................................................... 41
Chapter 6-8-7. Adjust PTZ Position........................................................................ 41
Chapter 6-8-8. Save ................................................................................................. 41
Chapter 6-8-9. Clear All Preset ............................................................................... 41
Chapter 6-8-10. Keyboard Direct Access .............................................................. 42
Chapter 6-9. Backup....................................................................................................... 42
Chapter 6-9-1. Internal CD-RW Backup ................................................................. 43
Chapter 6-9-2. External CD-RW Backup................................................................43
Chapter 6-9-3. USB Flash Disk Backup................................................................. 44
Chapter 7. Playback on PC.................................................................................................. 45
Chapter 7-1. NetworkViewer Program.......................................................................... 45
Chapter 7-2. Play Recorded PC Files ........................................................................... 46
Chapter 7-3. Play Recorded CD .................................................................................... 46
Chapter 8. Network............................................................................................................... 47
Chapter 8-1-1. Configuration.................................................................................. 47
Chapter 8-1-2. Internet Ports .................................................................................. 47
Chapter 8-1-3. Network Live Monitoring using NetworkViewer.......................... 47
Chapter 8-1-4. Disconnect PDR-2160 .................................................................... 47
Chapter 8-1-5. Capturing Video to AVI FIles.......................................................... 48
Chapter 8-1-6. Capturing Video To JPEG Files..................................................... 48
Chapter 8-1-7. Save File To PC............................................................................... 48
Chapter 8-1-8. Remote Playback............................................................................ 48
Chapter 8-2. Access PDR-2160 via Internet Browser .................................................. 49
Chapter 8-2-1. Before Using Internet..................................................................... 50
Chapter 8-2-2. Logon............................................................................................... 50
PDR-2160 Instruction Manual 5

Chapter 8-2-3. Show Frame Size............................................................................ 51
Chapter 8-2-4. Split Window Display Buttons....................................................... 51
Chapter 8-2-5. Hyper Link Panel ............................................................................ 51
Chapter 8-2-6. Playback Over Network.................................................................. 52
Chapter 8-2-7. Save AVI or JPEG file .....................................................................53
Chapter 8-2-8. Configure PDR-2160 via Web page............................................... 53
Chapter 8-2-9. PDR 2160 Internal Server Settings ................................................ 54
Chapter 8-2-10. User Settings.................................................................................. 54
Chapter 8-2-11 Timer Settings................................................................................. 55
Chapter 8-2-12 Alarm Email Notification ................................................................ 55
Chapter 8-2-13 System Status................................................................................. 56
Chapter 8-2-14 Network Settings ............................................................................ 56
Chapter 8-2-15. PTZ Settings................................................................................... 57
Chapter 9. Keyboard Connections...................................................................................... 58
Chapter 9-1. Connection Between PDR-2160 and Keyboard...................................... 58
Chapter 9-2. Daisy Connection of multiple PDR-2160 and Keyboard....................... 58
Chapter 9-3. Connection of PDR-2160 and PTZ.......................................................... 59
Chapter 9-4. Multiple Keyboards and Multiple PDR-2160 Connection ..................... 60
Chapter 9-5. Keyboard Control DVR and PTZ.............................................................61
Chapter 9-5-1. Switch to PDR-2160 DVR Control Mode....................................... 61
Chapter 9-5-2. Control DVR Multiplexer Features................................................61
Chapter 9-5-3. Control DVR’s Menu Setup............................................................ 63
Chapter 9-5-4. Control DVR Playback.................................................................... 63
Chapter 9-5-5. Control PTZ..................................................................................... 64
Appendix................................................................................................................................. 65
External Alarm Switches ................................................................................................ 65
Alarm Switch Pin Assignment Table............................................................................. 65
RS-485 Keyboard I/O Assignment ................................................................................. 65
RS-485 PTZ Pin Assignment .......................................................................................... 66
PDR-2160 Specifications ................................................................................................ 67
PDR-2160 Instruction Manual 6

Chapter 1. Systems Overview
Front View
1. LED status panel 10. Pause button
Please see system LED status panel 11. Stop video playback button
2. Remote Controller IR receiver 12. Mode switch
3. Split display & camera buttons Split window or camera selection buttons
a. 4, 8, 9, 13, 16 split display when mode 13. Down button
switch is on a. Move cursor down at menu mode.
b. Camera selection mode. b. Tilt down at PTZ control mode.
4. Left button 14. Right button
a. Move cursor left at menu setup. a. Move cursor right at menu mode.
b. Pan left at PTZ control mode. b. Pan right at PTZ control mode.
c. Decrease a value. c. Increase a value.
5. Enter/set button 15. Shuttle ring
a. Enter or set operation for menu setup. a. Fast forward video at playback mode.
b. Instant PTZ camera selection at live mode. b. Instant video FR or instant event list at
6. Up button live mode.
a. Enter or set operation for menu setup. 16. USB 2.0 connector
b. Tilt up at PTZ control mode. a. USB flash disk
7. Jog dial b. External CD-RW or DVD-RW
a. Play recorded images frame by frame at 17. Storage panel opening button
playback mode. 18. Built-in CD-RW drive
b. Perform zoom in and out for PTZ device 19. Emergency CD Eject Hole
live mode. 20. Removable HDD tray
8. Recording/stop recording button 21. Removable HDD lock
Start recording operation or stop the 22. Menu button
recording task. 23. Esc button
9. Play button 24. Backup button
a. Invoke playback selection menu.
b. Replay after FF, FR, Pause, stepping when
playing video.
PDR-2160 Instruction Manual 7

Rear View
1. Spot outs (2160S) 10. RS-485 Keyboard-out
a. Four spot outs controllable independently Connect to the next DVR’s input.
by keyboard. RJ-45 connector
b. Each spot out can be programmable for 11. Audio-out
alarmed camera display and sequence 12. RS-485 out — PTZ devices
display. 13. Alarm in/out
2. Main outs Alarm input/output connector, 16 alarm
One main out and one looping for main output. inputs, 1 N/O alarm output, 1 N/C alarm
3. VGA connector (optional for 2160S) output, and external recording
4. Audio 14. SATA II connectors
Four 4 RCA audio connector, only one audio Two SATA II connectors for external
can be recorded at a given time. SATA II RAID
5. Network RJ-45 connector 15. Looping — camera looping
6. Cooling fan 16. Video in — 16 channel analog video
7. Power switch 17. Power connector
8. S-video output AC 110V/220V power input
9. RS-485 Keyboard-in
Connected from the previous DVR’s
keyboard output.
RJ-45 connector
System LED Status Panel
System LEDs are meaningful while operating
PDR-2160. The status of each LED is
described as in the following table:
LED Description Color
REC Recording indicator Yellow
HDD 1 Master HDD recording indicator Green (blinking)
HDD 2 Slave HDD recording indicator Green (blinking)
ALARM External alarm switches indicators when motioned
or alarmed Red
USB USB portable disk connected indicator Green (blinking)
CD-RW CD writing indicator Green (blinking)
POWER PDR-2160 power on/off indicator Yellow
PDR-2160 Instruction Manual 8

Remote controller
The button arrangement of the remote controller is designed for easy-to-use purposes.
Buttons are separated in regions based on their features including DVR, PTZ, numerical keys,
and hybrid keys. The details are described in the following table.
DVR operational keys (gray area)
MENU Setup menu
ESC Escape/exit/disable alarm
buzzer/clear alarm OSD
ZOOM 2X digital video zooming
REC Record/stop recording
FREEZE Live video freeze
Pause
Playback
Stop
Fast forward
Fast rewind
Next single channel
Previous single channel
4 split display
8 split display
9 split display
13 split display
16 split display
SEQ Sequential display
MUTE Mute
AUDIO Audio on
BACKUP Video backup
DVR Addressable DVR control
NTSC/PAL Video system
LANGUAGE Language selection
PTZ features (yellow area) DVR & PTZ hybrid keys (blue area)
Auto Pan Perform auto pan feature Move up/tilt up
Zoom in Zoom in of a PTZ camera Move down/tilt down
Zoom out Zoom out of a PTZ camera Move left/pan left
Preset Call preset of a PTZ camera Move right/pan right
Enter/set
Numerical keys (green area)
0 to 9 Numerical keys
PDR-2160 Instruction Manual 9

Remote Controller Status
Remote Controller
Status Status
DVR 012:004 Addressable DVR Control 一DVR ID of local machine: Current
addressed DVR ID
CH 02 Call camera in full screen mode 一Call camera#2 in full screen mode
PRESET 04 Call preset 一Recall preset #4 of a PTZ device
Chapter 1-1. Before Using PDR-2160
Please read this chapter before operating PDR-2160. Features, terms, and symbols are
covered in this chapter.
Chapter 1-2. PTZ Control Mode
Instant controllable PTZ camera is shown in yellow color for the camera name/number in live
monitoring mode indicating that the camera can instantly be controlled for PTZ operations.
Moving the active camera sequentially, one can simply press the Enter button on the remote
controller or keypad. Once a camera is in active mode (text in yellow), major PTZ features can
be easily performed.
Jog & Shuttle
Jog & shuttle menu--PDR-2160 adopts Jog & Shuttle mainly in menu system and video
playback modes. In menu setup mode, rolling Jog is to move the cursor of the menu system
up or down. Shuttle can be used to move the cursor of the menu system left and right.
Jog & shuttle during video playback--During video playback mode, Jog &
Shuttle acts as conventional VCR for video stepping forward (rewind) and fast
forward (rewind).
Instant FR & list modes—Turning shuttle ring left invokes Instant Rewind feature. Instant
Rewind rewinds and plays the recorded video from the moment of the operation. It allows the
operator quickly review the video few seconds or few minutes ago.
PDR-2160 Instruction Manual 10

Turning shuttle ring right invokes Event List (Instant Event). Operator can quickly scan through
the event list for suspicious events. Instant Rewind and Instant Event features are identical by
pressing FF or FR button on front panel or keyboard.
Jog in live monitoring mode—Dialing jog dial in clockwise for a controlled PTZ camera can
perform zooming in for the PTZ device. Dial jog dial in counter clockwise for zooming out of
the PTZ camera.
Symbols & Icons
PDR-2160 adopts many symbols and icons for graphical user interface (GUI) design. These
symbols and icons contain useful information in operating PDR-2160. All the symbols and icons
are discussed in the rest of the chapter.
On-Line Help
Most of the time, the menu systems including menu setup and playback menu contain the
operating usage at the bottom of each menu. User can use the menu help to operate PDR-
2160 if the user manual is not handy.
↵SET ←→ SELECT ↑↓ MOVE ESC EXIT
Icons
PDR-2160 provides graphical On Screen Display (OSD) technology to show the operating
status on screen. The graphical user interface, icons, are described as in the chart bellow:
Freezing screen Record
Network connected Playback
Motion alarm Pause
Sequential display Fast rewind
External alarm Fast forward
Zooming
PDR-2160 Instruction Manual 11

Chapter 1-3. Hot Swappable HDD
PDR-2160 supports one hot swappable SATA II hard disk drive (HDD) and one fixed internal
SATA II hard disk. Most of the SATA II HDDs with 137 Giga bytes and above in the market are
supportable by PDR-2160.
Placing HDD for recording, follow these steps:
1. Place HDD on HDD tray.
2. Fasten HDD on the HDD tray with supplied screws.
3. Insert HDD tray into PDR-2160.
Caution: Fixing HDD on the HDD tray without tighten supplied screws may cause heating
problem of PDR-2160.
To lock PDR-2160 and to perform recording operation, please use the key to lock the HDD tray
in counter clockwise and press REC button. To remove HDD, please press REC button again
to stop recording task and unlock the HDD tray.
Lock HDD tray Unlock HDD tray
Caution: PDR-2160 provides HDD hot swappable, but it is strongly recommend stopping
recording before changing a HDD.
PDR-2160 Instruction Manual 12

Chapter 1-4. Connect to External SATA II RAID
To connect external SATAII RAID, please follow steps:
1. Power off PDR-2160.
2. Open the case of PDR-2160.
3. Plug SATA cable to external SATA connector.
4. Close the case of PDR-2160.
5. Connect PDR-2160 to external SATA II RAID using SATA cable.
6. Power on PDR-2160. Startup menu shows the HDD size, if the SATAII RAID can be
detected.
Caution: Please read external SATA II RAID user’s manual thoroughly before installation. It is
strongly recommended to use same size HDDs for the SATA RAID storage.
PDR-2160 Instruction Manual 13

Chapter 1-5. Surveillance Mode
Most of the time, PDR-2160 is operated at the surveillance mode. The information of screen
layout and symbols are described in this section.
SCREEN LAYOUT
1 2 3 4
57
68
9
①Date
②Day of the week
③Time
④HDD recording percentage and master (M)/slave (S) HDD indicator
⑤Recording symbol (circle in red)/scheduling recording (circle in yellow)
⑥Alarm activation indicator (bell in yellow)
⑦Yellow camera ID: controllable PTZ device
⑧Motion detection indicator (little man in yellow)
⑨Remote controller status
PDR-2160 Instruction Manual 14

Split Display Modes
PDR-2160 can provide various split display modes on live and playback monitoring using
remote controller and keypad.
16-Channel Split Display 13-Channel Split Display 9-Channel Split Display
8-Channel Split Display 4-Channel Split Display Full Screen Mode
Sequential Display
PDR-2160 provides the multiplexing feature displaying each camera in full
screen in a sequence with specific time period. To perform sequential display,
simply press SEQ on remote controller. A sequential display symbol shows
on top of the screen indicating that PDR-2160 is in sequential status.
Freeze In monitoring and playback modes, PDR-2160 provides screen-freezing
feature in which the suspicious individuals can be determined. To freeze
the screen, press Freeze button on the remote controller. Press the
button again to cancel the freezing screen.
Zoom PDR-2160 provides 2X digital zooming capability in screen freezing, live
monitoring, and video playback modes. Other split windows are all allowed
in using this feature. To perform this feature, press Zoom button on the
remote controller. Once PDR-2160 is in zooming status, press Up, Down,
Left, or Right buttons to move the zooming window around to view other
portion of the channel. Press the Zoom button again can cancel the zooming
window and return to normal screen.
PDR-2160 Instruction Manual 15

CH+ & CH- In case of scanning through each full screen channel, CH+ & CH- can be
used to monitor each camera. Press CH+ button that each camera channel
in full screen gets called in ascending sequence. Press CH- button that each
camera channel gets called in descending sequence.
Audio & Mute Once the audio channel is properly setup, PDR-2160 can output live audio.
To disable live audio, one can press Mute button. To enable live audio,
press Audio button.
Addressable DVR Control Button
To control one of PDR-2160 DVRs using only one remote controller, please press
Addressable DVR Control Button followed by the DVR ID and Enter key. The rest
of the PDR-2160 DVRs other than the one in control are going to stop response to
remote controller.
NTSC/PAL
To change video system, press NTSC/PAL button.
Language PDR-2160 provides multi-language on screen display (OSD) support. To change
from one language to another, simply press Language button.
PDR-2160 Instruction Manual 16

Chapter 2. PTZ Controls
PTZ device can be controlled in live monitoring mode and PTZ setup mode via a keypad and/or
a remote controller. The rest of the chapter describes the ways of manipulating PTZ devices
using a keypad and a remove controller.
Chapter 2-1. Instant PTZ Controllable Mode
Instant controllable PTZ camera is shown in yellow color for the camera name/number at live
monitoring mode indicating that the camera can be instantly controlled for PTZ operations.
Moving the active camera sequentially, one can simply press the Enter button on the remote
controller. Once a camera is in active mode (text in yellow), major PTZ features can be easily
performed.
Chapter 2-2. Remote Controller & PTZ
PTZ buttons are framed in yellow that contain auto panning, zooming, and zooming out. Other
PTZ and DVR buttons are shown in blue on remote controller. The details are described as
follows:
①Tilting the PTZ device up
②Tilting the PTZ device down
③Panning the PTZ device left
④Panning the PTZ device right
⑤Perform auto panning of the PTZ device
⑥Perform zooming in of the PTZ device
⑦Perform zooming out of the PTZ device
⑧Calling presets
8
4
3
2
1
5
6
7
Chapter 2-3. Recall Presets
To call preset, please follow the following instructions:
• Press Preset button to enable the calling preset mode. The blinking “Preset”
text on live monitoring screen indicates that PDR-2160 is in Preset mode.
• In Preset mode, preset 01 to 16 directly to recall preset points of the PTZ
device.
PDR-2160 Instruction Manual 17

Chapter 3. Recording
Chapter 3-1. Start Recording
To start recording, press REC button on the keypad or the remote controller. The
red recording icon shows on monitor at each camera’s position, and the REC LED
goes on.
Chapter 3-2. Stop Recording
To stop recording, press REC button again to stop the recording operation. Both
REC button and REC LED go off. The recording operation for all the recorded
cameras is disabled.
Chapter 3-3. Emergency Recording
Recording operation can be triggered by an external alarm switch. There are up to 16 external
alarm switches that can be installed for cameras. External alarm switches can be triggered
and inform PDR-2160 for emergency recording. Proper settings such as Alarm Rec Duration
and activation type (N/O or N/C) should be configured before this operation. Once one of the
alarm switches gets triggered, the alarm icon (yellow bell) shows on monitor at the bottom of
each camera channel.
Chapter 3-4. Motion Detection Recording
Motion detection is very useful feature of PDR-2160 that the intrusion detection of a camera’s
view can be detected. Motion detection recording sensors motion variation, and it triggers
PDR-2160 to perform recording task. Once motion detection is active, the motioned channel
activates an alarm symbol (little man in yellow) on the screen to inform users.
Chapter 3-5. Schedule Recording
Schedule recording table allows a user to define the specific time period for recording on a
weekly basis. The specific recording hour can also be set to schedule or motion. One can
preview the record scheduling table at Setup →Record →Schedule. PDR-2160 performs
recording operation based on the scheduling table in every hour. To set the recording hour,
please select Up, Down, Left, or Right button to move cursor. Press enter (toggle mode) to
select the schedule recording mode. Press enter for 5 seconds to set this recording mode for
the day.
PDR-2160 Instruction Manual 18
This manual suits for next models
1
Table of contents
Other Lilin DVR manuals

Lilin
Lilin DVR708 User manual

Lilin
Lilin DVR216B User manual

Lilin
Lilin NVR404C User manual

Lilin
Lilin nvr400L User manual

Lilin
Lilin DHD204A User manual

Lilin
Lilin DVR308 User manual

Lilin
Lilin DVR216C User manual

Lilin
Lilin PDR-6040 A User manual

Lilin
Lilin PDR 6164 User manual

Lilin
Lilin PDR-3160 User manual