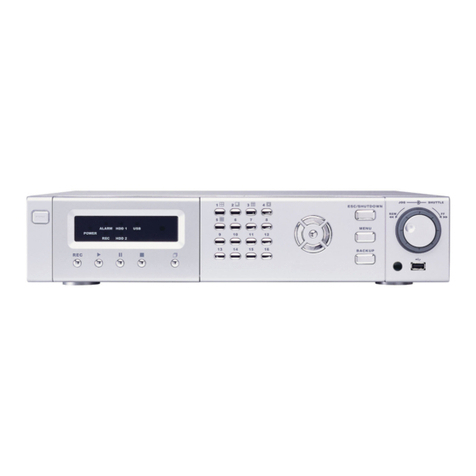
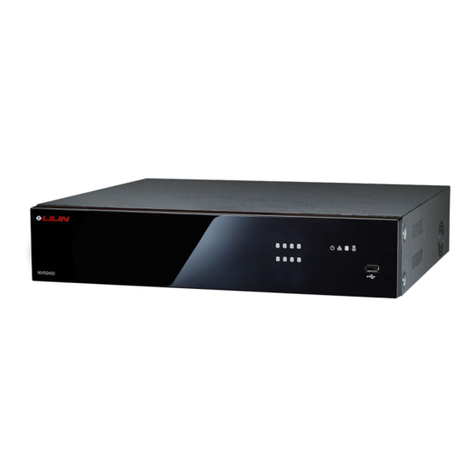
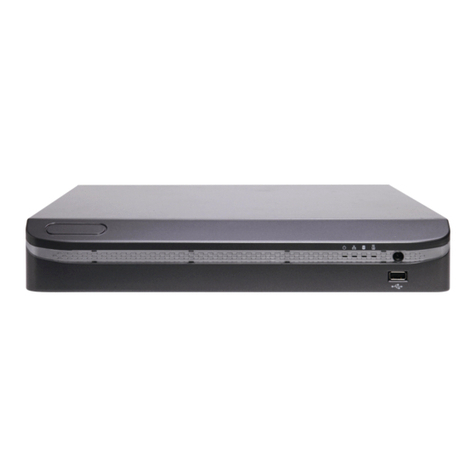
Lilin PDR-3160 User manual

16CH Stand Alone Digital Video Recorder
PDR-3160
INSTRUCTION MANUAL

PDR-3160 User Manual 1
Executive Summary
PDR-3160 is a high performance stand-along digital video recorder (DVR) with
32-bits RISC processor which can perform multiplex DVR features
simultaneously including Recording, Live Monitoring, Playback, and Network
Monitoring.
It is designed by the most advanced technologies of Merit Lilin. These
technologies enable users to enjoy extreme flexibilities including Jog & Shuttle
menu, USB portable disk backup, Integrated DVR & PTZ remote controller, and
quick video searching time bar user interface.
Securities are highly concerned during design phase. Many features such as
non-stop hot swappable HDD recording, multiplex system design, instant
controllable PTZ camera, system alarm & motion event lists, and user
authentication provide maximum securities in operating PDR-3160.
The quality and reliability of PDR-3160 are strictly monitored and controlled
throughout the manufacturing processes by Merit Lilin.
Major Features
16-channel video inputs
1-channel audio Input and output
Simultaneous recording & playback
Built-in multiplex features for split monitoring
Up to 480fps live display rate
Two hot swappable HDDs
16x12 motion detection grids
Portable USB disk backup & firmware update
Remote controller
HTTP for downloading network viewer application
Jog & Shuttle for menu systems

PDR-3160 User Manual 2
CAUTIOIN
Do not drop or strike this equipment
Do not install the equipment near any naked flames or heat
sources
Do not expose this unit to rain, moisture, smoke or dust
environment
Do not cover the opening of the cabinet with cloth and
plastic or to install this unit in poor ventilated places. Allow
10cm between this unit and its surroundings
Do not continue to operate the unit under abnormal
conditions such as detection or smoke, strange smell or no
display on screen while power is turned on
Do not touch the power connection with wet hands
Do not damage the power cord or leave it under pressure
Do not operate this unit near magnet, speaker system, etc.,
to avoid unnecessary magnetic interference
Connection cables should be grounded properly

PDR-3160 User Manual 3
TABLE OF CONTENTS
CHAPTER 1. SYSTEMS OVERVIEW.............................................................5
Chapter 1-1. BEFORE USING PDR-3160 .................................................8
Chapter 1-2. SURVEILLENCE MODE.....................................................11
CHAPTER 2. PTZ CONTROLS ....................................................................14
Chapter 2-1. INSTANT PTZ CONTROLLABLE MODE............................14
Chapter 2-2. REMOTE CONTROLLER & PTZ ........................................14
Chapter 2-3. RECALL PRESETS ............................................................15
CHAPTER 3. RECORDING ..........................................................................16
Chapter 3-1. START RECORDING..........................................................16
Chapter 3-2. STOP RECORDING ...........................................................16
Chapter 3-3. EMERGENCY RECORDING..............................................16
Chapter 3-4. MOTION DETECTION RECORDING .................................16
Chapter 3-5. SCHEDULE RECORDING .................................................16
CHAPTER 4. PLAYBACK SEARCH .............................................................17
Chapter 4-1. TIME SEARCH (M+S) ........................................................17
Chapter 4-2. EVENT SEARCH ................................................................18
Chapter 4-3. REC SEARCH ....................................................................18
Chapter 4-4. OTHER PLAYBACK FEATURES........................................19
CHAPTER 5. SYSTEM START-UP...............................................................20
CHAPTER 6. MENU SYSTEM......................................................................21
Chapter 6-1. SETUP MENU ....................................................................21
Chapter 6-2. CAMERA SETUP................................................................21
Chapter 6-2-1. CAMERA NAME................................................................ 22
Chapter 6-2-2. ENABLE NAME................................................................. 22
Chapter 6-2-3. Video Setup................................................................22
Chapter 6-2-4. SEQUENCE....................................................................... 23
Chapter 6-2-5. BOARDER COLOR .......................................................... 23
Chapter 6-3. RECORD SETUP ...............................................................23
Chapter 6-3-1. SCHEDULE........................................................................ 24
Chapter 6-3-2. REC MODE........................................................................ 24
Chapter 6-3-3. REC SPEED ...................................................................... 24
Chapter 6-3-4. RECORD QUALITY.......................................................... 25
Chapter 6-3-5. PLAYBACK SPEED......................................................... 25
Chapter 6-3-6. REC CHANNEL ENABLE............................................... 25

PDR-3160 User Manual 4
Chapter 6-3-7. AUDIO CHANNEL............................................................ 25
Chapter 6-4. ALARM SETUP...................................................................26
Chapter 6-4-1. CAMERA SELECT............................................................ 26
Chapter 6-4-2. ALARM ENABLE............................................................... 26
Chapter 6-4-3. MOTION ENABLE ............................................................ 26
Chapter 6-4-4. SENSITIVITY..................................................................... 26
Chapter 6-4-5. MOTION AREA SET......................................................... 27
Chapter 6-4-6. BUZZER TIME................................................................... 27
Chapter 6-4-7. ALARM REC TIME............................................................ 27
Chapter 6-5. SYSTEM SETUP ................................................................28
Chapter 6-5-1. DATE/TIME ........................................................................ 28
Chapter 6-5-2. HDD FORMAT................................................................... 29
Chapter 6-5-3. HDD INFO .......................................................................... 29
Chapter 6-5-4. FACTORY RESET ............................................................ 30
Chapter 6-5-5. VIDEO SYSTEM ............................................................... 30
Chapter 6-5-6. BUZZER ENABLE ............................................................ 30
Chapter 6-5-7. PASSWORD ...................................................................... 30
Chapter 6-5-8. FIRMWARE UPDATE....................................................... 32
Chapter 6-6. NETWORK ENABLE.................................................................. 33
Chapter 6-7. PTZ SETUP ........................................................................34
Chapter 6-7-1. CAMERA SELECT............................................................ 34
Chapter 6-7-2. FAST DOME TYPE........................................................... 34
Chapter 6-7-3. PRESET ADJUST............................................................. 35
Chapter 6-7-4. PRESET ............................................................................. 35
Chapter 6-7-5. DWELL................................................................................ 35
Chapter 6-7-6. SPEED................................................................................ 35
Chapter 6-7-7. ADJUST POS .................................................................... 36
Chapter 6-7-8. SAVE................................................................................... 36
Chapter 6-8. BACKUP .............................................................................37
APPENDIX.....................................................................................................42
EXTERNAL ALARM SWITCHES..............................................................42
PDR-3160 STORAGE MEDIA SUPPORTING LIST .................................43
120 GB HARD DISK RECORDING TABLE ..............................................44

PDR-3160 User Manual 5
Chapter 1. SYSTEMS OVERVIEW
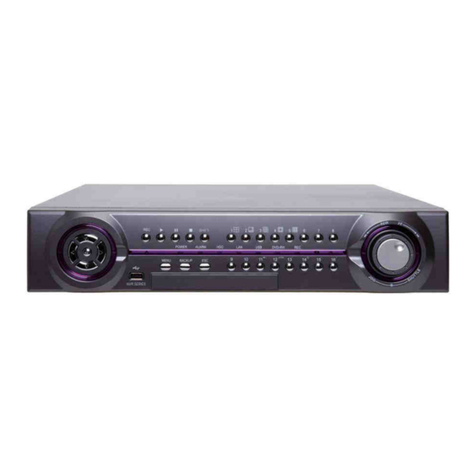
FRONT VIEW
1. HDD hot swappable lock
2. HDD hot swappable tray
3. Play button
4. Mode button
5. Pause button
6. Backup button
7. Stop button
8. ESC button
9. REC button
10. Menu button
11. Up, down, left, right, and
enter buttons
12.
Split display buttons—4 split, 8 split,
9 split, 13 split, and 16 split buttons
13. Camera 1 to 16
14. REC LED (yellow)
15. HDD LED (green)
16. AL LED (red)
17. USB LED (green)
18. POWER (yellow)
19. Jog & shuttle
20. USB connector
21. IR receiver

PDR-3160 User Manual 6
REAR VIEW
Cameras inputs 1-16 (BNC connectors)
Monitor output (BNC connector)
S-Video
Audio inputs (RCA connector)
Audio output (RCA connector)
RJ-45 (LAN connector)
External alarm switches (25 pins)—RS-485, 16 alarm input switches, 1
N/O alarm output, and 1 N/C alarm output.
PDR-3160 power switch
AC power input
REMOTE CONTROLLER
The button arrangement of the remote controller is designate for easy-to-use
purposes. Buttons are separated in regions based on their features including
PDR-3160 operational keys, pan, tilt, and zoom camera device (PTZ)
operational keys, numerical keys, and hybrid keys of PDR-3160 and PTZ. The
details are described in the following table.

PDR-3160 User Manual 7
PDR-3160 operational keys (gray area)
MENU Setup menu
ESC Escape/exit
ZOOM 2X digital video zooming
REC Record/stop recording
FREEZE Live video freeze
Pause
Playback
Stop
Fast forward
Fast rewind
Next single channel
Previous single channel
4 split display
8 split display
9 split display
13 split display
16 split display
SEQ Sequential display
MUTE Audio mute
Audio Audio on
BACKUP Video backup
PTZ features (yellow area) PDR-3160 & PTZ hybrid keys (blue
area)
AUTO PAN Perform auto pan
feature Move up/tilt up
ZOOM IN Zooming in of a fast
dome camera Move down/tilt down
ZOOM OUT Zooming out of a fast
dome camera Move left/pan left
PRESET Call preset of a fast
dome camera Move right/pan right
Enter/set
Numerical keys (green area)
0 to 9 Numerical keys

PDR-3160 User Manual 8
Chapter 1-1. BEFORE USING PDR-3160
Please read the chapter before operating PDR-3160. Features, terms and
symbols are covered in this chapter.
PTZ CONTROL MODE
Instant controllable PTZ camera is shown in yellow color for the camera
name/number in live monitoring mode indicating that the camera can instantly
be controlled for PTZ operations. Moving the active camera sequentially, one
can simply press the Enter button on the remote controller or keypad. Once a
camera is in active mode (text in yellow), major PTZ features can be easily
performed.
JOG & SHUTTLE
PDR-3160 adopts Jog & Shuttle mainly in menu system and video playback
modes. In menu setup mode, rolling Jog is to move the cursor of the menu
system up or down. Shuttle moves the cursor of the menu system left and right.
During video playback mode, Jog & Shuttle acts as conventional VCR for video
stepping forward (rewind) and fast forward (rewind).
SYMBOLS & ICONS
PDR-3160 adopts many symbols and icons for graphical user interface (GUI)
design. These symbols and icons contain useful information in operating PDR-
3160. All the symbols and icons are discussed in the rest of the chapters.

PDR-3160 User Manual 9
MENU HELP
Most of the time, the menu systems including menu setup and playback menu
contain the operating usage at the bottom of each menu. User can use the
menu help to operate PDR-3160 if the user manual is not handy.
SYSTEM LED STATUS PANEL
System LEDs are meaningful while operating PDR-3160. The status of each
LED is described as in the following table:
LED Description Color
REC Recording indicator Yellow
HDD HDD reading & writing indicator Green (blinking)
AL External alarm switches indicators Red
USB USB portable disk connected indicator Green
POWER PDR-3160 power on/off indicator Yellow
ICONS
PDR-3160 provides graphical On Screen Display (OSD) technology to show
the operating status on screen. The graphical user interface, icons, are
described as in the chart bellow:
Freezing screen Record
Network connected Playback
Motion alarm Pause
Sequential display Fast rewind
External alarm Fast forward
Zooming

PDR-3160 User Manual 10
HOT SWAPABLE HDD
PDR-3160 supports two hot swappable IDE HDDs (hard disk drives). Most of
the IDE HDDs with 138 Giga bytes and above in the market are supportable by
PDR-3160.
To lock PDR-3160 and to perform recording operation, please use the key to
lock the HDD tray in counter clockwise. PDR-3160 resumes recording, if PDR-
3160 was in recording mode.
To pull the HDD out of PDR-3160, first unlock the HDD tray in clockwise. If
PDR-3160 is in recording mode, the recording operation will be stopped.
Caution
Please use “cable select” (HDD default setting) mode
while installing HDDs.

PDR-3160 User Manual 11
Chapter 1-2. SURVEILLENCE MODE
Most of the time, PDR-3160 is operated at the surveillance mode.
The information of screen layout and symbols are described in this section.
SCREEN LAYOUT
Date
Day of the week
Time
HDD recording percentage and master (M)/slave (S) HDD indicator
Recording symbol (circle in red)
Alarm activation indicator (bell in yellow)
Yellow camera ID: controllable PTZ device
Motion detection indicator (little man in yellow)
1 2 3 4
5
6
7
8

PDR-3160 User Manual 12
SPLIT DISPLAY MODES
PDR-3160 can provide various split display modes on live and playback
monitoring using remote controller and keypad.
16-Channel Split Display 13-Channel Split Display 9-Channel Split Display
8-Channel Split Display 4-Channel Split Display Full Screen Mode
SEQUENTIAL DISPLAY
PDR-3160 provides the multiplexing feature displaying each full screen in a
sequence with specific time period. To perform sequential display, simply press
SEQ on remote controller. A sequential display symbol shows on top of the
screen indicating that PDR-3160 is in sequential status.
FREEZE
In monitoring and playback modes, PDR-3160 provides screen-freezing feature
in which the suspicious individuals can be determined. To freeze the screen,
press Freeze button on the remote controller. Press the button again to cancel
the freezing screen.

PDR-3160 User Manual 13
ZOOM
PDR-3160 provides 2X digital zooming capability in screen freezing, live
monitoring, and video playback modes. Other split windows are all allowed in
using this feature. To perform this feature, press Zoom button on the remote
controller. Once PDR-3160 is in zooming status, press Up, Down, Left, and
Right buttons to move the zooming window around to view other portion of the
channel. Press the Zoom button again can cancel the zooming window and
back to normal screen.
CH+ & CH-
In case of scanning through each full screen channel, CH+ & CH- can be used
to monitor each camera. Press CH+ button that each camera channel in full
screen gets called in ascending sequence. Press CH- button that each camera
channel gets called in descending sequence.
AUDIO & MUTE
Once the audio channel is properly setup, PDR-3160 can output the live audio.
To disable live audio, one can press Mute button. To enable live audio, press
Audio button again.

PDR-3160 User Manual 14
Chapter 2. PTZ CONTROLS
PTZ device can be controlled in live monitoring mode and PTZ setup mode via
keypad and/or remote controller. The rest of the chapter describes the ways of
manipulating PTZ devices using keypad and remove controller.
Chapter 2-1. INSTANT PTZ CONTROLLABLE MODE
Instant controllable PTZ camera is shown in yellow color for the camera
name/number in live monitoring mode indicating that the camera can be
instantly controlled for PTZ operations. Moving the active camera sequentially,
one can simply press the Enter button on the remote controller. Once a
camera is in active mode (text in yellow), major PTZ features can be easily
performed.
Chapter 2-2. REMOTE CONTROLLER & PTZ
PTZ buttons are framed in yellow that contain auto panning, zooming, and
zooming out. Other PTZ and DVR buttons are shown in blue on remote
controller. The details are described as follows:
Tilting the PTZ device up
Tilting the PTZ device down
Panning the PTZ device left
Panning the PTZ device right
Perform auto panning of the PTZ device
Perform zooming in of the PTZ device
Perform zoom out of the PTZ device
Calling presets
5
6
7
1
2
3
4
8

PDR-3160 User Manual 15
Chapter 2-3. RECALL PRESETS
To call preset, please follow the following instructions:
Press Preset button to enable the calling preset mode. The blinking “Preset”
text on live monitoring screen indicates that PDR-3160 is in Preset mode.
In Preset mode, preset 01 to 16 directly to recall preset points of the PTZ
device.
The above operations can apply to full screen mode as well as multi-channel
split modes.

PDR-3160 User Manual 16
Chapter 3. RECORDING
Chapter 3-1. START RECORDING
To start recording, press REC button on keypad or remote
controller. The red recording icon shows on monitor at each
camera’s position, and the REC LED goes on.
Chapter 3-2. STOP RECORDING
To stop recording, press REC button again to stop the recording
operation. Both REC button and REC LED go off. The recording
operation for all the recorded cameras is disabled.
Chapter 3-3. EMERGENCY RECORDING
Recording operation can be triggered by external alarm switch. There are up
to 16 external alarm switches that can be installed for cameras. External alarm
switches can be triggered and inform PDR-3160 for emergency recording.
Proper settings such as Alarm Rec Duration and activation type (N/O or N/C)
should be configured before this operation. Once one of the alarm switch gets
triggered, the alarm icon (yellow bell), shows on monitor at the bottom of each
camera channel.
Chapter 3-4. MOTION DETECTION RECORDING
Motion detection is very important feature of PDR-3160 that the intrusion
detection of a camera’s view can be detected. Motion detection recording
sensors motion variation, and it triggers PDR-3160 to perform recording task.
Once motion detection is in active, the motioned channel activates an alarm
symbol (little man in yellow) on the screen to inform users.
Chapter 3-5. SCHEDULE RECORDING
Schedule recording allows a user to
define the specific time period for
recording on a weekly basis. The
specific recording period can also be
enabled or disabled. One can preview
the record scheduling table at Setup
→Record →Schedule.
PDR-3160 performs recording operation based on the scheduling table.

PDR-3160 User Manual 17
Chapter 4. PLAYBACK SEARCH
To playback, please press play button on remote controller or keypad. A Play
message with four different ways box shows up for searching video clips
containing time search, event search, rec search, and play entire HDD. Each
of the function is described in the following sections:
Chapter 4-1. TIME SEARCH (M+S)
Time search (master + slave) feature can perform date and time search based
on recorded video data. This feature is very easy-to-use, and it allows a user
to perform video searching task throughout two hard disk drives. The stored
video clips are shown in red in the date/time bar. Yellow blocks indicate that
there is no video clip stored. On the other hand, the red blocks indicate that
there are video clips exist.
●To perform the searching, simply press Left or Right button and move the
cursor above the red block at desired date and time specified.
●Press Enter to choose the date and time information
●Press Up or Down to setup year, month, date, hour, and minute.

PDR-3160 User Manual 18
Chapter 4-2. EVENT SEARCH
Event search is performed based on individual hard disk drive. Event list
contains information including date, time, event type, and camera channel for
the event. There are three different event types—external alarm, schedule, and
motion alarm in PDR-3160.
●To perform event search, press Up and Down button to the desired event.
●Press Enter button to play the video clips
●Press Left or Right button to the next page
Chapter 4-3. REC SEARCH
REC SEARCH contains the list when a user press REC button to activate
recording operation or to stop recording. To play the REC Search list, please
choose REC Search item. A list of start and end recording shows up
accordingly. Press Up or Down to select the date and time for playing.

PDR-3160 User Manual 19
Chapter 4-4. OTHER PLAYBACK FEATURES
Once of the above playback features is performed, features such as fast
forward (FF), fast rewind (FR), pause, stop, step, and re-play can then be used.
FF: Press FF key on remote controller to fast forward the playing video.
The speed of fast forwarding ranges from 2X ~ 64X of the original playback
speed.
FR: Press FR key on remote controller to fast rewind the playing video.
The speed of fast rewinding ranges from 2X ~ 16X of the original playback
speed.
Note: Shuttle can be used to fast forwarding or to fast rewinding the video.
PAUSE & STEPPING: pressing Pause key during playing video can pause the
video. Once the video is in pausing stage, one can press Left or Right on PDR-
3160’s keypad or remote controller to play the video step-by-step.
Roll the Jog to see the slow motion of the video.
STOP: To stop video playback, press Stop button on keypad or remote
controller. PDR-3160’s screen switches back to live mode automatically.
Other manuals for PDR-3160
1
Table of contents
Other Lilin DVR manuals