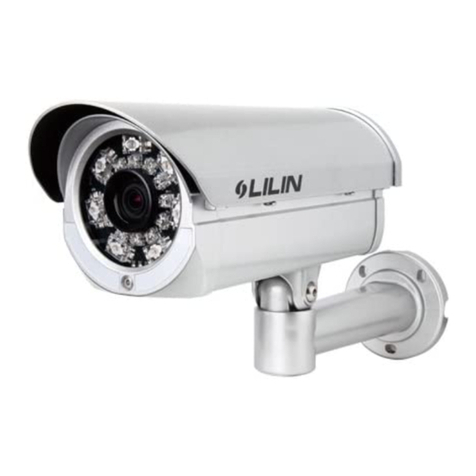
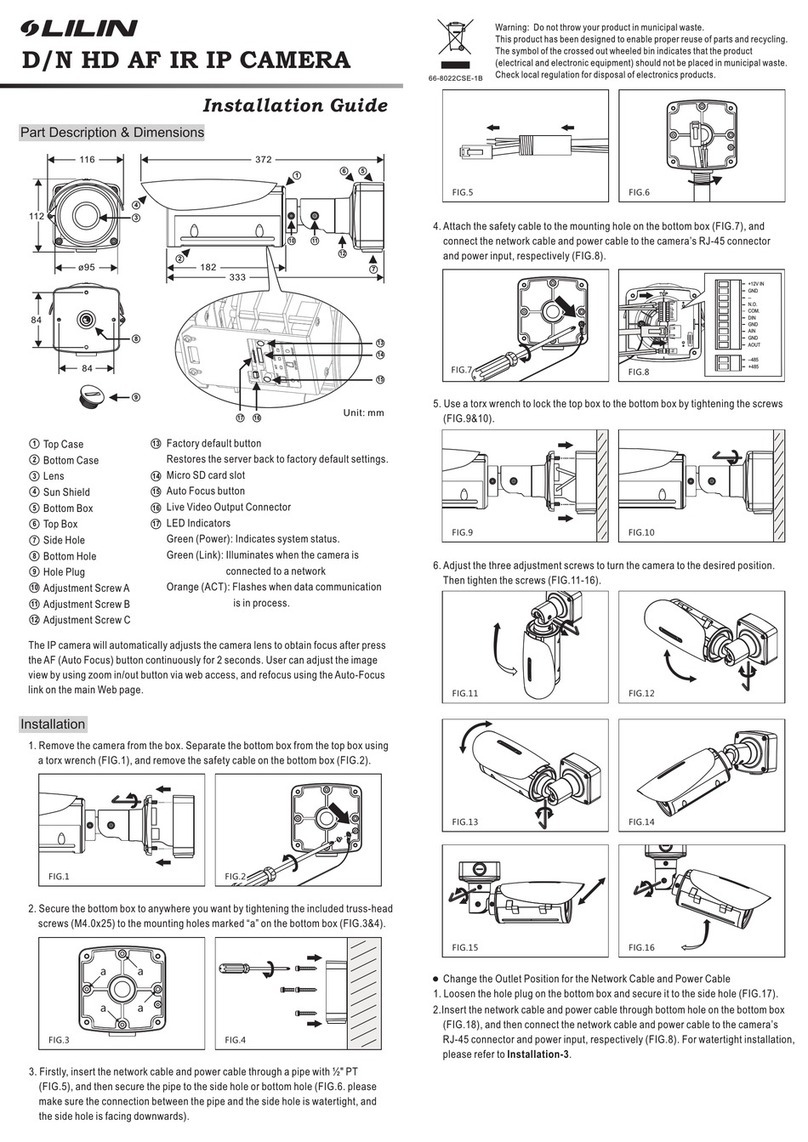
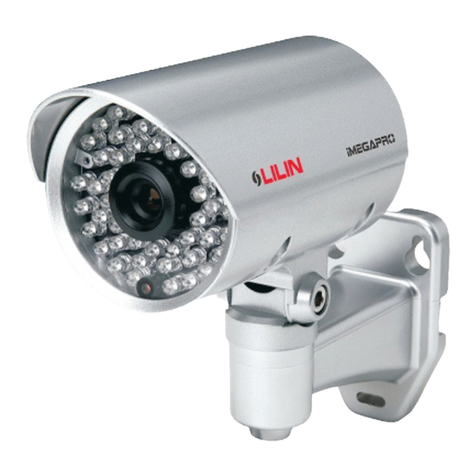
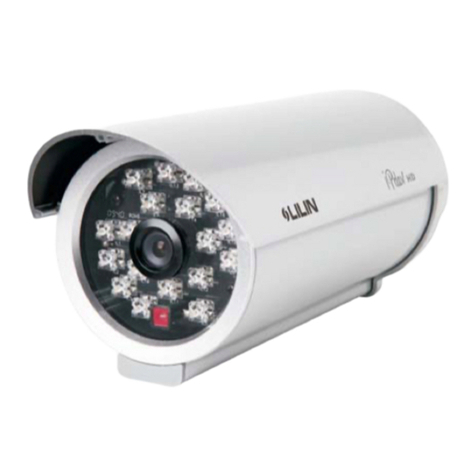
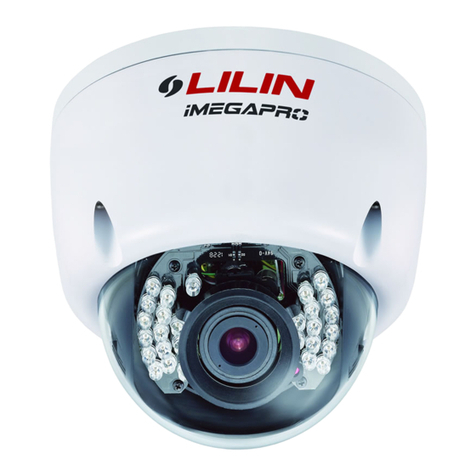
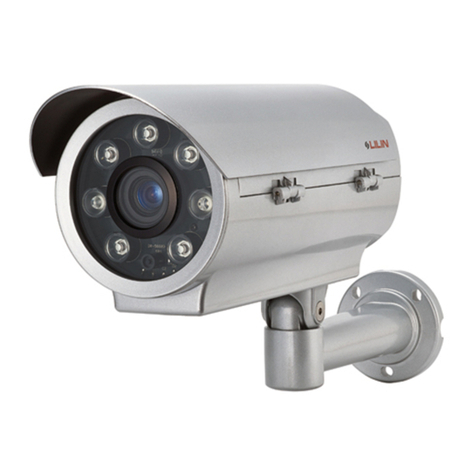
Lilin IPR454XW User manual

D/N SUPER HI-RES. VARI-FOCAL INFRARED IP CAMERA
IPR454X/458X W/S N/P
INSTRUCTION MANUAL
MERIT LILIN ENT. CO., LTD
http://www.meritlilin.com 66-IPR454CSE

All the safety and operating instructions should be read before the unit is operated.
The safety and operating instructions should be retained for future reference.
All warnings on the unit and in the operating instructions should be adhered to.
All operating and user instructions should be followed.
Only a qualified electrician should make electrical connections.
Do not use attachments not recommended by the product manufacturer as they may cause hazards.
All cable runs must be within permissible distance.
This unit must be properly and securely mounted to a supporting structure capable of sustaining the weight
of the unit.
IMPORTANT SAFEGUARDS
SAFETY PRECAUTIONS
1. Read Instructions
2. Retain Instructions
3. Head Warnings
4. Follow Instructions
5. Electrical Connections
6. Attachments
7. Cable Runs
8. Mounting
CAUTION
RISK OF ELECTRIC SHOCK
CAUTION
TO REDUCE THE RISK OF ELECTRIC SHOCK,
DO NOT OPEN COVER.
NO USER SERVICEABLE PARTS INSIDE.
REFER SERVICING TO QUALIFIED SERVICE PERSONNEL.
The lightning flash with arrowhead symbol, within an
equilateral triangle, is intended to alert the user to the
presence of uninsulated "dangerous voltage" within the
product's enclosure that may be of sufficient magnitude
The exclamation point within an equilateral triangle is
intended to alert the user to the presence of important
operating and maintenance (servicing) instructions in
to constitute a risk of electric shock to persons.
the literature accompanying the unit.
Unpack carefully. Electronic components can be damaged if improperly handled or dropped. If an item appears
to have been damaged in shipment, replace it properly in its carton and notify the shipper.
Be sure to save:
1. The shipping carton and packaging material. They are the safest material in which to make future shipments
of the equipment.
2. This Installation and Operating Instruction.
If the unit ever needs repair service, the customer should contact our dealer or branch for authorization to
return and shipping instructions.
UNPACKING
SERVICE

Do not drop or strike this equipment.
Do not install the equipment near any naked flames or heat sources
Do not expose this unit ot rain, moisture, smoke or dust environment.
Do not cover the opening of the cabinet with cloth and plastic or to install this unit in poor
ventilated places. Allow 10cm between this unit and its surroundings
Do not continue to operate the unit under abnormal conditions such as detection of smoke,
strange smell or no display on screen while power is turned on.
Do not touch the power connection with wet hands.
Do not damage the power cord or leave it under pressure.
Do not operate this unit near magnet, speaker system, etc., to avoid unnecessary magnetic
interference.
Connection cables should be grounded properly.
Caution
Executive Summary
IPR454X/458X W/S is an outdoor Infrared IP camera build in H.264 AVC (Advanced Video
Coding) video compression. H.264 AVC video compression engine supports high video quality,
full D1 resolution, bandwidth efficiency with PPPoE and DDNS.
Also it provides higher bit rate of internet and diverse alarm functions such as external alarm
or movement video detection E-mail or FTP. Moreover, IPR454X/458X W/S can do remote
surveillance with Java or Windows Mobile cell phone. The software R&D engineer can use HTTP
protocol (HTTPAPI) to develop related software, and integrate them with existing application
software system.
IPR454X/458X W/S is ideal solution for remote video monitoring via Internet.
1

Unit : mm
105
112
347
387
211.5
82.55
SUN SHIELD
TOP COVER
BOTTOM CHASSIS
BRACKET
PAN ADJUSTMENT SCREW
TILT ADJUSTMENT SCREW
WINDOW
SENSOR CAP
3
Chapter 1. Part Description & Dimension
Chapter 2. Installation
1. Take out the bracket from the box first. Put the power cable, RJ-45 network cable and video
cable through the bracket and then fix it ot the wall (FIG.1 & FIG.2)
FIG. 1 FIG. 2

4
2. Secondly, take out the camera body and open the top cover with screw driver (FIG.3)
FIG. 3
3. Put the power cable, RJ-45 network cable and video cable through the bracket rubble first and
then go through the bottom of camera body (FIG.4). Plug and fix the power cable to the terminal,
plug the RJ-45 network cable to RJ-45 LAN connector, and plug the video cable to output of the
camera (FIG.5).
FIG. 4
FIG. 6
4. Next, use the provided 1/4"-20UNC screws (silver-4pcs) to fix the camera body on the bracket
with hexagon screw driver (FIG.6)
LN
Note :
When using two-cord
power cable, please
connect them to
"Live" and "Neutral".
Live
Earth
Neutral
FIG. 5

5
FIG. 7
5. Loosen the pan and tilt adjustment screw on the bracket to turn the camera body to the desired
angle and then tighten the screws (FIG.7)
6. First, adjust the lens on focus and zoom to form the optimal video image after that tighten the
screws. Adjust the IRIS level VR to form the optimal image brightness (FIG.8). Please refer to
Chapter 5 Before Access PIH-036/038IP.
FIG. 9 FIG. 10
7. Replace the top cover and tighten the screws (FIG.9 & FIG.10)
IRIS LEVEL
VR
FOCUS or ZOOM
ZOOM or FOCUS
FIG. 8

6
Chapter 3. System Overview
Top View
AlarmIn/Out Connector
VideoOutJack
PowerLED indicator
(GreenLED)
RJ-45Jack
LoadDefaultButton
Input/Output Device
Component Description
Chapter 4. IPR454X/458X System Architectures
For connecting IPR454X/458X to the network, please follow one of the system architectures:
Hardware Installation for LAN access
HUB
Internet / Ethernet
Lan
Hardware Installation for Internet access
HUB
Lan
Router
N.O.
COM
N.C.
ALARM IN
GND

22
Chapter 8. Specifications
Chapter 8-1. Camera
Model No.
Lens
Power Input Voltage
System
Sync. Mode
Pick Up Element
Effective Pixels
Chip Size
Horizontal & Vertical
Sync. Frequency
Scanning System
Infrared Cut Filter
Resolution
Minimum Illumination
S/N Ratio
Auto Gain Control
White Balance
Aperture Correction
Power Consumption
Back Light Compensation
Video Output
Operating Temperature
Gamma Characteristic
IP Rating
Infrared
LED Beam Spread
Peak Wavelength
Radiant Distance
Dimension
Weight
Focal Length
Iris
Angleofview
H
V
D
IPR454XW
9 ~ 22mm 9 ~ 22mm
NTSC or PAL
AC24V ( 10%)
Internal
1/3" Super HAD CCD Sensor
768(H) x 494(V) [NTSC]
752(H) x 582(V) [PAL]
5.59mm(H) x 4.68mm(V)
15.734 KHz / 59.94Hz [NTSC]
15.625 KHz / 50Hz [PAL]
2:1 Interlace
Auto / Schedule / Day(Color) / Night(Mono)
Color: 540TV Lines , Mono: 600TV Lines
Color: 0.05Lux at F1.4,
Mono: 0.01Lux at F1.4
0Lux with IR
More Than 50dB (AGC-OFF)
36dB Variable Gain
ATW
Horizontal, Vertical
17W
Auto
CVBS 1.0Vp-p, 75ohm
IP66
850nm
30
50M 60M 50M 60M
-10 ~ +50 (14 ~ 122 )
Body:120mm(W) x 112mm(H) x 387mm(D), Bracket: 211.5mm(L)
2200g
=0.45
IPR454XS IPR458XW IPR458XS
Design and specifications are subject to change without notice.
D/N HI-RES. VARI-FOCAL INFRARED IP CAMERA
AC100~240V
Window 78 Heat Resistant Glass
3.3 ~ 12mm 3.3 ~ 12mm
F1.4
89.8 ~ 23.9 89.8 ~ 23.932.1 ~ 13.1 32.1 ~ 13.1
63.6 ~ 17.9 63.6 ~ 17.923.3 ~ 9.8 23.3 ~ 9.8
125.7 ~ 29.9 125.7 ~ 29.941.9 ~ 16.3 41.9 ~ 16.3

Chapter 8-2. IP System
66-IPR454CSE-1
26
Design and specifications are subject to change without notice.
Video Compression
Video Bitrate
Security
Resolution
Frame Rate
Video Streaming
Motion
Maintenance
Mobile Phone and PDA Support
Video Display
Users
Client PC Requirement
CAVLC/CABAC
CPU, Memory
Network Interface
Network Protocols
System Integration
OS
Alarm Input / Output
H.264/AVC Main Profile, Level 3 (I/P/B frames), Motion JPEG
Full D1: 720x480 (NTSC) / 720 x 576 (PAL)
CIF: 352 x 240 (NTSC) / 352 x 288 (PAL)
H.264: up to 30/25 FPS at full D1 resolution
JPEG: 1 FPS at CIF
Simultaneous Motion JPEG and H.264 AVC Main Profile
Program Stream (PS) / Transport Streams (TS)
15*10 motion detection zone
Image upload over FTP and e-mail by motion detection
Firmware update via HTTP
Firmware available at web site
Free eMobile software for Java mobile phone, Windows Mobile 5/6, and PDA
3GPP H.264 w/video via Podcast, compatible with CorePlayer
VLC: H.264 HTTP, unicast, and multicast streaming
ActiveX: for JPEG
3 Mbps to 56 Kbps
Frame rate and bitrate controllable on-the-fly
VBR / CBR supported
Base64 HTTP encryption
Multiple user access levels with password protection
10 user accounts available
5 simultaneous unicast users (H.264)
5 simultaneous HTTP users (H.264)
5 simultaneous HTTP users (JPEG)
Unlimited users using multicast (H.264)
OS: Windows 2000, Windows XP, Windows Vista
Browser: Windows Internet Explore 5.0 or above
CPU: Intel Pentium 4 1.8GHz or above
AM: 512MB or above
Supported
Embedded SoC, ARM926, 166MHz, 64MB DDR, 4MB flash memory
10Mbps / 100Mbps, RJ-45
IP,TCP,UDP,HTTP,SMTP,ESMTP,NTP,DDNS,FTP,ARP,DHCP,PPPoE,DNS,Telnet
HTTPAPI downloadable
Embedded Linux 2.6.9
1 input / 1 output (N.O. / N.C.)
D/N SUPER HI-RES. VARI-FOCAL INFRARED IP CAMERA
IPR454X/458X W/S N/P
INSTRUCTION MANUAL
MERIT LILIN ENT. CO., LTD
http://www.meritlilin.com 66-IPR454CSE

INSTRUCTION MANUAL
H.264 AVC IP Cameras

1
Executive Summary
The video compression engine of the H.264 AVC (Advanced Video Coding)
IP camera provides high video quality, full D1 resolution, bandwidth
efficiency, and real-time streaming. The cutting edge of H.264 AVC main
profile encoding technology can provide better compression rate and
superior video quality at 56 Kbps to 3 Mbps bit rate. Dual streaming
design, JPEG and H.264 AVC allow to stream video at low bandwidth
(Internet) and high bandwidth (LAN) for optimizing video quality. Low
latency design for both Intranet and Internet is a key factor of operating PTZ.
For PTZ application, the PTZ web interfaces including lens absolution
positioning are designed for easy-to-use purpose.
Key Features
True H.264 AVC/MPEG-4 part 10 real-time video compression
Support ONVIF protocol
Full D1 resolution at 720 * 480 (NTSC)/720 * 576 (PAL) in live monitoring
Full duplex H.264 AVC and JPEG streaming
HTTP ServerPush, UDP unicast, and UDP multicase supported
Motion detection engine for image alarm notification via Email or FTP
Built-in HTTP server for easy-to-use remote surveillance
Absolute lens positioning controlled from web interface
Constant bit rate (CBR)/variable bit rate (VBR) supported
H.264 AVC I, B, and P frames supported
Bit rate adjustable
B frame periods adjustable
Network time protocol (NTP) supported
Dynamic DNS (DDNS) supported
PPPoE supported
PTZ video-click-n-go (PTZ model only)
PTZ absolute position positioning (PTZ model only)
HTTPAPI software integration provided
Free Java Phone, Window Mobile, and PDAsoftware support
Support iPhone
Podcast protocol supported up to 15 FPS video and audio live monitoring
for 3GPP
AAC/G.711 audio (for audio models only)
Free 36 channels CMX Software

2
Trademark Acknowledgments
Microsoft, Windows 2000, Windows XP, Windows Vista,ActiveX, and
Internet Explorer are registered trademarks of Microsoft Corporation in the
U.S. and/or other countries.
Java and all Java-based trademarks and logos are trademarks or
registered trademarks of Sun Microsystems, Inc. in the United States and
other countries.
Flash, Macromedia, and Macromedia Flash Player are either trademarks or
registered trademarks ofAdobe Systems Incorporated in the United States
and/or other countries.
VLC is registered trademarks of the respective holders. VLC Plugin
ActiveX control is re-distributed based on GNU GENERAL PUBLIC
LICENSE Version 2. The source code can be found at
http://www.videolan.org/vlc/download-sources.html.
Linux and DynDNS are registered trademarks of the respective holders.
Intel, Pentium, and Intel® Core™ 2 Duo are registered trademarks of Intel
Corporation.
Other names of companies and their products mentioned in this manual
may be trademarks or registered trademarks of their respective owners.
Other References
For advanced HTTP network software development, please refer to
HTTPAPI document in the product CD or download the document from
company web site.
For free mobile surveillance, please refer to eMobile document in the
product CD or download the document from our company web site.

3
Caution
Do not drop or strike this equipment
Do not install the equipment near any naked flames or heat sources
Do not expose this unit to rain, moisture, smoke or dust environment
Do not cover the opening of the cabinet with cloth and plastic or to install
this unit in poor ventilated places. Allow 10cm between this unit and its
surroundings
Do not continue to operate the unit under abnormal conditions such as
detection of smoke, strange smell or no display on screen while power is
turned on
Do not touch the power connection with wet hands
Do not damage the power cord or leave it under pressure
Do not operate this unit near magnet, speaker system, etc., to avoid
unnecessary magnetic interference
Connection cables should be grounded properly

4
Table of Content
Chapter 1 System Overview........................................................................... 6
Chapter 2 Before Access IP Camera ............................................................. 8
Chapter 2-1 DIP Switch Settings.................................................................. 8
Chapter 2-2 Configure IP Address Using IPScan Utility............................... 8
Chapter 2-3 Configure IP Address Using HTML Page................................. 9
Chapter 2-4 Internet Browser Setting & Software Component Required... 10
Chapter 2-5 Login.......................................................................................11
Chapter 3 Start Using H.264 AVC IP Camera Network Features................ 12
Chapter 3-1 IP Camera Operational HTML Page ......................................12
Chapter 3-2 PTZ Features.......................................................................... 13
Chapter 3-2-1 PT Mode ......................................................................... 14
Chapter 3-2-2 Video-Click-N-Move........................................................ 15
Chapter 3-2-3 Audio............................................................................... 16
Chapter 3-3 Configuration ..........................................................................16
Chapter 3-3-1 Server Settings ............................................................... 16
Chapter 3-3-2 User Settings .................................................................. 17
Chapter 3-3-3 Timer............................................................................... 18
Chapter 3-3-4 System Setting................................................................ 19
Chapter 3-4 Network................................................................................... 19
Chapter 3-4-1 General Settings.............................................................20
Chapter 3-4-2 DHCP Setting .................................................................21
Chapter 3-4-3 PPPoE Settings .............................................................. 21
Chapter 3-4-4 HTTP Service ................................................................. 21
Chapter 3-4-5 SMTP Service................................................................. 22
Chapter 3-4-6 FTP Service....................................................................23
Chapter 3-4-7 DDNS Settings................................................................ 23
Chapter 3-5 Video Settings.........................................................................24
Chapter 3-5-1 Video General.................................................................24

5
Chapter 3-5-2 Video Advanced.............................................................. 26
Chapter 3-5-3 JPEG Encoding .............................................................. 27
Chapter 3-6 PTZ Settings........................................................................... 27
Chapter 3-6-1 PTZ Advanced Settings..................................................28
Chapter 3-6-2 PTZ Schedule Settings................................................... 28
Chapter 3-7 Alarm Settings ........................................................................ 29
Chapter 3-7-1 Motion/Alarm Setup for PTZ........................................... 29
Chapter 3-7-2 Motion/Alarm Setup for Camera with Alarm Input.......... 30
Chapter 3-7-3 Motion Area .................................................................... 31
Chapter 3-8 IR Cut Removable .................................................................. 32
Chapter 3-9 Alarm Output...........................................................................32
Chapter 3-10 SD Card Recording ..............................................................33
Chapter 3-10-1 Download SD Card Recording ..................................... 34
Chapter 3-11 Audio Setting ........................................................................ 34
Appendix..........................................................................................................35
Advance Network DDNS and PPPoE Technologies.................................. 35
Advance Network Port Forwarding Technology.........................................36
Emergency Factory Default........................................................................36
DIP Switch Settings .................................................................................... 37
Specification .................................................................................................... 41

6
Chapter 1 System Overview
Chapter 1-1 System Requirements
The IP Camera’s H.264 AVC video compression technology can provide
high compression rate and superior video quality. However, the
performance highly depends on both CPU computational power of a client
PC and the network bandwidth for transmitting video streaming. The
following sections specify system requirement for running H.264 AVC:
Chapter 1-2 Number of Video Clients Allowed Running on a PC
If bandwidth is sufficient, number of H.264 AVC software decoder for
decoding H.264 AVC streaming at full D1 resolution running on same PC is
benchmarked as in the following figure:
CPU Number of
H.264 AVC decoders
Resolution
Intel Pentium 4 1.80GHz
1 Full D1
Intel® Core™ 2 2.33GHz
4 Full D1
Chapter 1-3 Minimum Bandwidth Requirement
Please reserve 20% more bandwidth for specified bit rate. For example, if
the video streaming bit rate control is set to 1 Mbps. The network should
reserve at least 1.2 Mbps bit rate to gain maximum performance. Number
of client connections allowed at 1Mbps (upload and download) is calculated
as:
Bit rate at Number of clients
256 Kbps 8
512 Kbps 2
1024 Kbps 1
If your application is running for both Internet and LAN, it is highly
recommended to use JPEG encoding for Internet, especially very low bit
rate environment. It can maximize H.264 AVC video quality for LAN
application.

7
Chapter 1-4 Software Requirements
Third party software components are required for web interface. When
you first time login the IP camera using Internet Explorer, it prompts for a
security warning dialog box for downloading VLC Plugin if your computer
connects to the Internet. Please click on Install button to download.
You can also visit our company web site at Support->Software->VLC H.264
Software Decoder for download. If you do not have Internet access,
please install VLC H.264 Software Decoder from product CD shipped with
the product. It is highly recommended to download the software
mentioned above. Version 0.9.96 or above built by our company has
modified for transmitting H.264 AVC over low bandwidth Internet
environment.
Flash player is also required for controlling the PTZ device. Please visit
http://www.adobe.com/products/flashplayer to download the software
component.

8
Chapter 2 Before Access IP Camera
Before accessing the IP camera, make sure that camera’s analog BNC
output, RJ-45 network cable, audio cable, and IP camera’s power cable are
properly installed. For setup IP address, please consult your network
administrator for available IP addresses. The default IP address of IP
camera is 192.168.0.200. User can also user default IP address to verify
IP camera’s network connection.
Chapter 2-1 DIP Switch Settings
Please see appendix for detail.
Chapter 2-2 Configure IP Address Using IPScan Utility
To configure IP address using IPScan utility, copy IPScan application from
installation CD to your local PC or execute IPScan software from
installation CD directly. IPScan utility can also be downloaded from our
company web site. To change IP address, subnet mask, gateway, or
HTTP port, please follow steps below:
Run IPScan utility.
Click on Refresh button. All available devices get listed in Device list box.
Select the device item in Device list box.
Edit or modify addresses in IP, Subnet Mask, Gateway, or HTTP Port
edit box.
Click on Apply button to configure the settings.
Click on Refresh button to verify the settings.

9
Chapter 2-3 Configure IP Address Using HTML Page
To change IP address using HTML page, please first type the default IP
address, 192.168.0.200 in Internet browser and follow steps below:
Logon H.264 AVC IP camera using default username and
password—“admin” and “pass”.
Click on “Configure” hyper link.
Click on “Network->General” hyper link.
Type or modify edit box for IP address, subnet mask, gateway, or HTTP
connection port.
Click on Submit button.
Note: Make sure that IPScan is version 1.0.0.17 or above to support H.264 AVC IP
camera
This manual suits for next models
8
Table of contents
Other Lilin IP Camera manuals

Lilin
Lilin H.264 User manual

Lilin
Lilin ipg1022esx User manual

Lilin
Lilin iMEGALITE series User manual

Lilin
Lilin IPG1022ESX3 User manual

Lilin
Lilin IPG1022ELS User manual

Lilin
Lilin IPS7224M User manual

Lilin
Lilin ZG1232E User manual

Lilin
Lilin IPR712S User manual

Lilin
Lilin 6122 Manual

Lilin
Lilin AHD DOME User manual

Lilin
Lilin PZD6422CSE-2 User manual

Lilin
Lilin IPR414/418ESX3 User manual

Lilin
Lilin IPD6220ES3.6 User manual

Lilin
Lilin AHD7424AX4.2 User manual

Lilin
Lilin IPR732ES User manual

Lilin
Lilin D/N HD AF IR IP CAMERA User manual

Lilin
Lilin PZD6422X3 User manual

Lilin
Lilin IPD2122S4.3 User manual

Lilin
Lilin PIH - 7000 IP Series User manual

Lilin
Lilin IPS2102E User manual