manuals.online logo
Brands
  1. Home
  2. •
  3. Brands
  4. •
  5. LinkPoint
  6. •
  7. Payment Terminal
  8. •
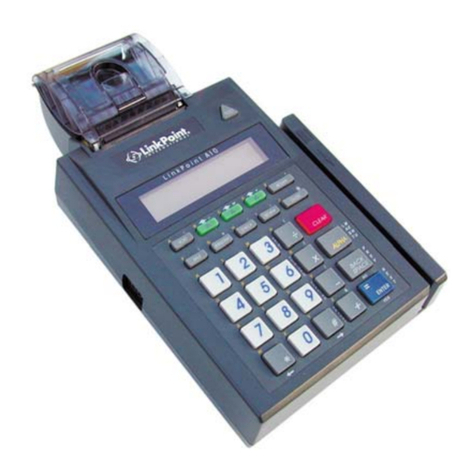
  9. LinkPoint 9100 Operating and maintenance instructions

LinkPoint 9100 Operating and maintenance instructions

NOTICE TO LINKPOINT 9100 USERS
CUSTOMER INFORMATION - GENERAL REQUIREMENTS
This equipment complies with Part 68 of the FCC rules and the requirements adopted by the ACTA. On the rear of this
equipment is a label that contains, among other information, a product identifier in the format US:AAAEQ##TXXXX. If
requested, this number must be provided to the telephone company.
Applicable certification jack Universal Service Order Codes (“USOC”) for the Equipment is RJ11C.
If service from the local telephone is requested they will require Facility Interface Code (“FIC”) and Service Order Code
(“SOC”). These are as follows:
(a) Facility Interface Code (“FIC”) 02LS2
(b) Service Order Code (“SOC”) 9.0Y
A plug and jack used to connect this equipment to the premises wiring and telephone network must comply with the
applicable FCC Part 68 rules and requirements adopted by the ACTA. A compliant telephone cord and modular plug is
provided with this product. It is designed to be connected to a compatible modular jack that is also compliant.
The Ringer Equivalence Number (REN) is used to determine the number of devices that may be connected to a
telephone line. Excessive RENs on a telephone line may result in the devices not ringing in response to an incoming call.
In most but not all areas, the sum of RENs should not exceed five (5.0). To be certain of the number of devices that may
be connected to a line, as determined by the total RENs, contact the local telephone company. The REN for this product
is part of the product identifier that has the format US:AAAEQ##TXXXX. The digits represented by ## are the REN
without a decimal point (e.g., 03 is a REN of 0.3).
If this equipment, LP9100, causes harm to the telephone network, the telephone company will notify you in advance that
temporary discontinuance of service may be required. But if advance notice isn't practical, the telephone company will
notify the customer as soon as possible. Also, you will be advised of your right to file a complaint with the FCC if you
believe it is necessary.
The telephone company may make changes in its facilities, equipment, operations or procedures that could affect the
operation of the equipment. If this happens, the telephone company will provide advance notice in order for you to make
necessary modifications to maintain uninterrupted service.
If trouble is experienced with this equipment LP9100, for repair or warranty information, please contact your service
provider. If the equipment is causing harm to the telephone network, the telephone company may request that you
disconnect the equipment until the problem is resolved.
This equipment is of a type that is not intended to be repaired.
This equipment must not be used on party lines. Connection to party line service is subject to state tariffs. Contact the
state public utility commission, public service commission or corporation commission for information.
FCC INFORMATION TO USERS
NOTE: This equipment has been tested and found to comply with the limits for a Class A digital device, pursuant to Part
15 of the FCC Rules. These limits are designed to provide reasonable protection against harmful interference when the
equipment is operated in a commercial environment. This equipment generates, uses, and can radiate radio frequency
energy and, if not installed and used in accordance with the instruction manual, may cause harmful interference to radio
communications. Operation of this equipment in a residential area is likely to cause harmful interference in which case
the user will be required to correct the interference at his own expense.
Warning: Changes or modifications not expressly approved by Linkpoint could void the user’s authority to operate the
equipment
RF EXPOSURE WARNING: For compliance with SAR requirements, a separation distance of minimum 2.5cm shall be
maintained to User’s body when it is operated in RF transmitting mode.
IMPORTANT SAFETY INSTRUCTIONS – TELECOMMUNICATION CABLE
CAUTION – To reduce the risk of fire, use only No.26 AWG or larger telecommunication cord.
IMPORTANT SAFETY INSTRUCTIONS – LITHIUM BATTERY
CAUTION – Risk of explosion if battery is replaced by an incorrect type. Dispose of used batteries according to the
manufacturer’s instructions.
NOTE: The user can replace the terminal's main (NiMH) battery, but the lithium battery inside the unit can only be
replaced by a LinkPoint-approved repair facility.
LINKPOINT 9100
INSTALLATION GUIDE
© 2003 LinkPoint International, Inc.
Document No: 902-MA-0196 Version 1.1 September 03
1. LOADING PAPER
Turn the terminal over and place the unit keyboard
side down as shown in Figure 1. Open the paper
cover, remove and discard the core from the
previous paper roll (if necessary).
Install the roll of paper onto the terminal paper
holders; make sure the roll is positioned evenly and
turns freely (see Figure 2). The print (thermal) side
should be facing toward the keyboard side of the
terminal.
Before closing the printer door, extend the paper so
that a small amount of paper emerges from the
printer mechanism (see Figure 3).
Make sure the paper is centered. Then close the
printer door and tear off the excess paper (see
Figure 4).
NOTE: The standard size paper roll is 1 7/8 inches
in diameter. Please note that the terminal
paper holders can be pushed down to
accept a smaller paper roll (see Figure 5).
Figure 1
Figure 2
Figure 3
Figure 4
Figure 5
2. CHARGING THE BATTERY
First, make sure the unit is turned off during the
entire battery charging process. Connect the
power cable to the three-pronged jack on the
charger power supply unit. Securely plug the
charger cable into the round port on the right
side of the terminal (see Figure 6). Plug the
power cable into a standard 120-volt electrical
outlet. Make sure all connections are secure.
A flashing battery icon will appear in the upper
right corner of the terminal display screen during
the charging process. Bars in the battery icon
will flash from right to left. Charge the terminal
for about 4-6 hours until the battery icon has
three solid black bars and has stopped flashing.
A new battery cannot be used fully until it has
been conditioned. To do this, fully charge the
battery using the procedures printed above; then
use the terminal until it displays the LOW
BATTERY message. At that point, recharge the
battery and repeat this process several times.
After the battery has been conditioned, it can be
recharged at any time. (NOTE: The battery
power is not low until the LOW BATTERY
message appears. The battery icon is only an
approximate indicator of the state of charge.)
For optimal performance, disconnect the battery
charger when performing wireless transactions.
3. USING THE TERMINAL
The terminal can process transactions in either
the dial-up or the wireless mode. The dial-up
mode uses a traditional telephone line to send
and receive LinkPoint 9100 data (see Figure 7).
The wireless mode sends and receives data by
connecting to a wireless network. Place the
terminal in an upright position, extend the whip
antenna on the top of the unit fully for maximum
performance in wireless mode (see Figure 8).
See your quick reference
guide or operator manual
for details on how to use
the terminal.
Figure 6
Figure 7
Figure 8

Other LinkPoint Payment Terminal manuals

LinkPoint 3000 Reference guide

LinkPoint

LinkPoint 3000 Reference guide

LinkPoint 3000 Reference guide

LinkPoint

LinkPoint 3000 Reference guide

LinkPoint L3FRR30 Reference guide

LinkPoint

LinkPoint L3FRR30 Reference guide

LinkPoint AIO User manual

LinkPoint

LinkPoint AIO User manual

LinkPoint AIO User manual

LinkPoint

LinkPoint AIO User manual

LinkPoint 9000 Assembly instructions

LinkPoint

LinkPoint 9000 Assembly instructions

LinkPoint AIO User manual

LinkPoint

LinkPoint AIO User manual

LinkPoint AIO User manual

LinkPoint

LinkPoint AIO User manual

LinkPoint 3000/AIO User manual

LinkPoint

LinkPoint 3000/AIO User manual

LinkPoint 3000 User manual

LinkPoint

LinkPoint 3000 User manual

LinkPoint 3000 User manual

LinkPoint

LinkPoint 3000 User manual

Popular Payment Terminal manuals by other brands

Ingenico i3070 CL Specifications

Ingenico

Ingenico i3070 CL Specifications

Moneris iPP320 PINpad Quick install guide

Moneris

Moneris iPP320 PINpad Quick install guide

CCV BUDGET  VX 520 user manual

CCV

CCV BUDGET VX 520 user manual

Ingenico i6550 Specifications

Ingenico

Ingenico i6550 Specifications

Skyzer Ingenico 5100 operating guide

Skyzer

Skyzer Ingenico 5100 operating guide

Ingenico Lane/5000 user guide

Ingenico

Ingenico Lane/5000 user guide

takepayments iWL251 installation guide

takepayments

takepayments iWL251 installation guide

Ingenico Self 7000 quick start guide

Ingenico

Ingenico Self 7000 quick start guide

First Data FD100 Quick reference guide

First Data

First Data FD100 Quick reference guide

VeriFone UX400 installation guide

VeriFone

VeriFone UX400 installation guide

wallee D200 user manual

wallee

wallee D200 user manual

SAND PS400 EFT-POS user manual

SAND

SAND PS400 EFT-POS user manual

Ingenico FLEX IPP320 installation guide

Ingenico

Ingenico FLEX IPP320 installation guide

Heartland WaveRider Installation

Heartland

Heartland WaveRider Installation

Windcave iPP350 manual

Windcave

Windcave iPP350 manual

Alpha Card Services Nurit 8320 Quick reference guide

Alpha Card Services

Alpha Card Services Nurit 8320 Quick reference guide

Loomis Pay-Mobile A920 manual

Loomis

Loomis Pay-Mobile A920 manual

TD Luxe 6200m UnionPay Guide

TD

TD Luxe 6200m UnionPay Guide

manuals.online logo
manuals.online logoBrands
  • About & Mission
  • Contact us
  • Privacy Policy
  • Terms and Conditions

Copyright 2025 Manuals.Online. All Rights Reserved.