manuals.online logo
Brands
  1. Home
  2. •
  3. Brands
  4. •
  5. Linkskey
  6. •
  7. Switch
  8. •
  9. Linkskey LKV-248AUSK User manual

Linkskey LKV-248AUSK User manual

Qui
c
k
I
n
s
t
allat
i
on
G
u
id
e
Ap
pli
c
ab
le
mo d
e
ls:
LKV-248AUSK
LKV-248AUSK
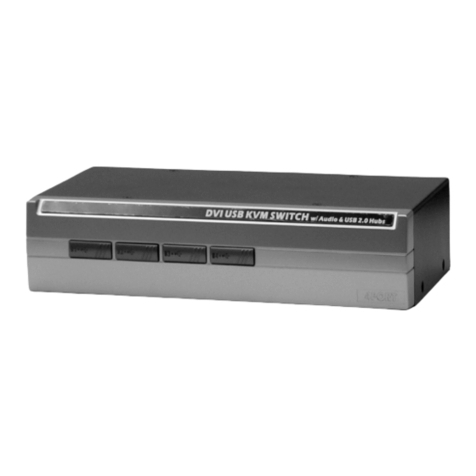
4-port USB PS/2 KVM w/ Audio & Mic
Quick Installation Guide
Thank you for purchasing the LKV-248AUSK With our highly
reliable and quality product, user can enjoy countless benefits
from using it.
The KVM Switch is a Plug-and-Play device for installation. For a
quick start on installation and operation, please follow the
instructions below for correct setup sequence:
T h e
c or r ec t s e t u p s e qu e n c e
is … …
(1 ) C on n ec t th e s h a r ed k e yb o a r d , m o n it or a n d m o u s e ( a n d
o p tion al s p e aker set a n d m i c r o p h on e ) to t h e K V M S w itch
firs t, a n d t h en c o n n ec t y ou r c o m p u t e rs .
( 2 ) P o w e r u p y ou r c o n n ec te d c om p u t er s
…
S in c e t h e K V M S w i t c h r e c e iv e s p o w er f r o m t h e c o m p u te r ’s U S B a n d PS / 2
in te rf a c e, it is p o w e re d u p w h e n y o u c on n ec t t he K V M S w itc h to a P C . B ut
if yo u inte n d to u s e t h e U S B h u b p orts for bigg e r d e vic e s, yo u s h o u ld pl u g
in th e e xt er n al p o w er ad a p te r.
Out-of-the-box Installation
LKV -248AUSK
Introduction
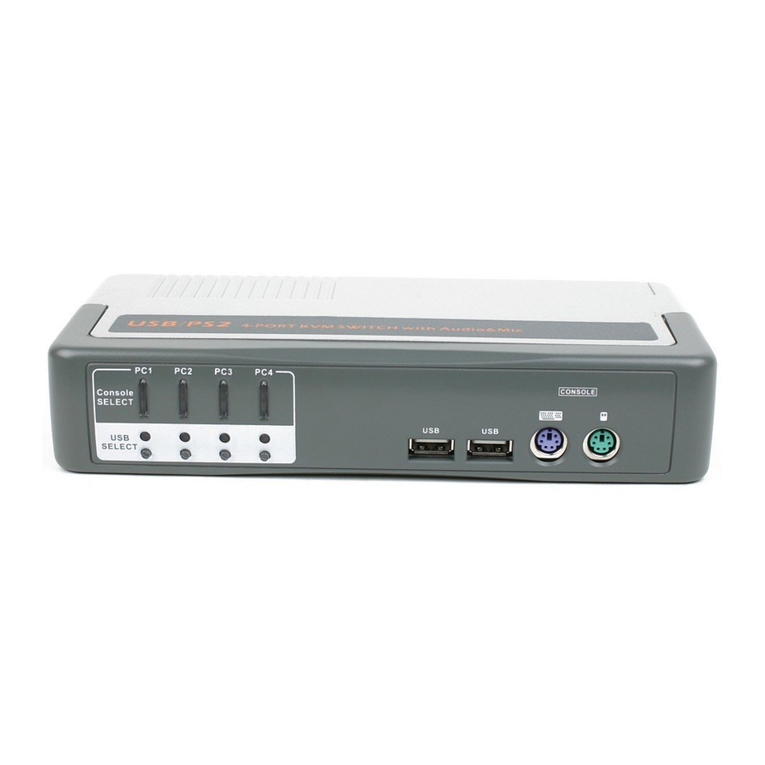
The LKV-248AUSK provides Audio&Mic switching to offer
you uninterrupted multimedia experience with KVM Switching.
With its multi-platform support for PC and Macintosh G3/G4,
iMAC, this KVM Switch allows you to access, control, boot
and reboot multiple USB-enabled multimedia computers
using only one keyboard, video, mouse and a speaker set
and microphone. Built-in with a 4-port USB Hub, it is designed
specifically for sharing your USB keyboard, mouse and other
USB devices with four USB-enabled PCs.
Before you install
The default setting of LKV-248AUSK is appropriate for most
systems. In fact, you do not need to configure the KVM
Switch before installation. Yet particular caution has to be
taken before installation:
If yo u d o not w a n t to use PS/2 ke ybo a rd / m o u se a n d w ant to u s e U S B
ke y b o a r d / m o u se in ste a d, yo u m i g h t n e e d to d i s a ble t h e PS /2 opt i on an d
ena b l e t h e U S B o p tio n in t h e B I O S s ettin g of y o u r P C , e s p e cial l y w h en
som e ol d er co m p ute rs m i g h t n ot b e a b l e to au to m a tica l l y d e t ect t h e in p ut
dev i c e s .
U S B k ey b o a rd u s e r m u s t n o te :
if y o u u se a U S B k e y b oa rd
in s te a d of a P S /2 o ne,
y ou w ill n o t b e a b le t o u ti liz e th e h otk ey
fu n ct io n
. In o rd er to u s e t he h o tk ey fu nct io n fu l l y, it is r ec o m m e nde d t o
u s e a P S/ 2 k e y b o a rd . A l s o yo u h a v e to
“ sy n c” yo u r h u b p o r t c o nt ro l
a n d P C p o rt s e le ct io n ( i.e . g re en P C p o r t L E D a n d r e d U S B h u b
p ort L ED s h o u ld b e a lig n e d ) so t h at yo u r P C c a n f in d yo u r U S B
k ey b o a rd a n d m o u s e
.
Take t h e K V M S wi t ch o u t of t he b ox an d b e g in in s t all a tion… .
If y ou a r e c o n n e c tin g w i th a n y co m p u t e r u s in g P S / 2
in te r f a ce , D O N O T T R Y
to c o n n ec t t h e K V M S w i tc h to th e c o m p u te rs
w h i l e t h e co m p ut e r s a r e s till in po w e r e d - on stat e s . O th e rw is e, t h e
com p u t e r w i l l h a ve d i ff i c u lty r e c o g nizin g y o ur s h ar ed ke yb o a rd a nd
m o u s e . H o w e ve r, i f y o u a r e c o nn e c ti n g it al l w it h U S B - e n ab l e d c o m p u t e r s ,
th er e i s n o s uc h l im itation s i n c e it i s h ot - p l u g gab l e .
Step 1.
Make sure all the compu ters that are to be connected to the KVM
S w itch and their peripherals are in po w ere d -off state. If not,
pow er them off b efore you proce e d w ith the foll ow ing steps. (If
you are connecting w ith compute rs using the PS/2 interface)
Step 2.
Con nect the shared PS/2 (or USB) keybo ard, mouse and m onitor
and a speaker set and m icrop hone as w ell as other shar ed
USB devices to the KVM sw itch.
A lso it is re co mm e nd e d to
con n ect the e x ternal p o w er adapter to y o ur K VM S w itch, if
y o u int e nd to u se USB h ub po r ts for bi g ger d e v ic e s.
Step 3.
Conne c t each of your c omputers to the KVM sw itch, using on ly
our Slim 3 -in -1 combo KVM ca ble, USB (T ype A -to -T ype B)
cable and audio & Mic cables (s ee the pictures below).
Slim 3 -in -1 USB c a ble A u d io - Mic
KVM combo c a ble
(TypeA-to-TypeB)
C o m b o C a ble
If y ou a r e u s in g U S B c om pu te r s, y ou can u s e s t an d a r d VG A c a bles
and US B c a b l e s for con nectio n s to P C s i n s te a d o f t h e Sl i m 3 - in - 1
K V M c o m b o c ab l e .
Step 4
. (Now your KVM Switch should have been powere d-up… .) Power
up the connected computers. Afte r your computers are
pow ered up, the ke ybo ard and mouse w ill be recognized and
now you can be g in operating the KVM sw itch.
LKV -248AUSK
Easy Operation
There are two methods to control your KVM Switch for either
simultaneous or independent PC / USB hub port / Audio&Mic
channel selection: using the front-panel push buttons or a
hotkey sequence.
Front-panel buttons
The front-panel buttons let you have direct control over KVM
switch operation and channel switching. Simply press the PC
button for PC port switching, and press the USB button for USB
hub port control switching. If you want to enable the binding of
PC/Hub port/Audio&Mic switching, use the hotkey sequences. See
Quick Reference Sheet
Keyboard hotkeys
A keyboard hotkey sequence consists of three specific
keystrokes: See Quick Reference Sheet
Hotkey seq u ence = S cr L k + ScrLk +
Command key
Each k eystroke w ithin a hotk ey seq uence should be pressed w ith in 2
seconds. O therwise, the hotk ey sequence w ill not be validated.
For detailed Ho tk ey seq uences and their corre sponding functional
commands, please refer to the Quick reference sheet.
30-170-7009-658-14 Rev. 1.4 Copyright© All rights reserved. Dec 2004
All manuals and user guides at all-guides.com
all-guides.com
Qui
c
k
Re
fe
re
nc
e
Sh
ee
t
Appl
icabl
e
mo d
e
ls:
LKV-248AUSK
Quick Reference Sheet
USB PS/2 KVM Switch w/ Audio&Mic --- Operation Commands for Hotkeys/ Front-Panel Buttons
Command Hotkeys1Front-panel Buttons Description
S el ec t P C C h a n n e l
(jo in t - s el e c t P C p o rt an d h u b port c on tr ol / A u di o & m ic , i f
b in d in g i s e n a b l e d )*
S el e ct H u b P o rt C o n tr o l
3
(J oi n t - s e le c t P C p or t a n d h ub p or t c on tr o l, i f P C / U S B H u b
p or t co n t r ol b i n d in g is ena b l e d )
3
S el ec t A u d i o & M ic C h an n e l
4
S cr L k + S c r L k + ( x)
2
(x is a t o p - r o w n um ber key )
x = 1 ~4 f o r chan n el n o .
S cr L k + S c r L k + F x
Fx = F1 ~ F4
(Fx is a function key)
S cr L k + S c r L k + F y
Fy = F5 ~ F8
Pr es s t h e
P C
B ut t o n t o sw i tc h
to t he d e s i re d P C c h an n el
Pr es s t h e
USB
Bu tto n to
toggle th e P C c h an n e l th a t
c on tr ol s a ll U S B h u b p o r ts
Sele ct the a ctive PC ch an n e l
(Joint - s e lect PC / H u b port c o n t rol/ au d i o & m ic c h annel, if b in din g is
en ab l e d )
S el ec t t he P C c h a n n el fo r a ll U S B h u b p o r ts co nt ro l
(Joint - s e le ct P C & H u b p o r t con t r ol, if b i n din g is en a b le d)
S el ec t t h e a c tiv e A u di o& M i c c h a n n e l
(Joint - s e l e ct P C p ort an d au di o & m ic ch a n nel , if P C / A u d io
b in d in g i s e n a b l e d )
3
(Fy i s a f u nct i o n key)
--
(J oi n t - s el ec t P C / A u d i o & m i c c h a n ne l, if b i nd in g is e na b l ed )
E n a b le the bi n d i ng of P C p o rt a n d h u b p o rt co n t rol sw i t chin g. (O n c e
B in d P C & H u b P or t C o n tr ol S w it ch i n g
3
S cr L k + S c r L k + Z
--
th is fe at u r e i s e na b l e d , a n y p c a n d / o r h u b p or t c o n tr ol s w itc h in g is
bo u n d to ge t h e r )
U n b in d P C & H u b P o rt C on tr o l S w it ch in g
3
S cr L k + S c r L k + X
-- D is a b le t h e bin di ng of PC p o rt a n d h u b p o rt c on tr ol sw i t ch ing
(f acto ry defau l t)
E n a b le the bi n d i ng of PC p o rt a n d a u di o & m i c sw i tch in g. (O n c e t h i s
B in d P C & A u d io/ M ic S w it ch i n g
4
S cr L k + S c r L k + Q
--
featu r e is en a b l e d, any pc a n d/ o r au d io& m ic sw i t ching is bo un d
together)
(factory d efa ult)
U n b in d P C & A u d io / M ic S w i t c hi n g
4
S cr L k + S c r L k + W
-- D is a b le t h e bin di n g o f P C p o rt a n d a u d i o & m i c s w i t ch in g
N e xt lo w e r P C ch a n n el
(joint - s el e ct P C p ort an d h u b po rt co ntr ol, if b i n din g is
en ab l e d )
3
N e xt h i g h e r P C c h an n e l
(joint - s el e ct P C p ort an d h u b po rt co ntr ol, if b i n din g is
en ab l e d )
3
S cr L k + S c r L k +

(arr o w u p) -- S ele ct t he n ex t l o w e r P C ch a n ne l
(jo in t - s e l e c t P C p or t a nd h u b p ort c on tr ol, if b i n d in g is e n a b l ed )
S cr L k + S c r L k +

(arr o w do w n) -- S e le c t the next h i g h er PC c h a nnel
(jo in t - s e l e c t P C p or t a nd h u b p ort c on tr ol, if b i n d in g is e n a b l ed )
B ee p S o un d O n / Off S cr L k + S c r L k + B
--
Toggle on/o f f t h e b e ep so u nd fo r h otk e y s a n d a u to s c ann ing
R e s et m o u s e/key b oard on t h e c on s ole s id e
C on so le M o u s e R e s et
2
S cr L k + S c r L k + E n d
-
-
(T h i s hotk e y co m m a nd i s a p p lic a b le to P C s w i t h P S /2 int e r f a c e s an d
w o r k s o n ly fo r P n P O S su c h a s W i nd o w s 9 8 S E or la ter W i n do w s
O S
).
A u to sc an S cr L k + S c r L k + S
--
A u tosca n th ro u gh e v e r y co n nec te d c h ann e l for q ui c k s c r e en b r o w s i n g
of e a ch c h a n nel ( s ca n de l a y = 5 s e c.).
A u to sc a n D e la y T im e
S cr L k + S c r L k + S
+
( x )
2
x = 1~6
110” ; 2 20” ; 3 30” ;
440” ; 5 50” ; 6 60”
-
-
Speci f y de l ay t im e w i t h in a r an ge of 10 ~ 6 0 s e co nd s
S to p A u to s c a n
Pr es s a n y key o n ke y b o ard Pre s s a n y butt o n
T e rm in a te A u to sc a n a ct i vi ty
Note s :
1. A P S /2 k e ybo a rd i s r e q u i r ed for pr o p e r hot k ey f u nctio n . If y ou use a U S B k e y b o ar d , h otkey is no lo n g er f o r use.
2. C ur r e n t ly o n l y t h e to p r ow n u m b e r k e y s a r e avai l a b le fo r ho t k e ys. D o not use th e n u m b e r p a d f o r h o t key co m m an ds.
3. W h en t h e bin d ing of PC & U SB h u b p o r t co ntrol sw i t c hin g i s en ab led b y t h e h otk e y s e q u en c e : S c rL k + S c r L k + Z, An y PC a n d h u b p o rt control sw i t chi n g ar e b o u nd to g e th e r . T o r e m ove t h is bi n ding, u s e t h e h ot k ey
s e q u e n ce : ScrL k + S c r L k + X
4. W h e n t h e bi n d ing of P C & A u d i o& M i c sw i t ching is en a b l e d b y t h e h otk e y s e q u e n c e: Sc r Lk + S cr Lk + Q , a n y P C a n d a u dio & m ic sw i t ch i n g are bo u nd to g ether. To rem o v e this bi n din g, use the h o t k ey s e q uen c e:
Sc r L k + Sc r L k + W .
U S B k ey b o a r d & m o u se t i p
: If yo u u s e a U SB k e yb o ar d a nd m o u s e, you h av e to m a ke t h e h u b port c o ntr ol “ sy n c” w i t h yo u r P C po r t b e fo r e yo u ca n o p era t e y o ur c o m p u te r p r op e r l y w i t h U SB d ev i c e s o n h ub p o r t s .
L E D in f o r m a t i on
: The P C port LE D /butto n is lit as o r a nge to i n d i cate a c o n n e ct e d state and a s g r ee n to in dica t e an a c tive p ort. The U S B h u b con tr ol stat u s L ED ( r e d) in d i cat e s not t h e c o nnec t e d st a t u s o f e a c h
U S B dev i ce , b u t i n dica t e s wh i ch P C port h a s t h e c o ntrol of all h u b p orts a n d t h e ir c o n nect e d d ev i c e s. Fo r ex a m p l e, w h en U S B L E D 1 i s lit, it m e ans P C p ort 1 h a s t h e c u r r ent control o f a ll h u b p o rts a n d th eir
c on n ec t e d U S B d e vi c es .
30-170-7009-658-14 Rev. 1.4 Copyright© All rights reserved. Dec 2004
Technical Support
E-mail: btitech@linkskey.com
Website: www.linkskey.com
All manuals and user guides at all-guides.com
Other Linkskey Switch manuals

Linkskey LKV-DM02SK User manual

Linkskey

Linkskey LKV-DM02SK User manual

Linkskey LDV-002ESK User manual

Linkskey

Linkskey LDV-002ESK User manual

Linkskey LKV-S02ASK User manual

Linkskey

Linkskey LKV-S02ASK User manual

Linkskey LKS-SG5P User manual

Linkskey

Linkskey LKS-SG5P User manual

Linkskey LDV-DM222AUSK User manual

Linkskey

Linkskey LDV-DM222AUSK User manual

Linkskey Prima LKV-9304 User manual

Linkskey

Linkskey Prima LKV-9304 User manual

Linkskey LKU-S02ASK User manual

Linkskey

Linkskey LKU-S02ASK User manual

Linkskey LKV-7308 User manual

Linkskey

Linkskey LKV-7308 User manual

Linkskey LDV-242AUSK User manual

Linkskey

Linkskey LDV-242AUSK User manual

Linkskey LDV-342ARC User manual

Linkskey

Linkskey LDV-342ARC User manual

Linkskey LDV-DM702AUSK User manual

Linkskey

Linkskey LDV-DM702AUSK User manual

Linkskey LKU -UA02 User manual

Linkskey

Linkskey LKU -UA02 User manual

Linkskey LDV-212ASK User manual

Linkskey

Linkskey LDV-212ASK User manual

Linkskey LKS-SR16 User manual

Linkskey

Linkskey LKS-SR16 User manual

Linkskey LKS-SG2419 User manual

Linkskey

Linkskey LKS-SG2419 User manual

Linkskey LKS-SG5P User manual

Linkskey

Linkskey LKS-SG5P User manual

Linkskey ioPower User manual

Linkskey

Linkskey ioPower User manual

Linkskey LDV-DM712AUSK User manual

Linkskey

Linkskey LDV-DM712AUSK User manual

Linkskey LKV-T02 User manual

Linkskey

Linkskey LKV-T02 User manual

Linkskey LKV-DM02SK User manual

Linkskey

Linkskey LKV-DM02SK User manual

Linkskey LDV-002EASK User manual

Linkskey

Linkskey LDV-002EASK User manual

Linkskey LKS-SG16R User manual

Linkskey

Linkskey LKS-SG16R User manual

Linkskey LKU-S02SK User manual

Linkskey

Linkskey LKU-S02SK User manual

Linkskey LKV-1680 User manual

Linkskey

Linkskey LKV-1680 User manual

Popular Switch manuals by other brands

TP-Link TL-SL5428 installation guide

TP-Link

TP-Link TL-SL5428 installation guide

Guildline 66252A Technical manual

Guildline

Guildline 66252A Technical manual

Embertec SmartSwitch Series Frequently asked questions

Embertec

Embertec SmartSwitch Series Frequently asked questions

Cooper Aspire instruction manual

Cooper

Cooper Aspire instruction manual

Korenix JetNet 7020G Quick installation guide

Korenix

Korenix JetNet 7020G Quick installation guide

Emcotec DPSI Ampere operating manual

Emcotec

Emcotec DPSI Ampere operating manual

Cisco Catalyst 3032 Getting started guide

Cisco

Cisco Catalyst 3032 Getting started guide

pico Technology PP066 manual

pico Technology

pico Technology PP066 manual

Bticino K4413CM2 quick start guide

Bticino

Bticino K4413CM2 quick start guide

Siemens RUGGEDCOM RX1511 installation manual

Siemens

Siemens RUGGEDCOM RX1511 installation manual

Woods WiOn Installation instruction

Woods

Woods WiOn Installation instruction

Pilz PSEN cs4.1a/p/M12 operating instructions

Pilz

Pilz PSEN cs4.1a/p/M12 operating instructions

3Com SUPERSTACK 2200 user guide
3Com
3Com SUPERSTACK 2200 user guide

HP HP 5120 series Configuration guide

HP

HP HP 5120 series Configuration guide

Wolpertech 4045 manual

Wolpertech

Wolpertech 4045 manual

Fujitsu PRIMERGY SX10 S2 user guide

Fujitsu

Fujitsu PRIMERGY SX10 S2 user guide

Dwyer Instruments A3202 Installation and operating instructions

Dwyer Instruments

Dwyer Instruments A3202 Installation and operating instructions

Barrett 4050 quick start guide

Barrett

Barrett 4050 quick start guide

manuals.online logo
manuals.online logoBrands
  • About & Mission
  • Contact us
  • Privacy Policy
  • Terms and Conditions

Copyright 2025 Manuals.Online. All Rights Reserved.