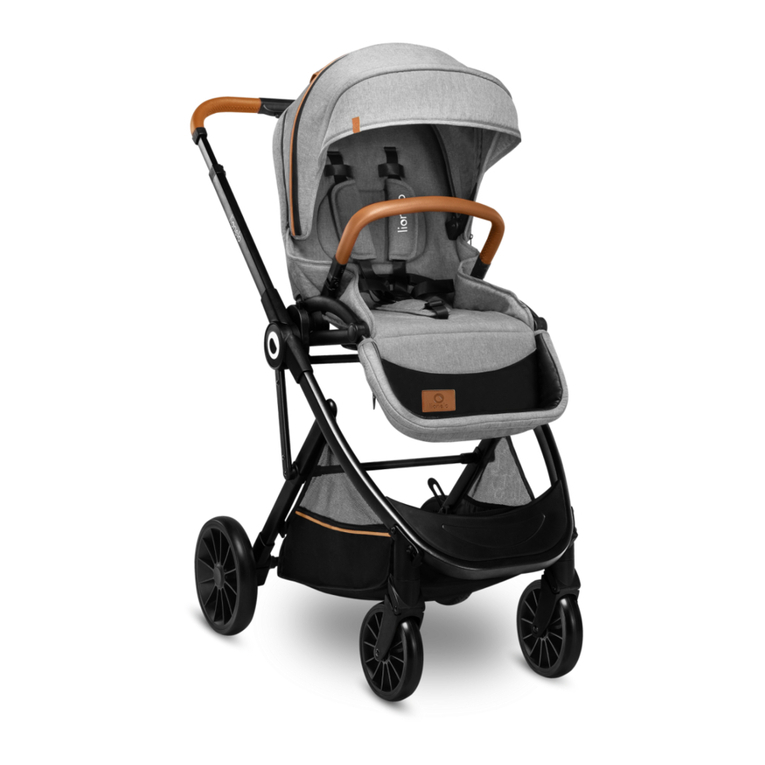
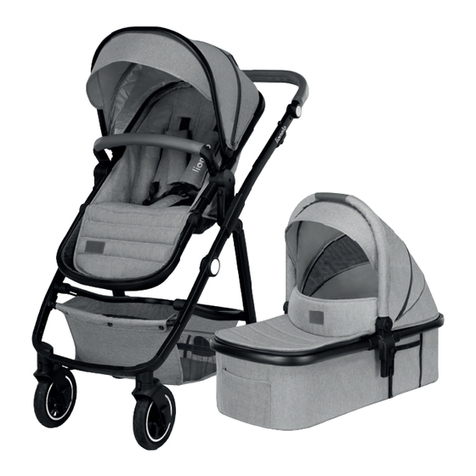
Lionelo Natt User manual

www.lionelo.com
Natt
Baby stroller
Wózek dziecięcy
Kinderwagen
Коляска
Passeggino
Poussette bébé
Carrito de bebé
Kinderwagen
Vaikiškas vežimėlis
Dětský kočárek
Babakocsi
Cărucior pentru copii
Manual de usuario
Handleiding
Naudojimo instrukcija
Návod k obsluze
Használa utasítás
Manual ulizare
User manual
Instrukcja obsługi
Bedienungsanleitung
Инструкция по эксплуатации
Manuale d’uso
Manuel de l’Ulisateur

‑ 2 ‑
1
11 10
9
8
12
6
7
3
2
4
13
5
A
1

‑ 3 ‑
1a
1b
2

‑ 4 ‑
click!
3
5
4
6
7

‑ 5 ‑
click!
8
9

‑ 6 ‑
click!
12
10
11

‑ 7 ‑
13
14
15

‑ 8 ‑EN
Dear Customer!
In case of any quesons or comments on the purchased product, please contact
Producer:
BrandLine Group Sp. z o. o.
ul. A. Kręglewskiego 1, 61-248 Poznań, Poland
IMPORTANT – READ CAREFULLY AND KEEP FOR
FUTURE REFERENCE
WARNING
1. Never leave the child unaended.
2. Ensure that all the locking devices are engaged before use.
3.
To avoid injury ensure that the child is kept away when
unfolding and folding this product.
4. Do not let the child play with this product.
5. Always use the restraint system.
6.
Check that the pram body or seat unit or car seat aachment
devices are correctly engaged before use.
7. This product is not suitable for running or skang.
8.
The product is suitable for a child weighing up to 22 kg or
up to 4 years (whichever comes rst).
9.
The lowest backrest posion is recommended for newborns.
10. If you want to take the baby out of the stroller, or put it in it,
make sure the parking device is locked.
11. The maximum allowable load of the basket is 3 kg.
12.
Any load aached to the handle and / or the back of the
backrest and / or the sides of the product will aect the
stability of the stroller.
13. Only one child can use the product at a me.
14. Do not use accessories that have not been approved by the
manufacturer.
EN

‑ 9 ‑ EN
15.
Use only spare parts supplied or recommended by the
manufacturer.
16. Do not use the product on stairs.
List of parts (g. A)
1. Handle
2. Folding lever
3. Lock
4. Seat adjustment strap
5. Rear wheels
6. Front wheels
7. Footrest
8. Safety bar
9. Harness
10. Canopy
11. Viewnder
12. Basket
13. Parking device
Unfolding the stroller
To unfold the stroller, remove the locking mechanism (g. 1, 1A), then grasp the
handle and dynamically pull it upward. The stroller will unfold on its own (g. 1B).
A click will signal the correct unfolding of the stroller.
Installaon and removal of front wheels
Note! Pay aenon to the installaon of the le and right wheel on the correct
side of the stroller frame. Make sure that the bolt inside the wheel is on the
inside of the frame.
1.
Insert the front wheel stem into the corresponding holes in the frame of
the stroller (g. 2).
2.
To lock the wheels for straight-ahead travel, move the lock (g. 3) in the
outward direcon. To unlock, move the lock towards the inside.
3. To remove the front wheels, press the buon (g. 4) and pull them out of
the stroller frame.
Installaon and removal of rear wheels
1.
Insert the rear wheel stem into the corresponding holes in the stroller frame
(g. 5).
2. To remove the rear wheels, pull the metal handle (g. 6) and pull them out
of the stroller frame.

‑ 10 ‑EN
Harness
1.
Insert the fastener components into the main buckle (g. 11). A correct
connecon will signal a click.
2.
Adjust the length of the harness to the child’s body using the buckles located
on the straps (g. 12).
3. To unbuckle the harness, press the buon located in the buckle (g. 13).
Harness adjustment
To adjust the harness, remove the buckle through the hole located in the seat
and put it in the desired place.
Make sure that the buckles are in the correct, stable posion aer reposioning.
Installaon and removal of the safety bar
1.
Insert the safety bar into the connectors on the stroller frame (g. 7). Correct
installaon will signal a click.
2.
To remove the safety bar, press the release buons located on the inside
of the frame. Push the buons independently on both sides of the stroller,
then pull out the safety bar.
Footrest adjustment
1.
To lower the footrest, press both adjustment buons (g. 8) and set the
footrest to the desired posion.
2. To raise the footrest, li it and move it to the desired posion.
A click will signal that the footrest is locked in the selected posion.
Seat adjustment
Note! Do not adjust the seat when there is a child in the stroller.
To change the posion of the seat, use the buckle located on the adjustment
strap at the back of the backrest (g. 9).
1. Slide the buckle down to the end of the adjustment strap to adjust the seat
to the reclining posion.
2. Slide the buckle upward to adjust the seat to a sing posion.
Parking device
Press to lock the wheels and stop the stroller. Li to unlock (g. 10).

‑ 11 ‑
PL
Drogi Kliencie!
Jeśli masz jakiekolwiek uwagi lub pytania do zakupionego produktu, skontaktuj
się z nami: [email protected]
Producent:
BrandLine Group Sp. z o. o.
ul. A. Kręglewskiego 1, 61-248 Poznań, Polska
EN | PL
Canopy adjustment
Slide the canopy forward or backward to move it to the desired posion.
Folding the stroller
Note! Unlock the front wheels before folding the stroller.
1. To fold the stroller, move both folding levers at the same me (g. 14), then
push the handle forward.
2.
Press down on the stroller to make sure it is folded correctly. Make sure that
the lock is correctly installed (g. 15)
Cleaning and maintenance
• The cover and basket can be hand-washed at 30°C.
• Clean the frame of the stroller with a damp cloth and mild cleaning agents.
•
Regularly check the condion of the stroller and wheels. Do not use
accessories that are not included. Use only original spare parts.
• Do not expose the stroller to direct sunlight for too long.
• Do not expose the stroller to salt water, as this can cause rust.
The photos are for reference only, the actual look of the products may dier from the
ones shown in the pictures.

‑ 12 ‑PL
WAŻNE! PRZECZYTAJ UWAŻNIE I ZACHOWAJ NA
PRZYSZŁOŚC JAKO ODNIESIENIE
OSTRZEŻENIA
1. Nigdy nie zostawiaj dziecka bez opieki.
2.
Upewnij się przed użyciem, czy wszystkie urządzenia blokujące
są włączone.
3.
Aby uniknąć obrażeń, upewnij się, czy dziecko jest odsunięte
kiedy rozkłada się lub składa niniejszy wyrób.
4. Nie pozwalaj dziecku bawić się tym wyrobem.
5. Zawsze używaj systemu zapięć.
6. Sprawdź, czy urządzenia mocujące gondolę lub siedzisko lub
fotelik samochodowy są prawidłowo załączone przed użyciem.
7.
Niniejszy wyrób nie jest odpowiedni do biegania ani jazdy
na rolkach.
8. Produkt jest odpowiedni dla dziecka o masie ciała do 22 kg
lub do 4 lat (w zależności od tego, co nastąpi wcześniej).
9. W przypadku noworodków zaleca się stosowanie najniższej
pozycji oparcia.
10.
Jeśli chcesz wyciągnąć dziecko z wózka, lub je do niego włożyć,
upewnij się że mechanizm postojowy jest zablokowany.
11. Maksymalne dopuszczalne obciążenie kosza wynosi 3 kg.
12.
Wszelkie ładunki przymocowane do uchwytu i / lub z tyłu
oparcia i / lub po bokach produktu wpłyną na stabilność wózka.
13.
Z produktu może korzystać jednocześnie tylko jedno dziecko.
14.
Nie należy używać akcesoriów, które nie zostały zatwierdzone
przez producenta.
15. Należy używać wyłącznie części zamiennych dostarczonych
lub zalecanych przez producenta.
16. Nie używaj produktu na schodach.
Lista części (rys. A)
1. Rączka
2. Dźwignia składania
3. Blokada
4. Pas regulacji siedziska
5. Koła tylne
6. Koła przednie

‑ 13 ‑ PL
7. Podnóżek
8. Barierka
9. Pasy bezpieczeństwa
10. Daszek
11. Wizjer
12. Kosz
13. Mechanizm postojowy
Rozkładanie wózka
Aby rozłożyć wózek, zdejmij blokadę (rys. 1, 1A), a następnie chwyć rączkę
i dynamicznie pociągnij ją ku górze. Wózek rozłoży się samoistnie (rys. 1B).
Prawidłowe rozłożenie wózka zasygnalizuje kliknięcie.
Montaż i demontaż kół przednich
Uwaga! Zwróć uwagę na montaż koła lewego i prawego po odpowiedniej stronie
ramy wózka. Upewnij się, że śruba wewnątrz koła znajduje się po wewnętrznej
stronie ramy.
1.
Włóż trzpień kół przednich do odpowiednich otworów w ramie wózka (rys. 2).
2.
Aby zablokować koła do jazdy na wprost, przesuń blokadę (rys. 3) w kierunku
zewnętrznym. Aby odblokować, przesuń blokadę w kierunku wewnętrznym.
3.
Aby zdemontować koła przednie, wciśnij przycisk zwalniający (rys. 4)
i wyciągnij je z ramy wózka.
Montaż i demontaż kół tylnych
1. Włóż trzpień kół tylnych do odpowiednich otworów w ramie wózka (rys. 5).
2.
Aby zdemontować koła tylne, pociągnij za metalowy uchwyt (rys. 6) i wyciągnij
je z ramy wózka.
Pasy bezpieczeństwa
1. Włóż elementy zapięcia do głównej klamry (rys. 11). Poprawne połączenie
zasygnalizuje kliknięcie.
2. Dostosuj długość pasów do ciała dziecka za pomocą klamerek znajdujących
się na pasach (rys. 12).
3. Aby odpiąć pasy, wciśnij przycisk znajdujący się na klamrze (rys. 13).
Regulacja pasów bezpieczeństwa
Aby wyregulować pasy, wyjmij sprzączkę przez otwór znajdujący się w siedzisku
i przełóż w pożądane miejsce.

‑ 14 ‑PL
Upewnij się, że klamry po przełożeniu znajdują się w odpowiedniej, stabilnej pozycji.
Montaż i demontaż barierki
1.
Włóż barierkę w złącza na ramie wózka (rys. 7). Prawidłowy montaż
zasygnalizuje kliknięcie.
2.
Aby zdjąć barierkę, wciśnij przyciski zwalniające znajdujące się po wewnętrznej
stronie ramy. Przyciski należ wcisnąć niezależnie z obu stron wózka,
a następnie wyciągnąć barierkę.
Regulacja podnóżka
1.
Aby obniżyć podnóżek, wciśnij oba przyciski regulacji (rys. 8) i ustaw podnóżek
w wybranej pozycji.
2. Aby podwyższyć podnóżek, unieś go i ustaw w wybranej pozycji.
Zablokowanie podnóżka w wybranej pozycji zasygnalizuje kliknięcie.
Regulacja siedziska
Uwaga! Nie dokonuj regulacji siedziska, gdy w wózku znajduje się dziecko.
Aby zmienić pozycję siedziska, użyj klamry znajdującą się na pasku regulującym
z tyłu oparcia (rys. 9).
1. Przesuń klamrę w dół, do końca paska regulującego, aby ustawić siedzisko
w pozycji leżącej.
2. Przesuń klamrę do góry, aby ustawić siedzisko w pozycji siedzącej.
Mechanizm postojowy
Naciśnij, aby zablokować koła i zatrzymać wózek. Unieś, aby odblokować (rys. 10).
Regulacja daszka
Przesuń daszek do przodu lub do tyłu, aby ustawić go w pożądanej pozycji.
Składanie wózka
Uwaga! Przed złożeniem wózka odblokuj koła przednie.
1. Aby złożyć wózek, przesuń jednocześnie obie dźwignie składania (rys. 14),
a następnie pchnij rączkę do przodu.
2. Dociśnij wózek, aby upewnić się, że został złożony poprawnie. Upewnij się,
że blokada została poprawnie założona (rys. 15)

‑ 15 ‑
DE
Sehr geehrter Kunde!
Falls Sie Fragen oder Anmerkungen zu dem gekauen Produkt haben, setzen Sie
sich mit uns in Verbindung: [email protected]
Hersteller:
BrandLine Group Sp. z o. o.
ul. A. Kręglewskiego 1, 61-248 Poznań, Polen
WICHTIG – BITTE SORGFÄLTIG LESEN UND FÜR
SPÄTERES NACHLESEN UNBEDINGT AUFBEWAHREN
WARNUNG
1. Lassen Sie das Kind nie unbeaufsichgt.
2.
Vergewissern Sie sich vor Gebrauch, dass alle Verriegelungen
eingerastet sind.
3.
Vergewissern Sie sich, dass das Kind beim Aulappen und
PL | DE
Czyszczenie i konserwacja
• Tapicerkę oraz kosz można prać ręcznie w temperaturze 30°C.
•
Ramę wózka należy czyścić z użyciem wilgotnej ściereczki i delikatnych
środków czyszczących.
• Regularnie sprawdzaj stan wózka oraz kół. Nie używaj akcesoriów, które nie
są dołączone do zestawu. Używaj wyłącznie oryginalnych części zamiennych.
•
Nie wystawiaj wózka na zbyt długie, bezpośrednie działanie promieni
słonecznych.
•
Nie narażaj wózka na kontakt ze słoną wodą, gdyż może to spowodować
powstawanie rdzy.
Zdjęcia mają charakter poglądowy, rzeczywisty wygląd produktów może się różnić od
prezentowanego na zdjęciach.

‑ 16 ‑DE
Zusammenklappen des Wagens außer Reichweite ist, um
Verletzungen zu vermeiden.
4. Lassen Sie das Kind nicht mit dem Produkt spielen.
5. Verwenden Sie immer das Rückhaltesystem.
6.
Vergewissern Sie sich vor der Verwendung, dass der
Kinderwagenaufsatz oder der Sitzeinheit oder die
Befesgungselemente des Autositzes korrekt eingerastet sind.
7. Dieses Produkt ist nicht zum Joggen oder Skaten geeignet.
8.
Das Produkt ist für ein Kind bis 22 kg oder bis 4 Jahre geeignet
(je nachdem, was zuerst eintri).
9.
Für Neugeborene wird empfohlen, die efste Rückenlehnenposion
einzustellen.
10.
Wenn Sie das Kind aus dem Kinderwagen herausholen oder es
in den Kinderwagen hineinlegen oder -setzen wollen, stellen
Sie sicher, dass die Feststellvorrichtung arreert ist.
11. Maximale zulässige Belastung des Korbs beträgt 3 kg.
12.
Jede Last, die am Gri und / oder an der Rückseite der
Rückenlehne und / oder an den Seiten des Kinderwagens
angebracht wird, beeinträchgt seine Stabilität.
13.
Das Produkt darf jeweils nur von einem Kind benutzt werden.
14.
Verwenden Sie keine Accessoires, die nicht vom Hersteller
zugelassen sind.
15.
Verwenden Sie nur vom Hersteller gelieferte oder empfohlene
Ersatzteile.
16. Verwenden Sie das Produkt nicht auf Treppen.
Liste der Teile (Abb. A)
1. Gri
2. Klapphebel
3. Verriegelung
4. Gurt zur Sitzeinstellung
5. Hinterräder
6. Vorderräder
7. Tribre
8. Schutz
9. Sicherheitsgurte
10. Verdeck
11. Sichenster
12. Korb
13. Feststellvorrichtung

‑ 17 ‑ DE
Aulappen des Kinderwagens
Zum Aulappen des Kinderwagens enernen Sie den Verriegelungsmechanismus
(Abb. 1, 1A), greifen dann den Gri und ziehen ihn dynamisch nach oben. Der
Wagen klappt sich von selbst auf (Abb. 1B).
Das korrekte Ausklappen des Wagens wird durch ein Klicken signalisiert.
Montage und Demontage der Vorderräder
Hinweis! Achten Sie darauf, die linken und rechten Räder auf der richgen Seite
des Wagenrahmens zu moneren. Achten Sie darauf, dass sich die Schraube im
Rad auf der Innenseite des Rahmens bendet.
1.
Stecken Sie den S der Vorderräder in die entsprechenden Löcher im
Kinderwagenrahmen (Abb. 2).
2.
Um die Räder für die Geradeausfahrt zu blockieren, bewegen Sie dieVerriegelung
(Abb. 3) nach außen. Zum Entriegeln bewegen Sie die Verriegelung nach innen.
3. Um die Vorderräder zu demonteren, drücken Sie den Entriegelungsknopf (
Abb. 4) und ziehen Sie sie aus dem Kinderwagenrahmen heraus.
Montage und Demontage der Hinterräder
1.
Stecken Sie den S der Hinterräder in die entsprechenden Löcher im
Kinderwagenrahmen (Abb. 5).
2. Um die Hinterräder zu demonteren, ziehen Sie am Metallgri ( Abb. 6) und
ziehen Sie sie aus dem Kinderwagenrahmen.
Sicherheitsgurte
1.
Stecken Sie die Schnallenelemente in die Hauptschnalle (Abb. 11). Die
korrekte Verbindung wird durch einen Klick signalisiert.
2. Passen Sie die Länge der Gurte mit Hilfe der Klemmen an den Gurten (Abb.
12) an den Körper des Kindes an.
3. Um den Gurt zu lösen, drücken Sie den Knopf an der Schnalle (Abb. 13).
Regulierung der Sicherheitsgurte
Um die Gurte einzustellen, ziehen Sie die Schnalle durch das Loch im Sitz und
bringen Sie sie in die gewünschte Posion.
Achten Sie darauf, dass sich die Schnallen nach dem Einstellen in der richgen,
stabilen Posion benden.

‑ 18 ‑DE
Montage und Demontage des Schutzes
1. Stecken Sie den Schutz in das Gurtverbindungselement am Wagenrahmen
(Abb. 7). Die korrekte Montage wird durch einen Klick signalisiert.
2.
Um den Schutz zu enernen, drücken Sie die Entriegelungsknöpfe an der
Innenseite des Rahmens. Die Knöpfe müssen unabhängig voneinander auf beiden
Seiten des Kinderwagens gedrückt und dann der Schutz herausgezogen werden.
Verstellbares Tribre
1.
Um die Fußstütze abzusenken, drücken Sie beide Einstellknöpfe (Abb. 8)
und bewegen die Fußstütze in die gewünschte Posion.
2. Um die Fußstütze zu erhöhen, heben Sie sie an und bringen Sie sie in die
gewünschte Posion.
Das Einrasten der Fußstütze in der gewählten Posion wird durch ein Klicken
angezeigt.
Einstellung des Sitzes
Hinweis! Verstellen Sie den Sitz nicht, wenn sich ein Kind im Kinderwagen bendet.
Um die Posion des Sitzes zu verändern, verwenden Sie die Schnalle am Einstellgurt
an der Rückseite der Rückenlehne (Abb. 9).
1.
Schieben Sie die Schnalle bis zum Ende des Einstellgurts nach unten, um
den Sitz in die Liegeposion zu bringen.
2. Schieben Sie die Schnalle nach oben, um den Sitz in eine aufrechte Posion
zu bringen.
Feststellvorrichtung
Drücken Sie darauf , um die Räder zu blockieren und den Kinderwagen anzuhalten.
Heben Sie sie zum Entriegeln an (Abb. 10).
Einstellen des Verdecks
Schieben Sie das Verdeck nach vorne oder nach hinten, um es in die gewünschte
Posion zu bringen.
Zusammenfalten des Kinderwagens
Hinweis! Entriegeln Sie die Vorderräder, bevor Sie den Kinderwagen
zusammenklappen.

‑ 19 ‑
RU
Уважаемый Клиент!
Если у вас есть какие-либо комментарии или вопросы по поводу
приобретенного вами продукта, свяжитесь с нами: [email protected]
Производитель:
BrandLine Group Sp. из о. о.
ул. A. Kręglewskiego 1, 61-248 Познань, Польша
DE | RU
1.
Um den Kinderwagen zusammenzuklappen, bewegen Sie beide Klapphebel
gleichzeig (Abb. 14) und drücken Sie dann den Gri nach vorne.
2.
Drücken Sie auf den Wagen, um sicherzustellen, dass er korrekt
zusammengefaltet wurde. Vergewissern Sie sich, dass die Verriegelung korrekt
angebracht wurde (Abb. 15).
Reinigung und Pege
•
Die Polsterung und der Korb können mit der Hand bei 30°C gewaschen
werden.
• Der Rahmen des Kinderwagens sollte mit einem feuchten Tuch und milden
Reinigungsmieln gereinigt werden.
• Überprüfen Sie regelmäßig den Zustand des Kinderwagens und der Räder.
Verwenden Sie kein Zubehör, das nicht im Set enthalten ist Verwenden Sie
nur Originalersatzteile.
• Setzen Sie den Kinderwagen nicht zu lange dem direkten Sonnenlicht aus.
•
Setzen Sie den Kinderwagen nicht Salzwasser aus, da sich dadurch Rost
bilden kann.
Die gezeigten Bilder dienen nur als Referenz. Das tatsächliche Produkt kann von den
Abbildungen abweichen.

‑ 20 ‑RU
ВАЖНО! ВНИМАТЕЛЬНО ПРОЧИТАЙТЕ
И СОХРАНИТЕ ДЛЯ ДАЛЬНЕЙШЕГО
ИСПОЛЬЗОВАНИЯ
ПРЕДУПРЕЖДЕНИЯ
1. Никогда не оставляйте ребенка без присмотра.
2.
Перед использованием убедитесь, что все блокирующие
устройства включены.
3. Во избежание травм следите за тем, чтобы ребенок не
находился при раскладывании или складывании этого
изделия.
4. Не позволяйте детям играть с этим изделием.
5. Всегда используйте систему крепления.
6. Перед использованием убедитесь, что люлька, сиденье
или устройства крепления автокресла правильно
закреплены.
7.
Этот продукт не подходит для бега или катания на роликах.
8. Изделие подходит для ребенка весом до 22 кг или до 4
лет (в зависимости от того, что наступит раньше).
9.
Для новорожденных рекомендуется использовать самое
нижнее положение спинки.
10.
Если вы хотите вытащить ребенка из коляски или
посадить его в нее, убедитесь, что парковочный механизм
заблокирован.
11. Максимально допустимая нагрузка на корзину 3 кг.
12.
Любые тяжести, прикрепленные к ручке и/или задней
части спинки и/или боковым сторонам изделия, повлияют
на устойчивость коляски.
13.
Только один ребенок может использовать продукт
одновременно.
14.
Не используйте аксессуары, не одобренные
производителем.
15. Используйте только запасные части, поставляемые или
рекомендованные производителем.
16. Не используйте изделие на лестнице.
Table of contents
Languages:
Other Lionelo Stroller manuals

Lionelo
Lionelo Elia Oslo User manual

Lionelo
Lionelo Dani User manual

Lionelo
Lionelo Cloe User manual

Lionelo
Lionelo Mika User manual

Lionelo
Lionelo Dani User manual

Lionelo
Lionelo ELIA User manual

Lionelo
Lionelo EMMA PLUS User manual

Lionelo
Lionelo LIV User manual

Lionelo
Lionelo Alexia User manual

Lionelo
Lionelo LUNA User manual

Lionelo
Lionelo EMMA PLUS User manual

Lionelo
Lionelo LO-EMMA User manual

Lionelo
Lionelo JulieONE User manual

Lionelo
Lionelo Mari Tour User manual

Lionelo
Lionelo Annet Plus User manual

Lionelo
Lionelo Amber User manual

Lionelo
Lionelo Irma User manual

Lionelo
Lionelo Riya User manual

Lionelo
Lionelo Annet Tour User manual

Lionelo
Lionelo LEA User manual