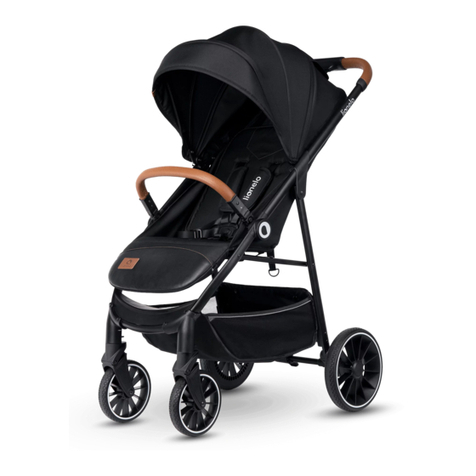
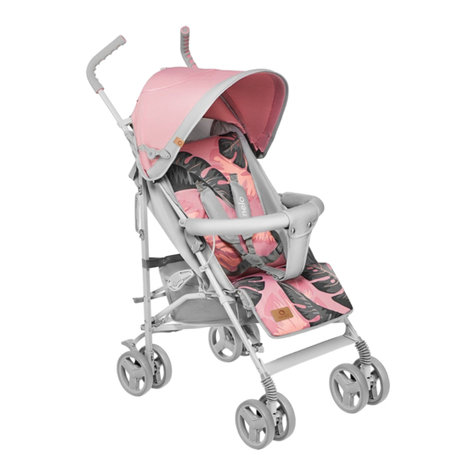
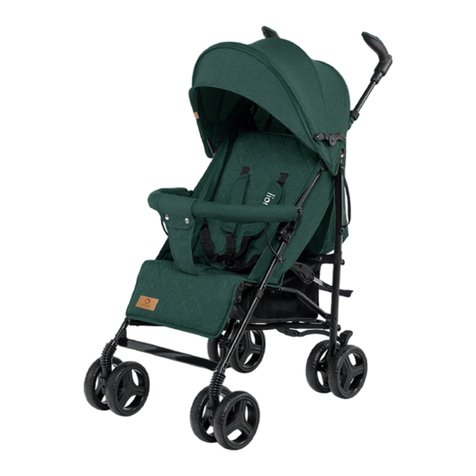
Lionelo LEA User manual

LEA
wózek
stroller
Instrukcja obsługi
User manual
WWW.LIONELO.COM


WWW.LIONELO.COM

PL
Wstęp
Drogi Kliencie!
Dziękujemy za obdarzenie nas zaufaniem i wybranie marki
Lionelo.
Nasze produkty wykonywane są z największą starannością,
by zapewnić Twojemu dziecku komfort korzystania, równ-
ocześnie dbając o jego bezpieczeństwo. Dzięki wykorzysta-
niu wysokiej jakości materiałów i nowoczesnych rozwiązań
technologicznych oddajemy w Twoje ręce produkt idealny
do codziennego użytkowania.
Przed użyciem produktu zapoznaj się dokładnie z
poniższą instrukcją obsługi.
Jeśli masz jakiekolwiek uwagi lub pytania do zakupionego
produktu, skontaktuj się z nami:
pomoctechniczna@lionelo.com

PL
Instrukcja obsługi
Uwaga: Montaż musi być przeprowadzony przez
osobę dorosłą. Niezastosowanie się do tych ostrzeżeń
i instrukcji montażu może spowodować poważne obrażenia lub
śmierć.
Środki ostrożności:
• Wózek przeznaczony jest dla dzieci od 6 do 36 miesiąca życia
i masie do 15 kg.
• Nieprzestrzeganie procedur zawartych w niniejszej instruk-
cji użytkowania może doprowadzić do poważnych uszkodzeń
ciała dziecka.
• Podczas korzystania z wózka, dziecko powinno być zabezpie-
czone pięciopunktowymi pasami bezpieczeństwa.
• Dziecko znajdujące się w wózku, nie może być pozostawione
bez opieki rodzica lub opiekuna.
• Jeżeli wózek jest w jakikolwiek sposób uszkodzony, należy
niezwłocznie zaprzestać jego użytkowania oraz skontaktować
się ze sprzedawcą.
• Nie wolno pozwalać dziecku na wstawanie podczas przeby-
wania w wózku – dziecko musi być zabezpieczone pasami.
• Wózek przeznaczony jest do użytku przez jedno dziecko.
• Dozwolone jest używanie części zamiennych dostarczonych
wyłącznie przez producenta.
• Wszystkie części wózka powinny być regularnie sprawdzane
w celu upewnienia się, że funkcjonują prawidłowo.
• Nie zawieszaj ani nie kładź żadnych ciężkich przedmiotów
na poręczy wózka, może to doprowadzić do jego wywrócenia i

PL
zranienia dziecka.
• Produkt nie jest przeznaczony do biegania, jazdy na
rolkach itp.
• Przed użyciem wózka należy upewnić się, że mechanizmy
składania zostały zablokowane.
• Aby uniknąć obrażeń dziecka, upewnij się, że nie znajdu-
je się ono w pobliżu wózka, kiedy produkt jest rozkładany i
składany.
• Nie pozwól dziecku bawić się tym produktem.
• Podczas wkładania / wyjmowania dziecka do/z wózka
hamulec musi być zablokowany.
• Siedzisko nie jest odpowiednie dla dzieci poniżej 6 miesią-
ca życia.
• Produkt należy trzymać z dala od ognia.
• Maksymalna ładowność kosza na zakupy wynosi 5 kg.
• Nie używać materaca grubszego niż 25mm.
Opis:
rączka
oparcie
kosz
tylne koła
daszek
pasy
bezpieczeństwa
podstawka pod
nogi
przednie koła
barierka
zabezpieczająca

PL
Rozkładanie:
a. Zwolnić zatrzask blokujący.
b. Podnieść rączkę do góry, a tylną blokadę do dołu.
c. Zapiąć zatrzaski wewnątrz siedziska oraz na dole pod
podnóżkiem.
Wsunąć uchwyt koła przedniego w
prowadnicę przednią, dosunąć uchwyt
koła aż do momentu zatrzaśnięcia
się blokady. Będzie słychać
charakterystyczne kliknięcie.
Upewnić się, że koło zostało prawidłowo
zamontowane i zablokowanew prowadnicy.
Wsunąć uchwyt koła tylnego w
prowadnicę przednią, dosunąć uchwyt
koła aż do momentu zatrzaśnięcia
się blokady. Będzie słychać
charakterystyczne kliknięcie.
Upewnić się, że koło zostało prawidłowo
zamontowane i zablokowane w prowadnicy.
zatrzask
blokujący
rączka
a
b
c
dół
Prowadnice
przednich kół
Prowadnice
przednich kół
Prowadnice
tylnych kół
otwory zabezpieczajace

PL
Wsunąć barierkę zabezpieczającą
w prowadniki znajdujące się w
środkowej części ramy wózka.
Aby odczepić barierkę, wcisnąć
zabezpieczenie znajdujące się
od zewnętrznej strony prowadników,
następnie wysunąć barierkę.
Wsunąć uchwyt daszka z góry
w prowadnicę znajdującą się na
ramie wózka w środkowej jogo
części. Dosunąć do momentu
zablokowania.
Aby rozłożyć daszek, przesuń go
do przodu. Aby złożyć daszek,
przesuń go do tyłu.
prowadnice barierki
zabezpieczającej
otwór blokujący
przycisk
barierka
zabezpieczająca
uchwyt
daszka
prowadnica
uchwytów daszka

PL
Podnóżek regulowany jest w
dwóch płaszczyznach.
Naciśnij przyciski umiejscowione
na bokach podnóżka i ustaw odpo
wiednią pozycję.
Aby wyregulować oparcie wózka, zlokalizuj pasek ze sprzączką
znajdujący się za oparciem. Przesuń klamrę do przodu w celu
podniesienia oparcia lub naciśnij przycisk na klamrze i przesuń
ją do tyłu w celu opuszczenia oparcia.
prowadnice barierki
zabezpieczającej
otwór blokujący
przyciski
klamra regulacji oparcia
przycisk
pasek

PL
Wózek wyposażony jest w system blokowania przednich
kół. Aby to zrobić, ustaw przednie koła przodem do kierun-
ku jazdy, następnie przesuń zabezpieczenie znajdujące się
pomiędzy kołami do góry. Aby zwolnić blokadę przesuń
zabezpieczenie do dołu.
Włoż lewą i prawą sprzączkę do uchwytu pasów. Kliknięcie
oznacza prawidłowo zapięte pasy.
Aby odpiąć pasy, naciśnij przycisk na środku uchwytu
i wysuń sprzączki z zatrzasków.
Regulacja długości pasów. Przesuń sprzączki znajdując się
na prawym i lewym pasie, aby wyregulować długość.
Przesuń hamulec do dołu, aby
zablokować koła.
Przesuń hamulec do góry, aby
odblokować koła.
sprzączka pasa sprzączka pasa
klamra regulacji
pasa
klamra regulacji
pasa
uchwyt pasów
tylny hamulec
przycisk

PL
Składanie:
Przed złożeniem wózka, złóż
daszek oraz opuść podnóżek do
dolnej pozycji.
Przesuń przyciski składania z
obu stron do góry i opuść rączkę
do dołu.
Złóż wózek.
Zabezpiecz złożony wózek zatr
zaskiem blokującym oraz ustaw
przednie koła tak jak na rysunku
po lewej stronie. Pozwoli to na
postawienie wózka.
Utrzymanie:
Ramę wózka można przecierać wilgotną szmatką. Tapicerkę
czyścić miękką szczotką. Tapicerki nie można prać w pralce.
Zdjęcia mają charakter poglądowy, rzeczywisty wygląd produktów może
różnić się od prezentowanego na zdjęciach.
rączka
przycisk
składania
zatrzask
blokujący
hak
blokady
przednie
koło
podnóżek

EN
Introduction
Dear Customer!
Thank you for placing your trust in us and choosing Lionelo.
Our products are made with the utmost care to ensure
comfort and above all, maximum safety of your child. Imple-
mentation of high quality materials and modern technol-
ogies allows us to provide users with a product that is
perfectly suited for everyday use.
Before using the product, please read the included
user manual carefully.

EN
Manual:
Note: The assembly of the product must be performed by an
adult. Failure to comply with this provision and the assembly
instructions could result in serious injury or even death.
Note:
• The stroller is suitable for children from 6 to 36 months old
and weighing less than 15 kg.
• Failure to follow the instructions in the manual could result in
serious injury or death of your child.
• While using the stroller, a child should be always secured with
a 5-point safety harness system.
• Do not ever leave your child unattended in the stroller.
• If the stroller is damaged in any way, please stop using it
immediately and contact your dealer.
• Do not allow your child to stand in the stroller. A child must be
always secured with a 5-point safety harness system.
• The stroller is a single user product.
• Only the spare parts supplied by the manufacturer can be
used with this stroller.
• All the components of the stroller should be regularly checked
to ensure they operate properly.
• Do not hang or place any heavy objects on the stroller’s bar.
Otherwise it can cause the stroller to overturn and hurt the
child.
• The product is not designed for running, skating, etc.
• Before you start using the stroller, make sure the folding
mechanisms are properly locked.
• To prevent a child from injury, do not allow it to stay near the

EN
handle
backrest
basket
rear wheels
canopy
safety
belts
footrest
front wheels
safety
rail
stroller when the product is being assembled or disassem-
bled.
• Do not allow children to play with the product.
• When placing / removing a child into / from the stroller, the
brake must be pulled.
• The seat is NOT suitable for children younger than
6 months.
• Keep the product away from re.
• The maximum load of the shopping basket is 5 kg.
• Do not use the mattress thicker than 25mm.
Description:

EN
Unfolding:
a. Release the unfolding lock.
b. Move the handle up, while pushing the rear lock down.
c. Fasten the snaps inside the seat and at the bottom under
the footrest.
Insert the front wheel’s stem into the
front guide and push the wheel’s stem
until the lock snaps into place. You will
hear the click sound.
Please ensure that the wheel has been
properly installed and locked in the guide.
Insert the rear wheel’s stem into the
front guide and push the wheel’s stem
until the lock snaps into place. You will
hear the click sound.
Please ensure that the wheel has been
properly installed and locked in the guide.
folding/
unfolding
lock
handle
handle
a
b
c
bottom
front wheel
guides
lock bottons
rear wheel
guides
lock holes

EN
Push the safety rail into the guides
in the central part of the stroller’s
frame.
In order to detach the safety rail,
press the lock latch at the outside
of the tray handles, and then pull
out the safety rail.
Slide the canopy mount into the
guide in the central part of the
stroller’s frame. Push it until it locks
in place.
Move the canopy forward to unfold
it. Move it backward to fold it.
safety rail guides
lock hole
button
safety rail
canopy
mount
canopy
mount guide

EN
The footrest can be adjusted into
two different positions.
Press the buttons on the sides of
the footrest and choose a desirable
position.
In order to adjust the backrest, nd the strap with a buckle
located behind the backrest. Move the buckle forward to lift
the backrest. Press the buckle button and move the buckle
backward to lower the backrest.
lock hole
buttons
backrest adjustment
buckle button
strap

EN
The stroller is equipped with a front wheel turning locking
system. To activate it, set the front wheels to the forward
direction, and then slide up the lock between the wheels.
Move the lock down so that the wheels can be turned again.
Insert the left and right clasp into the main buckle. You
should hear a “click sound” indicating that the belts have
been properly fastened.
In order to unfasten the safety belts, press the button on the
middle of the buckle and pull the clasps out.
Belts length adjustment Move the clasps on the right and
left belt to adjust the length.
Move the brake down to lock the
wheels.
Move the brake up to unlock the
wheels.
strap clasp strap clasp
strap adjustment
clasp
strap adjustment
clasp
main buckle
rear brake
button

EN
Folding:
Maintenance:
The stroller’s frame can be cleaned with a damp cloth. Clean
the padding with a soft brush. Do not machine wash the
padding.
The pictures in this manual are for illustrative purposes only. Therefore, they
may differ from the actual product.
handle
folding
button
folding/ unfolding
lock
lock hook
front
wheel
footrest
Before folding the stroller, fold
the canopy and lower the footrest
(to the lower position). Slide up
the folding buttons at t h e
both sides of the stroller’s frame
and push the handle down. Fold
the stroller.
Secure the folded stroller with the
folding lock and place the front
wheels as shown in the picture on
the left. It will allow you to keep it
in an upright position.

Produkt był testowany i jest zgodny z normami:
The product was tested and complies
with the standards:
EN 1888:2012
Table of contents
Languages:
Other Lionelo Stroller manuals

Lionelo
Lionelo Alexia User manual

Lionelo
Lionelo Cloe User manual

Lionelo
Lionelo LUNA User manual

Lionelo
Lionelo Irma User manual

Lionelo
Lionelo LO-EMMA User manual

Lionelo
Lionelo JulieONE User manual

Lionelo
Lionelo Mika User manual

Lionelo
Lionelo ELIA User manual

Lionelo
Lionelo EMMA PLUS User manual

Lionelo
Lionelo Amber User manual

Lionelo
Lionelo Dani User manual

Lionelo
Lionelo Natt User manual

Lionelo
Lionelo Dani User manual

Lionelo
Lionelo Mari Tour User manual

Lionelo
Lionelo Riya User manual

Lionelo
Lionelo EMMA PLUS User manual

Lionelo
Lionelo Elia Oslo User manual

Lionelo
Lionelo Annet Tour User manual

Lionelo
Lionelo Annet Plus User manual
Lionelo
Lionelo LIV User manual