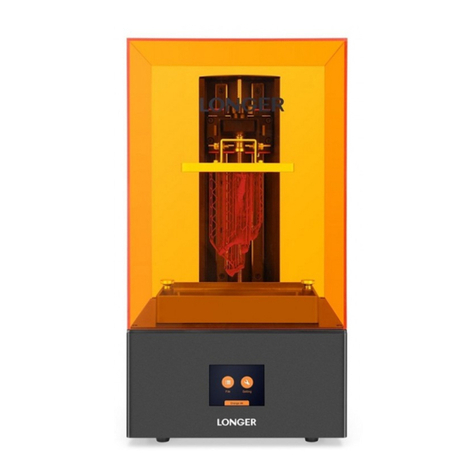
LONGER Orange120 User manual

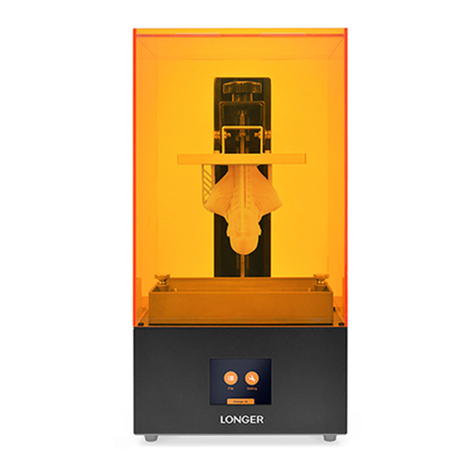
LONGER Technology Orange120 3D Printer
User Mannual Version1.0
2018-11-20

I
Contents
1. Introduction............................................................................................................................1
2. Specifications..........................................................................................................................2
3. Product Overview...................................................................................................................3
3.1 The 3D printer system ..................................................................................................... 3
3.2 The 3D printer description .............................................................................................. 3
3.3 The accessory box............................................................................................................ 4
4. Active Your 3D Printer............................................................................................................5
5 Touch Screen Description........................................................................................................6
5.1 Main Menu ...................................................................................................................... 6
5.2 Tools ................................................................................................................................ 6
5.3 About............................................................................................................................... 8
5.4 Job ................................................................................................................................... 9
5.5 Leveling.......................................................................................................................... 10
6 Software User Manual.......................................................................................................... 12
6.1 PC Requirements........................................................................................................... 12
6.2 Network Configuration.................................................................................................. 12
6.3 software installation...................................................................................................... 14
6.4 Printing Procedure......................................................................................................... 15
6.5 main menu..................................................................................................................... 16
6.6 Open .............................................................................................................................. 17
6.7 Edit................................................................................................................................. 18
6.8 Fix .................................................................................................................................. 19
6.9 Support.......................................................................................................................... 20
6.10 Slice.............................................................................................................................. 22
6.11 Generating Job File...................................................................................................... 23
6.12 Connect........................................................................................................................ 26
6.13 Upload Job File ............................................................................................................ 28
6.14 Print, Pause, Stop ........................................................................................................ 29
6.15 Printer Control............................................................................................................. 32
II
6.16 Wifi Connection........................................................................................................... 34
6.17 Post-processing ........................................................................................................... 35
7. FAQ...................................................................................................................................... 38
8. Attentions and Maintenance............................................................................................... 39
9. Printing Cases ...................................................................................................................... 40

1
1. Introduction
This user manual is provided to the operator with necessray
and detailed instructions for safe and correct operation,
software, maintenance, troubleshooting of Orange120 3D
printer. This manual document must be read carefully before
installation and operation of the printer. The non-compliance
with warnings and instructions may result in printer damage
or individual injury. And the user should be solely responsible
for the damage or failure caused by failure to follow the
instructions.
The content of this manual must be treated confidentially. No
part of this document may be given, copied, or transmitted to
others without the authorization of Longer3D Technology.
All rights reserved.

Equipment Model
Orange120
Printing Technology
LCD stereolithography
Build Size
12068150 mm
Layer Thickness
0.02-0.10 mm
LCD Resolution
25601440 pixel, 47.25 μm
Z axis Resolution
0.625 μm
Build Speed
30 mm/h
Material
Photopolymer Resin
Light Source
UV LED 405 nm
Software
IFORMER
Operation System
Windows 7/8/10, 64-bit
Connectivity
Ethernet, Wifi
Format
STL
Screen
2.8 inch touch screen
Dimension
Φ220375 mm
Net Weight
6.0 kg
Package Dimension
315315500 mm
Gross Weight
9.0kg
Power Requirement
100-240V AC, 50/60Hz
Working Power
72 W
Operation Environment
15-30℃, moisture 20%-70%

3
3. Product Overview
3.1 The 3D printer system
A: Orange120 3D printer
B: Building platform
C: Resin vat
D: Power cable
E: Resin bottle
F: Ethernet cable
3.2 The 3D printer description
A
B
C
D
F
E

Ethernet Cable1
Power Adapter1
Filtering Funnel2
Latex Gloves2
Building platform
Touch screen
Resin vat
Z aix
Leveling fixed screw
Leveling pad
Fan
Vat fixed sccrew
Building platform fixed screw
Ethernet cable input
Switch
Power port

Scraper1
Photopolymer
Resin 250mL1
Card5
Release Film1
●Screw Kits1
●Straight Screwdriver 3mm
●Hexagon Wrench 1.5mm
●Hexagon Wrench 2mm
●Hexagon Wrench 2.5mm
●Hexagon Wrench 3mm
●Hexagon Wrench 4mm
4. Active Your 3D Printer
Put the printer on a flat platform. Make sure that the printer is
stable. If the printer is titled, adjust the relevant leveling pad.
The printer will lower if rotate the leveling pad clockwisely, on
the contrary, the printer will arise if rotate the leveling pad
anticlockwise.
1) Connect the printer with PC by ethernet cable.
2) Connect power cable and power adapter.
3) Plug into the electronic power and switch on the printer.

6
5 Touch Screen Description
5.1 Main Menu
Tools: enter into tools interface which contains “Move”and
“Check”.
About: enter into the interface about printer’s information.
5.2 Tools
1) Move: move the Z aix.
1mm: move the Z aix by the distance of 1mm.
10mm: move the Z aix by the distance of 10mm.
50mm: move the Z aix by the distance of 50mm.

7
Up: move up the Z aix by the selected distance (the selected
distance is surrouned by red frame).
Down: move down the Z aix by the selected distance.
Home: move the Z aix to home position which is the position
to print the first layer (A tip dialog will show up to confirm the
operation that is “Make sure that there is no model below the
build plate OR in the resin tank”).
Disabled: make the stepper motor unlocked, so user can move
the Z aix by manually.
Back: back to previous menu.
2) Check
Turn on: lighten the LED and show up a picture to confirm that
the LCD and LED are ok (A tip dialog will up to confirm the
operation that is “Make sure that there is no model below the
build plate OR in the resin tank”).
Turn off: turn off the LED.

8
Back: back to previous menu.
5.3 About
About: the information of the printer
Version: the version number of system.
Temperature: the temperature of LED.
Voltage: the drive voltage of LED.
Fan speed: the rotate speed of two fans.
System ID: the ID of the printer.
WIFI IP: the IP of wireless network.

9
5.4 Job
Job: the information of printing job.
Status: the status of priting job, which contains priniting,
pausing, paused, cancelling, cancelled, completed.
Z height: the heigt of Z aix.
Elapsed Time: the time has been used.
Remaining Time: the time to complete the job.
Progress: the current printing layer and the total layer.
Percentage: the percentage of printing job.
Pause: pause the printing job (the “Status”will change to
pausing when select the “Pause”, and change to“paused”
after the current layer is printed).
Resume: resume the printing job (the “Resume”icon will
show up when the job is paused).
Stop: cancel the printing job (the “Status”will change to
cancelling when select the “Cancel”, and change to canceled

10
after the current layer is printed).
5.5 Leveling
1) Turn on the printer, move up the Z aix, take out the building
plate, install it as the picture belowed.
2) Loosen the four leveling fixed screws with hexagon wrench
4mm to make the building plate can move along Z axis freely.
3) Loosen the “vat fixed screw”, take down the resin vat, put
two pieces of A4 paper on the LCD screen. Move down the
building platform to home position, press and hold it, then
fasten the leveling fixed screws diagonally.

11
4) Drag the A4 paper and feel the force of dragging the paper.
The leveling is suitable when it needs some force to drag the
paper. However, the home position is high when it can drag
the paper easily. On the contrary, the home position is low
when it needs large force to drag the paper. Then it needs to
level the platform again.
5) Move up the building platform when the adjustment of
home position is finished. Then, install the resin vat, tighten
the vat fixed screw, pour into the resin. It is suggest that the
volume of resin is below the red line as show in the following
Pull
Pull

12
picture. And it needs to add resin manually if the volume of
model is bigger than resin left in the vat during printing.
6 Software User Manual
6.1 PC Requirements
Windows 7/8/10, 64-bit
6.2 Network Configuration
In order to insure the printer can be connected with software
sucessfully by ethernet cable, it needs to configure the
netwrok property. Take win10 system as an example:
Resin should below the line

13
Click the start menu, click setting, select Network & Internet.
Click Ethernet, click Change adapter options, select Ethernet
and right click, select Properties. Double click Internet
Protocol Version 4 (TCP/IPv4), select Obtain an IP address
automatically.
①
②
③
①
②
③
④
⑤
⑥

14
6.3 software installation
Double click the “IformerwareSetup.exe”, then installation
wizard will appear as shown below, click “Next”.
Choose install location, click “Install”(the default location is
C:\Program File (86)\Iformerware), the installation will begin.

15
To complete the installation by clicking “Finish”, the Iformer
software will run and create a shortcut on the desktop.
6.4 Printing Procedure
1) Open the stl OR slc model
2) edit the model, such as translate, rotate, scale and clone.
3) fix the error
4) generate support if necessary
5) slice the model
6) save printing job file of lgt format

16
7) connect to the printer by cable OR wifi network
8) upload the printing job file
9) start the printing
10) take down the model after finished, cleanout the model.
6.5 main menu
Menu
Bar
Open: load the stl OR slc model.
Save: save the printing job.
Delete: delete the selected model.
Connect: connect to the 3d printer.
Tools
Bar
Open: load the stl OR slc model.
Edit: translate, raotate, scale the model.
Fix: check and fix the model error.
Support: generate and edit the support.
Slice: slice the model.
Menu Bar
●Open
●Save
●Delete
●
Connect
Tools Bar
●Open
●Edit
●Fix
●
Support
●Slice
●Print
View Bar
Building Volume
Building Platform
Model

Print: set the printing parameters, generate
and save the printing job.
View
Bar
Top view
Bottom view
Left view
Right view
Isometric view
Printer Setting: set the resolution and
building volume of the printer.
Minimize the window.
Maximize the window.
Close the window.
6.6 Open
Click Open icon to load stl or slc model ( files can not be
translate
rotate
scale
①
②
③
Table of contents
Other LONGER 3D Printer manuals

LONGER
LONGER LK1 User manual

LONGER
LONGER Cube2 User manual

LONGER
LONGER LK4 User manual

LONGER
LONGER LK2 User manual

LONGER
LONGER LK4 Pro User manual

LONGER
LONGER LK4 X User manual

LONGER
LONGER Orange10 Installation guide

LONGER
LONGER LK4 User manual

LONGER
LONGER RAY5 User manual

LONGER
LONGER Orange30 User manual