manuals.online logo
Brands
  1. Home
  2. •
  3. Brands
  4. •
  5. Lorell
  6. •
  7. Indoor Furnishing
  8. •
  9. Lorell LLR60600 User manual

Lorell LLR60600 User manual

LLR60600/60601/60227/60228_052405 LLR60600/60601/60227/60228_052405 LLR60600/60601/60227/60228_052405
OPERATING INSTRUCTIONS
WARNING
1. Use this product only one person at a time.
2. Do not use this chair unless all bolts screws and
knobs are securely tightened.
3. Check that all bolts screws and knobs are tight every
six months or as needed.
4. Dispose of packing material properly. Do not
use plastic cover as head covering. It may cause
suffocation.
5. Do not use chair as a stepladder.
6. Use this chair for its intended purpose only.
7. Use mild detergent only for cleaning.
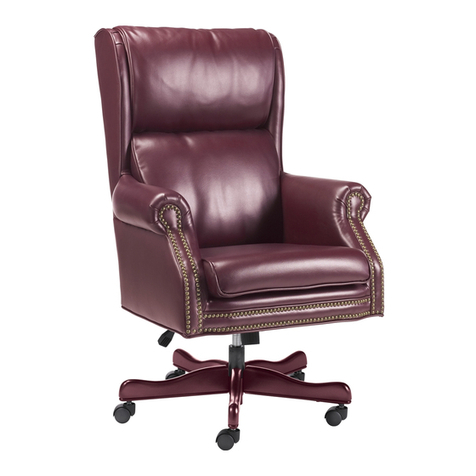
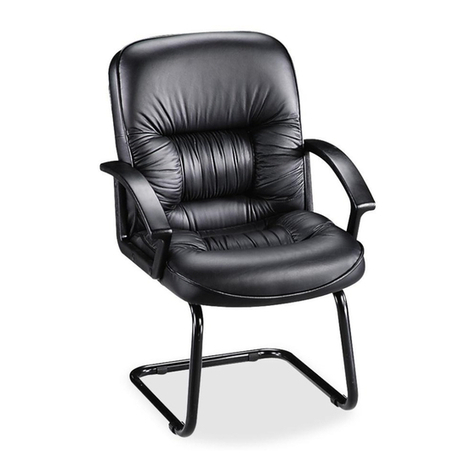
Traditional Chair
LLR60600/60227
Traditional Guest Chair
with Casters
LLR60601/60228
IF YOU ARE MISSING PARTS OR HAVE OTHER CONCERNS PLEASE
CALL OUR TOLL FREE NUMBER:
1-888-295-5839 OR EMAIL: Alex.T[email protected].
MONDAY-FRIDAY 9:00 AM TO 4:00 P.M. - EASTERN STANDARD TIME
Please provide the following information:
1. Full Name
2. Physical Address - Please do not include a P.O. Box as our carriers
cannot deliver to a P.O. Box Address.
3. Phone Number
4. Model Number
5. Part Number
6. Quantity
7. Reason for the request
Note: Our policy is to send all parts requests with normal ground
transportation, if your requirements are to have these parts sent via
overnight or next day, please provide your designated carrier and account
number.
3
4
1L
2R
5,8
Before You Begin: Open, identify and count all parts prior to assembly. Lay out the parts on
a non-abrasive surface such as a carpet or blanket. You will need the tools identified below:
1. Phillips Head Screw Driver
2. Allen Wrench (Provided)
STEP 1 Attach Front Frame (1L & 1R) to Seat Cushion (3) using two 3 1/2” Screws (6) and two Large Washers (9) for each frame. (SEE DETAIL A)
DO NOT TIGHTEN SCREWS
STEP 2 Attach Rear Frame (2) to Seat Cushion (3) using two 2” Screws (7) and two Large Washers (9) for each frame. (SEE DETAIL A)
DO NOT TIGHTEN SCREWS
STEP 3 Insert Back Cushion (4) onto Metal Brackets (10) of Front Frame (1L & 1R) and Rear Frame (2) using six 1” Screws (5) and six Small Washers (8).
FULLY TIGHTEN ALL SCREWS.
STEP 4 Attach fabric under seat to velcro.
NOTE: MODEL TV231 CASTERS ARE PRE-INSTALLED
ATTENTION: MAKE SURE ALL SCREWS ARE FULLY TIGHTENED BEFORE USING CHAIR.
HARDWARE IDENTIFICATION
PART QTY
1. Front Frame (1L & 1R) . . . . . . . 2
2. Rear Frame . . . . . . . . . . . . . . . 2
3. Seat Cushion . . . . . . . . . . . . . . 1
4. Back Cushion . . . . . . . . . . . . . 1
5. 1” Screws . . . . . . . . . . . . . . . . . 6
6. 3 1/2” Screws . . . . . . . . . . . . . . 4
7. 2” Screws . . . . . . . . . . . . . . . . . 4
8. Small Washers . . . . . . . . . . . . . 6
9. Large Washers . . . . . . . . . . . . . 8
10. Metal Brackets . . . . . . . . . . . 4
11. Allen Wrench (not shown) . . . 1
6,9
5,8
5,8
6,9
1R 7,9
5,8
5,8
2L
10 10 10
DETAIL A
7,9
6,9 6,9
LLR60600/60601/60227/60228
ASSEMBLY INSTRUCTIONS
Silla Tradicional
LLR60600/60227
Silla Tradicional de Huésped
con Ruedas
LLR60601/60228
SI LE FALTA PARTES O TIENE OTRO ASUNTO QUE LE
CONCIERNE PORFAVOR LLAMENOS A NUESTRO NUMERO
GRATUITO:
1-800-295-5839 o e-mail: AlexT[email protected]
LUNES – VIERNES 9:00 A.M. A 4:00 P.M. – TIEMPO OFICIAL DEL
ESTE
Por favor provee la siguiente información:
1.Nombre Completo
2.Domicilio – Porfavor no incluye P.O. Box ya que nuestros portadores
no pueden entregar a un domicilio de P.O. Box
3.Numero de Telephono
4.Numero de Modelo
5.Numero de Parte
6.Cantidad
7 Razón por el Pedido
Note: Nuestra póliza es de mandar todos los pedidos de partes con
transportacion terrenal, si sus requesitos son de mandar partes via
correo de noche o de siquiente dia,, porfavor provee su designado
portador y cuenta de numero.
ADVERTENCIA
1. Sólo una persona a la vez debe usar este producto.
2. No use esta silla a menos que todos los pernos, tornil-
los y perillas estén firmemente apretados.
3. Compruebe cada tres meses o según se necesite que
todos los pernos, tornillos y perillas estén apretados.
4. Elimine apropiadamente el material de empacado.
No use la cubierta plástica como cobertura de cabeza.
Puede causar asfixia.
5. No use la silla como escalera manual.
6. Use esta silla sólo para el propósito para el que se ha
diseñado.
7. Use sólo un detergente suave para limpiarla.
INSTRUCCIONES DE
OPERACION
LLR60600/60601/60227/60228_052405 LLR60600/60601/60227/60228_052405 LLR60600/60601/60227/60228_052405
Avant de commencer: Ouvrir, identifier et compter toutes les pièces avant
d’assembler. Placer les pièces sur une surface non rugueuse, comme un tapis ou une
couverture. Vous aurez besoin des outils identifiés ci-dessous :
1. Tournevis à tête Phillips
2. Clé Allen (fournie)
ÉTAPE 1 Enlever toutes les pièces du carton, les organiser selon les numéros de pièce indiqués sur la liste et s’assurer que les quantités des pièces
reçues sont correctes.
ÉTAPE 2 Attacher le cadre avant (1L et 1R) au coussin du siège (3) à l’aide de deux vis 3 1/2 po (6) et de deux grandes rondelles (9) pour chaque cadre.
NE PAS RESSERRER LES VIS. (VOIR LE DESSIN DÉTAILLÉ A)
ÉTAPE 3 Attacher le cadre arrière (2) au coussin du siège (3) à l’aide de deux vis 2 po (7) et de deux grandes rondelles (9) pour chaque cadre. NE PAS
RESSERRER LES VIS. (VOIR LE DESSIN DÉTAILLÉ A)
ÉTAPE 4 Insérer le coussin du dossier (4) dans les supports métalliques (10) du cadre avant (1L et 1R) et du cadre arrière (2) à l’aide de six vis 1 po (5) et
de six petites rondelles (8). RESSERRER COMPLÈTEMENT TOUTES LES VIS.
ÉTAPE 5 Attacher le tissu au-dessous du siège au velcro.
NOTE: LES ROULETTES DU MODÈLE TV231 SONT PRÉINSTALLÉES.
ATTENTION: AVANT D’UTILISER LE FAUTEUIL, S’ASSURER D’AVOIR RESSERRÉ COMPLÈTEMENT TOUTES LES VIS.
IDENTIFICATION DU MATÉRIEL
PIÈCE QTÉ
1. Cadre avant (1L et 1R) . . . . . . 2
2. Cadre arrière . . . . . . . . . . . . . 2
3. Coussin du siège . . . . . . . . . . . 1
4. Coussin du dossier . . . . . . . . . 1
5. Vis 1 po . . . . . . . . . . . . . . . . . . 6
6. Vis 3 1/2 po . . . . . . . . . . . . . . . . 4
7. Vis 2 po . . . . . . . . . . . . . . . . . . 4
8. Petites rondelles . . . . . . . . . . . 6
9. Grandes rondelles . . . . . . . . . . 8
10. Supports métalliques . . . . . . 4
11. Clé Allen (non montrée) . . . . . 1
DESSIN DÉTAILLÉ A:
7,9
6,9 6,9
LLR60600/60601/60227/60228
INSTRUCTIONS DE MONTAGE
3
4
1L
2R
5,8
6,9
5,8
5,8
6,9
1R 7,9
5,8
5,8
2L
10 10 10
3
4
1L
2R
5,8
Antes Que Empieses: Abre, identifique y quente todas las partes antes de asamblar. Pon
todas las partes sobre superfecies blandos como carpetas y cojines. Nesesitaras herramienta
identificado abajo:
1. Desarmador de Cruz
2. Llave Inglesa de Allen (Proveido)
PASO 1 Conecte el marco anterior (1I y 1D) (1) con el cojin de asiento (3) usando dos tornillos de 3 ½” (6) y dos arandelas grandes (9)
para cada marco. (MIRE DETALLE A) NO APRIETE LOS TORNILLOS
PASO 2 Conecte el marco posterior (2) con el cojin de asiento(3) usando dos tornillos de 2” (7) y dos arandelas grandes (9) para cada
marco. (MIRE DETALLE A) NO APRIETE LOS TORNILLOS
PASO 3 Inserte el cojin de respaldo (4) sobre los soportes de metal (10) del marco anterior (1I y 1D) y del marco posterior (2) usando
seis tornillos de 1” (5) y sies arandelas pequeñas (8). APRIETE TODOS LOS TORNILLOS COMPLETAMENTE.
PASO 4 Adjunte la tela de abajo de las silla al velcro.
NOTE: LAS RUEDAS DEL MODELO TV231 ESTAN PRE-INSTALADAS.
ATENCIÓN: ASEGÚRESE QUE TODOS LOS TORNILLOS ESTÉN TOTALMENTE APRETADOS ANTES DE USAR LA SILLA.
IDENTIFICACION DE PIESAS DE
ENSAMBLE
PIEZA CANT.
1. Marco Anterior (1I y 1D) . . . . . . 2
2. Marco Posterior . . . . . . . . . . . . . 2
3. Cojin de Silla . . . . . . . . . . . . . . . 1
4. Cojin de Respaldo . . . . . . . . . . 1
5. Tornillos de 1” . . . . . . . . . . . . . . . 6
6. Tornillos de 3 ½” . . . . . . . . . . . . . 4
7. Tornillos de 2” . . . . . . . . . . . . . . . 4
8. Arandelas pequeñas . . . . . . . . . 6
9. Arandelas grandes . . . . . . . . . . . 8
10. Soportes de Metal . . . . . . . . . 4
11. Llave Allen (No Mostrada) . . . . 1
6,9
5,8
5,8
6,9
1R 7,9
5,8
5,8
2L
10 10 10
7,9
6,9 6,9
LLR60600/60601/60227/60228
INSTRUCCIONES DE ENSAMBLE
DETALLE A
MODE D’EMPLOI
AVERTISSEMENT
1. Seule une personne à la fois peut utiliser ce produit.
2. Ne pas utiliser ce fauteuil à moins que toutes les vis et tous les
boulons et boutons soient resserrés.
3. Vérifier à tous les six mois ou au besoin que toutes les vis et
tous les boulons et boutons sont resserrés.
4. Éliminer les matériaux de conditionnement d’une manière
convenable. Ne pas utiliser la couverture en plastique pour
couvrir la tête à cause du risque d’étouffement.
5. Ne pas utiliser le fauteuil comme un escabeau.
6. Ce fauteuil ne doit servir qu’à l’usage pour lequel il a été conçu.
7. N’utiliser qu’un détergent liquide doux pour le nettoyage.
Chaise Traditionnelle
LLR60600/60227
Chaise traditionnelle d’invité
avec des roulettes
LLR60601/60228
S’Il VOUS MANQUE DES PIÈCES OU VOUS AVEZ D’AUTRES
INQUIÉTUDES, VEUILLEZ APPELER NOTRE NUMÉRO DE
TÉLÉHPONE SANS FAIS :
1-888-295-5839 OU PAR COURRIEL : Alex.T[email protected].
LUNDI - VENDREDI 9h00 À 16h00 – HEURE DE L’EST
Veuillez nous fournir les renseignements suivants :
1. Nom au complet
2. Adresse physique – N’incluez pas une case postale car nos
distributeurs ne peuvent pas livrer les produits à une adresse avec
une case postale.
3. Numéro de téléphone
4. Numéro de modèle
5. Numéro de pièce
6. Quantité
7. Raison pour la demande
Note : Notre politique est d’envoyer toutes les demandes de pièces en
utilisant le transport terrestre normal. Si vos exigences sont que ces
pièces soient envoyées le soir même ou le lendemain, veuillez nous
fournir avec votre expéditeur désigné et le numéro de compte.


This manual suits for next models

3

Other Lorell Indoor Furnishing manuals

Lorell LLR49872 User manual

Lorell

Lorell LLR49872 User manual

Lorell 60504 User manual

Lorell

Lorell 60504 User manual

Lorell 60501 User manual

Lorell

Lorell 60501 User manual

Lorell LLR99759 User manual

Lorell

Lorell LLR99759 User manual

Lorell 69603 User manual

Lorell

Lorell 69603 User manual

Lorell LLR25944 User manual

Lorell

Lorell LLR25944 User manual

Lorell LLR70064 User manual

Lorell

Lorell LLR70064 User manual

Lorell LLR84863 User manual

Lorell

Lorell LLR84863 User manual

Lorell LLR48847 User manual

Lorell

Lorell LLR48847 User manual

Lorell LLR48774 User manual

Lorell

Lorell LLR48774 User manual

Lorell LLR47422 User manual

Lorell

Lorell LLR47422 User manual

Lorell LLR84576 User manual

Lorell

Lorell LLR84576 User manual

Lorell LLR84876 User manual

Lorell

Lorell LLR84876 User manual

Lorell 60602 User manual

Lorell

Lorell 60602 User manual

Lorell Value Series User manual

Lorell

Lorell Value Series User manual

Lorell 69387 User manual

Lorell

Lorell 69387 User manual

Lorell 60114 User manual

Lorell

Lorell 60114 User manual

Lorell LLR84390 User manual

Lorell

Lorell LLR84390 User manual

Lorell LLR44312 User manual

Lorell

Lorell LLR44312 User manual

Lorell LLR60340 User manual

Lorell

Lorell LLR60340 User manual

Lorell 69372 User manual

Lorell

Lorell 69372 User manual

Lorell LLR86202 User manual

Lorell

Lorell LLR86202 User manual

Lorell LLR47920 User manual

Lorell

Lorell LLR47920 User manual

Lorell 69611 User manual

Lorell

Lorell 69611 User manual

Popular Indoor Furnishing manuals by other brands

Dream On Me 653 Assembly instructions

Dream On Me

Dream On Me 653 Assembly instructions

GFW POLAR HIGH GLOSS LED TV UNIT Assembly instructions

GFW

GFW POLAR HIGH GLOSS LED TV UNIT Assembly instructions

Urbini auri owner's manual

Urbini

Urbini auri owner's manual

Stompa T1037-02 Assembly instructions

Stompa

Stompa T1037-02 Assembly instructions

OVE ESTEBAN 72 installation manual

OVE

OVE ESTEBAN 72 installation manual

DIVERSIFIED WOODCRAFTS DT-33A Assembly instructions

DIVERSIFIED WOODCRAFTS

DIVERSIFIED WOODCRAFTS DT-33A Assembly instructions

Ameriwood 5660306PCOM manual

Ameriwood

Ameriwood 5660306PCOM manual

Schildmeyer Pisa 624150 Assembly instructions

Schildmeyer

Schildmeyer Pisa 624150 Assembly instructions

Courtyard Creations KTS127W-WM Assembly instructions

Courtyard Creations

Courtyard Creations KTS127W-WM Assembly instructions

Costway HV10473 manual

Costway

Costway HV10473 manual

Homelegance 1525T-1 Assembly instructions

Homelegance

Homelegance 1525T-1 Assembly instructions

diotti BRIGHTON Assembly instruction

diotti

diotti BRIGHTON Assembly instruction

NOA & NANI Järstorp Assembly instructions

NOA & NANI

NOA & NANI Järstorp Assembly instructions

Baxton BBT5222 Assembly instructions

Baxton

Baxton BBT5222 Assembly instructions

Living & Co Richmond instruction manual

Living & Co

Living & Co Richmond instruction manual

Blatchford Nimbus Instructions for use

Blatchford

Blatchford Nimbus Instructions for use

Dorset KY006 Assembly instructions

Dorset

Dorset KY006 Assembly instructions

ofichairs Ergomax manual

ofichairs

ofichairs Ergomax manual

manuals.online logo
manuals.online logoBrands
  • About & Mission
  • Contact us
  • Privacy Policy
  • Terms and Conditions

Copyright 2025 Manuals.Online. All Rights Reserved.