Lux Tools 115212 User manual

GB Trimmer (petrol) GR Βενζινοκίνητο θαμνοκοπτικό
115212
115213
115212_115213_Trimmer_Benzin.book Seite 1 Dienstag, 10. November 2015 3:12 15

3
1
1
2
3
4
5
6
7
8
7
10
11
9
9
9
12
12
115212_115213_Trimmer_Benzin.book Seite 3 Dienstag, 10. November 2015 3:12 15

4
2
13
14
15
16
17
18
19
20
21
3
25
24
23
22
24
22
23
115212_115213_Trimmer_Benzin.book Seite 4 Dienstag, 10. November 2015 3:12 15

5
4
27
42
4
6
26
5
29
28
4
3
30
12
29
28
3
4
115212_115213_Trimmer_Benzin.book Seite 5 Dienstag, 10. November 2015 3:12 15

6
6
31
7
9
7
8
36
37
35
32
33
34
35
39
115212_115213_Trimmer_Benzin.book Seite 6 Dienstag, 10. November 2015 3:12 15

7
8
40
41
10
35
32
33
11
9
9
43
44
115212_115213_Trimmer_Benzin.book Seite 7 Dienstag, 10. November 2015 3:12 15

8
10
35 45
46
45
11
11
46
115212_115213_Trimmer_Benzin.book Seite 8 Dienstag, 10. November 2015 3:12 15

9
11
46
47
48
11
115212_115213_Trimmer_Benzin.book Seite 9 Dienstag, 10. November 2015 3:12 15

10
GB
GB Original operating instructions
(translation)
Table of contents
How to use these instructions ....................... 10
Before you start … .......................................... 10
For your safety ................................................. 11
Product overview ............................................. 13
Unpacking and assembly ............................... 14
Operation ......................................................... 15
Cleaning and maintenance ............................. 17
Storage, transportation ................................... 19
Troubleshooting ............................................... 20
Disposal ............................................................ 21
Technical data .................................................. 21
Dear customer,
Thank you for placing your trust inour product!
Your new product has been designed and manufac-
tured according to state-of-the-art-technology.
Before using theproduct for the first time, please
make sure you read these operating instructions!
Here you will find information about how touse the
product safely and ensure its long service life. You
should payattention to all of the safety instructions
in this document!
How to use these instructions
All of the necessary diagrams can be found on the
first pages ofthese original operating instructions. A
series of working stages is clarified using numbers
on thediagrams. Within thedescriptions, you will be
directed by cross-references to the appropriate dia-
grams.
Before you start …
Proper use of the product
The product is not designated for commercial use.
Any unintended use or any activities onthe product
not described in these operating instructions are an
unauthorised misuse outside the manufacturer's
legal liability limits.
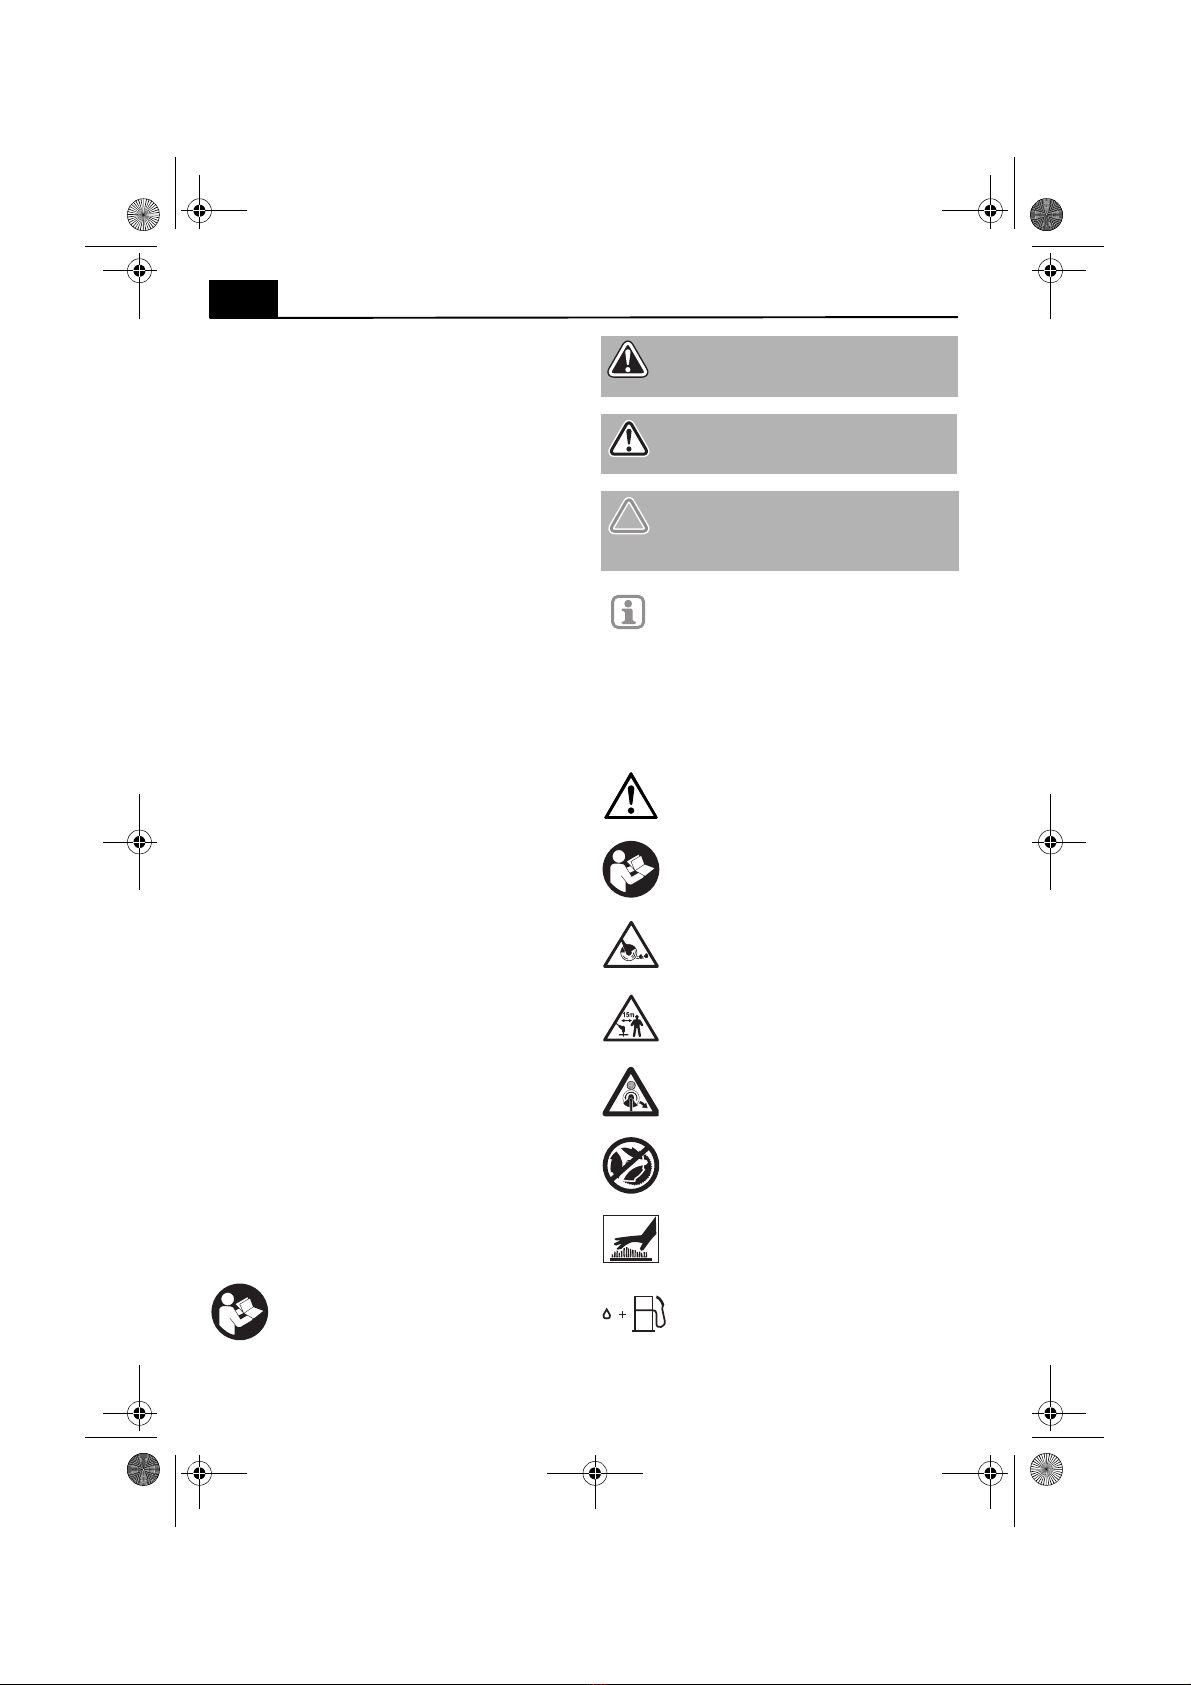
Symbols used
Notes indicating danger andother notes are clearly
identified in the original operating instructions.
The following symbols are used:
Symbols on the device
Symbols that can be found on your device
may not be removed or covered.
Information on the device that is no longer legible
must be replaced immediately.
Read the original operating instructions
through before use.
Comply with all safety instructions.
DANGER! Type and source of danger!
Ignoring a danger sign is a danger to life
and limb.
WARNING! Type and source of danger!
Ignoring a danger sign may cause a
danger to life and limb.
CAUTION! Type and source of danger!
This danger sign warns of damage to the
product, the environment or damage to
property.
Note: This symbol indicates information
that will help you to better understand the
processes at hand.
Caution when using this product! Observe
all the safety instructions provided in the
operating manual!
Read the original operating instructions
through before use.
Comply with all safety instructions.
When starting and working ensure that
the blade head is kept away from other
objects.
When working, ensure a 15 m gap to
other people and animals.
Observe the rotational direction and cut-
ting range of the product.
Do not use mower discs or saw blades to
trim grass alongside walls, fences or
trees.
Risk caused by hot surfaces!
Use a fuel mixture designed for two-
stroke motors.
115212_115213_Trimmer_Benzin.book Seite 10 Dienstag, 10. November 2015 3:12 15

GB
11
For your safety
General safety information
• The user of the product must have read and
understood these operating instructions prior to
its first use to ensure the safe handling of this
product.
• Please comply with all safety instructions! If you
disregard any of the safety instructions you may
place yourself and others at risk.
• Store all operating information and safety
instructions for future reference.
• When transferring the ownership of the product,
always include the operating instructions.
• Children must be kept away from the product.
Keep the product away from children and unau-
thorised persons.
• All components of the product, in particular, the
safety mechanisms, must be assembled cor-
rectly in order to ensure trouble-free operation.
• Conversions, independent modifications and the
use of non-approved parts are not permitted.
• The product may only be put into operation
when it is in perfect condition. If the product or
part of the product is defective, it must be
repaired by a specialist.
• Always comply with the all applicable domestic
and international safety, health, and working
regulations.
• When working, ensure you always use a natural
and secure stance.
• Do not force the product. Only use the product
for the intended purpose.
• People who do not have the physical, mental or
sensory abilities to operate the product carefully
and safely may not be permitted to use it.
• Always work with care and when you are in good
form: If you are tired, ill, if you have ingested
alcohol, medication or illegal drugs, do not use
the product as you are not in a condition to oper-
ate it safely.
Operation / workplace
• Only put the product into operation if no defects
were found when it was checked over. If a part is
defective, it must be replaced before the device
is used again.
• When operating the product ensure that the area
you are working in is clean and orderly. Do not
leave tools, objects or cable laying around in the
vicinity of the product.
• When working with the product make sure the
area is well lit.
• Make sure that flammable materials or materials
that may explode are kept out of the immediate
vicinity.
• Individuals under the age of 18 and those not
familiar with the operation of the product should
not be allowed to operate the product.
• Make sure to always wear the required personal
protective clothing.
• Keep children and bystanders away while oper-
ating the product. Distractions may cause you to
lose control of the product.
• When working with the product, ensure a secure
stance! Make sure that you cannot slip or fall
down. Do not bend forwards or lean over back-
wards!
Device-specific safety information
• In the vicinity of 15 m around the cutting area
there should be no people or animal as they may
be hurt by flying objects.
• When using, always hold the product firmly with
both hands and use the strap.
• Do not work above hip height.
• Never work on ladders.
• Never climb a tree and use the product there.
• Keep the product away from flammable materi-
als e.g. dried out grass or plastics when the
motor is hot.
• When putting the product down, make sure that
the motor is always switched off!
• When the motor is switched off, the ignition
switch must always be switched off.
• Do not work alone! Make sure that you are
always within shouting distance or can be seen
by another person who is able to perform first-
aid in an emergency situation.
• Do not leave tools, objects or cables lying
around in the vicinity of the product.
Fuel pump
Maximum speed (cutting head)
Maximum speed (blade)
Cold start lever (cold start position ;
warm start position ).
115212_115213_Trimmer_Benzin.book Seite 11 Dienstag, 10. November 2015 3:12 15

12
GB
• Make sure to remove all adjusting tools from the
area (assembly wrenches etc.) before switching
on the product.
• Never use saw blades as cutting tools.
• Do not operate the product without the protec-
tion mechanism in place.
• Protect the product from serious impacts! Do
not allow the device to fall! If the product has
been subjected to impacts, check whether fuel is
leaking immediately (risk of fire and explosion!).
• Check the fuel system regularly for leaks or
defective parts.
• The product is fitted with a coupling. Ensure that
the cutting tool is at a standstill when the motor
is in idle.
Handling fuels
Fuels are flammable and explosive. Avoid the risk of
explosion and fire:
• Switch off the motor and allow to cool down
before refilling.
• Smoking and any other naked flame is forbidden
when handling fuels.
• Only store and mix fuels in authorised and
clearly labelled canisters.
• Keep fuels under lock and key. Fuels may vapor-
ise even at ambient temperatures and may col-
lect at floor level in closed rooms (risk of explo-
sion).
• Start the product at least nine meters away from
where you refill it.
Fuels are poisonous! They contain substances that
are immediately poisonous and which are capable of
causing damage over time. Observe the care meas-
ures in order to prevent the substances entering the
body.
• Only refill the device or transfer fuel from one
canister to another out in the open or in a well
ventilated space.
• Do not breath in the fuel vapours.
• Avoid contact with skin and eyes. In the event of
accidental contact, rinse thoroughly with water.
In the event of eye contact, seek the aid of a phy-
sician immediately.
• When transferring fuel, use gloves.
• If fuel gets onto clothing, change clothes imme-
diately. Clean the clothing before you wear it
again.
• Store fuel out of the reach of children.
If used incorrectly, fuels may damage the environ-
ment:
• Transfer fuels carefully. Fuel may not enter the
soil or the sewer system.
•Remaining fuels must be disposed of correctly.
Never dispose with the house waste.
• Fuels may only be stored for a short time. Only
purchase volumes that will be used within the
next couple of months.
Raynaud's disease
Frequent use of vibrating machines can cause nerve
damage in people with bad circulation (for example,
smokers and diabetics). Fingers, hands, wrists and/
or arms, in particular, may show the following symp-
toms, but not necessarily all of them: pain, tickling,
twinges, numbness of body parts, whitening of the
skin.
– If you notice any unusual adverse effects, stop
working immediately and consult a doctor.
You can reduce the risks considerably by following
the tips below:
– When it is cold, make sure your body and your
hands, in particular, are kept warm. Working with
cold hands is one of the main triggers!
Take regular breaks and move your hands at the
same time. This will promote circulation.
Service
• Have your product serviced by a qualified repair
person using only identical replacement parts.
This will ensure that the safety of the product is
maintained.
Maintenance
• Check all screws regularly to ensure that they sit
tight. This will ensure that the safety of the prod-
uct is maintained.
• Only use original spare parts. Only these
replacement parts are designed and suitable for
the product. Other replacement parts will not
only lead to an invalidation of the warranty, they
may also endanger you and your environment.
Storage and transportation
• Make sure the product is always stored in dry
conditions.
• Protect the product from becoming damaged
during transport.
Personal protective clothing
When working, wear head protec-
tion.
When working, wear ear defend-
ers.
When working, wear goggles.
115212_115213_Trimmer_Benzin.book Seite 12 Dienstag, 10. November 2015 3:12 15

GB
13
Use without protective equipment may result in seri-
ous injuries and the volume of the device may also
cause permanent hearing damage. For this reason,
always wear the following protective gear when cut-
ting:
Cutting tips
• Only cut with the right (shown here as dark grey)
area of the cutting unit by moving the product in
a semi-circle from left to right. Only this area
offers light and low kickback cutting.
• Never start cutting in the left (light grey) area.
This represents a high level of kickback risk and
objects may be thrown in your direction by the
rotation of the cutting tool. You may be hurt as a
result.
• If you move the product from right to left, you
must keep the cutting tool away from the ground
to ensure that nothing is thrown up.
• Cut long grasses from top to bottom to ensure
that the grasses do not get tangled around the
cutting tool.
Cut in a sensitive manner:
• Only use the tip of the cutting tool. This is gentle
on the cutting tool and prevents grass getting
caught in the tool.
• Only take the cutting tool as close as absolutely
necessary to posts, walls, fences and similar.
Solid objects will wear the cutting tool down
quickly and may damage it.
• Tree trunks, young trees and bushes may be
damaged by the cutting tool.
Product overview
Figure 1 – Page 3
1. Motor
2. Eye for strap
3. Operating bar
4. Upper shaft pipe
5. Locking wheel
6. Lower shaft pipe
7. Blade head
When using, always wear protec-
tive gloves.
When working, wear sensible
shoes.
Type of pro-
tection:
Minimum
protection
Ideal
Head protec-
tion
Helmet Helmet with
visor
Hearing pro-
tection
Ear plugs Circumaural
ear defenders
DIN EN 352-1
Eye protection Completely
closed gog-
gles
Visor on hel-
met
Hand guard Working gloves made of leather
Protection for
feet
High safety shoes with a
gripped sole, steel toe caps and
leg protection
Clothing Safety dungarees (cut-proof)
Jacket with
long sleeves
made from
sturdy fabric
Safety jacket
(cut-proof)
WARNING! Risk of injury! When using
the product, uncontrolled kickback may
occur. In the event of uncontrolled
kickback , the product is pushed away/
accelerated with high energy. Observe
the described notes regarding cutting.
Never cut material, solid material in
particular (e. g. scrub, bushes etc.) in an
area in which kickback of the product is
possible.
115212_115213_Trimmer_Benzin.book Seite 13 Dienstag, 10. November 2015 3:12 15

14
GB
8. Blade
9. Protective hood
10. Protective hood for thread spool
11. Spool housing
12. Operating handle
Figure 2 – Page 4
13. Ignition cable with spark plug
14. Cold start lever (Choke)
15. Air filter housing
16. Locking mechanism for air filter housing
17. Fuel pump
18. Tank lid
19. Fuel tank
20. Starter cord
21. Exhaust silencer
Figure 3 – Page 4
22. Gas lever lock
23. Gas lever
24. Gas lever block
25. Ignition switch
Unpacking and assembly
Unpacking
Unpack the product and make sure all of the pieces
are there.
Scope of delivery
Installation
The product may be used with a variety of cutting
tools, according to requirement.
• Mower discs/saw blades: Specifically for work-
ing in open areas with heavy growth such as
weeds, high grass, undergrowth, bushes, scrub
etc.
• Thread spool: Specifically for trimming grass
alongside a wall, fences, trees etc.
Connect both shaft pipes
Figure 4 – Page 5
Remove the cover cap from the lower shaft pipe.
– Press the locking lever (26) and slide the lower
shaft pipe (6) into the upper shaft pipe (4), so
that the motor and the blade head are correctly
aligned.
Caution: Another installation of the shaft pipes is not
permitted.
When the shaft pipes have been fitted offset:
– Press the locking lever (26) and rotate the lower
shaft pipe (6) until the alignment is correct.
– Allow the locking lever (26) to engage.
– Tighten the locking wheel (27) by hand.
Mounting the operating bar
Figure 5 – Page 5
– Remove the pre-mounted cuff (28).
– Position the operating bar (3) between the con-
nector and pad on the upper shaft pipe (4).
– Screw the operating bar (3) with screws (29) into
place.
• Operating instructions
• Upper shaft pipe with motor
• Lower shaft pipe with blade head
• Blade (with transport protection)
• Two-piece blade accommodation flange with
nut and locking pin
•Protectivehood
• Operating bar with operating handle
•Strap
• Combination tool
• Allen wrench
• Assembly pin
Note: If any one of the parts is missing or
damaged, contact the retailer.
WARNING! Risk of injury! Parts that are
not properly assembled may lead to
serious injuries or death when used with
the product! This device may only be
operated after all parts are completely
assembled and secured and none of the
parts are damaged!
– Therefore it is important to read the
entire chapter before assembling the
parts!
– Make sure the parts are carefully and
completely assembled.
– Used tools when prescribed.
WARNING! Risk of injury! Parts may only
be mounted and removed after the motor
has been switched off and allowed to cool
down.
115212_115213_Trimmer_Benzin.book Seite 14 Dienstag, 10. November 2015 3:12 15

GB
15
– Slide the operating bar (3) to a comfortable posi-
tion.
Only 115212
Figure 5 – Page 5
– Attach the throttle cable guide (30) of the operat-
ing handle (12) with clips to the upper shaft
pipe (4) and operating bar (3).
Mounting the strap
Figure 1 – Page 3
– Hook the strap into the eye (2) on the shaft pipe.
Mounting the protective hood
Figure 6 – Page 6
– Undo the previously fitted screws (31).
– Screw the protective hood (9) using three
screws (31) to the blade head (7).
Caution: Another installation of the protective
hood (9) is not permitted.
Mounting the blade
Figure 7 – Page 6
– Fit an inner flange (32) to the toothed drive
shaft (33). The groove on the rear of the inner
flange and the groove on the drive shaft must be
situated on top of each other. The mount (34) for
the blade points outwards.
– Insert the mounting pin (35) as shown.
– Remove the blade transport protection and store
(e.g. for storing the device).
– Position the blade (8) on the mount of the inner
flange (32). Observe the running direction!
– Fit the outer flange (36) and screw tight with the
nut (37). Caution: Left thread!
– Tighten the nut (37) with the supplied combina-
tion tool and mounting pin (38).
– Caution: Remove the mounting pin (35) after
assembly.
– Insert the pin (39) through the drilled hold in the
drive shaft and bend the two ends as shown.
Mounting the cutting tool
Figure 8 – Page 7
– Secure the protective hood for the thread
spool (10) with screws (41) to the protective
hood (9).
– Fit an inner flange (32) to the toothed drive
shaft (33). The groove on the rear of the inner
flange and the groove on the drive shaft must be
situated on top of each other.
– Insert the mounting pin (35) as shown.
– Place the spool housing (11) on the drive
shaft (33) and tighten in an anti-clockwise direc-
tion.
– Caution: Remove the mounting pin (35) after
assembly.
Operation
Filling with fuel
Figure 2 – Page 4
– Set the product down securely, with the tank
lid (18) facing up.
– Before opening, clean the tank lid (18) and fun-
nel, if required.
– Slowly unscrew the tank lid (18) and remove.
– Carefully fill with fuel mixture. Do not spill!
– Check the seal of the tank lid (18) for damages
and clean if necessary.
WARNING! Risk of injury! The blade is
sharp. When assembling, always wear
protective gloves.
DANGER! Risk of injury! The pin acts to
secure the blade fixture screw and
prevents the blade from coming away
from the unit in an extreme case. Each
time the product is disassembled, the pin
must be replaced by a new one.
DANGER! Risk of injury! On the
underside of the protective hood there is a
sharp blade designed to cut the thread.
Remove the transportation protection
mechanism after mounting.
WARNING! Risk of injury! Fuel is
explosive!
– Switch off the motor and allow to cool
down before refilling.
– Observe all of the safety notes for
handling fuels.
Note: Use the prescribed fuel.
115212_115213_Trimmer_Benzin.book Seite 15 Dienstag, 10. November 2015 3:12 15

16
GB
– Immediately replace damaged seals!
– Tighten the tank lid (18) with seal by hand.
– If any fuel is spilt: Always clean fuel up.
Check to make sure the product is in a safe operat-
ing condition:
– Check that no leaks have developed.
Check before starting
Check the safety mechanisms and the safe state of
the product (locking wheel, protective hood and
blade head in particular).
– Check to see if there are any visible defects: bro-
ken parts cracks, etc.
– Check to make sure all product parts are cor-
rectly mounted.
– Check to make sure the safety equipment is
functioning properly.
– Check that no leaks have developed.
– Remove the blade transport protection
Starting the motor
– Place the product down on flat, clear ground so
that the motor (1) and the protective hood (9/10)
are on the ground.
Cold starting the motor
Figure 2 – Page 4
– Set the ignition switch (25) to START.
– Press the fuel pump (17) several times until no
bubbles can be seen (approximately 10 times).
– Pull the cold start lever (14) all the way up .
Figure 3 – Page 4
– Set the gas lever (23) to the half setting: Push
down and hold the gas lever block (24) and the
gas lever (23) at the same time. Press the gas
lever lock (22), then release the gas lever (23)
and gas lever lock (22). The gas lever block (24)
must engage!
– Using the left hand, hold the product on the
upper shaft pipe (4).
Figure 2 – Page 4
– Pull the starter cord (20) out slowly until you feel
resistance, than continue to pull quickly and
forcefully until the motor starts briefly.
– Set the cold start lever (14) to the middle
position .
– Pull the starter cord (20) out quickly forcefully
until the motor starts.
– When the motor is running, slowly return the cold
start lever (14) to (lower position).
Figure 3 – Page 4
– Slowly press the gas lever (23) to increase the
revolutions of the motor and allow the motor to
operate for a time at full speed operation.
Warm starting the motor
Figure 2 – Page 4
– To start up a warm motor, do not use the cold
start lever (14) (lower position ).
– If the engine does not start after you have pulled
the starter cord three times (20), repeat the
entire starting process as described under "Cold
starting".
WARNING! Risk of injury! The product
may only be put into operation if there are
no defects. If a part is defective, it must be
replaced before the device is used again.
WARNING! Danger of fire! The product
may catch fire as a result of spilt fuel. Wipe
any spilled fuel away before starting.
Start the product at least nine metres from
the place you filled it.
WARNING! Risk of injury! The product
must be resting calmly and securely to
start. You must be able to hold it securely
with one hand without the blade head
coming into contact with anything. The
blade will operate when it is started!
Note: This will protect both the starter
cord and the motor. Pull the starter cord
out to a maximum of 50 cm and feed back
in slowly by hand.
Note: If the cold start lever is set to cold
start :
Only pull the starter cord until the first
sound of ignition is heard. Otherwise there
is a risk that too much fuel will enter the
combustion chamber and it will not be
possible for a spark to develop.
WARNING! Risk of cuts! Te gas lever
must be operated once, forcefully after
starting for the gas lever lock to be
unlocked and the motor to be switched to
idle revolutions and ensure the blade is
not rotating in idle.
The blade may not rotate in idle, if
necessary, have idle gas adjusted.
115212_115213_Trimmer_Benzin.book Seite 16 Dienstag, 10. November 2015 3:12 15

GB
17
Switching off the motor (115212)
Figure 3 – Page 4
– Set the ignition switch (25) on the operating han-
dle to STOP.
The motor will switch off.
Operation
Prior to using the product, ensure that you are famil-
iar with the technology. Information can be found in
the technical literature. The information provided
here are only to be used as guidelines.
Proper position
– The use, guide the strap over the left shoulder.
– Hold the operating bar (3) with both hands.
– Motor (1) and shaft pipe (4/6) are on your right.
– Balance the device and assume a natural
stance.
How to cut correctly
– Check the area you wish to cut and remove any
objects that may be thrown up by the blade.
– Check the safety equipment on the device
before the start of work.
– Starting the motor
– Carry the device as described using the strap
and hold the operating bar (3) firmly with both
hands.
– Push down fully on the gas lever (23). Always cut
at full speed!
Lengthening the thread
When the unit no longer cuts cleanly, the threads
have become too short.
The best cutting results are obtained when the
thread is lengthened far enough to be cut by the
blade to the correct length.
Lengthening the thread in cutting operation
– Briefly tap the underside of the spool
housing (11) on the ground when the machine is
running.
– If the thread is still not long enough, tap it on the
ground again.
The threads will automatically be cut to the correct
length by the blade.
Lengthening threads by hand
If the threads are too short then they can not be
lengthened by tapping.
They must be pulled from the thread spool housing
by hand.
– Place the product on the floor.
– Using one hand, press the underside of the
thread spool housing and pull both threads out
until they reach slightly further than the edge of
the protective hood (10).
The threads will be cut to the correct length by the
blade next time the unit is used.
Cleaning and maintenance
DANGER! Risk of injury! Switch the
motor off if:
• The blade has come into contact with
hard objects,
• Changes in the behaviour of the
device can be felt,
• The sound of the motor changes.
Have the device checked and, if neces-
sary, repaired. Never work with a dam-
aged device or cutting tool.
DANGER! Risk of injury! If you hold the
motor too high or on the wrong (left) side,
you may cause yourself serious burns on
the hot surfaces. The motor must
– Always be to your right and
– Always behind your body at waist
height.
DANGER! Risk of injury! Always switch
the motor off before you set down the
product!
DANGER! Risk of injury! When
performing work on the thread spool,
always switch the motor off!
DANGER! Risk of injury! Prior to
conducting maintenance or cleaning:
– Switch off the motor.
– Allow the device to cool down.
– Remove the spark plug connector.
115212_115213_Trimmer_Benzin.book Seite 17 Dienstag, 10. November 2015 3:12 15

18
GB
Cleaning and maintenance overview
After each use
Annually
If necessary
Cleaning
Cleaning the product
– Remove large dirt particles.
– Wipe down the device with a damp cloth.
Lubricate the drive shaft
The drive shaft must be lubricated at three points.
At the connection of the two shaft pipes.
Figure 4 – Page 5
– Undo the screw (42).
– Fill with grease and replace the screw (42) and
tighten.
At the blade head:
Figure 9 – Page 7
– Remove the screws (43) and (44).
– Fill with grease and replace the screws (43)
and (44) and tighten.
Clean/replace air filter
Figure 2 – Page 4
– Set the cold start lever (14) to (upper posi-
tion) to ensure that no dirt is able to enter the
carburettor.
– Undo the lock (16) on the air filter housing (15)
and remove the lid.
– Remove the air filter.
– Clean the air filter in warm water (with a little
cleaning agent).
– Rinse the air filter in clean water.
– Leave the air filter to dry fully.
– Fit the clean or new air filter.
– Place the lid on the air filter housing (15) and
tighten the lock (16) again by hand.
Replace the spark plug
Figure 2 – Page 4
Only replace spark plugs with a new spark plug of
the same type.
– Remove spark plug connector (13).
– Unscrew the spark plug with the combination
wrench.
– Insert a new spark plug and carefully tighten
using the combination wrench.
– Fit the spark plug connector (13) again.
Changing/turning the blade
DANGER! Risk of injury! Carry out only
the maintenance work described here in
person.
All other work, in particular motor
maintenance and repair, must be carried
out by a trained specialist. Improper
maintenance work can damage the
device and lead to injuries.
What? How?
Clean the air filter. Clean the air filter.
Clean product. Clean product.
Lubricate the drive
shaft.
Grease press and or-
dinary lubricating
grease.
What? How?
Check the spark plug. Replace the spark
plug.
Have the product
checked.
Contac the seller.
What? How?
Replace the air filter. Clean/replace air filter.
Replace the spark plug. Replace the spark
plug.
Replace thread if it is
too short.
Replace the thread.
DANGER! Risk of injury! The spark plug
connector and spark plug may not be
touched when the engine is running.
CAUTION! Machine damage! Only
screw the spark plug into place when the
motor is cold.
DANGER! Risk of injury! When working
on the blade head, always switch the
motor off.
DANGER! Risk of injury! The blade is
sharp! When assembling, always wear
protective gloves.
115212_115213_Trimmer_Benzin.book Seite 18 Dienstag, 10. November 2015 3:12 15

GB
19
Figure 7 – Page 6
– Switch off the motor.
– Place the product on the ground and clean the
blade head thoroughly.
– Bend the pin (39) and remove.
– Insert the mounting pin (35).
– Undo the nut (37) in a clockwise direction. Left
thread.
– Remove the outer flange (36) and blade (8).
– Before mounting the blade (8) clean the outer
flange (36).
– Mount the blade (8) again.
Replacing the thread
The entire thread spool may be replaced, or just the
thread itself.
Figure 10 – Page 8
– Undo the thread housing (11) and remove from
the product using the supplied tool (45).
– Disconnect the thread housing (11) and thread
spool (46) using the supplied tool (45).
– Remove the thread remains.
Figure 11 – Page 9
– Bend a new thread in the middle, and hook into
the thread spool as shown (46).
– Wind the thread clockwise onto the spool (46)
until there is just around 20 cm left.
– Push the two threads into the opposing
grooves (47).
– Feed both threads in the openings (48) of the
spool housing (11).
– Reconnect the thread housing (11) and thread
spool (46) using the supplied tool (45) and mount
to the product.
Setting the thread to the right length
– Using one hand, press the underside of the
thread spool and pull both threads out until they
reach slightly further than the edge of the protec-
tive hood.
The threads will be cut automatically to the correct
length by the blade next time the unit is used.
Storage, transportation
Storage
– Allow the product to cool down before putting it
into storage.
– Store the product horizontally if possible. Ensure
that no fuel is able to leak out of the carburettor.
– Fit the blade transport protection
– Store the product in a dry and well ventilated
place.
– In the event of a longer period of storage, vent
the product.
If necessary, remove the lower shaft pipe (6) and
hang separately.
– Fit the cover cap to protect the shaft pipe from
dirt.
When placed out of operation (4 weeks or long-
er)
If you are intending to store for a longer period of
time, remove the fuel from the product. This prevents
the motor from resinifying.
– Empty the fuel tank.
– Start the motor and allow to run until the motor
switches itself off.
– Allow the motor to cool down completely.
– Remove the spark plug.
– Allow 1 teaspoon of two-stroke motor oil to
trickle into the combustion chamber.
– Gently pull the starter cord (20) several times in
order to coat the internal components with the
oil.
– Fit the spark plug again.
Store the device in a dry location, well away from
potential sources of ignition, for example, stoves or
gas heaters etc.
Transporting the device in a motor vehicle
If the device is transported in a motor vehicle:
– Fit the blade transport protection
– Allow the device to cool down.
– Empty the tank.
– Secure the device from shifting.
DANGER! Risk of injury! The pin acts to
secure the blade fixture screw and
prevents the blade from coming away
from the unit in an extreme case. Each
time the product is disassembled, the pin
must be replaced by a new one.
DANGER! Risk of injury! Make sure that
unauthorised persons do not have access
to the product.
115212_115213_Trimmer_Benzin.book Seite 19 Dienstag, 10. November 2015 3:12 15

20
GB
Troubleshooting
What to do when something does't work …
In many cases, small defects can lead to a malfunc-
tion. You will usually be able to deal with these your-
self. Please consult the following table before con-
tacting the seller. This may save you a lot of effort
and quite often money.
DANGER! Risk to life! Unprofessional
repairs may mean that your product will
no longer operate safely. This endangers
you and your environment.
Error/Fault Cause Remedy
The motor does not start. Tank empty? Fill with fuel.
Wrong fuel or incorrect mixture? Empty the tank and fill with the
right mixture.
Is the ignition switch (25) set to
OFF?
Switch on the ignition switch (25).
Spark plug connector (13) is not
firmly fitted?
Fit the spark plug connector (13)
properly.
Is the connector of the ignition
cable (13) soiled?
Clean the spark plug
connector (13).
Gas lever (22) not locked? Push the gas lever (22) to the half
gas position and lock.
Excess fuel in the combustion
chamber?
Start the motor several times
without operating the cold start
lever (14)
(Position ). If the motor does
not start:
Remove the spark plug and dry
the electrode.
Spark plug is dirty (tip is sooty)? Clean the spark plug.
Electrode spacing of the spark
plug is too big
Set the gap to 0.6--0.7 mm.
Is the spark plug defective? Replace the spark plug.
Motor cold? Operate the cold start
lever (14)
The motor does not reach the
maximum speed.
Is the air filter soiled? Clean or replace the air filter.
Carburettor setting incorrect? Have the carburettor adjusted.
The motor does not stop. Spark plug: Electrode is light grey
with signs of burning?
Use a spark plug with higher tem-
perature resistance.
Motor is operating too fast. Motor is too cold? Allow motor to slowly warm up, if
necessary adjust the cold start le-
ver up a little.
115212_115213_Trimmer_Benzin.book Seite 20 Dienstag, 10. November 2015 3:12 15
Other manuals for 115212
1
This manual suits for next models
1
Table of contents
Languages:
Other Lux Tools Trimmer manuals

Lux Tools
Lux Tools A-RT-20 User manual

Lux Tools
Lux Tools E-HS-400/42 T User manual

Lux Tools
Lux Tools 115212 User manual

Lux Tools
Lux Tools 481 940 User manual

Lux Tools
Lux Tools A-HS-20/52 Set User manual

Lux Tools
Lux Tools E-RT-550/27 User manual

Lux Tools
Lux Tools E-FS-1000/38 User manual

Lux Tools
Lux Tools B-FS-31/45 User manual

Lux Tools
Lux Tools E-HS-600/55 A User manual

Lux Tools
Lux Tools 468273 User manual