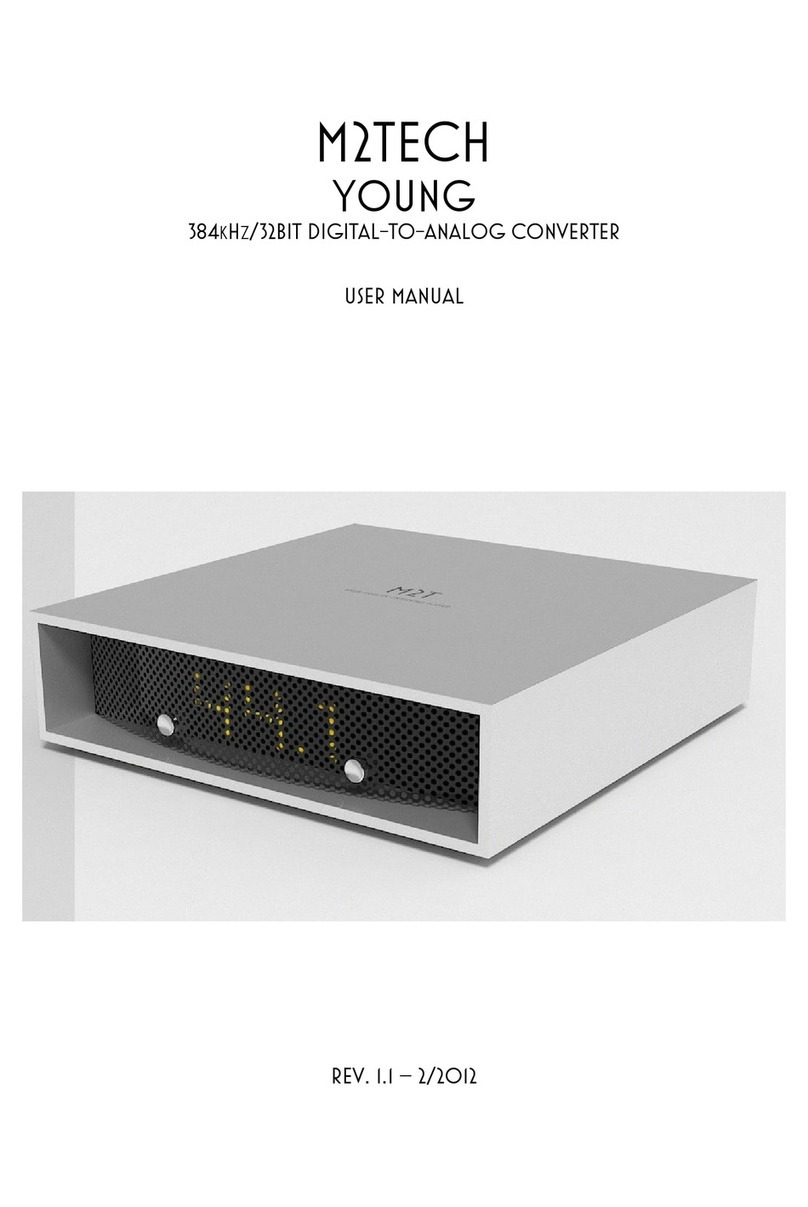
M2TECH MANUNTA User manual

MANUNTA
BY M2TECH
EVO DAC 3
HIGHEST RESOLUTION DIGITAL-TO-ANALOG CONVERTER
USER MANUAL
REV. PRB – 6/2022

MANUNTA
BY M2Tech
www.manunta-audio.com
EVO DAC 3
DIGITAL-TO-ANALOG CONVERTER
REVISION PRB – UNE 2022
Copyright © 2022, M2Tech Srl
2

MANUNTA
BY M2Tech
www.manunta-audio.com
EVO DAC 3
DIGITAL-TO-ANALOG CONVERTER
REVISION PRB – UNE 2022
Warning!
Changes or modifications not authorized by the manufacturer can invalidate the
compliance to CE regulations and cause the unit to be no more suitable to use. The
manufacturer refuses every responsibility regarding damages to people or things
due to the use of a unit which has been subject to unauthorized modifications or to
misuse or to malfunction of a unit which has been subject to unauthorized
modifications.
This unit is compliant with the following CE regulations: CEI EN 022:2009 Class B (Radiated Emissions),
CEI EN 024:1999, CEI EN 024:A2/2003, CEI EN 024:IS1/2008 (Radio Frequency Electromagnetic
Fields, 0Hz Magnetic Field Immunity Test and Electrostatic Discharges – ESD).
For a proper operation of this unit, all connections to other equipment in the system must be done
when all equipment are off. Failing to comply with this advice may lead to damage to the Evo D C 3.
The label above, printed on the product case, indicates that the product, when no more usable, can’t be
treated as generic garbage, but must be disposed of at a collection point for recycling of electrical and
electronic equipment, in compliance with the WEEE regulation (Waste of Electrical and Electronic
Equipment).
By making sure that this unit is correctly recycled, you will help preventing potential damages to environment
and human health, which could be caused by a wrong treatment of this product as generic garbage.
Materials’ recycling helps saving natural resources. For more in-depth information about recycling this
product, please contact M2Tech Srl.
W RNING: the information contained in this manual are considered to be reliable and accurate.
M2Tech reserves the right to change or modify the information any time, without prior advice. It’s up
to the customer to ensure that the manual being consulted is the latest version.
Copyright © 2022, M2Tech Srl
3

MANUNTA
BY M2Tech
www.manunta-audio.com
EVO DAC 3
DIGITAL-TO-ANALOG CONVERTER
REVISION PRB – UNE 2022
Dear customer,
Thank you for purchasing Evo DAC 3. You are the owner of a very high quality digital-to-
analog converter with many unique features designed to obtain the best performance in
every hi-fi system.
Evo DAC 3 implements a specific set of technological and functional solutions, from the
asynchronous USB interface, to the MQA® decoder on all inputs, to a discrete-
components, balanced output stage, ease of use and reliability.
Evo DAC 3 is provided with a complete set of digital inputs, to allow for using every kind of
source. The Bluetooth® receiver with aptX® decoder makes high-quality music streaming
from your smartphone or tablet straightforward.
The balanced and single-ended outputs allow for driving every kind of amplifier.
The fully-loaded remote control allows for total control of both Evo DAC 3 and most audio
players running on the computer attached to its USB input, as well as other Manunta by
M2Tech products.
We’re sure that your expectations will be fulfilled by purchasing Evo DAC 3: you’ll hear your
favourite music as never before, so you can now prepare for a whole new listening
experience!
Marco Manunta, CEO
MQA® and the Sound Wave Device are trade marks of MQA Limited © 2016.
MQA is an a ard- inning British technology that delivers the sound of the original master
recording. M2Tech has adopted MQA technology, hich enables you to play back fully
authenticated MQA audio files and streams, delivering the sound of the original master
recording.
The product MQA dedicated LED glo s green or blue to indicate that the unit is decoding
and playing an MQA stream or file, and denotes provenance to ensure that the sound is
identical to that of the source material. It glo s blue to indicate it is playing an MQA Studio
file, hich has either been approved in the studio by the artist/producer or has been
verified by the copyright o ner. It glo s magenta to indicate that the unit is rendering an
MQA stream or file. This delivers the final unfold of the MQA file.
The Bluetooth® ord mark and logos are registered trademarks o ned by the Bluetooth
SIG, Inc. and any use of such marks by M2Tech Srl is under license. Other trademarks
and trade names are those of their respective o ners.
Qualcomm aptX® is a product of Qualcomm Technologies International, Ltd.
Please note here your Evo DAC 3 serial number and purchase info for future reference:
S/N: _______________________ Date of Purchase: _________________________
Place of Purchase__________________________
Note: Proof of retail purchase, such as your purchase receipt, will be required in the unlikely event
that any warranty service will be required.
Copyright © 2022, M2Tech Srl
4

MANUNTA
BY M2Tech
www.manunta-audio.com
EVO DAC 3
DIGITAL-TO-ANALOG CONVERTER
REVISION PRB – UNE 2022
T BLE OF CONTENTS
1. Unpacking and Placing the Unit........................................................................................7
2. Front Panel........................................................................................................................9
3. Back Panel......................................................................................................................11
4. Remote Control...............................................................................................................13
. Connecting and Powering the Unit.................................................................................1
6. Cleaning the Unit.............................................................................................................17
7. Using the Evo DAC 3........................................................................................................19
7.1. Volume Setting.........................................................................................................19
7.2. Mute Toggle..............................................................................................................19
7.3. Source Selection......................................................................................................19
8. Using a Computer as Digital Source...............................................................................21
8.1. Plug’n’Play Operation with Apple OSx.....................................................................21
8.1.1. DSD files playback with OSx.............................................................................21
8.2. Plug’n’Play Operation with Linux..............................................................................21
8.2.1. DSD files playback with Linux...........................................................................22
8.3. Using the Evo DAC 3 with Windows..........................................................................22
9. Using the Evo DAC 3 I2S Input.........................................................................................23
10. Controlling the Computer Player by Using the Evo DAC 3 Remote Control.................2
11. Updating Evo DAC 3 Firmware......................................................................................2
12. Controlling the Evo DAC 3 by the Bluetooth® Interface.................................................2
13. Specifications.................................................................................................................27
Copyright © 2022, M2Tech Srl

MANUNTA
BY M2Tech
www.manunta-audio.com
EVO DAC 3
DIGITAL-TO-ANALOG CONVERTER
REVISION PRB – UNE 2022
Copyright © 2022, M2Tech Srl
6

MANUNTA
BY M2Tech
www.manunta-audio.com
EVO DAC 3
DIGITAL-TO-ANALOG CONVERTER
REVISION PRB – UNE 2022
1. Unpacking and Placing the Unit
Lay the package on a table. Open the box by lifting the front wing. The following items are
included:
one Evo DAC 3;
one wall wart (AC-to-DC adapter);
one remote control;
two AAA type batteries.
Should one or more item be missing, please contact your retail dealer.
Remove the Evo DAC 3 from the box and place it onto a stable base, far from heat
sources. Avoid full sunlight on the unit. Allow for ample room around the unit for venting.
The Evo DAC 3 is a high efficiency device; therefore it doesn’t produce relevant heat during
its operation. Regardless, it’s recommended to guarantee an adequate air flow around the
unit. Moreover, every time it will mainly be operated by remote control, it’s recommended
to place it so as the remote control’s infrared signals can easily reach its front panel.
Avoid smoke, moisture, dirt and liquids from reaching the unit. Please note that any signs
of abuse will void warranty coverage.
Do not place the unit on thick carpets or inside a box or piece of furniture, not even close
to curtains.
Copyright © 2022, M2Tech Srl
7

MANUNTA
BY M2Tech
www.manunta-audio.com
EVO DAC 3
DIGITAL-TO-ANALOG CONVERTER
REVISION PRB – UNE 2022
Copyright © 2022, M2Tech Srl
8

MANUNTA
BY M2Tech
www.manunta-audio.com
EVO DAC 3
DIGITAL-TO-ANALOG CONVERTER
REVISION PRB – UNE 2022
2. Front Panel
Figure 1
1) IR receiver. Aim the remote control to this point to send commands to the Evo DAC 3.
2) Power on/power off/Input select button. Press this button to switch the Evo DAC 3 on
when it’s off. When the Evo DAC 3 is on, a short press will change the selected input. A
more prolonged press while the Evo DAC 3 is on will cause it to switch off.
3) Sampling frequency indicator LED’s. These LED’s indicate the active sampling
frequency. Blue colour indicates that the sampling frequency is a multiple of 48kHz, green
colour indicates that the sampling frequency is a multiple of 44.1kHz. Multiply the base
sampling frequency for the multiply factor aside the lit LED to obtain the sampling
frequency.
4) Format indicator LED’s. Indicate the format of the file being reproduced. The MQA
LED is multicolour and indicates various MQA formats according to MQA standard.
5) Input indicator LED’s. Indicate the active input.
6-7) Volume up/volume down/mute buttons. Use these buttons to set the output
volume. Push both buttons together to toggle muting.
Copyright © 2022, M2Tech Srl
9

MANUNTA
BY M2Tech
www.manunta-audio.com
EVO DAC 3
DIGITAL-TO-ANALOG CONVERTER
REVISION PRB – UNE 2022
Copyright © 2022, M2Tech Srl
10

MANUNTA
BY M2Tech
www.manunta-audio.com
EVO DAC 3
DIGITAL-TO-ANALOG CONVERTER
REVISION PRB – UNE 2022
3. Back Panel
Figure 2
8) Single-ended outputs. Connect the Evo DAC 3 to your amplifier/preamplifier with
single-ended inputs using coaxial cables terminated with RCA connectors. Gold-plated
female RCA sockets.
9) Balanced outputs. Connect the Evo DAC 3 to your amplifier/preamplifier with balanced
inputs using balanced cables terminated with three-pole XLR connectors. Gold-plated
male XLR sockets.
NOTE: Ground on pin 1, send (hot) on pin 2, return (cold) on pin 3. If your amplifier
requires hot on pin 3 and cold on pin 2, the connection will be inverting. In this case
the absolute phase can be obtained by reversing the speakers’ cables polarity.
10) S/PDIF digital input. Connect a source provided with 7 Ohms S/PDIF output. Gold-
plated female RCA socket.
11) Toslink™ optical digital input. Connect a source provided with a Toslink™ digital
output. Toslink™ type connector.
12) I2S connector. Connect to the PS Audio compliant I2S output of a streamer, digital
disc player or other I2S digital source using a standard HDMI cable. Female HDMI
connector.
13) USB connector. Connect to the USB 2.0 port of a computer using the stock USB
cable. Type “B” female USB connector.
Copyright © 2022, M2Tech Srl
11

MANUNTA
BY M2Tech
www.manunta-audio.com
EVO DAC 3
DIGITAL-TO-ANALOG CONVERTER
REVISION PRB – UNE 2022
14) Power supply input. Connect the connector from the stock 1 V adaptor or from the
Evo Supply 3 or M2Tech Van Der Graaf MkII. . /2.1mm jack with positive on tip.
15-16) Bluetooth® modules receiver antennas. Keep this antennas clear from metal
shields or covers.
Copyright © 2022, M2Tech Srl
12

MANUNTA
BY M2Tech
www.manunta-audio.com
EVO DAC 3
DIGITAL-TO-ANALOG CONVERTER
REVISION PRB – UNE 2022
4. Remote Control
The Evo DAC 3 comes with a fully-loaded remote control which
allows for setting all of its controls, as well as for controlling other
M2Tech Rockstars series products.
Please note when a command is sent to the Evo DAC 3 the “DAC”
key blinks in green. If any of the other key “AMP”, “PHONO” or
“PLAYER” blinks instead, the Evo DAC 3 will not receive the
command. In this case, press the “DAC” key to select the right
commands codes for the Evo DAC 3.
Below is a brief description of the relevant keys for the Evo DAC 3.
Standby key: This allows for putting the Evo DAC 3 in standby
mode (prolonged push) and for awakening it.
DIM: Display dimming.
D C: Instructs the remote to send commands using the DAC
system code.
VOL+/VOL-: Volume setting.
MUTE: Mute toggle on/off.
PH SE: Phase toggle inverting/non inverting. Please note this
setting is not indicated on the front panel.
IN+/IN-: Input selection.
Player Controls: these buttons are dedicated to the control of an
audio player running on the computer attached to the Evo DAC 3.
The following commands can be sent: Play/pause, stop, next,
track, previous track
Figure 3
Copyright © 2022, M2Tech Srl
13

MANUNTA
BY M2Tech
www.manunta-audio.com
EVO DAC 3
DIGITAL-TO-ANALOG CONVERTER
REVISION PRB – UNE 2022
Copyright © 2022, M2Tech Srl
14

MANUNTA
BY M2Tech
www.manunta-audio.com
EVO DAC 3
DIGITAL-TO-ANALOG CONVERTER
REVISION PRB – UNE 2022
5. Connecting and Powering the Unit
W RNING: ll connections between the Evo DAC 3 and other equipment must be
made when all units are turned off and completely powered down or unplugged.
Failing to do so may cause damage to the Evo DAC 3 and/or other units.
Please refer to chapter 3, “Back Panel”.
Connect the digital sources (CD/SACD/DVD player, satellite receiver, DAB receiver) to the
inputs (Figure 2, 10-11). The Bluetooth® connection will be done after powering the unit.
Connect your streamer or any other I2S-provided source to the Evo DAC 3 I2S input (Figure
2, 12).
Connect your computer to the Evo DAC 3 USB input (Figure 2, 13).
Connect either Evo DAC 3 balanced or single-ended outputs to a pair of inputs on an
integrated amplifier or preamplifier (Figure 2, 8-9).
Connect the plug from the stock wall wart or from the Evo Supply 3 to the Evo DAC 3 power
input (Figure 2, 14).
Connect the wall wart or the Evo Supply 3 to a mains outlet. The former will automatically
accept any voltage from 90VAC to 26 VAC.
Switch the Evo DAC 3 on by pushing the left front panel button (Figure 1, 2). If you’re using
the Evo Supply 3, you have to activate the output used to power the Evo DAC 3 first.
NOTE: as the Evo DAC 3 is provided with a volume control, it is possible to use it as
a preamplifier. In this case, it is a good habit to switch the power amplifier on after
switching the Evo DAC 3 on, and to switch the power amplifier off before switching
the Evo DAC 3 off.
NOTE: it is possible to use a dedicated low noise power supply in place of the wall
wart, to increase the sonic performance Manunta by M2Tech provides a device for
this purpose, the Evo Supply 3. M2Tech’s Van Der Graaf MkII can also be used. Should
the user opt for use of power supply not provided by Manunta by M2Tech or
M2Tech, we reserve the right to void the Evo DAC 3 warranty.
Copyright © 2022, M2Tech Srl
1

MANUNTA
BY M2Tech
www.manunta-audio.com
EVO DAC 3
DIGITAL-TO-ANALOG CONVERTER
REVISION PRB – UNE 2022
Copyright © 2022, M2Tech Srl
16

MANUNTA
BY M2Tech
www.manunta-audio.com
EVO DAC 3
DIGITAL-TO-ANALOG CONVERTER
REVISION PRB – UNE 2022
6. Cleaning the Unit
The Evo DAC 3 should be cleaned with a soft, slightly damp cloth. Do not use alcohol or
any other types of cleaning fluids as they could damage the unit.
Avoid fluids from dropping or leaking inside the unit. Fluids of any type poured into the unit
will void your warranty.
Copyright © 2022, M2Tech Srl
17

MANUNTA
BY M2Tech
www.manunta-audio.com
EVO DAC 3
DIGITAL-TO-ANALOG CONVERTER
REVISION PRB – UNE 2022
Copyright © 2022, M2Tech Srl
18

MANUNTA
BY M2Tech
www.manunta-audio.com
EVO DAC 3
DIGITAL-TO-ANALOG CONVERTER
REVISION PRB – UNE 2022
7. Using the Evo DAC 3
At activation, the Evo DAC 3 performs a routinary check for all indicators, then it sets idle
ready for commands.
7.1. Volume Setting
Volume setting is done by either pushing the VOL+/VOL- buttons on the front panel (item
6/7, Figure 1), by pushing the VOL+ e VOL- keys on the remote control or using the free
app for Android and iOS provided by Manunta by M2Tech.
Volume can be set from -101dB (minimum) to 0dB (maximum) in 0. dB steps.
As the Evo DAC 3 is not provided with any display, the volume level is not indicated.
Anyway, the app will show it, therefore it’s a good choice to use the app to control the Evo
DAC 3.
7.2. Mute Toggle
The Evo DAC 3 is provided with a feature (muting) which allows for immediately lowering of
the listening level by 20dB without touching the encoder knob. This feature is useful when
it is necessary to listen to another person for a while, or to operate the source to change
track, answer the telephone, etc.
Muting is toggled by a short press of both front panel’s VOL+ and VOL- buttons (item 6/7,
Figure 1).
To reset muting, repeat the operation: the original listening level will be immediately
restored..
As an alternative it is possible to toggle mute on and off by pushing the “MUTE” key on the
remote control or on the app’s button.
W RNING: pay attention to the volume setting when the muting is active: if volume
is raised too much, once the muting is reset the listening level could be too high so
as to damage the speakers or even the listener’s ears. It is always wiser to limit
volume when in mute mode and even when turning on and off the Evo DAC 3.
7.3. Source Selection
The Evo DAC 3 is provided with various inputs, therefore it is possible to connect different
sources and select which one to listen to. To select a source, press the front panel’s left
button shortly.
Copyright © 2022, M2Tech Srl
19

MANUNTA
BY M2Tech
www.manunta-audio.com
EVO DAC 3
DIGITAL-TO-ANALOG CONVERTER
REVISION PRB – UNE 2022
It’s also possible to change source by using the IN+/IN- buttons on the remote control or
by using the app.
Copyright © 2022, M2Tech Srl
20
This manual suits for next models
1
Table of contents
Other M2TECH Media Converter manuals

M2TECH
M2TECH EVO DAC User manual

M2TECH
M2TECH JOPLIN User manual

M2TECH
M2TECH YOUNG 384KHZ/32BIT User manual

M2TECH
M2TECH VAUGNAN User manual

M2TECH
M2TECH Vaughan User manual

M2TECH
M2TECH JOPLIN User manual

M2TECH
M2TECH YOUNG User manual

M2TECH
M2TECH HIFACE EVO TWO User manual

M2TECH
M2TECH JOPLIN MKII User manual

M2TECH
M2TECH HiFace DAC User manual
Popular Media Converter manuals by other brands

Cooper & Hunter
Cooper & Hunter CH-HP10SIRK3 owner's manual

USR IOT
USR IOT USR-TCP232-410s user manual

MicroConnect
MicroConnect HB-104A Quick installation guide

BZB Gear
BZB Gear BG-UHD-QVP-4X2 user manual

Black Box
Black Box LBH100A-H-SC Specifications

AutomationDirect
AutomationDirect IronHorse GSDA-DP-S user manual