manuals.online logo
Brands
  1. Home
  2. •
  3. Brands
  4. •
  5. Magnescale
  6. •
  7. Measuring Instrument
  8. •
  9. Magnescale DS50NR5 User manual

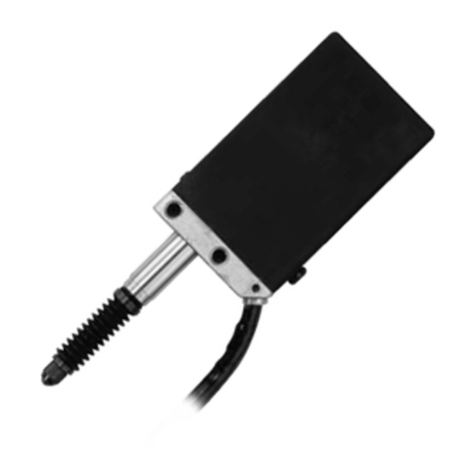
Magnescale DS50NR5 User manual

Instruction Manual
Digital Gauge
DS50NR5 / DS50PR5 /
DS100NR5 / DS100PR5
Read all the instructions in the manual carefully before use and strictly follow them.
Keep the manual for future references.
2020.9
Printed in Japan
©2020 Magnescale Co., Ltd.
DS50NR5 / DS50PR5 / DS100NR5 / DS100PR5
2-A02-934-1B
45 Suzukawa, Isehara-shi, Kanagawa 259-1146, Japan
Specications
DS50NR5 DS50PR5 DS100NR5 DS100PR5
Communication Interface USB2.0FS
Resolution 0.5 μm
Measuring range 50 mm 100 mm
Accuracy (at 20°C) 4 μm p-p 5 μm p-p
Measuring force
(at 20°C)
Upward –
6.2 N or less
–
9.3 N or lessHorizontal 0.9±0.4 N 1.8±0.65 N
Downward 1.3±0.5 N 2.7±0.55 N
Reference point One location (at 1 mm position of spindle movement)
Maximum response speed 250 m/min
Vibration resistance
(10 to 2000 Hz) 150 m/s2
Impact resistance (11 ms) 1500 m/s2
Protective structure IP50 IP64 IP50 IP64
Operating temperature 0°C to +50°C
Storage temperature –20°C to +60°C
Power supply voltage DC +5 V ±5%
Power consumption 1.2 W or less
Diameter of stem φ20 0
– 0.013 mm
Mass *1Approx. 360 g Approx. 630 g
Feeler Provided with a carbide ball tip DZ-122 (Mount screw M2.5)
Cable length Measuring unit⇔Interpolation box : 2 m
Interpolation box⇔USB : 0.5 m
Accessories Instruction Manual
System requirement CPU : Intel Core i3 or higher recommended
RAM : 1 GB or higher recommended
OS : Windows7, Windows10 (32bit/64bit of each edition)
*1 e mass indicated is the total mass excluding the cable and interpolation box.
Trademarks
Microsoft Windows is the registered trademark of Microsoft Corporation.
Intel® CoreTMi3 is the registered trademark of Intel Corporation.
Other system names, product and service names described in the instruction manual are trademarks or registered trademarks of their corresponding manufacturers.
Connecting the measuring unit
is measuring unit uses an interface that is compliant with the
USB (Universal Serial Bus) 2.0 FS (Full speed) standard, and can be
connected directly to a personal computer or hub.
Note
Use a personal computer that is compatible with the recommended
system requirement (refer to “Specications”).
Installing software
e soware available on the Magnescale website can be used by
installing in a personal computer. Refer to the soware instruction
manuals available on the Magnescale website for the soware
installation and operation methods.
Magnescale website
https://www.magnescale.com/mgs/language/english/product/
Digital Gauge > DS805S/DS812S
Operating Cautions
•Do not use the unit in places where it may receive excessive
shocks. Otherwise the inside of the unit may be damaged or the
unit may become unable to produce normal output signals.
•Be sure to turn o the power before connecting or disconnecting
connectors in order to prevent damage or misoperation.
•Aer mounting the measuring unit, insert the connector into the
display unit until it locks. Be sure to turn o the power switch
before connecting or disconnecting the connector.
•Locate the measuring unit (head built-in portion) at least 10 cm
away from a strong magnetic source. (Do not exceed 5 mT in
parallel magnetic elds.)
•Do not forcibly pull the cable for connecting or disconnecting, or
it may cause breakage.
•e measuring unit is short circuited to the frame GND (ground
terminal) of the display unit by shield wire of the cable. When
the measuring unit is used with an other signal processing device
on a machine tool, etc., be aware of the ground level.
•e N-type measuring unit has an unsealed spindle for use in
mechanical devices and measuring rooms having a favorable
work environment.
Due to the low measurement force, the N-type cannot be used
with the spindle directed upward.
•e P-type measuring unit is dust-proof, drip-proof, and oil-
resistant making it suitable for use in environments subject to
chips, cutting oil, and machine oils. However, avoid immersing
the P-type in cutting oil, etc., as it is not of a water-proof
structure.
•Adhesion of cutting oil, etc. which increases in viscosity aer
drying, may hinder accurate spindle motion. Remove them with
water or tepid water. en apply machine oil or the like to the
spindle.
•e P-type measuring unit is provided on the sliding portion of
the spindle with an anti-drip/dust seal of nitrile rubber. Spindle
movement may be impaired by exposure to cutting oil, water, etc.
that may remove oil from the spindle surface.
•Recommended calibration interval 1 year.
Mounting Instructions
•Be sure to chuck the stem for mounting the measuring unit. If
other portion of the measuring unit needs to be chucked, avoid
chucking the name label portion (where the head is built in) and
its neighborhood (Fig. 1).
If the measuring unit is mounted on another device, ensure that
the measuring unit is free from contact with mount screws.
•If excessive torque is applied on the spindle when screwing in
the feeler, the internal mechanisms can be damaged. erefore,
screw in the feeler with your hands, and never use a tool.
Except when using a at feeler, it is recommended to either
attach the spring washer (nominal size: 2.5) or use a screw lock
to prevent loosening of the feeler. (Tightening torque reference
value: 0.05–0.06 N·m)
•e measuring unit comprises ball bearings. erefore, chucking
the stem of the measuring unit too tightly when mounting may
damage the spindle and prevent its smooth motion.
•A holder of dimensions as shown in Fig. 2 may be used to mount
the measuring unit, tightening the screw to about 4 N·m torque.
•Since mounting parallelism aects the measuring accuracy,
adjust the parallelism to within 0.3 mm in relation to 100 mm
displacement by means of mount bracket (or sleeve).
•Fix the cable in a suitable position to prevent possible cable
breakage. Never handle the cable by forcibly pulling or bending
it. (Inside bend radius 50 mm or more)
•If the spindle is to be xed to the machine, use coupling DZ-191
which is optionally available. Refer to the DZ-191 Instruction
Manual regarding the mounting procedure.
•Aer the stem is secured, do not apply force in the rotational
direction. is could cause a failure.
20H6
M4 30
225
40
24
8
Chucking portions
Sleeve
Fig. 1 Mounting positions
φ4.5, φ8 Spot facing depth 4
Tightening torque: 4 N・m
Use 4M hexagon socket head cap screw.
Fig. 2 Mount holder dimensions
Unit: mm
φ
+0.013
0
Head built-in portion
Stem
Troubleshooting
e operating status of the measuring unit can be checked using the LED
indicator.
LED lighting color Details Remedial action
Lights in blue. The power is turned on. Normal operation
is now performed. The reference point has
been detected.
-
Blinks in blue. The power is turned on.
The reference point standby status is
established or the reference point is being
detected.
When the reference point is used, turn on the power with the spindle
extended as far as possible (Note: in case of SV type, with the spindle
contracted), and then move the spindle 1.5 mm or more.
When the power is turned on with the spindle stopped near the reference
point position, it may not be possible to detect the reference point or the
reference point may shift.
Blinks in red. The signal level of the measuring unit is
abnormal.
After dealing with the factor suspected to be responsible for the alarm, reset
the software or turn the power back on.
If the same symptoms persist even when the power has been turned back on,
the measuring unit might be malfunctioned.
Lights in red. The maximum response speed has been
exceeded. The signal level of the measuring
unit is abnormal. Serial communication
trouble has occurred. Normal operation
cannot be performed due to the eects
such as external noise etc.
O Power OFF If the same symptoms persist even when the power has been turned on, the
measuring unit might be malfunctioned or the cable might be broken.
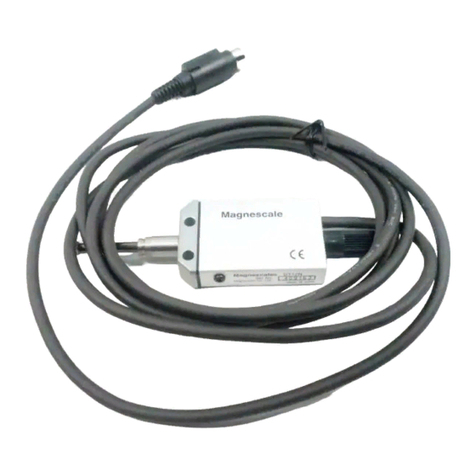
LED indicator
Dimensional Diagrams
*When cable extension is needed, please use CE38 which is optionally available. (Cable length Max. 4 m)
DS50NR5 / PR5
DS100NR5 / PR5
66
70
18
15
286
12
(102) 329.5
443.5 (20)
2.5 38.5
(20)
(51)12 44
223
1
Pin arrangement Signal name
2
3
4
VBUS
D-
D+
GND
φ6
0
−0.013
φ20
−0.02
−0.07
φ20
USB2.0TYPE-A Connector Interpolation box
(Stem)
Cable length 2 m
Cable length
0.5 m
(Stem)
Unit: mm
0
−0.013
φ20
φ8
φ4.8
φ4.8
φ25 0
−0.1

This manual suits for next models

3

Other Magnescale Measuring Instrument manuals

Magnescale DK812 Series User manual

Magnescale

Magnescale DK812 Series User manual

Magnescale MG10A-P1 User manual

Magnescale

Magnescale MG10A-P1 User manual

Magnescale DK812A Series User manual

Magnescale

Magnescale DK812A Series User manual

Magnescale LY71 Manual

Magnescale

Magnescale LY71 Manual

Magnescale SR77 Owner's manual

Magnescale

Magnescale SR77 Owner's manual

Magnescale LASERSCALE BL55-RU Series User manual

Magnescale

Magnescale LASERSCALE BL55-RU Series User manual

Magnescale DK802 Series User manual

Magnescale

Magnescale DK802 Series User manual

Magnescale LY71 Service manual

Magnescale

Magnescale LY71 Service manual

Magnescale SR87 Owner's manual

Magnescale

Magnescale SR87 Owner's manual

Magnescale DL310B User manual

Magnescale

Magnescale DL310B User manual

Magnescale LY72 Manual

Magnescale

Magnescale LY72 Manual

Magnescale DF805SR User manual

Magnescale

Magnescale DF805SR User manual

Magnescale LH71 Series Manual

Magnescale

Magnescale LH71 Series Manual

Magnescale LH72 Manual

Magnescale

Magnescale LH72 Manual

Magnescale DK812 Series User manual

Magnescale

Magnescale DK812 Series User manual

Magnescale LH70 User manual

Magnescale

Magnescale LH70 User manual

Magnescale MT Series User manual

Magnescale

Magnescale MT Series User manual

Magnescale LH71 Series User manual

Magnescale

Magnescale LH71 Series User manual

Magnescale DZ174-010 User manual

Magnescale

Magnescale DZ174-010 User manual

Magnescale SR75 Owner's manual

Magnescale

Magnescale SR75 Owner's manual

Magnescale DT12N User manual

Magnescale

Magnescale DT12N User manual

Magnescale SR85 Owner's manual

Magnescale

Magnescale SR85 Owner's manual

Magnescale DF800S Series User manual

Magnescale

Magnescale DF800S Series User manual

Magnescale DK812S Series User manual

Magnescale

Magnescale DK812S Series User manual

Popular Measuring Instrument manuals by other brands

Advance acoustic SIGMA11 Getting started

Advance acoustic

Advance acoustic SIGMA11 Getting started

Bender LINETRAXX RCM410R-1 manual

Bender

Bender LINETRAXX RCM410R-1 manual

Kolida Total Station KTS-462R10L manual

Kolida

Kolida Total Station KTS-462R10L manual

Trotec BI20 operating manual

Trotec

Trotec BI20 operating manual

Emerson MRLDS-250 user guide

Emerson

Emerson MRLDS-250 user guide

VWR MD 8000 L manual

VWR

VWR MD 8000 L manual

Roche Cedex Bio Operator's manual

Roche

Roche Cedex Bio Operator's manual

SSS Siedle novotechnik MAP 300 manual

SSS Siedle

SSS Siedle novotechnik MAP 300 manual

GREISINGER GOX 91 Brief Operating Manual

GREISINGER

GREISINGER GOX 91 Brief Operating Manual

Sokkia X-1000 series Operator's manual

Sokkia

Sokkia X-1000 series Operator's manual

PASCO PS-3229 Product guide

PASCO

PASCO PS-3229 Product guide

Stack Clubman ST200 quick start guide

Stack

Stack Clubman ST200 quick start guide

Pentax ETH-302 instruction manual

Pentax

Pentax ETH-302 instruction manual

DORSEY DBL-248 manual

DORSEY

DORSEY DBL-248 manual

Keithley 2182 Quick reference guide

Keithley

Keithley 2182 Quick reference guide

DAKOTA ULTRASONICS MMX-6 Operation manual

DAKOTA ULTRASONICS

DAKOTA ULTRASONICS MMX-6 Operation manual

Pyxis SP-395T TTA Operation manual

Pyxis

Pyxis SP-395T TTA Operation manual

LEGRAND IME Conto D4-Pt installation manual

LEGRAND

LEGRAND IME Conto D4-Pt installation manual

manuals.online logo
manuals.online logoBrands
  • About & Mission
  • Contact us
  • Privacy Policy
  • Terms and Conditions

Copyright 2025 Manuals.Online. All Rights Reserved.