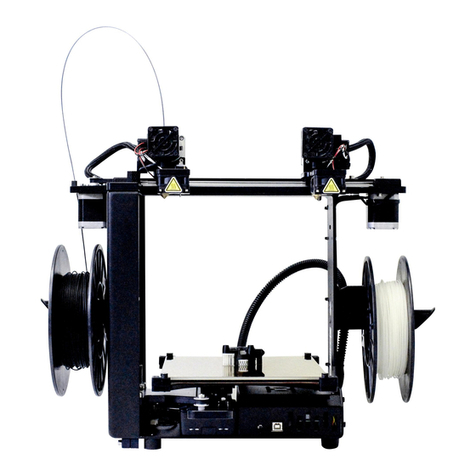
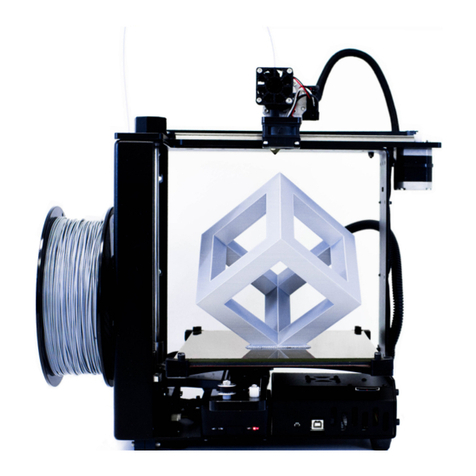
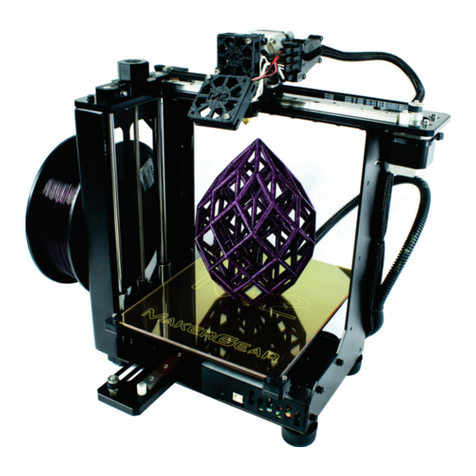
MAKERGEAR M2 User manual

2
V4 Rev. E
Made in the USA since 2009
User Guide
jk

Contents
1‐Welcome
2‐Warning&ImportantSafeguards
4‐What'sIncluded
5‐SetUp
8‐Slicing.STLor.OBJFiles
10‐ChangingFilament
11‐M2Features
15‐What'sTheFunction?
16‐Maintenance&TechnicalSupport
17‐Shutdown&Storage
18‐Warranty
19‐WhatDoes"M2V4Rev.E"Mean?
20‐AboutUs

Withtheexceptionofminimalsetup,yourM2is
readytoprintout‐of‐the‐box.Toensureboth
safetyandhighqualityprinting,carefullyfollow
theSetUpinstructionsincludedinthisbooklet.
Thismachinewasassembledandtestedatthe
MakerGearshopinBeachwood,Ohio,USAand
wasfullyoperationalatthetimethatitwas
shipped,asdemonstratedbythesampleobjects
includedwithyourM2—thesewereprintedon
yourmachinebeforeshipping.Thisbookletcan
alsobefoundontheMakerGearwebsiteat
www.makergear.com/pages/m2‐assembled,
whereyoucanalsoaccessmorespecific
instructionsandresources.
WELCOME
YourMakerGearM23DPrinterhasarrived!
1
DonotchangeyourM2'sfirmwareunlessyou
knowexactlywhatyou'redoingorhavebeen
instructedtodosobyMakerGearSupport.
Donotremovethefilmofyellowpolyimide
tapefromyourM2'sglassbed;thisfunctionsas
yourprintsurface,andshouldbefacingup.

READ ALL INSTRUCTIONS
CAREFULLY BEFORE
PRINTING!
PLEASE
SAFETY FIRST,
INSTRUCTIONS SECOND!
2

ImportantSafeguards
1.Toprotectagainstelectricalshock,donotputthe
machinebody,cordorelectricalpluginliquid.Ifyour
printerfallsintoliquid,donottouchit.Instead,unplug
theunit,thenremoveitimmediately.Donotreach
intotheliquidwithoutunpluggingtheunitfirst.
3
2.Thismachineshouldnotbeusedbychildrenunless
supervisedbyanadultwhounderstandstherisksand
precautionsinvolvedinusingthismachine.Toavoid
potentialinjuries,closesupervisionisnecessarywhen
unitisusedbyornearchildren.
3.Unplugpowercordfromoutletwhennotinuse.To
unplug,grasptheplugandfirmlypullitfromelectrical
outlet.Youshouldnoteverpullthecord.
4.Avoidanycontactwithmovingparts.
5.Keephands/hair/clothingawayfromattachmentsof
printerwhiletheunitisoperatingtoreduceriskof
injurytopersons,and/ordamagetotheunit.
6.Donotoperateyourunitif:damagedcord/plug,
malfunctioning,droppedordamagedinanyway,
ornotoperatingproperly.

What'sIncluded
PowerSupply—ensure
thatthevoltagesettingis
correctforyour
outletbeforepoweringon.
Toolkit,M3driver,tweezers,
filamentguidetube,
polyimidetape,USB
cord,feelergauge,and4
extrabedhold‐downclips.
1kgspoolof1.75
mmblackPLA(colormay
vary).
4
Spoolholderwithscrews
andsamplebracelet,both
ofwhichprintedonyour
M2usingfilesonthe
includedSDcard.

SetUp
Carefullyremovethefoamfromthe
topoftheprinterandfrominsidetheprinterframe.
RemovetheHBPfromitsslotinthefoamandplaceiton
the4legged“Spider”insidetheframe,withtheglass
facingup.Removetheprinterfromthebottomfoam.
Remove(andpleaseread)WARNINGsheetfrom
underneathyourglassbedbyremovingthebinderclip.
Rotatethebedhold‐downclipstopointtowardthefront
andbackofthebedinordertosecuretheglassinplace.
UnpackthepowersupplyandsettheVoltageSwitchto
thevoltagesuppliedthroughyouroutlet.Thereareonly
twosettings:115V(for100–130V)and230V(for220–
240V).Youmustfirstdetermineyourcountry'sstandard
voltagebeforeusingtheM2powersupply‐usingan
incorrectvoltagesettingmaycauseseveredamage.
1
2
5
3InstalltheSpoolHolderwiththefourscrewsusingthe
3mmallenkey,ensuringthatthelongersideisfacingup.
PlaceyourPLAspoolontheSpoolHoldersothatit
unwindsupwardsthroughtheFilamentGuideandfeedit
through.CutthePLAsothetipisflat,thenfeedthefila‐
mentintotheFilamentGuideTubeandintotheFilament
Drive(Ifyouhavetroublefeedingfilamentwithaflattip,
thentrycuttingitata45degreeangle).

4Insertthe6PositionPowerSupplyConnectorintothe6
PositionElectronicsConnector
intheelectronicscase—notethatthepowersupply
connectorshouldrununderallotherwires.Next,plugthe
powersupplyintoawalloutletandflipthepowersupply
switchtotheonposition.
6
DownloadtheMakerGearQuickStartAppvia
http://www.MakerGear.com/pages/QuickStart‐
App.Carefullyfollowtheapp'sstep‐by‐stepinstructionsin
ordertocreateyourfirstprint:
5
ConnectInstalldriver(Windowsusersonly),
connecttoM2.
CheckPlatformCheckstartingheight,check
bedlevel,makeadjustmentsusing
instructionsprovidedbytheapp.
LoadFilamentHeatHBP&extruder,properly
extrudefilament.
PrintSelect"Bracelet.g"fromyourSDcard,
click"Print".
Toaccessthe
M2QuickStartAppTutorial,visit
http://www.makergear.com/pages/quickstart‐app
SECURELYINPLACE
*PLA:
ABS:
220°Chotend,70°Cheatedbedrecommended.
245°Chotend,110°Cheatedbedrecommended.

7
Ifyouwishtoremoveorchangeyournozzle,youmustfirst
removetheentirehotend.Anyattempttounscrewthenozzle
directlyfromyourM2willdamagethehotend.
Someofouruserschoosetoprintwithanozzlethatiseither
largerorsmallerthanthe0.35mmnozzleincludedontheM2
inordertoaccommodatespecificprintingneeds.Ifyouplanto
printwithdifferentsizednozzles,werecommendkeepingeach
nozzleinstalledinaseparatehotend‐thisallowsyoutoswitch
betweennozzlesmoreeasily.
Afterprinting"bracelet.g",youwillbegiventhreeoptions:
6
ClickRetryifyourfirstprintwasunsuccessful‐thiswill
returnyoutothecheckplatformsectioninordertoidentify
andaddressanyissueswithyourplatformthatmayhave
causedprintdefects.
ClickPrintAnotherFileifyourfirstprintwassuccessfuland
youwanttoexperiencemoreMakerGearMagic.
ClickDonetonavigatetothe"Advanced"tab,whereyou
canfindmanualcontrolsforyourM2aswellasareal‐time
displayofthetemperaturesandcoordinatesofyour
extruderandHBP.
ANoteAboutNozzles
VisitourYoutubechannelforstep‐by‐stepinstructionson
howtoremovetheV4hotendandremove/mountanozzle.

SlicingFiles
Ifyoutrytodownloadandprintafilefromtheinternet,
you’llnoticeitsformatiseither.STLor.OBJ,whichyourM2
isunabletoread.Inordertoprintthesefiles,youmustuse
specialsoftwaredesignedto“slice”theminto“.g”or
".gcode"format—thisfileformat,knownasG‐Code,gives
yourM2step‐by‐stepcommandsforwhere/howtoextrude
material.Thestepslistedbelowwillhelpyousetupyour
slicersettingstoslicea.STLfilestoredonyourSDCardinto
.gformat.
Print"hexa.g"fromtheincludedSDcard,whichwehave
slicedforyouusingSimplify3Dsoftware.Thisshouldtake
about15minutestoprint,andwillserveasacomparisonto
yourslicedversionofthesamemodel.
8
RemoveyourSDCardfromthecardreaderonyourM2
andinsertitintoyourcomputer'scardreader—thiswill
enablesignificantlyfastertransferoffilesbetweenyour
computerandtheSDcard(ifyourcomputerdoesnothave
anSDcardreader,thenyoucanuseanexternalUSBcard
reader).
2
Movehexa.stlfromyourSDcardontoafolderstoredon
yourcomputer.
3

DownloadthemostrecentversionofSlic3rfromslic3r.org.
Yourslicersettingswillbeincorrect.Tocorrectthem,click
“LoadConfigBundle”under“File”andselect
the"config.ini"fileavailableonyourSDCard.
9
5
Useyourprintercontrolsoftware(e.g.,Printrunby
Pronterface,availableat
http://www.pronterface.com/#download)
toinstructyourM2toprinthexa2.gfromyourSDcard.
4
Import"hexa.stl"intoyourslicingsoftware,slicethefile
(i.e.,clickexportin.gformat),andthennameit"hexa2.g".
Transferthisnew.gfiletoyourSDcard,ejectthecardfrom
yourcomputer,andtheninsertitbackintothecardreader
onyourprinter.
6
*
Ifyouexperiencepersistentissues,youcanalwayscontact
MakerGearSupportvia:
Ifthisprintdoesnothavesimilarstrengthandappearance
tothe"hexa.g"samplethatyouprinted,seetheonline
resourcesofferedbyyourslicingsoftwareproviderinorder
tofamiliarizeyourselfwithdifferentslicingsettings'impact
onvariousaspectsofprintquality.
http://www.makergear.com/pages/support

3
2
Cuttheendofyournewmaterialsothetipis
flat/round,andfeeditintothefilamentdrive.
1Afterensuringthatyourhotendishotenoughto
printwithyourcurrentfilamentmaterial,usethe
manualcontrolsinyoursoftwarepackageto
"Retract"whilepullingfilamentgentlyuntilitis
releasedfromfilamentdrive.
Afterplacingthetipofthenewmaterialintothe
filamentdrive,usethemanualcontrolsin
yoursoftwarepackageto"Extrude"thefilamentuntil
youcanseeitextrudingfromthenozzle.Thismay
requiregentledownwardpressure.
Ifswitchingbetweenfilamentmaterialtypes(e.g.,
PLAtoABS),heatyourextrudertothehottest
printingtemperatureofthetwomaterialsinorder
topurgetheoldmaterialandproperlyextrudethe
newmaterial.
4
10
*Ifunabletofeedfilamentproperly,thentrycuttingthe
tipatananglebeforefeedingitintothefilamentdrive.
ChangingFilament
*TheM2allowsyoutoprintwithmanydifferentfilament
materials;however,werecommendusingnon‐experimental
filamentmaterialsprovidedbyMakerGear.

M2Features
1Z‐FineAdjustKnob
2HeatedBuildPlatform
3X‐AxisRail
4X‐AxisBelt
5Z‐AxisLeadscrew
610mmLinearRods
7Z‐AxisLimitSwitch
8SDCardReaderSlot
9ManualResetButton
10USBPort
11SpoolHolder
11

M2Features
12X‐AxisLimitSwitch
13FilamentGuide
14Y‐AxisRail 15Y‐AxisBelt
166PositionElectronicsConnector
17Y‐AxisLimitSwitch
12

M2Features
1750mmFan
1840mmFan
19FilamentDrive
20ExtruderWireMount
21V4HotEnd
13

M2Features
20ExtruderWireMount
21V4HotEnd
22V4Nozzle
14
1750mmFan
1840mmFan
19FilamentDrive

What'sTheFunction?
Z‐FineAdjustKnobForlast‐minutechangestothedistance
betweenyournozzle&bed.
HeatedBuildPlatform(HBP)Controlsglassbedtemperature.
X‐AxisRailGuidesyourextruderduringside‐to‐sidemovement.
X‐AxisBeltKeepsyourextruderin‐syncwithyourX‐motor.
Z‐AxisLeadscrewRotatestomovebedup&down.
10mmLinearRodsGuideyourbedup&down.
Z‐AxisLimitSwitchSets"home"positionforZ‐axismotion.
SDCardReaderSlotRetrievesstoredcommandinfo.
ManualResetButtonStopsallcurrentM2operations.
USBPortReceivescommandinfo.
SpoolHolderKeepsyourfilamentspoolsecureduringprinting.
X‐AxisLimitSwitchSets"home"positionforX‐axismotion.
FilamentGuideGuidesyourfilamentfromspooltoguidetube.
Y‐AxisRailGuidesyourbedduringfront‐to‐backmovement.
Y‐AxisBeltKeepsyourbedin‐syncwithyourY‐motor.
6PositionElectronicsConnectorBringspowertoyourM2.
Y‐AxisLimitSwitchSets"home"positionforY‐axismotion.
ExtruderWireMountHouseswiringfortheextruder.
40mmFanCoolsyourfilamentdrive.
50mmFanHelpssolidifyprintedlayers(asneeded).
FilamentDrivePullsfilamentintoyourextruder.
15
SimpleexplanationsofM2Features.

16
Maintenance&Support
Weekly(every50hours)
Ensurethatyourbedisatthecorrecthightandproperly
leveled.Todoso,opentheMakerGearQuickStartapplication
andfollowthecommandswithintheSetUpprocessinorderto
completethefollowingsteps:
Ensurethattheprintsurfaceisfreeofdefects(tornorbubbled
tape)anddust/dirt/grease,andreplacetapeorcleansurface
withappropriatecleaner(alcohol/waterat50%/50%
recommended).
1)CheckStartingHeight2)CheckBedLevel
Monthly(every200‐250hours)
Ensurethemachineisfreeofdustandfilamentdebris,andclean
ifnecessary.Focusareasincludefansandfanguards,filament
surfaceandfilamentdrive,andtheentireframe.Cleanoilfrom
theXandYlinearrailsandapplyafreshcoattoeach.Adotof
oilineachofthelonggroovesontheXandYrailsissufficient.
Onceapplied,movethataxisthroughitsfulltravelmultiple
timestospreadtheoil.
TechnicalSupportlivesonourwebsite
athttp://www.makergear.com/pages/support
Formoremaintenancetips
visitMakerGear.wikidot.com

Shutdown&Storage
IfusingyourM2regularly,thenturnoffthepowersupplyand
unplugboththepowersupplyandUSBcordswhenfinished.
IfstoringyourM2foraperiodof1‐2weeks,followthe
instructionslistedaboveANDstorethefilamentspoolinits
originalbag(fullysealed,withthedesiccantpacketinside).
IfstoringyourM2foraperiodof2weeksormore,followthe
instructionslistedaboveTHENcoveryourentiremachinein
ordertoprotectitfromthebuildupofdustandotherairborne
particles.
TechnicalSupportlivesonourwebsiteat
http://www.makergear.com/pages/support
DONOTunscrewyournozzledirectlyfromyourM2!
Tochangeorremoveitsnozzle,youmustfirstremovethe
entirehotend.VisitourwebsiteandYoutubechannelforstep‐
by‐stepinstructionsonhowtoremovethehotendandchange
itsnozzle.
17

Warranty
NewM2sorderedfromMakerGearorfromanauthorized
MakerGeardistributorhaveaSix‐MonthNon‐
TransferableLimitedWarranty.MakerGearwillreplace
defectivepartsonM2sthatareunderwarranty.
Replacementpartsmaybeneworrefurbishedandinclude
freeshippingintheUSonly.Non‐UScustomersare
responsiblefortheshippingcostsforreplacementparts.
TheM2hasanopendesign(noproprietarycartridges)and
M2ownersarefreetouse3rdpartyfilament.However,
theMakerGearhotendisonlycoveredwhenMakerGear
filamentandauthenticMakerGearcomponentsareused.
Duetovariancesinquality,MakerGearisunableto
providetechsupportforissuesrelatedtothirdparty
filament.Ifyouareusingfilamentorextrudercomponents
fromathirdparty,youmustcontactyourvendorfor
technicalsupport.Thesix‐monthwarrantyofferedby
MakerGeardoesnotcovermachineabuse.
Exceptions
18
TechnicalSupportlivesonourwebsite
athttp://www.makergear.com/pages/support
Other manuals for M2
3
Table of contents
Other MAKERGEAR 3D Printer manuals

MAKERGEAR
MAKERGEAR M2 User manual
MAKERGEAR
MAKERGEAR M2 User manual

MAKERGEAR
MAKERGEAR Ultra One User manual

MAKERGEAR
MAKERGEAR M3-ID Installation and operation manual

MAKERGEAR
MAKERGEAR M2 User manual

MAKERGEAR
MAKERGEAR V4 Quick start guide

MAKERGEAR
MAKERGEAR M3-SE User manual

MAKERGEAR
MAKERGEAR M3-ID User manual
MAKERGEAR
MAKERGEAR M3 User manual