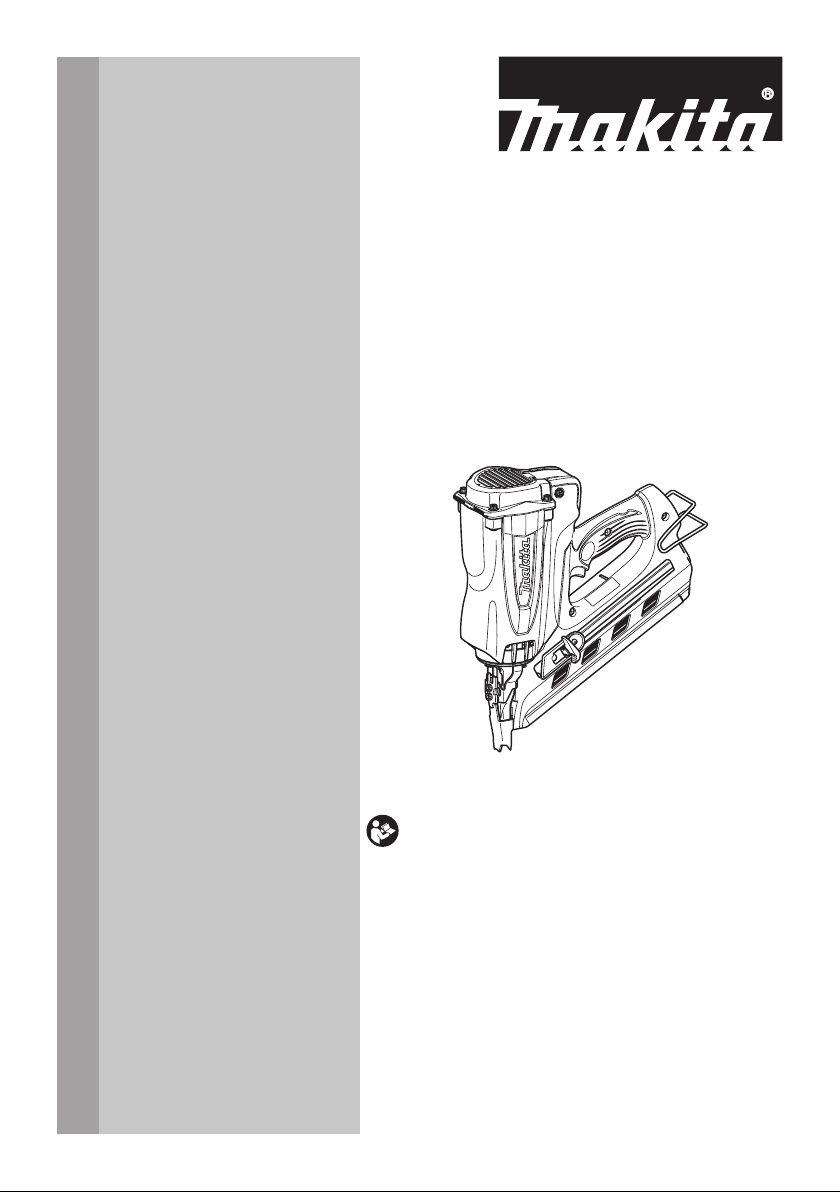
Makita GN900 User manual

INSTRUCTION MANUAL
Cordless Clipped Head Framing
Nailer
GN900
ENGLISH: Original instructions
Read before use.

2ENGLISH
SPECIFICATIONS
Model GN900
Nail length X Shank diameter Nail L :50 mm - 90 mm d : 2.9 mm - 3.3 mm
Nail capacity 40 nails (1strip)
Nail collation angle (degree) 34
Figure of nail head Clipped
Dimensions (L X W X H) 321 mm X 108 mm X 368 mm
Net weight 3.3 kg
Rated voltage D.C. 7.2 V
• Due to our continuing program of research and development, the specications herein are subject to change with-
out notice.
• Specications and battery cartridge may differ from country to country.
Symbols
The following show the symbols used for the equip-
ment. Be sure that you understand their meaning before
use.
Read instruction manual.
Container under pressure, keep away
from temperatures over 50°C (for ex. sun
radiation) Keep container in a well venti-
lated place.
Use only outside or well ventilated rooms.
Do not breathe gas.
Do not use near ames or sprays on
heated surfaces. In use, may form amma-
ble/explosive vapour-air mixture.
Do not damage, puncture or burn even
after use.
Wear safety glasses.
Wear ear protection.
Keep ngers away from trigger when not
driving fasteners to avoid accidental ring.
Use only in ventilated area to avoid nausea
and unconsciousness. Never use tool
in combustible atmospheres. The tool
exhaust may ignite ammable materials.
Do not use on scaffoldings, ladders.
Warning: hot surface!
Do not touch around this symbol. Touching
the surface may cause burns or injuries.
Ni-MH
Li-ion
Only for EU countries
Do not dispose of electric equipment or
battery pack together with household waste
material!
In observance of the European Directives,
on Waste Electric and Electronic
Equipment and Batteries and Accumulators
and Waste Batteries and Accumulators
and their implementation in accordance
with national laws, electric equipment and
batteries and battery pack(s) that have
reached the end of their life must be col-
lected separately and returned to an envi-
ronmentally compatible recycling facility.
Intended use
The tool is intended for the preliminary interior work
such as xing oor joists or common rafters and framing
work in 2″ x 4″ housing.
The tool is for high-volume professional application
only. Do not use it for any other purpose. It is not
designed to drive fasteners directly on a hard surface
like steel and concrete.
Noise
The typical A-weighted noise level determined accord-
ing to EN ISO 11148-13:
Sound pressure level (LpA) : 89 dB (A)
Sound power level (LWA) : 102 dB (A)
Uncertainty (K) : 3 dB (A)
Wear ear protection
Vibration
The vibration total value determined according to EN
ISO 11148-13:
Vibration emission (ah) : 2.5 m/s2or less
Uncertainty (K) : 1.5 m/s2
NOTE: The declared vibration emission value has
been measured in accordance with the standard test
method and may be used for comparing one tool with
another.
NOTE: The declared vibration emission value
may also be used in a preliminary assessment of
exposure.

3ENGLISH
WARNING: The vibration emission during actual
use of the power tool can differ from the declared
emission value depending on the ways in which the
tool is used.
WARNING: Be sure to identify safety measures
to protect the operator that are based on an estima-
tion of exposure in the actual conditions of use (taking
account of all parts of the operating cycle such as
the times when the tool is switched off and when it is
running idle in addition to the trigger time).
EC Declaration of Conformity
For European countries only
The EC declaration of conformity is included as Annex A
to this instruction manual.
Gas nailer safety warnings
WARNING: Read all safety warnings and
all instructions. Failure to follow the warnings and
instructions may result in serious injury, electric shock
and/or re.
Save all warnings and instruc-
tions for future reference.
For personal safety and proper operation and mainte-
nance of the tool, read this instruction manual before
using the tool.
General safety
1. Any other use except for intended use of
this tool is forbidden. Fastener driving tools
with continual contact actuation or contact
actuation shall only be used for production
applications.
2. Keep ngers away from trigger when not
operating this tool and when moving from one
operating position to another.
3. Multiple hazards. Read and understand the
safety instructions before connecting, dis-
connecting, loading, operating, maintaining,
changing accessories on, or working near
the tool. Failure to do so can result in serious
bodily injury.
4. Keep all body parts such as hands and legs
etc. away from ring direction and ensure
fastener cannot penetrate workpiece into parts
of the body.
5. When using the tool, be aware that the fastener
could deect and cause injury.
6. Hold the tool with a rm grasp and be prepared
to manage recoil.
7. Only technically skilled operators should use
the fastener driving tool.
8. Do not modify the fastener driving tool.
Modications may reduce the effectiveness of
safety measures and increase the risks to the
operator and/or bystander.
9. Do not discard the instruction manual.
10. Do not use a tool if the tool has been damaged.
11. Be careful when handling fasteners, especially
when loading and unloading, as the fasteners
have sharp points which could cause injury.
12. Always check the tool before use for broken,
misconnected or worn parts.
13. Do not overreach. Only use in a safe working
place. Keep proper footing and balance at all
times.
14. Keep bystanders away (when working in an
area where there is a likelihood of through traf-
c of people). Clearly mark off your operating
area.
15. Never point the tool at yourself or others.
16. Do not rest your nger on the trigger when
picking up the tool, moving between operating
areas and positions or walking, as resting
nger on trigger can lead to inadvertent opera-
tion. For tools with selective actuation, always
check the tool before use to ascertain the
correct mode is selected.
17. Only wear gloves that provide adequate feel
and safe control of triggers and any adjusting
devices.
18. When resting the tool, lay it down on the at
surface. If you use the hook equipped with
the tool, hook the tool securely on the stable
surface.
19. Do not operate when under the inuence of
alcohol, drugs or the like.
Projectile hazards
1. The fastener driving tool shall be disconnected
when unloading fasteners, making adjust-
ments, clearing jams or changing accessories.
2. During operation be careful that fasteners
penetrate material correctly and cannot be
deected/misred towards operator and/or any
bystanders.
3. During operation, debris from workpiece and
fastening/collation system may be discharged.
4. Always wear protective goggles to protect
your eyes from injury when using power tools.
The goggles must comply with ANSI Z87.1 in
the USA, EN 166 in Europe, or AS/NZS 1336
in Australia/New Zealand. In Australia/New
Zealand, it is legally required to wear a face
shield to protect your face, too.
It is an employer's responsibility to enforce
the use of appropriate safety protective equip-
ments by the tool operators and by other per-
sons in the immediate working area.
5. The risks to others shall be assessed by the

4ENGLISH
operator.
6. Be careful with tools without workpiece con-
tact as they can be red unintentionally and
injure operator and/or bystander.
7. Ensure tool is always safely engaged on the
workpiece and cannot slip.
8. Wear hearing protection to protect your ears
against exhaust noise and head protection.
Also wear light but not loose clothing. Sleeves
should be buttoned or rolled up. No necktie
should be worn.
Operating hazards
1. Hold the tool correctly: be ready to counteract
normal or sudden movements such as recoil.
2. Maintain a balanced body position and secure
footing.
3. Appropriate safety glasses shall be used and
appropriate gloves and protective clothing are
recommended.
4. Appropriate hearing protection shall be worn.
5. Use the correct energy supply as directed in
the instruction manual.
6. Do not use the tool on moving platforms or
back of trucks. Sudden movement of the platform
may lose control of the tool and cause injury.
7. Always assume that the tool contains
fasteners.
8. Do not rush the job or force the tool. Handle
the tool carefully.
9. Watch your footing and maintain your balance
with the tool. Make sure there is no one below
when working in high locations.
10. On rooftops and other high locations, drive
fasteners as you move forward. It is easy to lose
your footing if you drive fasteners while inching
backward. When driving fasteners against perpen-
dicular surface, work from the top to the bottom.
You can perform driving operations with less
fatigue by doing so.
11. A fastener will be bent or the tool can become
jammed if you mistakenly drive fastener on
top of another fastener or strike a knot in the
wood. The fastener may be thrown and hit
someone, or the tool itself can react danger-
ously. Place the fasteners with care.
12. Never attempt to drive fasteners from both the
inside and outside at the same time. Fasteners
may rip through and/or y off, presenting a grave
danger.
Repetitive motions hazards
1. When using a tool for long periods, the oper-
ator may experience discomfort in the hands,
arms, shoulders, neck, or other parts of the
body.
2. While using a tool, the operator should adopt
a suitable but ergonomic posture. Maintain
secure footing and avoid awkward or off-bal-
anced postures.
3. If the operator experiences symptoms such
as persistent or recurring discomfort, pain,
throbbing, aching, tingling, numbness, burn-
ing sensation, or stiffness, do not ignore these
warning signs. The operator should consult a
qualied health professional regarding overall
activities.
4. The continuous use of the tool may cause
repetitive strain injury due to recoil produced
by the tool.
5. To avoid repetitive strain injury, the operator
should not overreach or use excessive force.
Additionally, the operator should take a rest
when feeling fatigue.
6. Conduct a risk assessment regarding repeti-
tive motion hazards. It should focus on mus-
cular-skeletal disorders and be preferentially
based on the assumption that decreasing
fatigue during work is effective in reducing
disorders.
Accessory and consumable hazards
1. Remove the gas container and battery before
changing/replacing accessories such as work-
piece contact, or making any adjustments.
2. Use only the sizes and types of accessories
that are provided by the manufacturer.
3. Use only lubricants recommended in this
manual.
Workplace hazards
1. Slips, trips and falls are major causes of work-
place injury. Be aware of slippery surfaces
caused by use of the tool and also of trip haz-
ards caused by the air line hose.
2. Proceed with additional care in unfamiliar
surroundings. Hidden hazards may exist, such
as electricity or other utility lines.
3. This tool is not intended for use in potentially
explosive atmospheres and is not insulated
from coming into contact with electric power.
4. Make sure there are no electrical cables, gas
pipes etc. that could cause a hazard if dam-
aged by use of the tool.
5. Keep work area clean and well lit. Cluttered or
dark areas invite accidents.
6. There may be local regulations concerning
noise which must be complied with by keeping
noise levels within prescribed limits. In certain
cases, shutters should be used to contain
noise.
Dust and exhaust hazards
1. Always check your surroundings. The exhaust
from the tool may blow dust or objects and hit
operator and/or bystanders.
2. Direct the exhaust so as to minimize distur-
bance of dust in a dust lled environment.
3. If dust or objects are emitted in the work area,
reduce the emission as much as possible to
reduce the health hazards and risk of injury.
Noise hazards
1. Unprotected exposure to high noise levels can
cause permanent, disabling, hearing loss and
other problems such as tinnitus (ringing, buzz-
ing, whistling or humming in the ears).
2. Conduct a risk assessment regarding noise
hazards in the work area and implement appro-
priate controls for these hazards.
3. Appropriate controls to reduce the risk may
include actions such as damping materials to

5ENGLISH
prevent workpieces from "ringing".
4. Use appropriate hearing protection.
5. Operate and maintain the tool as recom-
mended in these instructions, to prevent an
unnecessary increase in noise levels.
6. Take noise reduction measures, for exam-
ple placing workpieces on sound damping
supports.
Vibration hazards
1. The vibration emission during operation
depends on the gripping force, the contact
pressure force, the working direction, the
adjustment of energy supply, the workpiece,
the workpiece support. Conduct a risk assess-
ment regarding vibration hazards and imple-
ment appropriate controls for these hazards.
2. Exposure to vibration can cause disabling
damage to the nerves and blood supply of the
hands and arms.
3. Wear warm clothing when working in cold
conditions, keep your hands warm and dry.
4. If you experience numbness, tingling, pain or
whitening of the skin in your ngers or hands,
seek medical advice from a qualied occupa-
tional health professional regarding overall
activities.
5. Operate and maintain the tool as recom-
mended in these instructions, to prevent an
unnecessary increase in vibration levels.
6. Hold the tool with a light, but safe, grip
because the risk from vibration is generally
greater when the grip force is higher.
Additional safety instructions for gas tools
1. Use the tool only with the Makita genuine gas
container.
2. Be careful when using gas tools, as the tool
can become hot, affecting grip and control.
3. Gas fastener driving tools shall be used in
ventilated spaces.
4. In the case that liquid combustible gas comes
into contact with human skin, injuries may
occur.
5. Gas containers shall be marked according to
the required transport regulation.
6. Handle gas containers carefully and check
for damages. Damaged gas containers can
explode and cause injury.
7. Read and follow the instructions supplied with
the gas container.
8. Ensure combustible materials are not exposed
to hot exhaust gases.
9. Do not use gas tools in explosive areas as the
sparks generated in the tool may cause re or
explosion.
10. Gas containers should not be stored care-
lessly or at high temperature. Follow the local
regulations and gas container's instructions
for handling and disposal of gas containers
and batteries or accumulators.
11. For gas tools, a small release of gas might be
generated by regular operations.
Battery tool use and care
1. Recharge only with the charger specied by
the manufacturer. A charger that is suitable for
one type of battery pack may create a risk of re
when used with another battery pack.
2. Use power tools only with specically desig-
nated battery packs. Use of any other battery
packs may create a risk of injury and re.
3. When battery pack is not in use, keep it away
from other metal objects, like paper clips,
coins, keys, nails, screws or other small metal
objects, that can make a connection from one
terminal to another. Shorting the battery termi-
nals together may cause burns or a re.
4. Under abusive conditions, liquid may be
ejected from the battery; avoid contact. If con-
tact accidentally occurs, ush with water. If
liquid contacts eyes, additionally seek medical
help. Liquid ejected from the battery may cause
irritation or burns.
5. Do not use a battery pack or tool that is dam-
aged or modied. Damaged or modied batteries
may exhibit unpredictable behaviour resulting in
re, explosion or risk of injury.
6. Do not expose a battery pack or tool to re or
excessive temperature. Exposure to re or tem-
perature above 130 °C may cause explosion.
7. Follow all charging instructions and do not
charge the battery pack or tool outside the
temperature range specied in the instruc-
tions. Charging improperly or at temperatures
outside the specied range may damage the
battery and increase the risk of re.
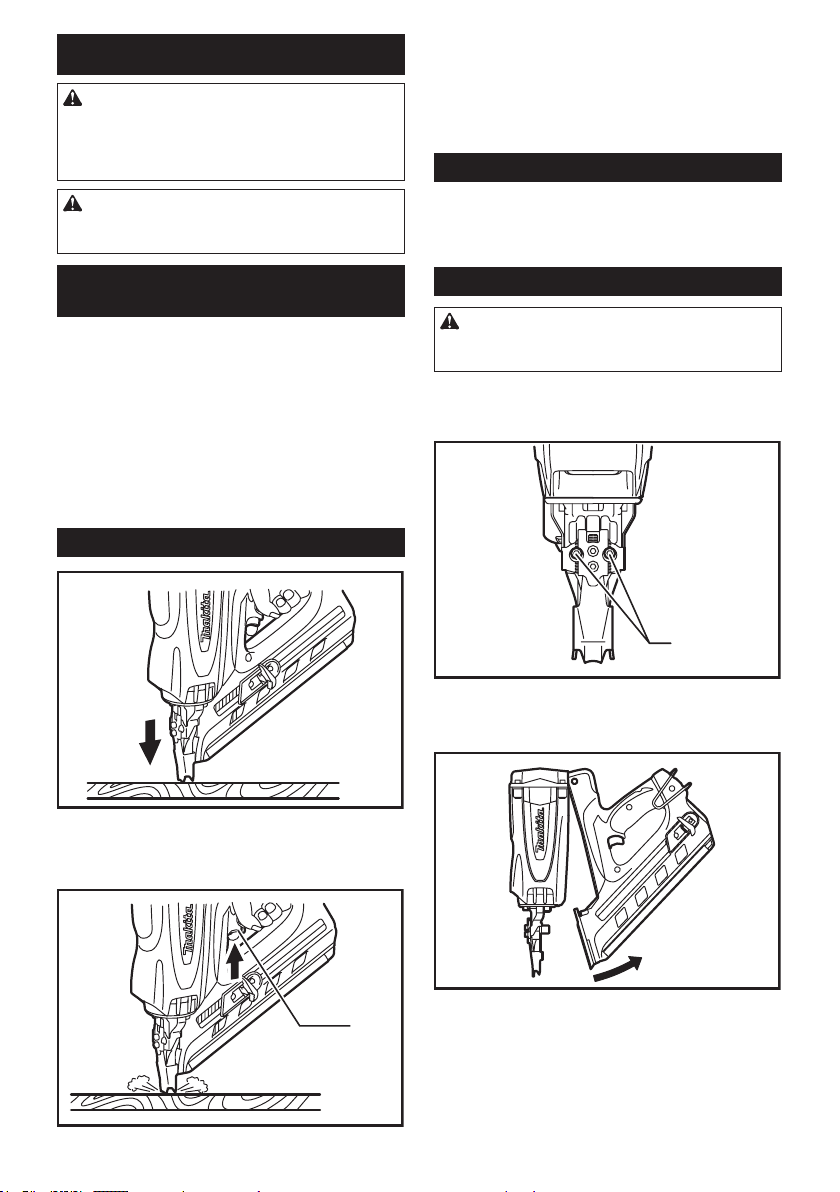
Safety devices
1. Make sure all safety systems are in working
order before operation. The tool must not oper-
ate if only the trigger is pulled or if only the contact
arm is pressed against the wood. It must work only
when both actions are performed. Test for possible
faulty operation with fasteners unloaded and the
pusher in fully pulled position.
2. Securing the trigger in the ON position is very
dangerous. Never attempt to fasten the trigger.
3. Do not attempt to keep the contact element
depressed with tape or wire. Death or serious
injury may occur.
4. Always check contact element as instructed
in this manual. Fasteners may be driven acci-
dentally if the safety mechanism is not working
correctly.
Service
1. Perform cleaning and maintenance right after
nishing the job. Keep the tool in tip-top condi-
tion. Lubricate moving parts to prevent rusting and
minimize friction-related wear. Wipe off all dust
from the parts.
2. Ask Makita authorized service center for peri-
odical inspection of the tool.
3. To maintain product SAFETY and RELIABILITY,
maintenance and repairs should be performed
by Makita Authorized Service Centers, always
using Makita replacement parts.
4. Follow local regulations when disposing of the
tool.
SAVE THESE INSTRUCTIONS.

6ENGLISH
WARNING: DO NOT let comfort or familiarity
with product (gained from repeated use) replace
strict adherence to safety rules for the subject
product. MISUSE or failure to follow the safety
rules stated in this instruction manual may cause
serious personal injury.
Important safety instructions for
battery cartridge
1. Before using battery cartridge, read all instruc-
tions and cautionary markings on (1) battery
charger, (2) battery, and (3) product using
battery.
2. Do not disassemble battery cartridge.
3. If operating time has become excessively
shorter, stop operating immediately. It may
result in a risk of overheating, possible burns
and even an explosion.
4. If electrolyte gets into your eyes, rinse them
out with clear water and seek medical atten-
tion right away. It may result in loss of your
eyesight.
5. Do not short the battery cartridge:
(1) Do not touch the terminals with any con-
ductive material.
(2) Avoid storing battery cartridge in a con-
tainer with other metal objects such as
nails, coins, etc.
(3) Do not expose battery cartridge to water
or rain.
A battery short can cause a large current
ow, overheating, possible burns and even a
breakdown.
6. Do not store the tool and battery cartridge in
locations where the temperature may reach or
exceed 50 °C (122 °F).
7. Do not incinerate the battery cartridge even if
it is severely damaged or is completely worn
out. The battery cartridge can explode in a re.
8. Be careful not to drop or strike battery.
9. Do not use a damaged battery.
10. The contained lithium-ion batteries are subject
to the Dangerous Goods Legislation require-
ments.
For commercial transports e.g. by third parties,
forwarding agents, special requirement on pack-
aging and labeling must be observed.
For preparation of the item being shipped, consult-
ing an expert for hazardous material is required.
Please also observe possibly more detailed
national regulations.
Tape or mask off open contacts and pack up the
battery in such a manner that it cannot move
around in the packaging.
11. Follow your local regulations relating to dis-
posal of battery.
12. Use the batteries only with the products
specied by Makita. Installing the batteries to
non-compliant products may result in a re, exces-
sive heat, explosion, or leak of electrolyte.
SAVE THESE INSTRUCTIONS.
CAUTION: Only use genuine Makita batteries.
Use of non-genuine Makita batteries, or batteries that
have been altered, may result in the battery bursting
causing res, personal injury and damage. It will
also void the Makita warranty for the Makita tool and
charger.
Tips for maintaining maximum
battery life
1. Charge the battery cartridge before completely
discharged. Always stop tool operation and
charge the battery cartridge when you notice
less tool power.
2. Never recharge a fully charged battery car-
tridge. Overcharging shortens the battery
service life.
3. Charge the battery cartridge with room tem-
perature at 10 °C - 40 °C (50 °F - 104 °F). Let
a hot battery cartridge cool down before
charging it.
Overview of the nailer
1
2
3
4
5
6
8
7
9
► 1. Battery cartridge 2. Fuel cover 3. Trigger
4. Indication lamp 5. Pusher lever 6. Pusher button
7. Magazine 8. Contact element 9. Hex wrench
FUNCTIONAL
DESCRIPTION
CAUTION:
• Always be sure to remove the fuel cell, the
battery cartridge and nails before adjusting or
checking function on the tool.

7ENGLISH
Installing or removing battery
cartridge
• Always switch off the tool before insertion or
removal of the battery cartridge.
• To remove the battery cartridge, withdraw it from
the tool while pressing the button on the side of
the cartridge as shown in the gure.
1
► 1. Button
• To insert the battery cartridge, hold it so that the
battery cartridge front shape ts to that of the
battery installment opening and slip it into place.
Always insert it all the way until it locks in place
with a little click. If not, it may accidentally fall
out of the tool, causing injury to you or someone
around you.
• Do not use force when inserting the battery car-
tridge. If the cartridge does not slide in easily, it is
not being inserted correctly.
Fuel cell
Attaching the metering valve to the
fuel cell
1
2
► 1. Metering valve 2. Cap
Detach the cap (in case the metering valve is provided
with the cap).
Push in the front edge.
Push in the rear edge until it seats.

8ENGLISH
Inserting the fuel cell
Push up and pull the fuel cover to open.
1
► 1. Jet nozzle
Insert the fuel cell directing the jet nozzle of the meter-
ing valve toward the adaptor.
Insert the jet nozzle into the small hole of the adapter
properly.
Put the fuel cover over the metering valve and push it
down to latch.
Adjusting the nailing depth
CAUTION:
• Remove the fuel cell, the battery cartridge and
nails before adjusting the depth of nailing.
1
► 1. Screws
With the hex wrench, loosen two screws and move the
contact element.
Retighten screws rmly.
Indication lamp
Color of the indication lamp means the followings.
Blinking green: Normal status
Blinking red: Need to recharge the battery cartridge
Lighting-up-red: Recharge the battery cartridge.
Nailing cannot be performed due to no remaining bat-
tery capacity.
Blinking orange: Thoroughly cleaning is recom-
mended. Refer to the section "MAINTENANCE" to
clean inside of the tool thoroughly. To reset the orange
blinking of the indicator lamp, push the contact element
for ve seconds, and then push the contact element
ve times.
Blinking orange after blinking green and red alter-
nately: Fault detection is running. Remove and reinsert
the battery cartridge to reset. If fault detection is running
again, it is malfunction condition. Ask your local Makita
service center to repair it.

9ENGLISH
Installing the hook
1
► 1. Hook
The hook is convenient for hanging the tool temporarily.
The hook can be set in two positions according to where
the tool will be hung.
To change the hook position, contract it at its foot by
pushing in from both sides and shift to another position.
ASSEMBLY
CAUTION:
• Always remove the fuel cell and the battery
cartridge.
Loading the nailer
Insert a strip of nails into the slit in the rear of the
magazine.
Pull the Pusher Lever to the rear of the Magazine and
return it to the end of the strip gently.
Load nails so that they get parallel to the driver guide.
Removing nails
1
► 1. Pusher button
Pull the pusher lever and push the pusher button to
release the nail supporter, and then return the pusher
lever to the top pushing the pusher button.
Slide the nails toward the rear of the magazine and
remove them out.

10 ENGLISH
OPERATION
WARNING:
• Do not touch around the exhaust vent. The
surface will be so hot during or after an oper-
ation. Touching around the exhaust vent may
cause burns or injuries.
CAUTION:
• Make sure all safety systems are in working
order before operation.
Checking proper action before
operation
Before operation, always check following points.
— Make sure that the tool does not operate only by
installing the battery cartridge and fuel cell.
— Make sure that the tool does not operate only by
pulling the trigger.
— Make sure that the tool does not operate only by
placing the contact element against the workpiece
without pulling the trigger.
— Make sure that the tool does not operate when
pulling the trigger rst and then placing the contact
element against the workpiece.
Driving nails
1. To drive a nail, place the contact element against
the workpiece.
The fan motor is activated, fuel gas is injected into com-
bustion chamber and mixed with air by the fan.
1
► 1. Trigger
2. Hold the contact element pressing rmly and pull
the trigger.
Fuel gas is combusted and the nail is driven.
3. Further driving can be initiated only after both the
contact element and the trigger are released.
Anti dry re mechanism
This is the mechanism that the tool prevents to be red
without nail.
Dry re prevention automatically sets up when the rest
of nails get to last 4-7 pieces.
Jammed nailer
CAUTION:
• Always be sure to remove the fuel cell and the
battery cartridge before clearing a jam.
When the nailer gets jammed, do as follows.
1. Remove the fuel cell, the battery cartridge and
nails.
1
► 1. Screws
2. Loosen the (2) magazine mounting screws with
the hex wrench.
3. Pull the handle/magazine away from the nose of
the tool and clear jam.
4. Realign the handle/magazine to the nose and
tighten mounting screws.
5. Reload a strip of nails.

11 ENGLISH
WARNING:
• Make sure that the magazine mounting
screws are tight and the magazine is tight
to the nose. Attempting to re tool with a loose
magazine will result in loss of nail control, dam-
age to the tool or nail discharge toward operator.
MAINTENANCE
CAUTION:
• Always remove the fuel cell, the battery car-
tridge and nails before attempting to perform
inspection or maintenance.
• Never use gasoline, benzine, thinner, alcohol
or the like. Discoloration, deformation or cracks
may result.
Maintenance after daily work
Always check the tool for its overall condition and loose
screws before operation. Tighten as required.
At the end of daily work, conduct an end-of-workday
routine.
These simple steps are based on maintaining the safety
and performance of the tool.
Before leaving the work site:
• Remove the battery cartridge and store in a
tool-carrying case. Always use the tool-carrying
case for transporting and storing the tool.
• Dispose of all empty cells where they will not be
found by children, crushed, punctured or burned.
When you get home:
• Place the battery cartridge in its charger if it needs
charging as indicated by the red indication lamp.
• Wipe the tool with a clean, soft cloth.
• Check the lter and clean if it is dusty.
Cleaning the air lter
1
2
► 1. Filter cover 2. Filter
Press slightly up the lter cover and remove it. And then
simply lift out the lter.
Tap the lter lightly to remove any dust. Soap and water
restores the lter to an almost new condition.
To maintain product SAFETY and RELIABILITY, repairs,
any other maintenance or adjustment should be per-
formed by Makita Authorized Service Centers, always
using Makita replacement parts.
Thoroughly cleaning
If dry res occur frequently, which means the tool is
needed to be cleansed thoroughly.
See the accompanying cleaning guide for detail, and
perform the cleaning.
If you have any questions regarding to cleaning, please
ask your local Makita Service Center.
OPTIONAL
ACCESSORIES
CAUTION:
• These accessories or attachments are recom-
mended for use with your Makita tool specied
in this manual. The use of any other accessories
or attachments might present a risk of injury to
persons. Only use accessory or attachment for
its stated purpose.
If you need any assistance for more details regard-
ing these accessories, ask your local Makita Service
Center.
• Nails
• Safety goggles
• Fuel cell
• Cleaning kit
• Makita genuine battery and charger
NOTE:
• Some items in the list may be included in the
tool package as standard accessories. They
may differ from country to country.

Makita Corporation
3-11-8, Sumiyoshi-cho,
Anjo, Aichi 446-8502 Japan
www.makita.com
884862G228
EN
20190112
Other manuals for GN900
10
Table of contents
Other Makita Nail Gun manuals

Makita
Makita DPT351 User manual

Makita
Makita DFN350 User manual

Makita
Makita AN923 User manual

Makita
Makita AF500HP Manual

Makita
Makita AN923 Quick start guide

Makita
Makita AF503 User manual

Makita
Makita AN922 User manual

Makita
Makita AN911H User manual

Makita
Makita XNB01 User manual

Makita
Makita AN923 User manual

Makita
Makita AN960 User manual

Makita
Makita AN935H User manual

Makita
Makita AF506 User manual

Makita
Makita AN621 User manual

Makita
Makita AN250HC Manual

Makita
Makita DPT353 User manual

Makita
Makita DFN350 User manual

Makita
Makita AF353 User manual

Makita
Makita AN621 Quick start guide

Makita
Makita PT001GZ User manual