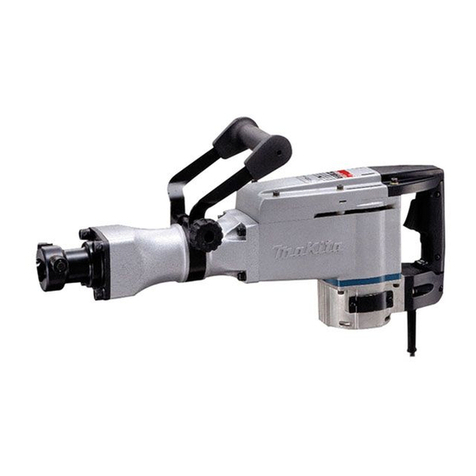
Makita HK1810 User manual

Power
Blows per minute Overall length
0
~
3.200 31
5
mm (1
2-318")
Scraper
Net weight
3.2 kg
17.0 Ibs)
MODEL
HK181O
Variable Speed
INSTRUCTION MANUAL
DOUBLE
INSULATION

IMPORTANT
SAFETY INSTRUCTIONS
(For
All
Tools)
WARNING:
WHEN USINGELECTRICTOOLS, BASICSAFETY
PRECAUTIONSSHOULDALWAYS BE FOLLOWEDTO REDUCE
THE RISK OF FIRE, ELECTRIC SHOCK, AND PERSONAL
INJURY, INCLUDING THE FOLLOWING:
READ ALL
INSTRUCTIONS.
1.
KEEP WORK AREA CLEAN. Cluttered areas and benches invite injuries.
2.
CONSIDER WORK AREA ENVIRONMENT. Don't use power tools
in
damp
or
wet locations. Keep work area well
lit.
Don't expose power tools torain.
Don't use tool
in
presence of flammable liquids or gases.
3.
KEEP CHILDREN AWAY. All visitors should be kept away from work area.
Don't let visitors contact tool or extension cord.
4.
STORE IDLETOOLS. When not
in
use, tools should bestored
in
dry, andhigh
or locked-up place
-
out of reach of children.
5.
DON'T FORCETOOL.
It
will
do thejob betterand safer at the ratefor which
it
was intended.
6.
USE RIGHT TOOL. Don't force small tool or attachment to do the job of a
heavy-dutytool. Don't usetool for purpose not intended; for example, don't
use circular saw for cutting tree limbs or logs.
7.
DRESS PROPERLY. Don't wear looseclothingorjewelry. They can becaught
in
moving parts. Rubber gloves and non-skid footwear are recommended
when working outdoors. Wear protective hair covering tocontain longhair.
8.
USE SAFETY GLASSES. Also use face or dust mask if cutting operation is
dusty.
9.
DON'T ABUSE CORD. Nevercarry tool bycordor yank
it
todisconnect from
receptacle. Keep cord from heat, oil, and sharp edges.
IO.
SECURE WORK. Use clamps or a vise to hold work. It's safer than using
your hand and
it
frees both hands to operate tool.
11.
DON'T OVERREACH. Keep proper footing and balance at all times.
12.
MAINTAIN TOOLS WITH CARE. Keep tools sharp and clean for better and
safer performance. Follow instructions for lubricatingand changing acces-
sories. Inspecttool cordsperiodicallyandifdamaged, have repairedbyautho-
rized service facility. Inspect extension cords periodically and replace if
damaged. Keep handles dry, clean, and free from oil and grease.
13.
DISCONNECTTOOLS. When notinuse, beforeservicing, and when chang-
ing accessories, such as blades, bits, cutters.
2

14.
REMOVEADJUSTING KEYS AND WRENCHES. Form
habit
of
checking
to
seethatkeys andadjusting wrenchesare removedfromtool beforeturning
it
on.
15.
AVOID UNINTENTIONALSTARTING. Don’t carry tool withfinger onswitch.
Be sure switch is OFF when plugging
in.
16.
EXTENSION CORDS. Make sure your extension cord is in good condition.
When using an extension cord, be sure to use one heavy enough to carry
the current your product will draw. An undersized cord
will
cause a drop
inlinevoltage resulting
in
loss
of power and overheating. Table
1
showsthe
correctsize touse depending oncord lengthandnameplateampere rating.
If
in
doubt, use the next heavier gage. The smaller the gage number, the
heavier the cord.
TABLE
1
MINIMUM
GAGE
FOR
CORD
SETS
I
Total Length
of
Cord in Feet
I
0
-
25
I
26
-
50
I
51
-
100
I
101
-
150
Mrl:More
1
18
~
16
110
16
,
14
-
10 18 16 14 12
10
-
12 16 16 14 12
12
-
16 14 12
Not Recommended
17.
OUTDOOR USEEXTENSIONCORDS. When toolisusedoutdoors, use only
extension cords intended for use outdoors and
so
marked.
18.
STAY ALERT. Watch what youaredoing, use common sense. Don’t operate
tool when you are tired.
19.
CHECK DAMAGEDPARTS. Before further use of the tool, a guard or other
part that is damaged should be carefully checked to determine that
it
will
operate properly and performitsintendedfunction. Check for alignment of
moving parts, binding of moving parts, breakage of parts, mounting, and
any other conditions that may affect its operation. A guard or other part
that is damaged should be properly repaired or replaced
by
an authorized
service center unless otherwise indicated elsewhere
in
this instruction
manual.Havedefective switches replacedbyauthorizedservicecenter.Don’t
use
tool
if
switchdoes not turn
it
on and off.
20. GUARD AGAINST ELECTRIC SHOCK. Prevent body contact withgrounded
surfaces. For example; pipes, radiators, ranges, refrigerator enclosures.
21.
REPLACEMENTPARTS. When servicing, useonly identical replacementparts.
22. POLARIZEDPLUGS. To reduce the risk of electric shock, this equipmenthas
a polarized plug (one blade is wider than the other). This plug will
fit
in
a
polarized outlet only one way. If the plug does not fit fully in the outlet,
reversethe plug.
If
it
still does not
fit,
contact aqualifiedelectriciantoinstall
the proper outlet.
Do
not change the plug in any way.
3

VOLTAGE WARNING: Beforeconnectingthe tooltoa powersource (receptacle,
outlet, etc.) be sure the voltage supplied is the same as that specified on the
nameplateof the tool. A power source withvoltage greater than that specified
for the tool can result
in
SERIOUS INJURYtothe user
-
as well as damage to
the tool.
If
in
doubt,
DO
NOT PLUG INTHE TOOL. Usinga power source with
voltage less than the nameplate rating is harmful to the motor.
ADDITIONAL SAFETY RULES
1.
Wear ear protectors when using for extended periods.
2.
Be sure the scaling chisel is secured in place before operation.
3.
Under normaloperation, the toolisdesignedtoproducevibration. Thescrews
can come loose easily, causing a breakdown or accident. Check tightness
of screws carefully before operation.
4.
In
cold weather or when the tool has not been usedfor a longtime, let the
tool warm up for several minutes by operating
it
under no load. This will
loosen upthe lubrication. Without proper warm-up hammeringoperation is
difficult.
Be sure no one is below when using the tool
in
high
locations.
5.
Always be sure you have a firm footing.
6.
Hold the tool firmly with both hands.
7.
Keep hands away from moving parts.
8.
Do
not leave the tool running. Operate the tool only when hand-held.
9.
Do
not point the tool at any one
in
the area when operating. The scaling
chisel or bull point could fly out and injure someone seriously.
IO.
When chippingintowahls, floors
or
wherever "live" electricalwires may be
encountered,
DO
NOT TOUCH ANY METAL PARTS
OF
THE TOOL!
Hold the
tool
only by the plastic handle or the side grip to prevent electric
shock
if
you chip into a "live" wire.
11.
Do
not touch the scaling chisel immediately after operation; they may be
extremely hot and could burn your skin.
SAVE THESE INSTRUCTIONS.
4

Installing or removing scaling chisel or other bit (bull point, etc.)
CAUTION:
Always be sure that the tool is switched off and unplugged before installing or removing
the bit.
To
install the bit, first attach the dust cover
provided to the bit as shown in the figure.
Then turn the
tool
retainer in the direction
of the arrow and insert the bit into the tool
barrelas far as
it
will go. Now turn the tool
retainer in the opposite direction to secure
the bit.
Dust
cover
To
removethe bit, follow the installation procedure in reverse.
Switch
action
Tool
speed
is
increased by increasing pres-
sure
on
the trigger. To start the tool,
simply pull the trigger.
Release
the trigger
to stop. A speed control screw
is
provided
so
thatmaximumtool speed can
be
limited
(variable). Turn the speed control screw
clockwise for higher speed, and counter-
clockwise for lower
speed.
Speed
control screw
Trigger
switch
CAUTION
:
Before plugging in the tool, always check to
see
that the trigger switch actuates properly
and returns tothe
"OFF"
positionwhen released.

Operation
Position the chisel
at
the location to be
scaled, then pull the trigger. Apply light
pressure to the tool. Forcing the tool will
only decreasethe tool performance.
6

MAINTENANCE
CAUTION
:
Always be sure that the tool
is
switched off and unpluggedbefore attempting to perform
inspectionor maintenance.
Lubrication
This tool requires no hourly or daily lubricationbecause
it
has
a
grease-packedlubrica-
tion system. It should be relubricated after every
6
months of operation. Send the com-
plete tool to Makita Authorized or Factory Service Center for this lubricationservice.
However, if circumstances require that
you
should lubricate
it
by yourself, proceed
as
follows.
Run the tool for several minutes to warm
it
up. Switchoff and unplugthe tool. Remove
the crank cap using
a
Makita lock nut wrench 28 (optional accessory).
Rest
the
tool on
the table with the bit end pointing upwards. This will allow the old grease to collect in-
side the crank housing. Wipe out the old grease inside and replace with
a
fresh grease
(20
g;
2/3
oz).
Use only Makita genuine grease (optional accessory). Fillingwith more
than the specified amount of grease (approx. 20g; 2/3
02)
can cause faulty hammering
action or tool failure. Fill only with the specified amount of grease. Reinstall the crank
cap and tighten with the lock nut wrench.
Do
nottighten the crank cap excessively. It
is
madeof resinand
is
subject to breakage.
I
I
Replacingcarbon brushes
When the resin insulating tip inside the
carbon
brush
is
exposed
to
contact the
commutator,
it
will automatically shut off
the motor. When this occurs, both carbon
brushes should be replaced
at
the same
time. Use only identical carbon brushes.
Insulatingtip
7-
Commutat
Carbon brush
JL
7

Use
a
screwdriver to remove the rear cover
as
shown inthe figure.
Use
a
screwdriver to remove the brush
holder caps. Take out the worn carbon
brushes, insert the new ones and secure the
brush holdercaps.
To maintain product SAFETY and RELIABILITY, repairs, any other maintenance
o*
adjustment should be performed by Makita Authorized
or
Factory Service Centers,
always using Makitareplacementparts.
8

ACCESSORIES
CAUTION
:
These accessories or attachments are recommended
for
use with your Makita tool specified in this
manual. The use of any other accessories or attachments might present
a
risk of injury to persons.The
accessories or attachments should be usedonly inthe proper and intended manner.
Part No.
798265-3
798264-5
0
Scalingchisel
Size
(mm)
30
(1-3/16")
x
150(5-7/8")
50 (2")
x
150 (5-7/8")
Bull
point
Part No. 798266-1
0
Scraper assembly
Part No. 122349-9
Hammer grease
Part No. 181490-7
0
Grooving chisel
Safety goggles
Part No. 191686-2
Steel carrying case
Part No. 181856-1
Part No.
1
Size
(mm)
798277-6
1
8 (5/16")
x
170 (6-11/16")
~~~
798276-8
I
12 (1/2")
x
170 (6-11116")
0
Hex wrench
Part No. 783203-8
Lock nut wrench
28
Part No. 782402-9
Dust
cover
Part No.423154-0
9

POWER SCRAPER
Model
HK1810
Note: The switch, noise suppressor and other part configurations
may differ from country to country.
10

MOOEL
HK1810
Mar -15
-'89
US
I:$
A.,,
DESCRIPTION
I:$
AtD
DESCRIPTION
1
2
3
4
5
6
7
8
9
10
11
12
13
14
15
16
17
18
19
20
21
22
23
24
25
26
27
28
29
30
31
32
33
34
35
36
37
2
2
1
1
1
1
1
1
1
1
1
1
1
1
1
1
1
1
1
1
1
1
1
1
1
1
1
1
1
1
1
1
1
1
1
2
2
-
Hex
Bolt
M6x46
Flat
Washer
8
Tool
Retainer
Barrel
Cover
Steel
Ball
5
6
Compression Spring 3
Tool
Holder
Crank Cap
0
Ring 44
Pin
6
Rod
Needle
Bearing
810
Crank
Shaft
Woodruff
Key
3
Ball Bearing 6002LLB
0
Ring
32
011
Seal
15
Crank
Housing
Flat
Washer 15
Helicai
Gear
36
Retaining
Ring S-12
Needle
Bearing 1010
Gear
Housing
Rubber
Pin
6
Ball
Bearing
6001LLB
Flat
Washer 12
P1StO"
0
Ring 19
0
Ring
19
Striker
Ring 28
Impact
Bolt
0
Ring
12
0
Ring 12
Cylinder Liner 24
Pin
6
Cushion
Plate
38
39
40
41
42
44
45
46
41
48
49
50
51
52
53
54
55
56
57
58
59
61
62
63
64
65
66
67
70
71
72
73
74
75
76
77
1
1
I
1
1
4
1
1
1
1
1
1
1
2
1
1
2
2
1
2
4
4
1
3
2
1
1
1
1
1
1
2
1
2
1
1
0
Ring 19
Compression
Spring
24
Flat Washer 25
0
Ring 39
Barrel
Hex Socket Head
Bolt
M6x25
IWith Washerl
Fan
67
ARMATURE ASSEMBLY
IWith
Item
25 26
&
45
-
481
ln~ulation
Washer
Ball
Bearing
608LB
Rubber
Pin
4
Baffle Plate
FIELDASSEMBLY
Pan
Head
Screw
M4x40 IWith Washer
.%
Bond1
Motor
Housing
Name Plate
Carbon
Brush
Brush
Holder
Cap
Real
Cove!
Pan
Head
Screw
M5x12 IWith Washer1
Hex
Socket
Head
Bolt
M6x45
Flat
Washer
6
Label
Pan
Head
Screw
M5x25 IWith Washerl
Pan
Head
Screw
M6xl8
lWith Washer1
Dust
Cover
Switch
Handle
Set IWithItem 741
Cord
Guard
Cord
Strain
Relief
Pan
Head
Screw
M4x18 IWith Washer)
Handle
Set IWith
Item
671
Pan
Head
Screw
M6x25 lWnh Washerl
0
Ring 19
Dust
Cover
Note The switch and other part specifications may differ
from
Country
to
Country
11

P
MAKCTA
LIMITED
ONE
YEAR
WARRANTY
Warranty
Policy
Every Makita tool is thorou ly inspected and tested before leaving the factory. It is warranted
to
be free of defects from workdsh, and materials for the period of ONE YEAR from the date
of
original purchase. Should any trouble develop during this one-year period, return the COMPLETE
tool, freight prepaid,
to
one
of
Makita’s Factory or Authorized ServiceCenters. If inspection shows
the trouble is caused by defective workmanship or material, Makita
will
repair (or at our option,
replace) without charge.
This Warranty does not apply where:
repairs have been made or attemptedby others:
repairs are required because of normal wear and tear:
The
tool
has
been abused, misused or improperly maintained;
alterationshave been made to the tool.
IN
NO EVENT SHALL MAKITA BE LIABLE FOR ANY INDIRECT, INCIDENTALOR
CON-
SEQUENTIAL DAMAGES FROM THE SALE OR USE OFTHE PRODUCT.THIS DISCLAIMER
APPLIES BOTH DURING AND AFTER THE TERM
OF
THIS WARRANTY.
MAKITA DISCLAIMS LIABILITY FOR ANY IMPLIED WARRANTIES, INCLUDING IMPLIED
WARRANTIES OF “MERCHANTABILITY” AND “FITNESS FOR A SPECIFIC PURPOSE,”
AFTER THEONE-YEAR TERM OFTHISWARRANTY.
This Warranty eves
YOU
sDecific ledriehts. and
YOU
mav also have other riehts which varv from
state
10
state
-$om;
states do notallow the exclusion o;limitation
of
incidental or conseqhential
damages,
so
the above Imitation or exclusion may not apply
to
you. Some states do not allow
limitation on how long an implied warranty lasts,
so
the above limitation may not apply
to
you.
Makita Corporation
3-11
-8,
Sumiyoshi-cho,
Anjo, Aichi
446
Japan
8834838069
PRINTED IN
JAPAN
1995
-3-
N
Other manuals for HK1810
2
Table of contents
Other Makita Power Tools manuals

Makita
Makita RW01 User manual

Makita
Makita XWT04Z User manual

Makita
Makita UP100D User manual

Makita
Makita DCO140 User manual

Makita
Makita PJ7000 User manual

Makita
Makita XRT01 User manual

Makita
Makita M8701 User manual

Makita
Makita DTD170 User manual

Makita
Makita DHR280 User manual

Makita
Makita HM1801 User manual

Makita
Makita HM1810 User manual

Makita
Makita DVR340 User manual

Makita
Makita DVR850 User manual

Makita
Makita UX01G User manual

Makita
Makita JV0600 User manual

Makita
Makita HR3540C User manual

Makita
Makita HM1802 User manual

Makita
Makita DTW1001 User manual

Makita
Makita 3600H User manual

Makita
Makita JS3201 User manual