P 2/11
Repair
[2] LUBRICATION and ADHESIVE
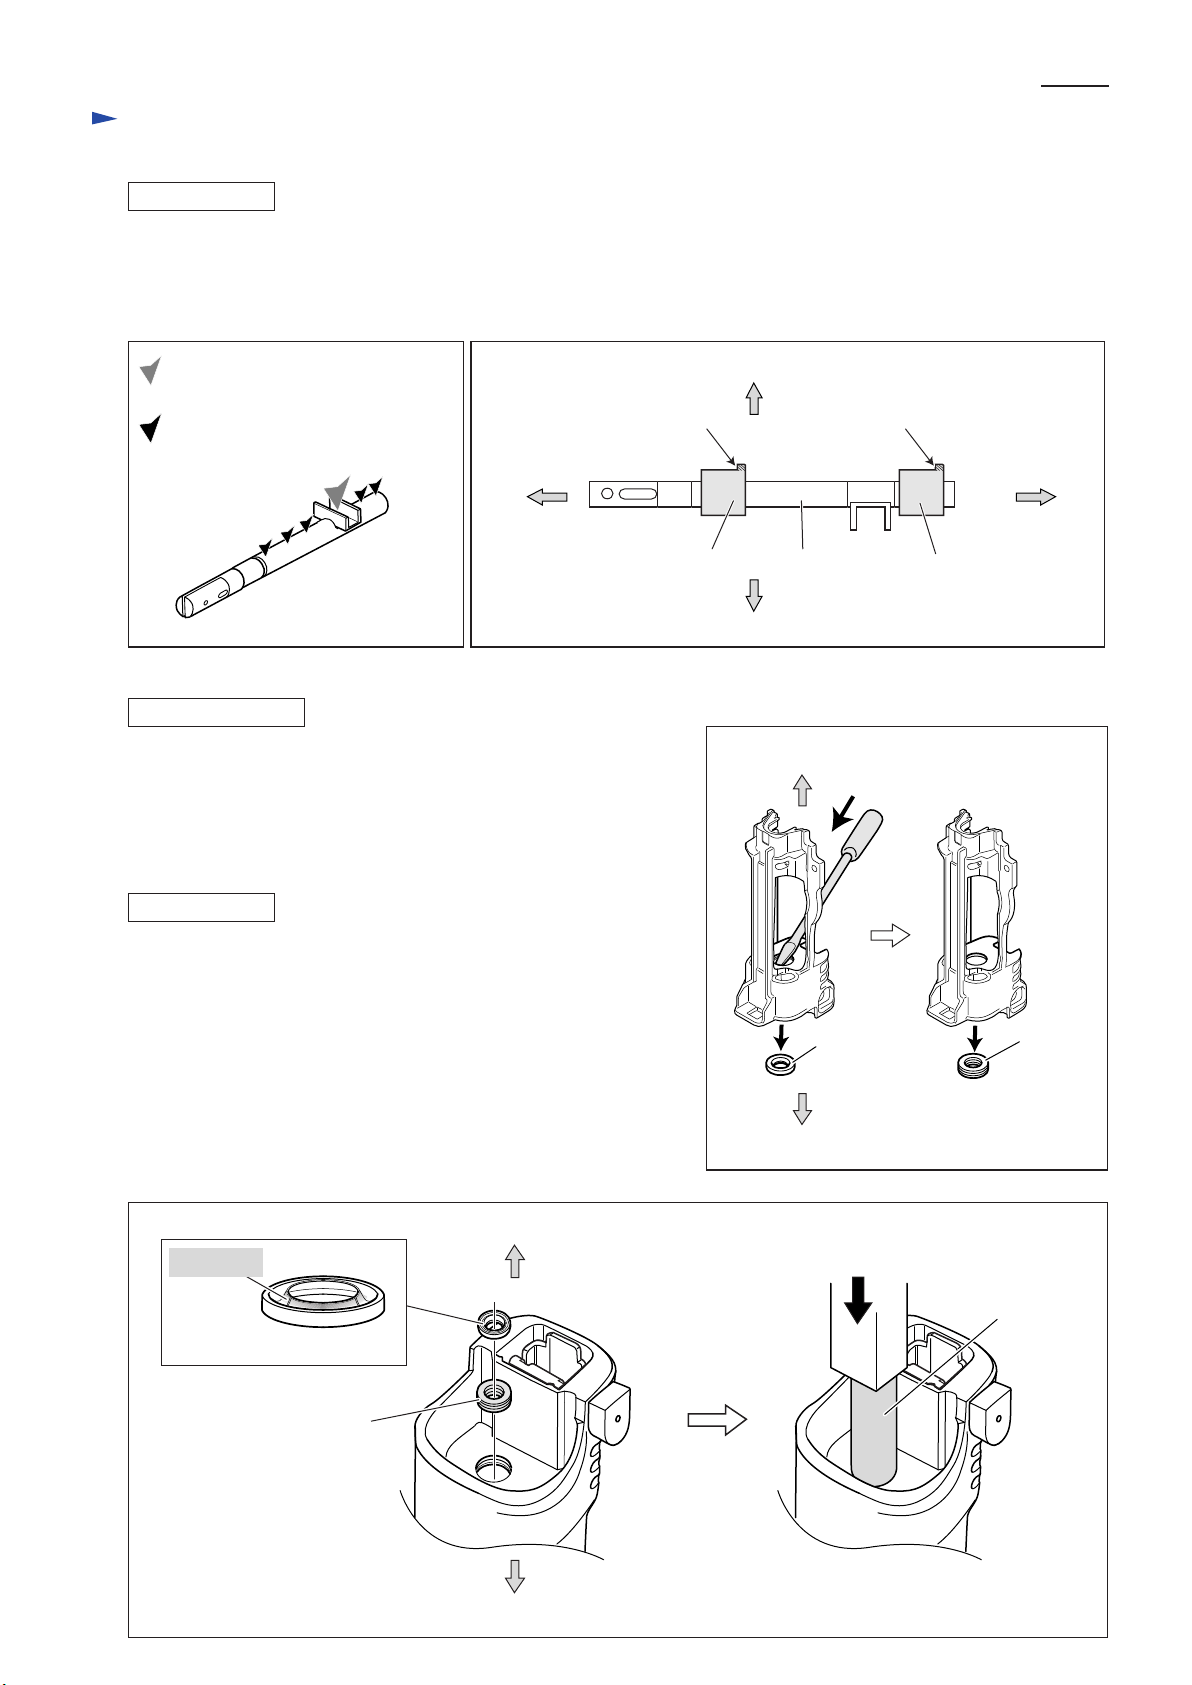
Lubrication: Apply Makita grease FA No.2 to the following portions designated with the black triangle to protect
parts and product from unusual abrasion. (Fig. 1)
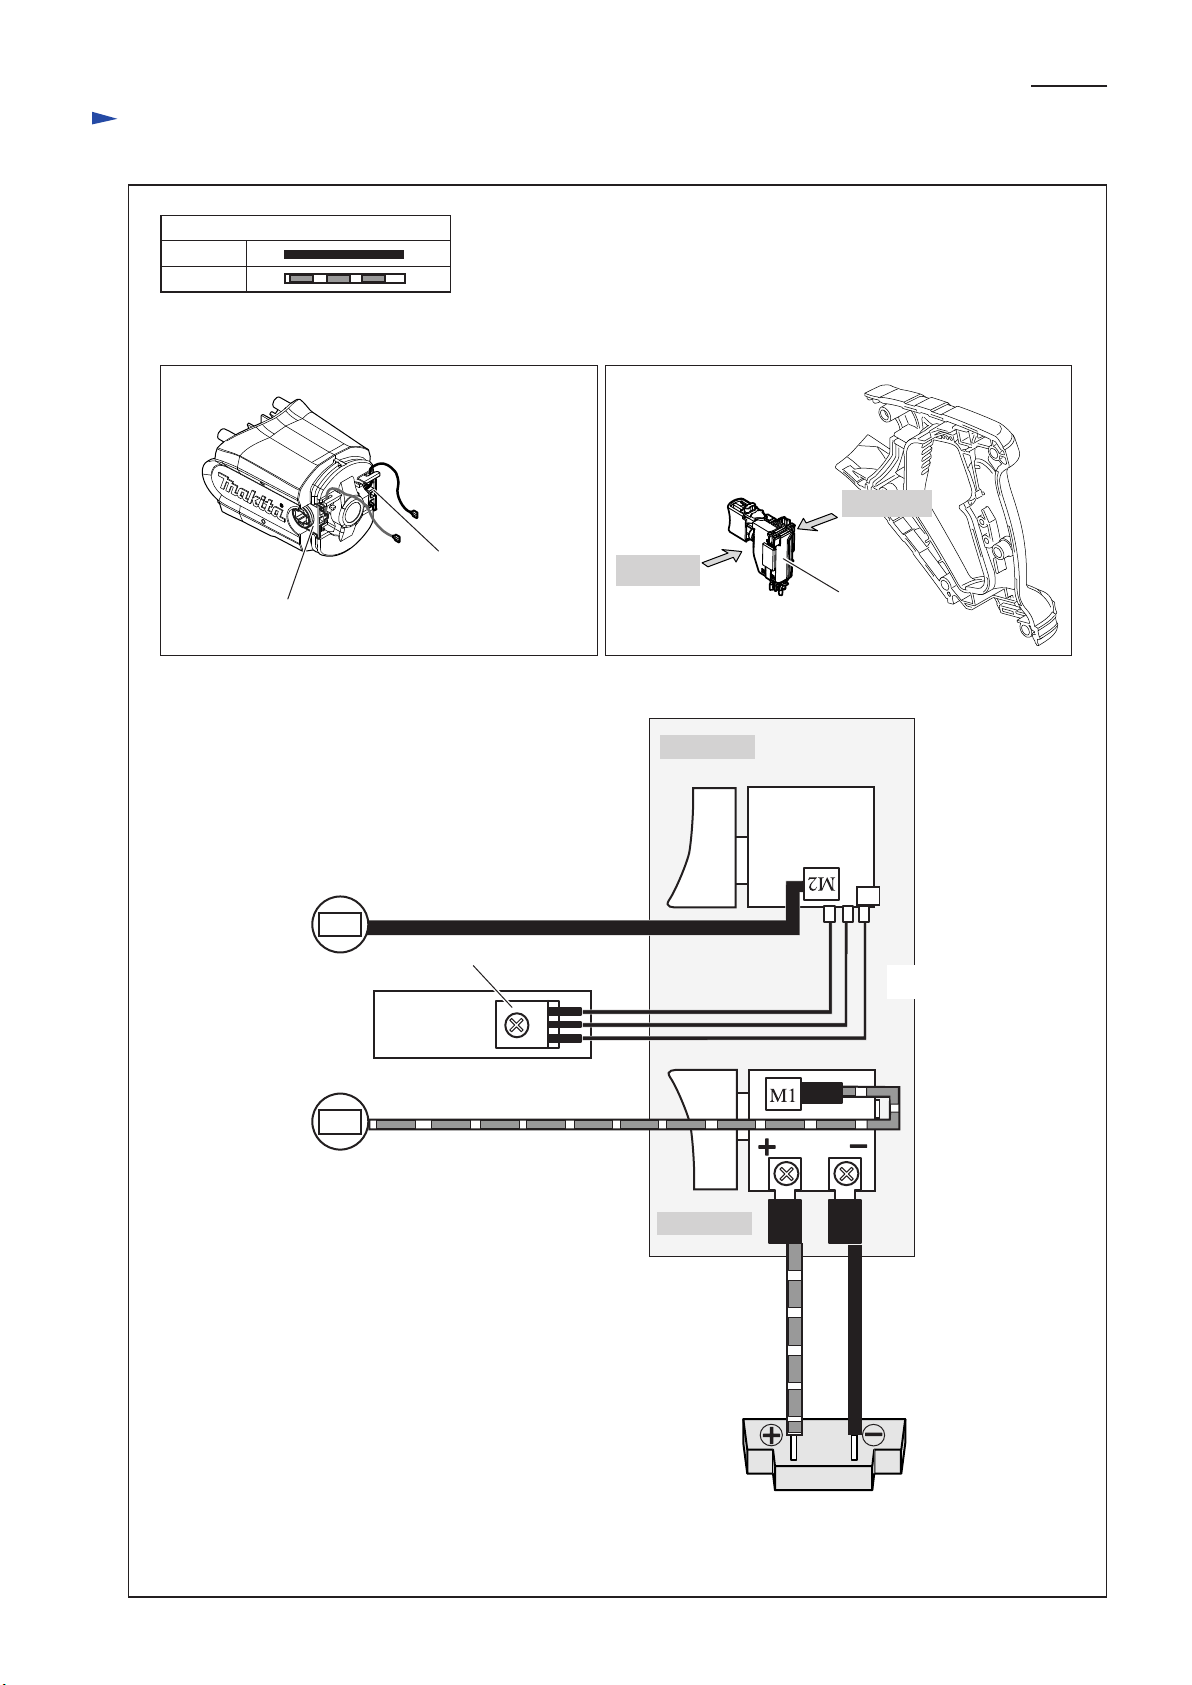
Adhesive: When reusing threadlocker coated screws, be sure to apply adhesive before tightening.
Recommended adhesives are ThreeBond 1321B or 1342, or Loctite 242.
[1] NECESSARY REPAIRING TOOLS
CAUTION: Remove the recipro saw blade and battery cartridge from the machine
for safety before repair/ maintenance !
Fig. 1
38
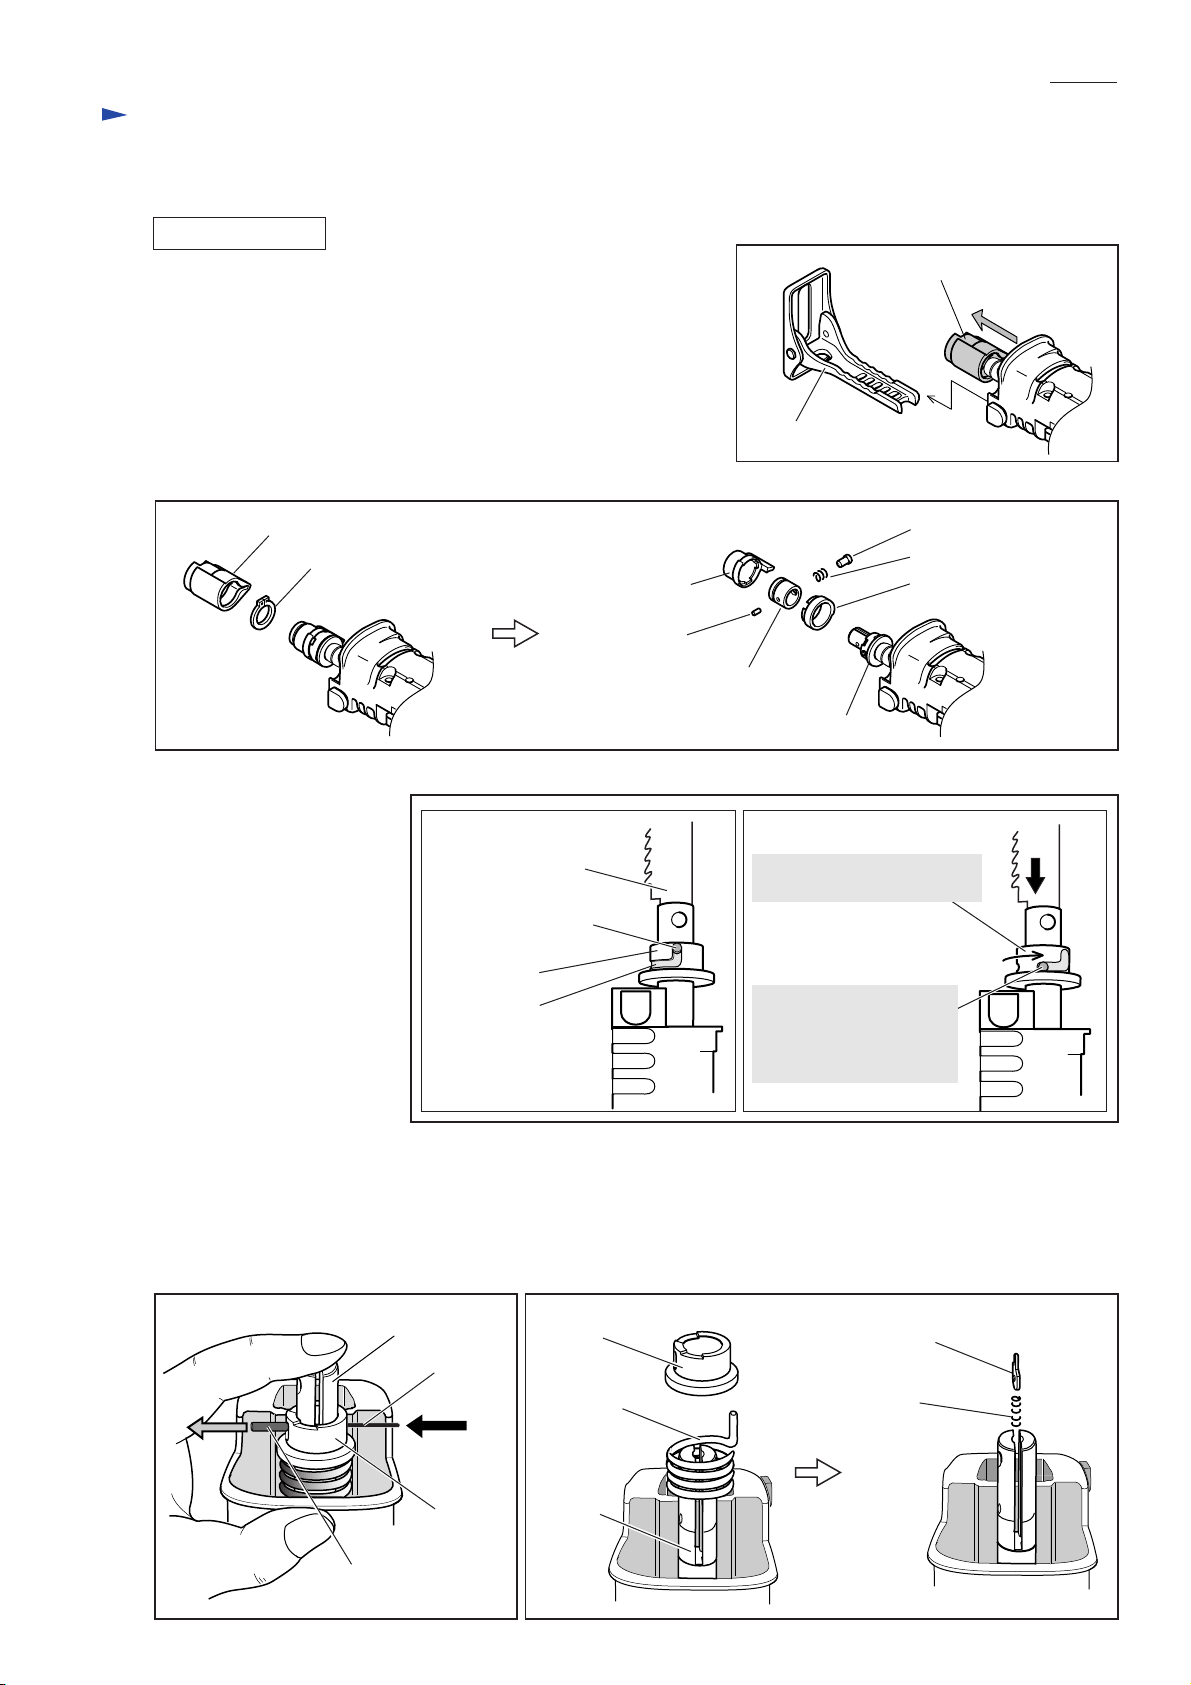
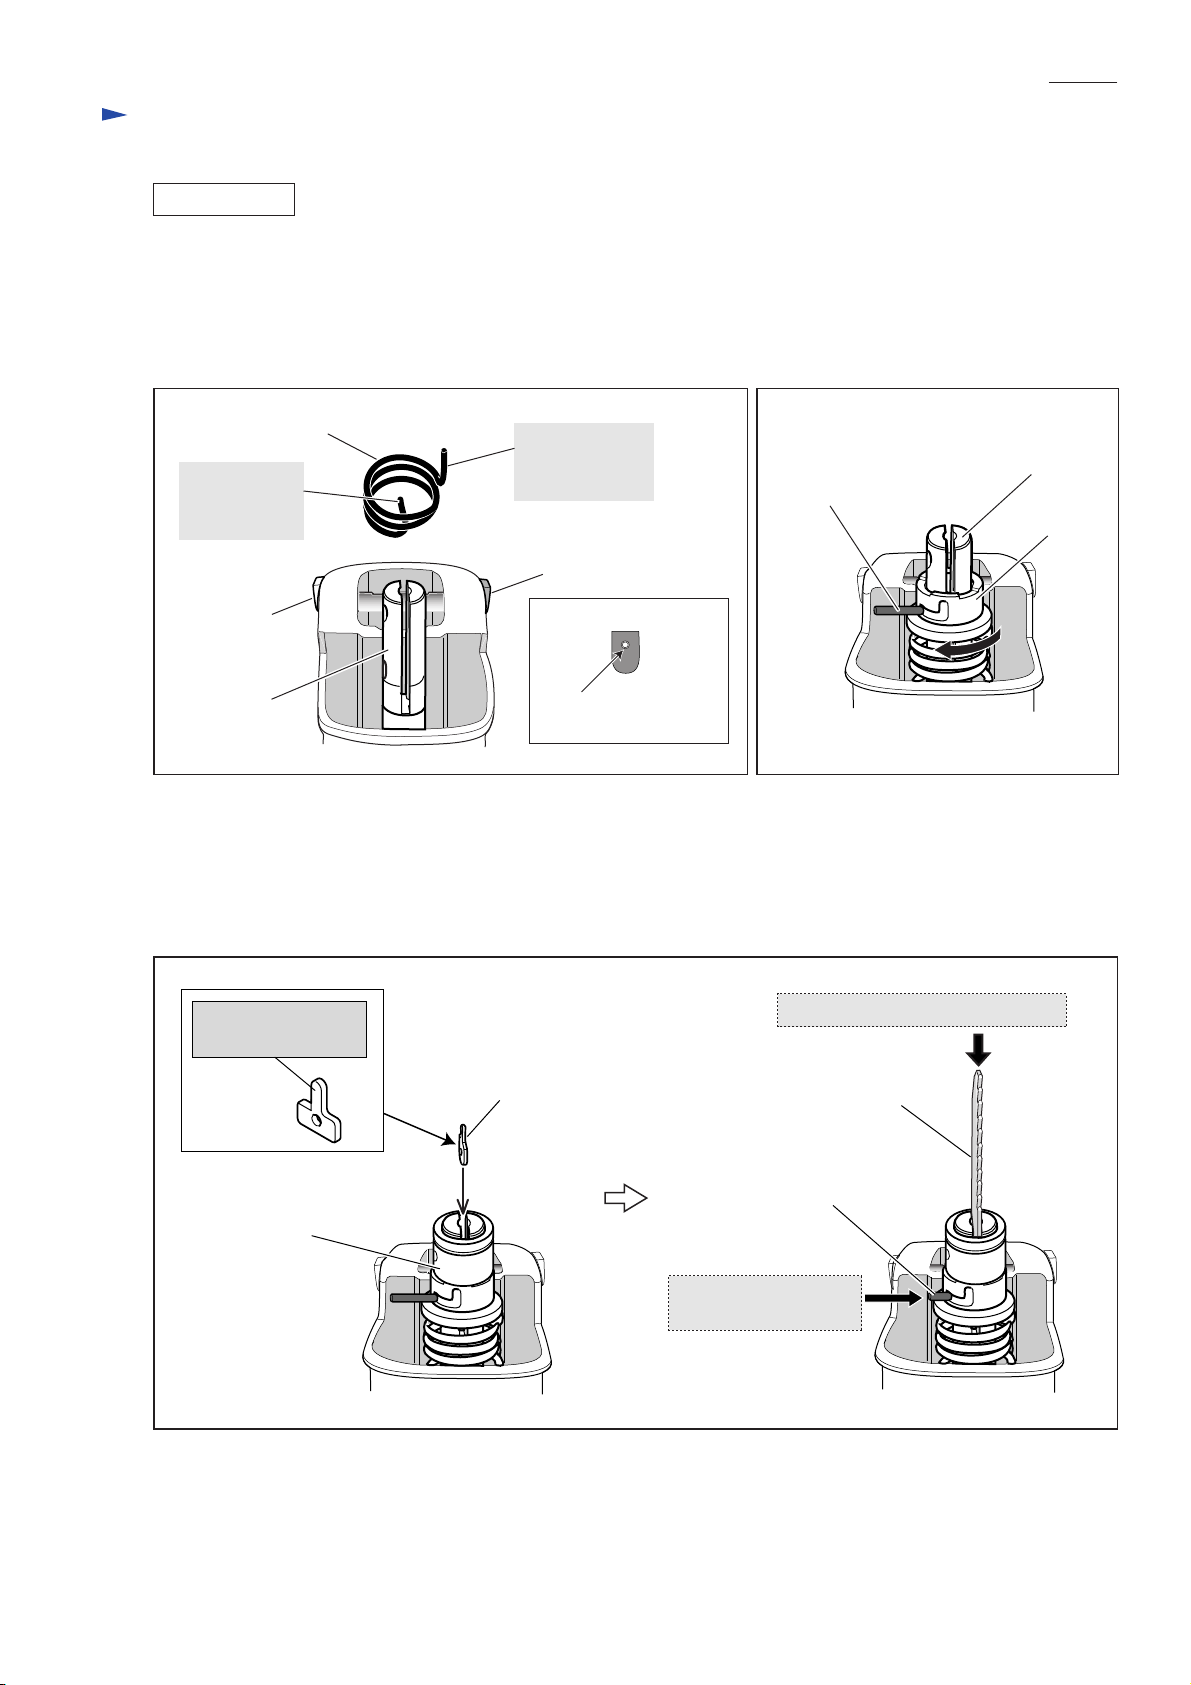
Blade clamp section
Plane bearing 14A
29
6 Shoulder pin 5
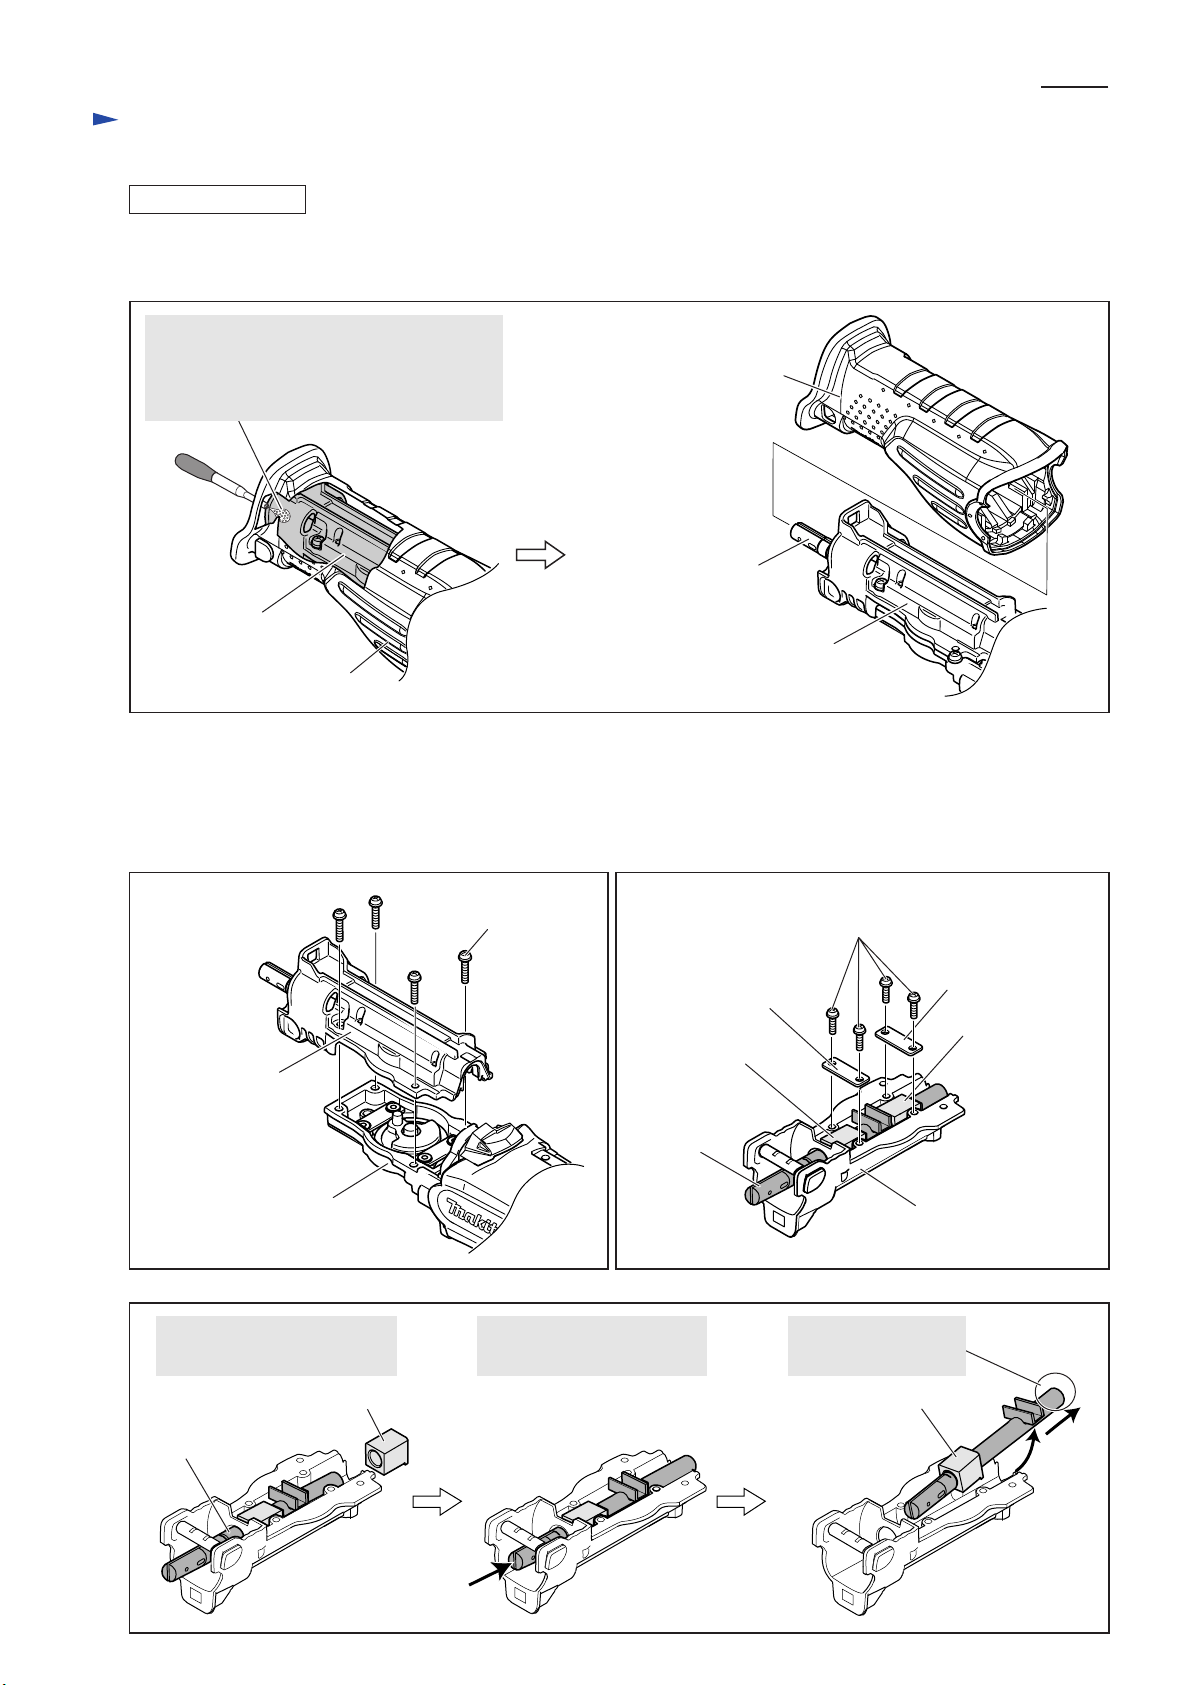
Slider complete Surface that contacts Plane bearing 14A
Surface that contacts Needle bearing 708 (Put approx. 7g.)
Pin head that contacts Driving sleeve
Gear assembly Surface of crank pin that contacts Needle bearing 708
40 Flat washer 14 Surface that contacts Gear assembly
Plane bearing 14A
17 X ring 14 Inside surface that contacts Slider complete
46 Gear housing complete Pin 10 (the gear shaft for Gear assembly)
Gear room (Put approx. 10g.)
Driving sleeve
1R146 L type Torx wrench M6 Removing Shoe guide
1R232 Pipe 30
Round bar foe arbor 13-100
Round bar foe arbor 26-100
Spring pin extractor 2.5
Spring pin extractor 1.5
Bearing extractor
Retaining ring S and R pliers
Removing/ installing Needle bearing 1012
1R242 Removing/ installing Needle bearing 1012
1R250 Press-fitting Oil seal 14
1R267 Removing Shift button
1R269 Removing Ball bearing 6001DDW
1R291 Removing/ installing Retaining rings S-18 and S-12
1R296 Removing Pin 3 from the Blade clamp section
1R314
---
Torx bit VT-25
Recipro saw blade
Removing/ installing Torx socket head screw
Assembling Pin 3 to the Blade clamp section
Code No. Description Use for
Item No. Description Portion to lubricate
Gear housing cover complete
Needle bearing 708