3
www.markantoffice.com
MFX RECTANGULAR & CORNER SIT TO STAND (S2S) - ALUMINIUM BEAM
INSTALLATION MANUAL
2
1
1
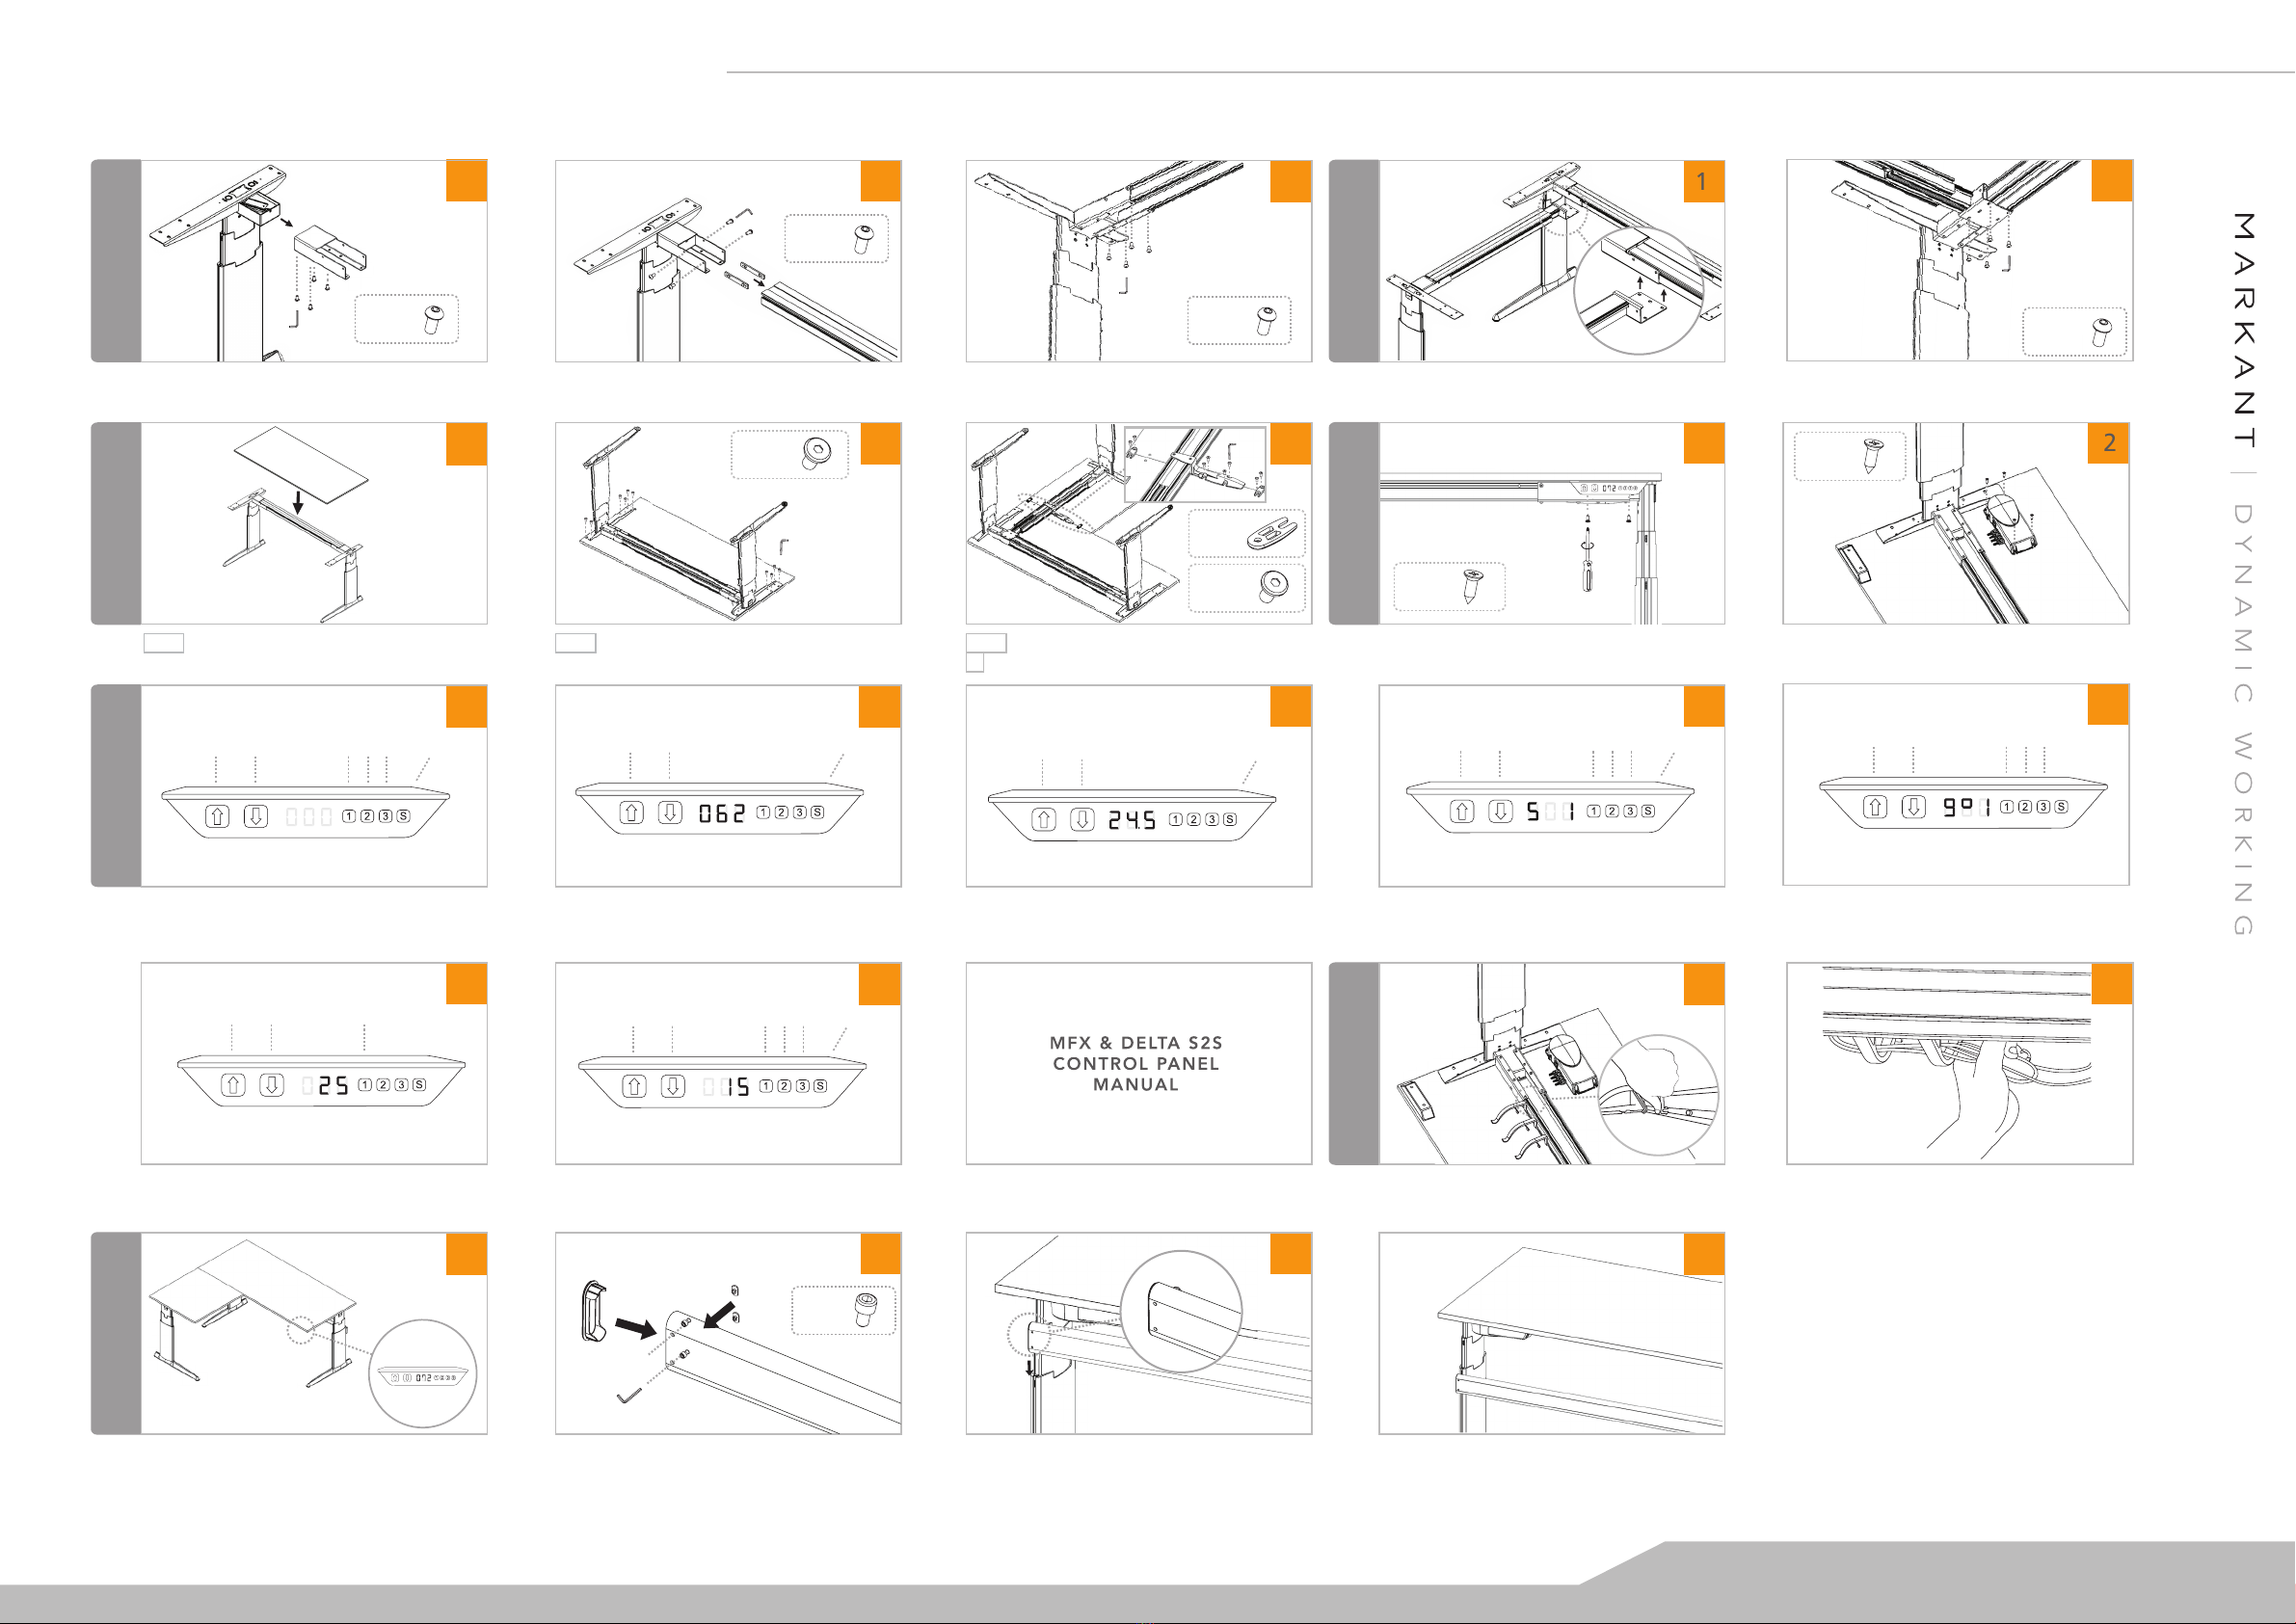
BASIC FRAME
CONTROL BOX
23 1 2
12
7
12 3 4
6
CABLE MANAGEMENT
12
WORKTOP
4
1 2
SETTING
3
CORNER FRAME
STABILISATION BAR
5
Slide end leg into beam.Attach the endleg with connector.
Attach control panel with ST screws at the bottom of worktop. View up-side-down - Mount control box with ST screws from bottom
of worktop.
Button Head
x 4
M5 x 10mm
Corner (view up-side-down) - Attach worktops with
stabiplates and top support.
Attach button head screw into the beam. Left/right return connector - Attach return beam to main beam. Left/right return connector (bottom view) - Fix button heads
into main beam.
Allen Key
3mm
Allen Key
4mm
Beginning - follow basic frame for each MFX installation
Rectangular - Place worktop on frame. Rectangular (view up-side-down) - Attach frame and
worktop with JCBC screws.
Button Head
x 4
M6 x 12mm
Button Head
x 4
M6 x 12mm
Button Head
x 4
M6 x 12mm
For easy installing, turn on the main power supply, increase 10cm
height from the lowest desk height.
Slide T-nut into endleg. Tighten the screw. Stabilisation bar assembly (completed look).a. Attach T-nut from back b. Fix cap screws into stabilisation bar with
allen key, c. Press plastic cover into stabilisation bar.
Cap Screw
x 2
M5 x 8mm
a.
b.
c.
ST Screw
x 2
M8 x 13mm
ST Screw
x 4
M8 x 13mm
PLEASE REFER TO MARKANT
FOR FURTHER HELP
Start up - Turn on the main power supply before setting. Once the
power is on, display ashes show 000.
Adjust the brightness timeout - Press and hold ‘3’, at the same
time press Up (+seconds) or Down (-seconds). Available brightness
timeouts: 0 - 15 seconds and off.
Adjust the brightness of the LED display - Press and hold ‘1’,
at the same time press Up (+ brightness) or Down (- brightness).
Available brightness setting: 0=off, 25=25%, 50=50%, 75=75%,
100=100%.
Moving to a saved preferred height (9omemory)- Press one of
the memory key 1, 2 or 3. The display will ash 9o1, 9o2, 9o3 for
3 sec. Within 3 sec. press and hold Up or Down until the desk stops
in the stored position, the height of the desk will be shown.
Saving preferred height - Press ‘S’, display will ash ‘S’ for 3 sec.
Within 3 sec. press one of the memory 1, 2 or 3. The display shows
S1, S2 or S3 for 1 sec. To abort saving memory, press Up or Down while
the ‘S’ ashing, or wait 3 sec until display returns to show the height.
Normal operation & changing between cm & inches - Press and
hold up or down until the desired height of the desk has been reached,
the display always shows the actual height. Keep the ‘S’ pressed for
approximately 6 sec. to change the unit measurement.
Adjust the display to match with actual height - Press down.
The default setting shows 62cm or 24.5 inches desk height. To change
this, press ‘S’ + Up or Down at the same time to set your own default
(e.g. 62cm).
Up Down Store memory
Handset
Up Down Store memoryMemory 1,2,3 Up Down Memory 1,2,3
Up Down Store memoryMemory 1,2,3
Handset 62cm - 126cm
Up Down Store memory
Up Down Store memoryMemory 1,2,3
Up Down Memory 1
View up-side-down - Press cable ngers into the rail depend on needs. Bottom view - Tidy up all the cables, slot it into the cable ngers.
JCBC Screw
x 8
M8 x 16mm
Stabiplate
x 2
Allen Key
4mm
Allen Key
4mm
Allen Key
5mm
Allen Key
4mm
JCBC Screw
x 12
M8 x 16mm
Allen Key
5mm


