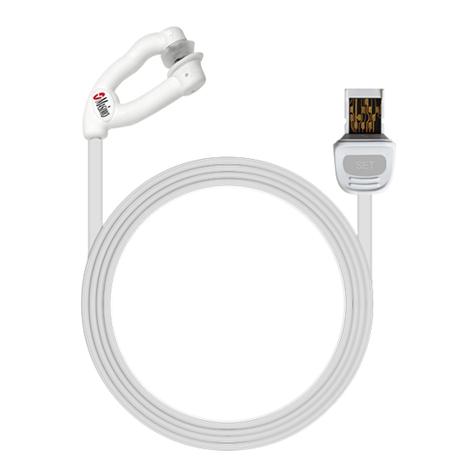
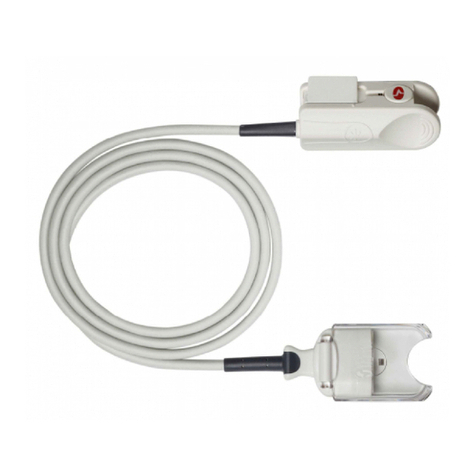
Masimo rainbow DC Series User manual

© 2018 Masimo Corporation
rainbow® DC Series
Reusable SpCO®, SpMet® & SpO2Sensors
Images 2
en English 3-7
fr French 8-12
de German 13-17
it Italian 18-22
es Spanish 23-27
sv Swedish 28-32
nl Dutch 33-37
da Danish 38-42
pt Portuguese 43-47
zh Chinese 48-51
ja Japanese 52-56
fi Finnish 57-61
no Norwegian 62-66
cs Czech 67-71
hu Hungarian 72-76
pl Polish 77-81
ro Romanian 82-86
sk Slovak 87-91
tr Turkish 92-96
el Greek 97-101
ru Russian 102-106
ko Korean 107-110
ar Arabic 114-111

24869K-eIFU-0818
rainbow® DC Series
Reusable SpCO®, SpMet® & SpO2Sensors
Fig. 2
GRAPHIC DOCUMENTATION AND APPROVAL GR-13173
DRO-10283
CONFIDENTIAL AND PROPRIETARY
© 2001 Masimo Corporation
All Rights Reserved
Page 1 of 1
FRM 1379 Rev A
DRO 5201
Approvals
Approvals
Document
Number TitleProgram
Date
Michelle Diaz
GR-13173 Adobe Illustrator 10.0 (.eps)Graphic, Rainbow DC-I, placing on finger
Graphic, Rainbow DC-I, placing on finger
9/14/04
Marketing Communications Date
Fig. 1
Fig. A
GRAPHIC DOCUMENTATION AND APPROVAL GR-13175
DRO-10283
CONFIDENTIAL AND PROPRIETARY
© 2001 Masimo Corporation
All Rights Reserved
Page 1 of 1
FRM 1379 Rev A
DRO 5201
Approvals
Approvals
Document
Number TitleProgram
Date
Michelle Diaz
GR-13175 Adobe Illustrator 10.0 (.eps)Graphic, Rainbow DC-I, on finger
Graphic, Rainbow DC-I, on finger
9/14/04
Marketing Communications Date
Fig. 3
2
3
1
Fig. 5
2
1
3
Fig. 4

34869K-eIFU-0818
en
rainbow® DC Series
Reusable SpCO®, SpMet® & SpO2Sensors
DIRECTIONS FOR USE
Reusable
LATEX
PCX-2108A
02/13
Not made with natural rubber latex Non-sterile > 10 kg
Prior to using this sensor, the user should read and understand the Operator’s Manual for the device and this Directions for
Use.
INDICATIONS
rainbow® DCI® and DCI-P reusable sensors are indicated for spot check or continuous non-invasive monitoring of arterial
saturation (SpO2), arterial carboxyhemoglobin saturation (SpCO®), arterial methemoglobin (SpMet®), and pulse rate. SpCO
and SpMet accuracies were not validated under motion or low perfusion conditions.
WARNING: Masimo sensors and cables are designed for use with devices containing Masimo SET® oximetry or licensed to
use Masimo sensors.
CONTRAINDICATIONS
rainbow DCI and DCI-P reusable sensors are contraindicated for use on mobile patients or for prolonged periods of use.
The sensor site must be inspected at least every four (4) hours or sooner; and if the circulatory condition or skin integrity is
compromised, the sensor should be applied to a dierent site.
DESCRIPTION
rainbow DCI and DCI-P reusable sensors are for use only with devices containing Masimo rainbow SET® technology Version
7.1 or higher, devices containing Masimo SET technology or licensed to use rainbow compatible sensors. Consult individual
oximetry system manufacturers for compatibility of particular devices and sensor models. Each device manufacturer is
responsible for determining whether their devices are compatible with each sensor model.
NOTE:
Though this sensor is capable of reading all parameters, it is limited by the parameters on the device.
The rainbow DCI and DCI-P reusable sensors have been validated on the Radical-7® Pulse CO-Oximeter® containing Masimo
rainbow SET technology.
WARNINGS, CAUTIONS AND NOTES
• All sensors and cables are designed for use with specific monitors. Verify the compatibility of the monitor, cable and
sensor before use, otherwise degraded performance and/or patient injury can result.
• The site must be checked frequently or per clinical protocol to ensure adequate adhesion, circulation, skin integrity and
correct optical alignment.
• Exercise extreme caution with poorly perfused patients; skin erosion and pressure necrosis can be caused when the
sensor is not frequently moved. Assess site as frequently as every (1) hour with poorly perfused patients and move the
sensor if there are signs of tissue ischemia.
• Circulation distal to the sensor site should be checked routinely.
• During low perfusion, the sensor site needs to be assessed frequently for signs of tissue ischemia, which can lead to
pressure necrosis.
• With very low perfusion at the monitored site, the reading may read lower than core arterial oxygen saturation.
• Do not use tape to secure the sensor to the site; this can restrict blood flow and cause inaccurate readings. Use of
additional tape can cause skin damage, and/or pressure necrosis or damage the sensor.
• Sensors applied too tightly or that become tight due to edema will cause inaccurate readings and can cause pressure
necrosis.
• Misapplied sensors or sensors that become partially dislodged may cause incorrect measurements.
• Venous congestion may cause under reading of actual arterial oxygen saturation. Therefore, assure proper venous
outflow from monitored site. Sensor should not be below heart level (e.g. sensor on hand of a patient in a bed with arm
dangling to the floor, Trendelenburg position).
• Venous pulsations may cause erroneous low SpO2readings (e.g. tricuspid value regurgitation, Trendelenburg position).
• The pulsations from intra-aortic balloon support can be additive to the pulse rate on the oximeter pulse rate display.
Verify patient’s pulse rate against the ECG heart rate.
• The sensor should be free of visible defects, discoloration and damage. If the sensor is discolored or damaged,
discontinue use. Never use a damaged sensor or one with exposed electrical circuitry.
• Carefully route cable and patient cable to reduce the possibility of patient entanglement or strangulation.
• Avoid placing the sensor on any extremity with an arterial catheter or blood pressure cuff.

44869K-eIFU-0818
• If using pulse oximetry during full body irradiation, keep the sensor out of the radiation field. If sensor is exposed to the
radiation, the reading might be inaccurate or the unit might read zero for the duration of the active radiation period.
• Do not use the sensor during MRI scanning or in a MRI environment.
• High ambient light sources such as surgical lights (especially those with a xenon light source), bilirubin lamps,
fluorescent lights, infrared heating lamps, and direct sunlight can interfere with the performance of the sensor.
• High intensity extreme lights (such as pulsating strobe lights) directed on the sensor, may not allow the Pulse
CO-Oximeter to obtain vital sign readings.
• To prevent interference from ambient light, ensure that the sensor is properly applied, and cover the sensor site with
opaque material, if required. Failure to take this precaution in high ambient light conditions may result in inaccurate
measurements.
• High levels of COHb or MetHb may occur with a seemingly normal SpO2. When elevated levels of COHb or MetHb are
suspected, laboratory analysis (CO-Oximetry) of a blood sample should be performed.
• Inaccurate SpCO and SpMet readings can be caused by abnormal hemoglobin levels, low arterial perfusion, low arterial
oxygen saturation levels including altitude induced hypoxemia, motion artifact.
• SpCO readings may not be provided if there are low arterial oxygen saturation levels or elevated methemoglobin levels
• Elevated levels of Carboxyhemoglobin (COHb) may lead to inaccurate SpO2measurements.
• Elevated levels of Methemoglobin (MetHb) will lead to inaccurate SpO2measurements.
• Elevated Total Bilirubin levels may lead to inaccurate SpO2measurements.
• Intravascular dyes such as indocyanine green or methylene blue or externally applied coloring and texture such as nail
polish, acrylic nails, glitter, etc. may lead to inaccurate SpO2, SpCO and SpMet measurements.
• Inaccurate SpO2readings may be caused by severe anemia, low arterial perfusion or motion artifact.
• To prevent damage, do not soak or immerse the sensor in any liquid solution. Do not attempt to sterilize the sensor.
• Do not attempt to sterilize by irradiation, steam, autoclave or ethylene oxide.
• Do not modify or alter the sensor in any way. Alteration or modification may affect performance and/or accuracy.
• Do not attempt to reprocess, recondition or recycle Masimo sensors or patient cables as these processes may damage
the electrical components, potentially leading to patient harm.
• Caution: Replace the sensor when a replace sensor message is displayed, or when a low SIQ message is consistently
displayed while monitoring consecutive patients after completing the low SIQ troubleshooting steps identified in the
monitoring device operator’s manual.
• Note: The sensor is provided with X-Cal® technology to minimize the risk of inaccurate readings and unanticipated loss
of patient monitoring. The sensor will provide up to 8,760 hours of patient monitoring time. Replace the sensor when
the patient monitoring time is exhausted.
CABLE AND SENSOR SELECTION
NOTE: The maximum length for the sensor, cable and extension cable combination is 15 feet. Refer to the table below for
correct examples:
Cable Sensor
Length 3 feet > 3 feet
RC-1 Yes Yes
RC-4 Yes Yes
RC-12 No No
INSTRUCTIONS
A. Site Selection
• Choose a site that is well perfused and least restricts a conscious patient's movements. The ring or middle finger of the
non-dominant hand is preferred.
• Alternatively, the other digits on the non-dominant hand may be used. Always choose a site that will completely cover
the sensor's detector window.
• Site should be cleaned of debris and dry prior to sensor placement.

54869K-eIFU-0818
Slender Digit Gauge Instructions
• The Slender Digit Gauge on the sensor cable is an aid for selecting an appropriate digit for sensor application.
• Use of this gauge is recommended only for patients weighing > 30 kg that have slender digits. Remove the gauge from
the digit BEFORE sensor application.
1. It is preferable to start with the ring nger of the non-dominant hand. If this is too slender, select a larger digit. Slide
the gauge circle on the digit. If the gauge circle stops at any point of the nail bed before the cuticle, the DCI sensor
should be used on that digit (Fig A).
2. If the gauge slides past the cuticle, the digit is too slender for this sensor. Select a dierent digit, or use a pediatric/
slender digit sensor (DCI-P) on this patient (Fig A).
B. Attaching the sensor to the patient
1. Refer to Fig 1. Open the sensor by pressing on hinge tabs. Position the selected digit so that it corresponds to that
of the nger shown on top of the sensor. Place the selected digit over the sensor window of the sensor. The eshiest
part of the digit should be covering the detector window in the lower half of the sensor. The top half of the sensor is
identied by the cable.The tip of the nger should touch the raised digit stop inside the sensor. If the ngernail is long,
it may extend over and pass the nger stop.
2. Refer to Fig 2. The hinged tabs of the sensor should open to evenly distribute the grip pressure of the sensor along
the length of the nger. Check the arrangement of the sensor to verify correct positioning. Complete coverage of the
detector window is needed to ensure accurate data.
3. Refer to Fig 3. Orient the sensor so that the cable will be running towards the top of the patient's hand.
NOTE: With smaller digits, in order to completely cover the detector window, it may be necessary to use a lower weight range
sensor. The sensor is not intended for use on the thumb or across a child’s hand or foot.
C. Attaching the sensor to patient cable
1. Refer to Fig 4. Orient sensor connector (1) to patient cable connector (2) as shown.
2. Insert sensor connector (1) completely into patient cable connector (2). Close sensor connector cover (3) over patient
cable connector (2) and lock in place as shown in Fig 5.
Disconnecting the sensor from the patient cable
1. Refer to Fig 5. While holding the sides of patient cable connector (2), lift sensor connector cover (3) from patient cable
connector (2).
2. Disconnect sensor connector (1) from patient cable connector (2).
Removing the sensor from the patient
1. Open the sensor by pressing on hinge tabs. Remove the sensor from the digit and follow the cleaning instructions, if
necessary.
2. Store the sensor away for its next use.
CLEANING
To clean the sensor, rst remove it from the patient and disconnect it from the instrument.You may then clean the sensor by
wiping it with a 70% isopropyl alcohol pad. Allow the sensor to dry prior to placement on a patient.
SPECIFICATIONS
When used with Masimo rainbow SET technology monitors or with licensed Masimo rainbow SET technology modules using
rainbow Series patient cables, the DCI-mini sensors have the following performance specications:
Sensor DCI DCI-P
Application Site finger finger or thumb
Weight Range > 30 kg 10-50 kg
SpO2Accuracy, No Motion160-80% 3%
70-100% 2%
60-80% 3%
70-100% 2%
SpO2Accuracy, Motion23% 3%
Pulse Rate Accuracy, No Motion33 bpm 3 bpm
Pulse Rate Accuracy, Motion35 bpm 5 bpm
SpO2Accuracy, Low Perfusion42% 2%
Pulse Rate Accuracy, Low Perfusion33 bpm 3 bpm
SpCO Accuracy, No Motion53% 3%
SpMet Accuracy, No Motion61% 1%
This manual suits for next models
2
Table of contents
Languages:
Other Masimo Accessories manuals

Masimo
Masimo Rainbow Manual

Masimo
Masimo RD SedLine EEG User manual

Masimo
Masimo RD SET E1 Manual

Masimo
Masimo Rainbow RAS-45 Manual

Masimo
Masimo RD SET Adt User manual

Masimo
Masimo M-LNCS TC-I Manual

Masimo
Masimo RD rainbow 4L Manual

Masimo
Masimo rainbow R1 Series User manual

Masimo
Masimo RD SET User manual

Masimo
Masimo RD SET Specialty Sensor Series User manual