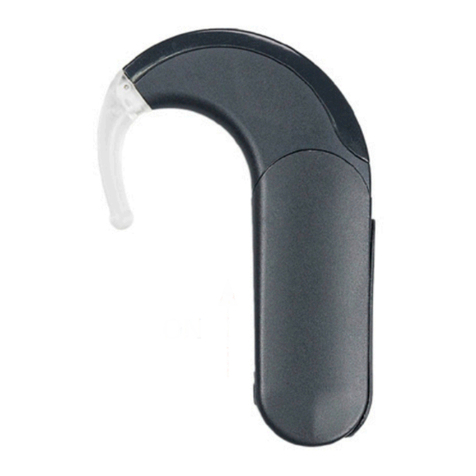
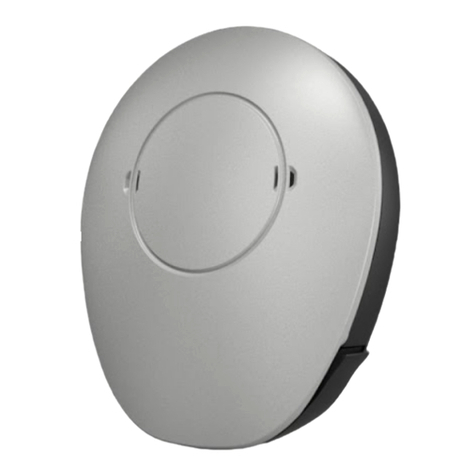
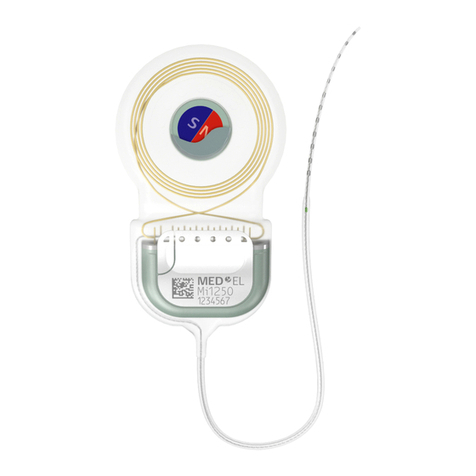
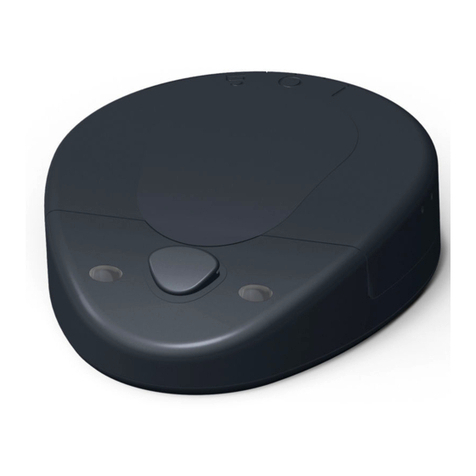
Medel RONDO 3 User manual

Cochlear Implants
User Manual
RONDO Audio Processor
AW_. (English US)
DRAFT:
Effective Date:
TW#: TW
19. May. 2020
250086


Table of Contents
1. Introduction .............................................................................................................. 2
2. Intended use – Indications – Contraindications ........................................................ 3
Intended use ......................................................................................................................
Indications..........................................................................................................................
Contraindications...............................................................................................................
3. RONDO 3 audio processor......................................................................................... 6
The parts of the system ....................................................................................................
Audio processor .................................................................................................................
Attachment options ..........................................................................................................
Indicator lights ..................................................................................................................
Private alert.......................................................................................................................
Link Monitoring .................................................................................................................
FineTuner Echo..................................................................................................................
Connectivity .....................................................................................................................
Alternative power source.................................................................................................
4. Special considerations for young children............................................................... 28
5. General precautions and warnings.......................................................................... 29
6. Care and maintenance ............................................................................................ 37
Maintenance ....................................................................................................................
Disposal............................................................................................................................
7. Troubleshooting ...................................................................................................... 39
Audio processor ...............................................................................................................
FineTuner Echo..................................................................................................................
8. Technical data ......................................................................................................... 42
Audio processor ...............................................................................................................
FineTuner Echo.................................................................................................................
Regulatory statements.....................................................................................................
Symbols............................................................................................................................
Guidance and manufacturer’s declaration ......................................................................
9. Appendices ............................................................................................................. 47
Supplies and accessories .................................................................................................
Warranty ..........................................................................................................................
Manufacturer address......................................................................................................
Contact MED-EL ...............................................................................................................

Introduction
. Introduction
This user manual provides information and instructions regarding the MED-EL Cochlear
Implant System with the RONDO audio processor (Mex)(hereafter referred to as
audio processor). It includes descriptions of available parts, wearing options, and accesso-
ries for the audio processor, as well as instructions for troubleshooting and proper care of
the external cochlear implant equipment.
NOTE: You are the operator of your/the user’s audio processor, therefore we recom-
mend that you read this user manual in its entirety. Do not perform any maintenance
activities other than those described in this user manual. When performing these
maintenance activities, always remove the audio processor from the head.
Before you can use your audio processor, your audiologist must program it to your needs.
The adjustment to a cochlear implant and adequate tting of the device are gradual pro-
cesses that occur over time. It is important to remember that your ability to hear with your
new MED-EL Cochlear Implant System may take a little time while you become accustomed
to this new method of hearing. You may choose to work with an aural rehabilitation spe-
cialist or other clinician to help you maximize your communication skills using the device.
After your initial tting, you will need to return to your CI center on a regular basis for
reprogramming. Frequent reprogramming may be required during the rst year of implant
use. This is normal and necessary, and it reects a learning process that occurs as you
become more and more accustomed to stimulation through the implant. As more time
passes, you will likely nd that you may require fewer and fewer sessions. Most users
continue to require occasional adjustments for as long as they use their MED-EL Cochlear
Implant System.
Please contact your healthcare provider or local MED-EL representative with any additional
questions you may have.
Symbols used in this user manual
Information indicating a hazardous situation that, if not avoided, could result in
minor injury or inconvenience for the user and/or property damage
Information indicating a hazardous situation that, if not avoided, could result in
death or serious injury
Information particularly relevant for parents, guardians or caregivers of children
who use the system
―
1x = , , or

Intended use – Indications – Contraindications
. Intended use – Indications –
Contraindications
Intended use
The RONDO is an audio processor and an external part of the MED-EL Cochlear Implant
System. The MED-EL Cochlear Implant System is intended to evoke auditory sensation via
electrical stimulation of the auditory pathways for severely to profoundly hearing impaired
individuals who obtain little or no benet from acoustic amplication in the best aided
condition.
Additionally, the MED-EL Cochlear Implant System is intended to evoke auditory sensations
via electrical stimulation of the auditory pathways for individuals with single–sided deafness
(SSD) or asymmetric hearing loss (AHL). SSD is dened as profound sensorineural hearing
loss in one ear and normal hearing or mild sensorineural hearing loss in the other ear.
AHL is dened as a profound sensorineural hearing loss in one ear and mild to moderately
severe sensorineural hearing loss in the other ear, with a difference of at least dB in pure
tone averages between ears.
Indications
The RONDO audio processor is an external component of the MED-EL Cochlear Implant
System and is indicated for use in patients who have been implanted with Mi
SYNCHRONY or Mi SYNCHRONY (hereafter referred to as SYNCHRONY), Mi
CONCERT (hereafter referred to as MED-EL CONCERT), SONATA (hereafter referred to as
SONATA), PULSAR (hereafter referred to as PULSAR) or C+ cochlear implants.
Bilateral deafness
• Adults eighteen () years of age or older who have bilateral, sensorineural hearing
impairment and obtain limited benet from appropriately tted binaural hearing aids.
These individuals typically demonstrate bilateral severe to profound sensorineural
hearing loss determined by a pure tone average of dB or greater at Hz, Hz,
and Hz. Limited benet from amplication is dened by test scores of %
correct or less in the best aided listening condition on CD recorded tests of open-set
sentence recognition (Hearing In Noise Test [HINT] sentences).
―
2Electro-acoustic stimulation (EAS) users can use the RONDO audio processor as an alternative wearing
option if desired, however acoustic amplication will not be available in this conguration

Intended use – Indications – Contraindications
• Children aged twelve () months to seventeen () years eleven () months must
demonstrate a profound, bilateral sensorineural hearing loss with thresholds of dB
or greater at Hz and above. In younger children, little or no benet is dened by
lack of progress in the development of simple auditory skills in conjunction with appro-
priate amplication and participation in intensive aural habilitation over a three () to
six () month period. In older children, lack of aided benet is dened as < % correct
on the Multi-syllabic Lexical Neighbourhood Test (MLNT) or Lexical Neighbourhood Test
(LNT), depending upon the child‘s cognitive ability and linguistic skills. A three () to
six () month hearing aid trial is required for children without previous experience with
hearing aids. Radiological evidence of cochlear ossication may justify a shorter trial
with amplication.
Single-sided deafness and Asymmetric Hearing Loss
The MED-EL Cochlear Implant System is indicated for evoking auditory sensations via
electrical stimulation of the auditory pathways for individuals ages years and above with
single-sided deafness (SSD) or asymmetric hearing loss (AHL), where:
• SSD is dened as profound sensorineural hearing loss in one ear and normal hearing or
mild sensorineural hearing loss in the other ear.
• AHL is dened as a profound sensorineural hearing loss in one ear and mild to mod-
erately severe sensorineural hearing loss in the other ear, with a difference of at least
dB in pure tone averages (PTAs) between ears.
• Profound hearing loss is dened as having a PTA of dB HL or greater at Hz,
Hz, Hz and Hz. Normal hearing is dened as having a PTA of up to dB
HL at Hz, Hz, Hz and Hz. Mild hearing loss is dened as having a
PTA of up to dB HL at Hz, Hz, Hz and Hz. Mild to moderately
severe hearing loss is dened as having a PTA ranging from to up to dB HL at
Hz, Hz, Hz and Hz.
Individuals with SSD or AHL must obtain limited benet from an appropriately tted uni-
lateral hearing aid in the ear to be implanted. For individuals ages years-old and above,
limited benet from unilateral amplication is dened by test scores of ve () percent
correct or less on monosyllabic consonant-nucleus-consonant (CNC) words in quiet when
tested in the ear to be implanted alone. For individuals between and years-old, insuf-
cient functional access to sound in the ear to be implanted must be determined by aided
speech perception test scores of ve () percent or less on developmentally appropriate
monosyllabic word lists when tested in the ear to be implanted alone.
Before implantation with a cochlear implant, individuals with SSD or AHL must have at least
one () month experience wearing a Contralateral Routing of Signal (CROS) hearing aid or
other relevant device and not show any subjective benet.

Intended use – Indications – Contraindications
General
The RONDO audio processor is indicated to be used in typical everyday environments
(home, ofce, outdoor etc.).
The RONDO audio processor is intended to be used every day during a patient’s
waking hours.
The user of the RONDO audio processor does not need any special skills or elevated level
of education, however, the user (or custodian if the user is a child or a person not able
to perform the actions listed below) shall at minimum be able to perform the following
actions:
• Switching ON/OFF
• Charging the internal battery
• Placing/removing the RONDO audio processor over/from implant
• Evaluating the battery level
As the RONDO audio processor is a component of the MED-EL Cochlear Implant System,
all indications stated for the MED-EL Cochlear Implant System are applicable.
Contraindications
A patient must not receive a RONDO audio processor if the individual is known to be
intolerant of the materials used in the RONDO audio processor. For details, please refer
to section Technical data.
The RONDO audio processor and any external wireless device (e.g. remote control) are
not intended to be used in environments where RF transmissions are prohibited (e.g.
operating room).
As the RONDO audio processor is a component of the MED-EL Cochlear Implant System,
all contraindications stated for the MED-EL Cochlear Implant System are applicable.
NOTE: Important information related to indications, contraindications, warnings and
risks for your cochlear implant are shipped in a separate document (instruction for
use of the implant) to your clinic with the cochlear implant. If you want to review this
information, please contact your clinic or MED-EL.

RONDO audio processor
. RONDO audio processor
The parts of the system
The MED-EL Cochlear Implant (CI) System is an active medical device that has internal
(implanted) and external parts. The internal part of the device is surgically implanted behind
the ear in the skull, while the external audio processor is worn over the implant site.
The external parts include the audio processor, the audio processor accessories and
optional equipment. In its basic conguration, the audio processor consists of the main
unit containing the electronics and rechargeable battery and the exchangeable cover.
A separate remote control called the FineTuner Echo facilitates access to various audio
processor functions.
①⑧
②③ ④
⑥
⑤
⑦
①RONDO audio processor
②Clothing attachment clip with cap
③Hair attachment clip, small, with bracket
④Telecoil adapter
⑤USB power supply
⑥Cable for wireless charger
(not manufactured by MED-EL)
⑦Wireless charger (not manufactured by MED-EL;
may not look exactly as shown)
⑧FineTuner Echo

RONDO audio processor
Audio processor
Switching the audio processor ON/OFF
Your audio processor has a pushbutton to switch the processor on and off.
To switch on your audio processor, proceed as follows:
①Press down on the center pushbutton of the processor for
approx. seconds. 2s
②The white indicator light will fade in. The audio processor is
now turned on.
③The blue indicator light will blink up to four times indicating the activated program.
For example, if the light blinks three times, program is currently active.
NOTE: The audio processor has a Link Monitoring feature. The red indicator light will
blink when implant and audio processor cannot communicate. This happens when
the audio processor is not positioned over the implant or positioned over the wrong
implant. Your healthcare provider can deactivate the indicator light if you prefer this.
To switch off your audio processor, proceed as follows:
①Press and hold down the pushbutton until the white indicator
light fades out. The audio processor is now switched off.
Switching the audio processor on or off can cause a soft sound. You should remove the
audio processor from the implant site before operating the pushbutton if this sound
bothers you.
Bottom view
⑤
④
Top view
①③
②
Back view
⑥
⑦
⑧
①Main indicator light
②ON/OFF pushbutton
③Microphone openings
④Charging indicator light
⑤Magnet
⑥Finger grooves
⑦Socket cover
⑧Bracket grooves

RONDO audio processor
The audio processor has an automatic power-off function and switches off after approx.
minutes when there is no connection with the implant (e.g. when the audio processor is
not worn). This feature helps maintain battery life when the audio processor is not worn
and not intentionally switched off. Your healthcare provider can deactivate this function if
you prefer this.
Placing the audio processor over the implant
①Switch on the audio processor.
②Place the audio processor over the site of the implant.
The bottom of the audio processor holding the magnet
should be against your head and the microphones
face upwards.
③As soon as the audio processor is near the implant, it should be positioned correctly
by attraction to the implant magnet. The audio processor is held in place by magnetic
attraction over the implant.
NOTE: If you are implanted with a SYNCHRONY implant, there is a chance that the
external and internal magnets may be misaligned when placing the audio processor
on the head. This misalignment is due to the diametric magnet design and may result
in hearing interruptions and/or the processor falling off. To avoid misalignment, gently
rotate your audio processor between a quarter and half a turn back and forth to allow
the audio processor to position itself correctly over the implant. You will notice correct
alignment by uninterrupted hearing and/or stronger magnetic attraction.
Charging the audio processor
The audio processor has one lithium-ion (Li-ion) rechargeable battery which is integrated
in the processor housing and cannot be changed. This battery supplies the external and
internal components of the MED-EL Cochlear Implant System with power.
The integrated battery in your audio processor will supply power for up to hours without
recharging, i.e. it provides a full day of operation. Charging the battery takes approx. . to
hours depending on ambient temperature. We recommend charging the battery once a
day while you are sleeping.
❌
Off-center
✓
Aligned

RONDO audio processor
MED-EL recommends using only the wireless charger provided with the audio processor.
The wireless charger is an off-the-shelf product and may vary from country to country
depending on availability.
To charge the audio processor, proceed as follows:
①Connect the wireless charger to a power supply.
②Remove the audio processor from the head. You do not
have to switch off the audio processor for charging.
The audio processor will automatically switch off when
placed on the wireless charger.
③Place the audio processor in the center of the wireless
charger with the round charging indicator light on the
bottom of the audio processor facing upwards. If any
clips are attached, make sure to position them off the
wireless charger, so that the metallic parts are not
attracted by the magnet.
④The orange charging indicator light of the audio processor illuminates continuously
while the battery is charging. When the battery is fully charged, the light goes off.
⑤When the charging indicator light of the audio processor is off, the audio processor is
ready for use.
⚠CAUTION
• Do not place the audio processor on the wireless charger as shown below. In this
position the audio processor will not be charged.
• Do not use the wireless charger on the head. The audio processor becomes
warm during wireless charging and can cause skin burns.
When charging the audio processor wirelessly, you should observe the following:
• The audio processor becomes warm during wireless charging. This is normal and does
not indicate a failure.
• Always observe the specied ambient temperature for wireless charging ( °C to +°C
[+ °F to + °F]). High ambient temperatures may slow down the charging process.
• Do not expose the wireless charger with audio processor to direct sunlight. This may
interrupt the charging process and battery run-time may be reduced when you use
your audio processor the next time. Moreover, the audio processor may become exces-
sively hot and cause skin burns when placing it on the head directly after charging.

RONDO audio processor
• Please note that the battery run-time will be reduced if the audio processor was not
fully charged. If you interrupt the charging process and remove the audio processor
from the wireless charger, make sure that the audio processor is not too hot before
putting it on the head.
• If the battery is fully charged and you place the audio processor on the wireless
charger, the battery will not be charged. The orange charging indicator light will not
illuminate.
• If the wireless charger indicates an error, remove the audio processor from the
wireless charger. Should the error occur repeatedly, exchange the wireless charger.
• The audio processor is delivered only partially charged, so the initial battery lifetime
may be reduced. Please make sure to fully charge your audio processor before using it
for the rst time.
• If the date (YYYY-MM) stated next to the symbol has expired before your audio
processor has been charged for the rst time, contact your local MED-EL representative.
Battery life reduces over time. This is normal for any type of rechargeable battery. If your
audio processor works less than hours after fully charging the battery, contact your
healthcare provider or local MED-EL representative.
Checking the battery status
To check the battery status, proceed as follows:
①Make sure that the audio processor is switched on.
②Briey push the pushbutton again. The main indicator light will blink in different
patterns and colors according to remaining battery charge.
Battery status (green, orange, red)
Blinking pattern Meaning Required action
Battery fully charged (% to %) None
Battery charge % to % None
Battery charge low to % Consider charging the audio processor.
Battery charge low Charge the audio processor.
seconds
Cover
The cover has integrated membranes to protect the microphones from dust, deterioration
and water. The cover should be replaced every months or if it is damaged. If it is not
replaced, increasing contamination may impair your hearing.

RONDO audio processor
To change the cover, proceed as follows:
①Insert your ngernail into one of the nger grooves between cover
and processor and lift the cover up.
②Place the new cover on the audio processor and gently push down.
Do not use excessive force when positioning the cover.
③Ensure that the cover completely snaps into place. You should see no gaps between
the audio processor and the cover.
The cover comes in different designs so you can customize your audio processor.
Magnet
A magnet is located in a compartment on the bottom of the audio processor to hold the
audio processor in place on the head over the implant. Keep clear of metallic items as they
attract the magnet.
Different magnet strengths are available. Magnet strength is indicated by the number of
diamonds or circles on the magnet (=weakest). Your healthcare provider can change the
magnet to adjust the magnet strength to your needs.
⚠CAUTION
• Depending on the type of implant, two variants of magnets are available for the
audio processor. The type of implant is stated on your Patient Identication Card.
• For recipients implanted with a SYNCHRONY implant, the magnet strength is
represented by diamonds.
• For recipients implanted with any other type of implant (MED-EL CONCERT,
SONATA, etc.), the magnet strength is represented by circles.
• It is essential that, based on the type of implant, the correct variant of magnet
is used! If the wrong variant of magnet is inserted, the audio processor may
still be held in place over the implant. However, due to different polarization of
the magnets, a slight dislocation between the implant and audio processor will
occur which may result in improper communication between implant and audio
processor.
• The magnet strength chosen should be appropriate for the individual user. Strong
magnets are not recommended for users with thin skin aps (e.g. young chil-
dren), as excessive magnetic attraction could potentially increase the likelihood
of skin irritation.
Magnet strengths for SYNCHRONY implant
Magnet strengths for all other types of implants

RONDO audio processor
• If you notice any signs of skin irritation around the audio processor, contact your
healthcare provider.
👪PARENTAL GUIDANCE
It is easiest to observe children when playing or in everyday situations to deter-
mine whether the audio processor is properly attracted to the implant. If it falls
off too easily, your child may develop an aversion to wearing the audio processor.
During the rst months after surgery, you should regularly check the skin under the
audio processor for irritation. As the child grows, skin thickness will increase and
the magnetic attraction force may have to be adjusted by increasing the magnetic
strength. Please contact your healthcare provider for assistance.
How to change the magnet
NOTE: MED-EL strongly recommends that you do not change the magnet yourself, but
have your healthcare provider do it.
①Place the magnet exchange tool (may be purchased
separately) on the magnet, aligning the arrow on the tool
with the bar symbol on the magnet cover.
②Turn the tool counter clockwise towards the unlocked
symbol ( ). The magnet disengages and can now be
lifted out.
③Remove the magnet from the tool.
④Make sure that the new magnet is equipped with a white rubber ring to hold the
magnet securely in the housing. Align the arrow on the magnet exchange tool with the
bar symbol on the magnet cover.
⑤Align the arrow on the magnet exchange tool with the
unlocked symbol ( ) on the housing. When positioned
correctly, the magnet glides in easily.
⑥Turn the magnet exchange tool clockwise until the arrow
on the tool is aligned with the locked symbol ( ) on the
housing of the audio processor. The magnet is inserted
correctly when the bar symbol on the magnet cover
is aligned with the locked symbol ( ) on the housing.
Do not use excessive force.

RONDO audio processor
Attachment options
Attachment clip
The audio processor user kit includes various types of clips to attach to the audio proces-
sor with the bracket or cap. These optional attachment clips provide additional xation of
the audio processor to hair or clothing if desired.
To use the bracket, proceed as follows:
①To snap the bracket into the bracket grooves on the side
of the audio processor next to the socket cover, push rst
one lip, then the other into the bracket grooves. You can
attach the bracket on either side of the audio processor.
②To remove the bracket, insert your ngernail on the side
closer to the socket cover and lift the bracket off.
To use the cap, proceed as follows:
①To snap on the cap, hold the audio processor with the top
facing up in one hand and the cap between thumb and
forenger of your other hand. Now slide the cap onto the
audio processor so that rst one lip, then the other glides
into the outermost bracket grooves on the side of the
audio processor. The socket cover rests between the side
wings of the cap. Make sure that the leash does not get
caught under the cap.
②To remove the cap, insert your ngernail on one side and
lift the cap off.
MED-EL strongly recommends that you always use an attachment clip to reduce the risk
of damaging the audio processor should it come off and drop on the oor or another
hard surface.
Hair attachment clip
with bracket
Clothing attachment clip
with bracket
Clothing attachment clip
with cap

RONDO audio processor
👪PARENTAL GUIDANCE
Children shall be instructed not to swallow or put any components of their MED-EL
Cochlear Implant System into their mouths or to play with any components.
Swallowing of system components could cause suffocation or internal injury.
Indicator lights
The audio processor has two indicator lights which illuminate and/or blink with different
patterns and colors to indicate different conditions. Your healthcare provider can deacti-
vate the blinking signals (except error patterns, ON/OFF indication, ight mode conrma-
tion pattern, battery status and charging indicator light) if you prefer this.
Main indicator light
Audio processor status (white, blue)
Blinking pattern Meaning Required action Remarks
ON indicator light None The white light fades in or out when
pressing the pushbutton in the center
of the audio processor.
OFF indicator light
Program to selected None The blue indicator light will blink
depending on the selected program
(i.e. after switching on the processor
or changing the program).
FineTuner Echo command
received and accepted
None
seconds
Battery status (green, orange, red)
Blinking pattern Meaning Required action
Battery fully charged (% to %) None
Battery charge % to % None
Battery charge low to % Consider charging the audio processor.
Battery charge low Charge the audio processor.
seconds
Charging indicator light
(bottom view)
Main indicator light
(top view)

RONDO audio processor
Link Monitoring (red,green)
Blinking pattern Meaning Required action Remarks
After placing an audio processor
programmed for a previous
generation implant (e.g. C+,
C) over the implant: Indicates
functionality of the audio
processor.
None Applicable only to previous
generation implants (e.g. C,
C+)
After placing an audio processor
programmed for a new gener-
ation implant over the implant:
Correct implant detected.
Indicates functionality of audio
processor and implant.
None Applicable only to PULSAR,
SONATA, MED-EL CONCERT,
SYNCHRONY and later generation
implants
Optional visual indication of
activated link monitoring. This
check is repeated whenever
the audio processor is moved
relative to the implant.
None Can be activated by your
audiologist.
Audio processor and implant
disconnected
Position the audio
processor over the
implant site.
If the blinking persists,
contact your clinic, audiologist
or MED-EL. The audio processor
will automatically power off after
minutes (no stimulation). Your
audiologist can deactivate the
automatic power off function.
Audio processor positioned
over wrong implant (bilaterally
implanted users)
Position the audio
processor over the
correct implant.
Audio processor has switched
off due to empty batteries (if
battery charge is still sufcient
to power the audio processor).
Audio processor is in microphone
monitoring mode.
Switch the audio
processor off and
on again.
seconds
Error indication (red)
Blinking pattern Meaning Required action Remarks
Maximum or minimum
value of volume or audio
sensitivity range reached
Stop pushing button(s)
on FineTuner Echo.
Electronic problem or
temporary processor
disturbance
Switch processor off.
Switch processor
back on.
If the blinking persists, the audio
processor must be replaced.
Selected position
not programmed or
programming failure
Select another
position.
If the blinking persists, the audio
processor should be reprogrammed
by the healthcare provider.
seconds

RONDO audio processor
Blinking pattern Meaning Required action Remarks
Electronic problem or
temporary processor
disturbance
Switch processor off.
Switch processor
back on.
If the blinking persists, the audio
processor must be replaced.
Electronic problem or
programming failure
Switch processor off.
Switch processor
back on.
If the blinking persists, the audio
processor must be reprogrammed by
the audiologist.
Electronic problem or
temporary processor
disturbance
Switch processor off.
Switch processor
back on.
If the blinking persists, the audio
processor must be replaced.
seconds
Flight mode conrmation pattern (red)
Blinking pattern Meaning Required action
Flight mode successfully activated None
seconds
Charging indicator light (bottom, orange)
Blinking pattern Meaning Required action Remarks
Audio processor battery is
charging
None The light goes off when the
battery is fully charged.
seconds
Private alert
The private alert feature allows adding an acoustic warning signal to the audio signal. This
added signal is audible only to the user of the audio processor and can be adjusted in
loudness steps. Your healthcare provider will set the loudness accordingly. Your healthcare
provider can also deactivate these signals if you prefer this.
Battery low warning signal
If the battery voltage falls below a certain level, four short warning beeps will be gener-
ated approximately every seconds. You are still able to hear, but you should charge the
battery of the audio processor as soon as possible.
End of range reached warning signal
If a maximum or minimum value of volume or audio sensitivity has been reached, a
continuous beeping signal is audible for the user as long as the key of the FineTuner Echo
is pressed.

RONDO audio processor
Conrmation signal
If a command from the FineTuner Echo has been executed successfully by the audio
processor, a conrmation beep is audible for the user of the audio processor.
Link Monitoring
The audio processor has a Link Monitoring function. When activated, the main indicator
light blinks with different patterns and colors to indicate different conditions. The indicator
light blinks green when the audio processor is functional and the correct implant has been
detected. The indicator light blinks red when no link has been established between the
implant and the audio processor. Please consult the table Link Monitoring (red, green) in
section Indicator lights for more information about the blinking patterns.
FineTuner Echo
NOTE: The previous generation FineTuner cannot be used with this audio processor.
The FineTuner Echo is a small and light-weight remote control provided to help you opti-
mally use your audio processor in changing daily listening situations. Its ergonomic design
and display facilitate changing the settings of your audio processor.
The FineTuner Echo is not necessary for the function of your audio processor. When
switched on, the audio processor activates the same program, volume and sensitivity
setting it had when it was switched off.
FineTuner Echo system components
Front view Back view Accessories
⑤
①
②
③
⑥ ⑦
④
⑧
⑩
⑨
①Green light
②Display
③Keypad
④Battery compartment
⑤Battery
⑥Silicone ring
⑦Battery lid
⑧Lanyard
⑨Display protection foil
⑩Microber cloth

RONDO audio processor
Using the FineTuner Echo for the rst time
①Clean the FineTuner Echo screen with the microber cloth.
②To apply the display protection foil, pull off a small section
of the backing and attach the adhesive side to the top
part of the display. Slowly pull off the backing from the foil
while carefully pressing out any trapped air bubbles with
the microber cloth.
③Insert a coin cell battery (type CR) with the sign
facing up. Hold the battery at a slight angle and insert
it under the lip in the battery compartment, then gently
push it down.
④To close the lid, align the arrow on the lid with the
symbol on the housing and push down gently. Use a
coin to turn the lid until the arrow on the lid meets the
symbol on the housing. You will feel a slight resistance
when the lid locks in place.
⑤After inserting the battery, a pairing notication appears
automatically, prompting you to pair your FineTuner Echo.
The pairing screen shows a symbolic audio processor, not
the actual model.
To pair the FineTuner Echo, proceed as follows:
①Switch off the audio processor.
②Place the audio processor on the battery lid of the
FineTuner Echo.
③Switch on the audio processor.
④If the pairing process was successful, a appears next
to the pairing screen. If the pairing process was not
successful, a is displayed.
⑤For bilateral users, repeat the steps above for the other side.
NOTE: Your audio processor has to be congured for use with the FineTuner Echo. If the
audio processor is not programmed correctly, the pairing process will not be successful.
For bilaterally implanted users it is particularly important that the audio processors are
correctly programmed for the right and left side. Otherwise only one processor can be
paired to the right or left side.
If you experience problems when trying to pair the FineTuner Echo and the audio proces-
sor, please contact your healthcare provider.
Table of contents
Other Medel Hearing Aid manuals

Medel
Medel SONNET (Me1310) User manual

Medel
Medel SYMFIT 6.1 User manual

Medel
Medel hearLIFE DUET 2 Assembly instructions

Medel
Medel OPUS 2 User manual

Medel
Medel OPUS 2 User manual

Medel
Medel SONNET User manual

Medel
Medel WaterWear for BTE User manual

Medel
Medel Samba Assembly instructions

Medel
Medel OPUS 2 User manual

Medel
Medel OPUS 2 User manual

Medel
Medel Samba User manual

Medel
Medel ADHEAR System Instruction manual

Medel
Medel FineTuner Echo User manual

Medel
Medel RONDO User manual

Medel
Medel Me152 Series User manual

Medel
Medel Samba User manual

Medel
Medel AudioLink Ma070301 User manual

Medel
Medel OPUS 2 Technical Document

Medel
Medel Sonnet Operating instructions

Medel
Medel SONNET (Me1310) User manual