manuals.online logo
Brands
  1. Home
  2. •
  3. Brands
  4. •
  5. medi
  6. •
  7. Medical Equipment
  8. •
  9. medi pcs CSAR085M22 Operating manual

medi pcs CSAR085M22 Operating manual

medi pcs
pneumatic compression system
Garment
Application & Maintenance Guide
Sizing

Size Item # Leg Length Circumferences
Ankle (B) Calf (C)
Regular CSLLS 
 
Long CSLLS 
Size Item # Arm Length Circumferences
Wrist (C) Axilla (G)
Short CSARM 
Regular CSARM   
Long CSARM 
Arm
Sizing Chart: Use to select the appropriate garment based on body
measurements. All measurements in cm.
Lower Leg
Sizing Chart: Use to select the appropriate garment based on
body measurements. All measurements in cm.
Lower Leg Sizing Measurements
T
ip of Middle Finger to Axilla
C
G
Floor to Knee Crease
B
C
Floor to Gluteal Fold
C
G
B
Arm Garment Sizing Measurements
Size Item # Leg Length
Circumferences
Ankle
(B)
Calf
(C)
Thigh
(G)
Small-Short CSWLS 
  
Small-Regular CSWLS 
Small-Long CSWLS 
MediumShort CSWLM 
  Medium-Regular CSWLM 
Medium-Long CSWLM 
Large-Short CSWLL 
  Large-Regular CSWLL 
Large-Long CSWLL 
Whole Leg
Sizing Chart: Use to select the appropriate garment based on body
measurements. All measurements in cm.
Whole Leg Sizing Measurements
Introduction 
Care & cleaning 
Application 
The garments are air-chambered garments that are made of smooth, pliable
fabric (100% nylon). They are designed to fit the contours of the body by
wrapping around the limb(s) and attaching with hook and loop fasteners. They
contain overlapping air chambers that inflate and deflate sequentially.
• Arm garments contain eight (8) chambers
• Lower garments contain six (6) chambers
• Whole garments contain eight (8) chambers
Undersleeves for wear underneath the garments are available for purchase
separately, but are not required.
Do not connect the garments to the pressure control unit (PCU) until after
the garments have been applied to the appropriate limbs to avoid accidental
pulling or movement of the PCU.
Remove any jewelry, watches, or other items that may cause damage to the
garment before applying.
If desired, apply a liner over the limb before applying the garment. This will
help keep the garment clean during use. Loose, unrestrictive clothing such as
sweatpants or cotton t-shirts may also be used, so long as the clothing is safe
to be compressed against the skin and will not cause damage to the garment.
Store the garments by first loosely coiling the hoses and garment connectors. Avoid
kinking or crushing the hoses. Lay the garments flat in a cool, dry place for storage.
Ensure that the garments are disconnected from the PCU before cleaning. Gently
wipe the garment using a slightly damp cloth, moistened with a mild anti-bacterial
soap or 70% Isopropyl Alcohol solution. Do not allow any moisture or liquid to
enter the air inlets of the garment connectors. After wiping with a damp cloth,
thoroughly dry the compression garment using a soft towel or cloth and allow to
air dry fully. Do not bleach, iron, or machine wash or machine dry the garments.
Leg garments
There are two methods of application:
Method A:
Step 1: Loosely form the garment to your leg’s
shape and fasten the hook tabs (4.1).
Step 2: With the foot piece of the garment
furthest from you, slide your leg into the
garment until it reaches your knee (for lower
leg, shown in 4.2) or upper thigh (for whole
leg, shown in 4.3). Note: Do not stand or walk
while wearing leg garments. Photo is for
illustration purposes only.
Step 3:Readjust the hook and loop material
of the garment if necessary so that it fits
securely but comfortably on your leg (4.4). As
the garment inflates it will intelligently apply
compression based on your limb size so it is
not necessary that the garment have a snug
fit or apply compression from donning.
.
.
.
.
Your toes may or may not extend from the end
of the garment, depending on your foot size.
The garment should not be applied so tightly
that it applies compression without inflation,
and it should never hurt. The garment
connector should extend from the end of the
garment closest to the heel.
Leg garments
Method B:
Step 1: While sitting or lying down, undo the
hook and loop material of the garment and
open the garment (4.5).
Step 2: Place your foot in the foot section
of the garment with your heel comfortably
positioned in the heel pocket (4.6).
Step 3: Starting at the ankle, secure the
garment in place around your leg using the
hook and loop material (4.7). As the garment
inflates it will apply compression so it is not
necessary that the garment have a snug fit or
apply compression from donning.
Step 4: Continue securing the garment up
your leg until the entire garment is fastened
(4.8). When applied, the garment should be
comfortably secured, but not so tight that it
applies compression. Fully applied whole leg
shown in (4.9). Note: Do not stand or walk
while wearing leg garments. Photo is for
illustration purposes only.
.
.
.
.
.
Your fingers may or may not extend from
the end of the garment depending on the
length of your arm. When applied, the
garment should not be so tight that it applies
compression and it should never hurt. The
garment connector should extend from the
end of the garment closest to the wrist.
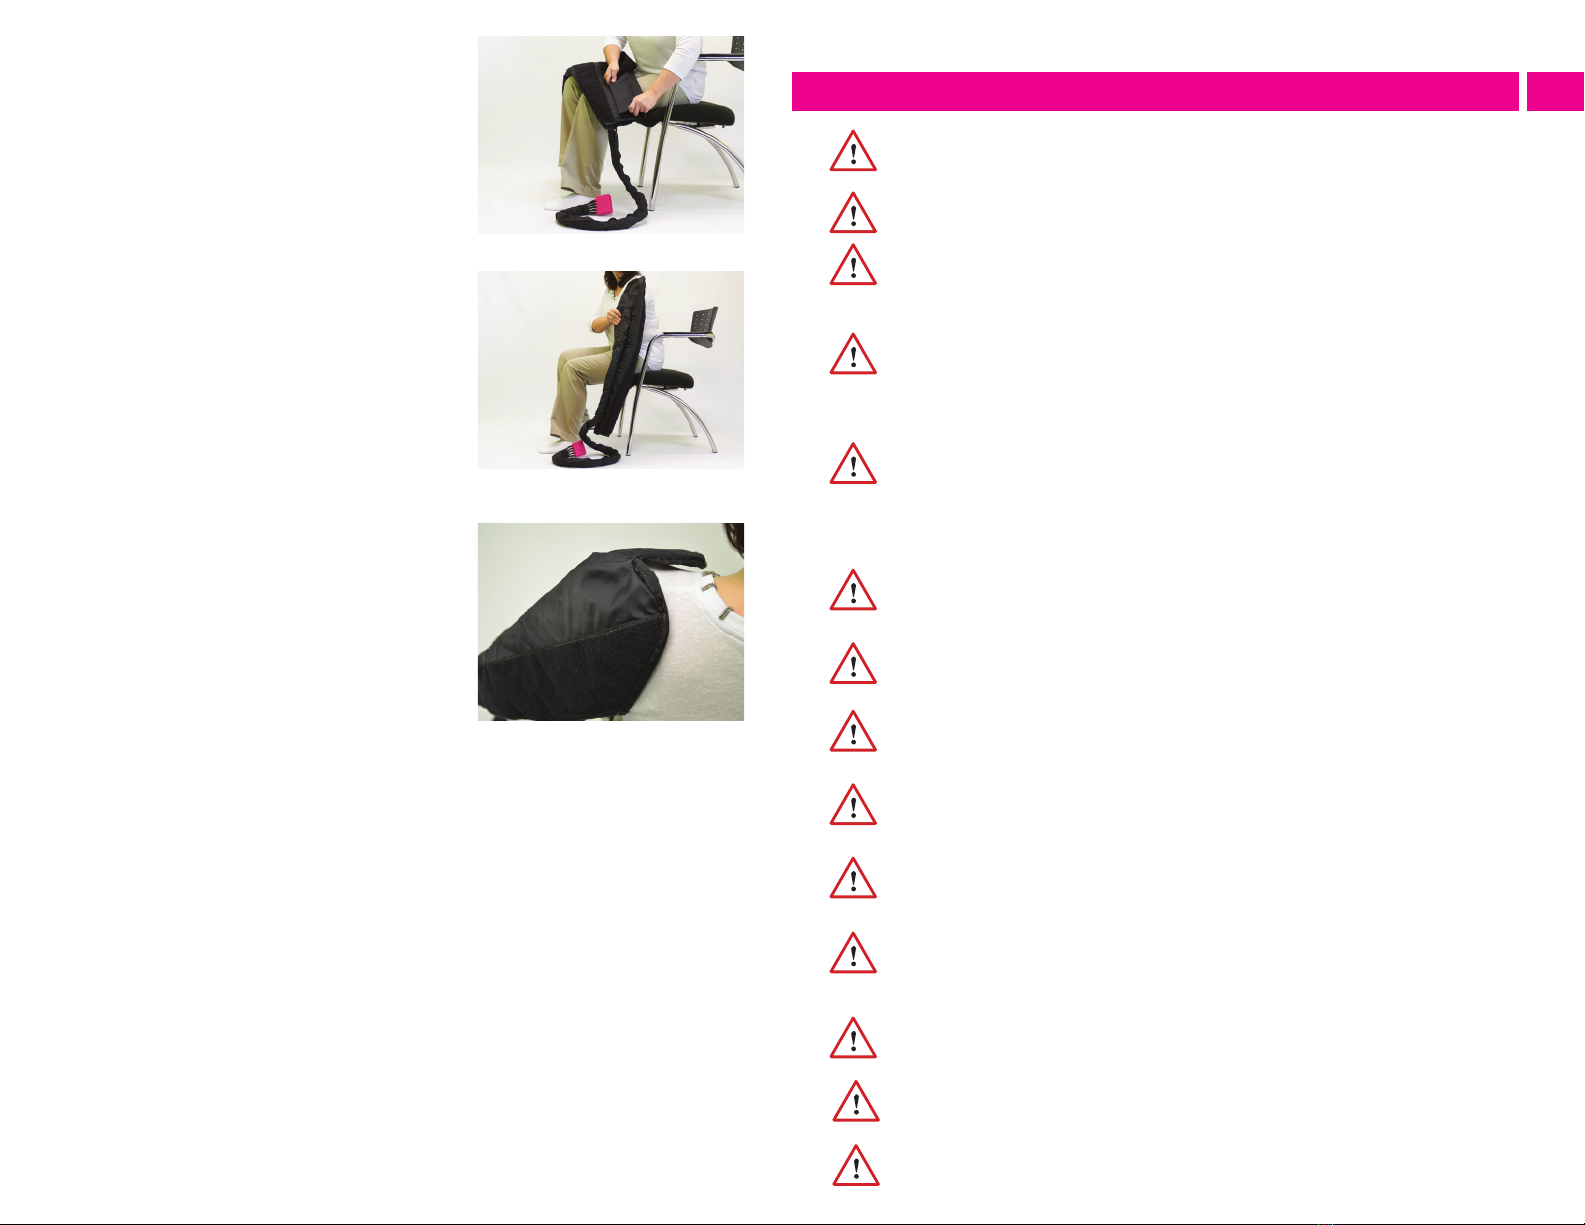
Arm garments
Step 1: Loosely form the garment to your
arm’s shape and fasten the hook tabs (4.10).
Use the outermost hook panel for larger
circumference arms. Fold the panel under
itself and use the inner hook panel for smaller
circumference arms.
Step 2: With the curved end of the garment
closest to you, slide your arm into the
garment until it reaches your armpit (4.11).
Step 3:Ensure that the curved top edge of the
garment is positioned on the outer side of
your shoulder (4.12). The straight end of the
garment should be positioned over the hand.
Readjust the hook and loop material of the
garment, if necessary, so that it fits securely
but comfortably on your arm. As the garment
inflates it will intelligently apply compression
based on your limb size so it is not necessary
that the garment have a snug fit or apply
compression from donning.
.
.
.
Garment removal
Disconnect the garment from the PCU and allow it to deflate as necessary. To
remove the garment, either slide your limb out of the garment or undo the hook
and loop material and remove your limb. It is recommended to keep the hook and
loop material fastened even when the garment is not in use to avoid it snagging on
clothes, linens, or other materials.
Safety 
Warning: Explosion Hazard
Do not use in the presence of flammable gases, including flammable anesthetics.
Warning: Electrical Shock Hazard
Do not allow liquid to enter any part of the system.
Warning:Electric Shock Hazard
Never attempt to perform maintenance or service the device while in use. To completely
eliminate power, disconnect the power supply from the Pressure Control Unit or from the
wall outlet.
Warning: Electric Shock Hazard
To prevent electric shock, do not open the Pressure Control Unit. Do not attempt to
service the pressure control unit yourself. All maintenance tasks should be performed
only by the manufacturer or by authorized service personnel. Service by unauthorized
personnel shall void the warranty.
Warning:Ventilation Hazards
Always place the pump on a solid surface free of objects that may block ventilation
openings. Never lock the ventilation openings. Keep the ventilation opening free of
debris such as lint and hair. Never operate the pump on a soft surface, such as a bed,
couch, or pillow, where the ventilation opening may be blocked. Never drop or insert any
object into any opening of the pump.
Warning: Environmental Hazards
Keep the pump, garments, and power supply cord and plug away from sharp objects,
flames, and heated surfaces.
Warning: Proper Inspection Required
Prior to using always inspect pressure control unit, power supply, garments, and
connectors for damage.
Warning: Tripping
Never operate the controller where the cord or tubing harness shall present a tripping
hazard.
Warning: Strangulation
The power supply and hoses of this product may pose a strangulation hazard. Keep power
supply and hoses out of the reach of children at all times.
Warning: Contact Injuries
Pressure Control Unit should be placed at same height or below patient to prevent
possible injury from device falling on patient.
Warning: Treatment Should Never Hurt
The garment compression should never hurt. If you experience pain or notice your
condition worsening, contact your physician. Do not change your treatment settings
without consulting your physician.
Warning: Parental Supervision
Children under the age of 18 should only use the system under adult supervision and
direction of a physician.
Caution: Single Patient Use
Garments are intended for single patient non-ambulatory use only.
Caution: Compatibility
Use only the medi pcs power supply (GSM60B24), garments, and accessories with the
medi pcs system.
medi USA
6481 Franz Warner Parkway
Whitsett, NC 27377
[email protected]
T 800-633-6334
F 888-570-4554
mediusa.com PBO160 Rev A
For information on care and maintenance
of your pressure control unit (PCU), system
assembly, programming treatment,
troubleshooting, or technical information,
please refer to the Operator’s Manual
included with the medi pcs PCU.
For other language translations, please visit
www.mediusa.com.

This manual suits for next models

13

Other medi Medical Equipment manuals

medi SAS light User manual

medi

medi SAS light User manual

medi Epico ROMs User manual

medi

medi Epico ROMs User manual

medi protect.ROM telescopic User manual

medi

medi protect.ROM telescopic User manual

medi protect.Manu active User manual

medi

medi protect.Manu active User manual

medi M.4s comfort User manual

medi

medi M.4s comfort User manual

medi Genumedi PSS User manual

medi

medi Genumedi PSS User manual

medi Soft OA User manual

medi

medi Soft OA User manual

medi Genumedi E+motion User manual

medi

medi Genumedi E+motion User manual

medi Epicomed E+motion User manual

medi

medi Epicomed E+motion User manual

medi Epicomed E+motion User manual

medi

medi Epicomed E+motion User manual

medi Stabimed RICE User manual

medi

medi Stabimed RICE User manual

medi circaid juxtafit premium User manual

medi

medi circaid juxtafit premium User manual

medi M.4 s OA User manual

medi

medi M.4 s OA User manual

medi protect.Dorsofix User manual

medi

medi protect.Dorsofix User manual

medi Soft OA User manual

medi

medi Soft OA User manual

medi Manumed RFX User manual

medi

medi Manumed RFX User manual

medi Patella User manual

medi

medi Patella User manual

medi PT control wrap User manual

medi

medi PT control wrap User manual

medi Lumbamed basic User manual

medi

medi Lumbamed basic User manual

medi SAS 45 User manual

medi

medi SAS 45 User manual

medi Lumbamed plus User manual

medi

medi Lumbamed plus User manual

medi Rhizomed User manual

medi

medi Rhizomed User manual

medi Shoulder fix User manual

medi

medi Shoulder fix User manual

medi PT control User manual

medi

medi PT control User manual

Popular Medical Equipment manuals by other brands

Itamar Medical WatchPAT Operation manual

Itamar Medical

Itamar Medical WatchPAT Operation manual

PROTEOR 1P650 KNEE Assembling and adjustment instructions

PROTEOR

PROTEOR 1P650 KNEE Assembling and adjustment instructions

Liberate Medical VentFree user manual

Liberate Medical

Liberate Medical VentFree user manual

Dicarre DA20 user guide

Dicarre

Dicarre DA20 user guide

Stryker Medical M Series Operation manual

Stryker Medical

Stryker Medical M Series Operation manual

Invacare ScanBed 750 user manual

Invacare

Invacare ScanBed 750 user manual

Getinge Arjohuntleigh Nimbus 3 Professional Instructions for use

Getinge

Getinge Arjohuntleigh Nimbus 3 Professional Instructions for use

Mettler Electronics Sonicator 730 Maintenance manual

Mettler Electronics

Mettler Electronics Sonicator 730 Maintenance manual

Pressalit Care R1100 Mounting instruction

Pressalit Care

Pressalit Care R1100 Mounting instruction

Denas MS DENAS-T operating manual

Denas MS

Denas MS DENAS-T operating manual

bort medical ActiveColor quick guide

bort medical

bort medical ActiveColor quick guide

AccuVein AV400 user manual

AccuVein

AccuVein AV400 user manual

agiliti NP Trio user manual

agiliti

agiliti NP Trio user manual

Rocket Medical Rocket Digital Oocyte Aspiration Pump Service manual

Rocket Medical

Rocket Medical Rocket Digital Oocyte Aspiration Pump Service manual

Monteris Medical Neuroblate Instructions for use

Monteris Medical

Monteris Medical Neuroblate Instructions for use

Otto Block 8E33 7 manual

Otto Block

Otto Block 8E33 7 manual

ADVANCED HOME CARE Helios Guide

ADVANCED HOME CARE

ADVANCED HOME CARE Helios Guide

NeuLog NUL-208 Guide

NeuLog

NeuLog NUL-208 Guide

manuals.online logo
manuals.online logoBrands
  • About & Mission
  • Contact us
  • Privacy Policy
  • Terms and Conditions

Copyright 2025 Manuals.Online. All Rights Reserved.