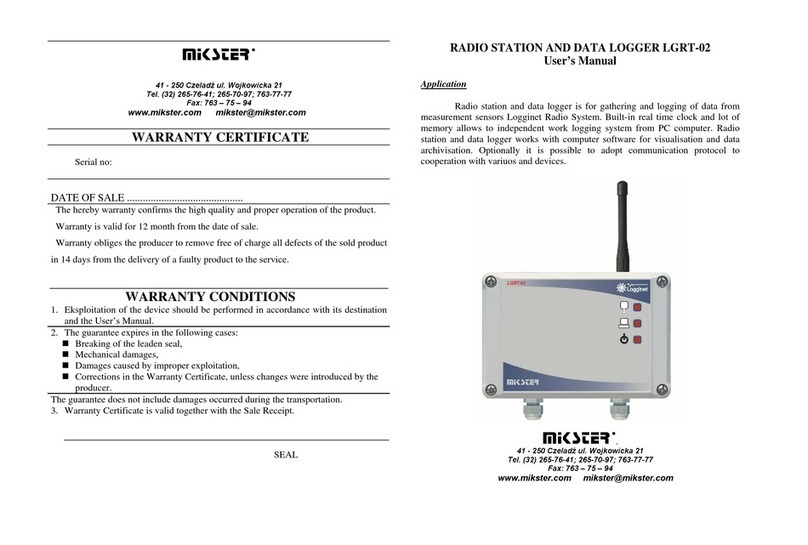
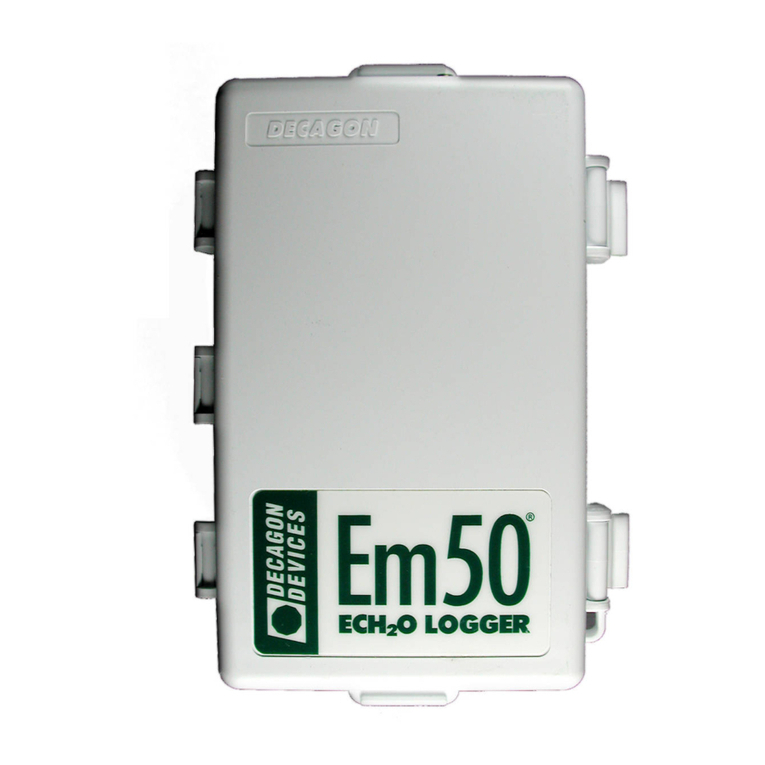
METER EM50 Series User manual

i
TABLE OF CONTENTS
1. Introduction.............................................................................................. 1
2. About the Em50 Logger Series.......................................................2
2.1 Em50 Logger Series Overview ....................................................................2
2.2 Specifications............................................................................................2
2.3 Functionality .............................................................................................3
2.3.1 Reset Button.................................................................................... 3
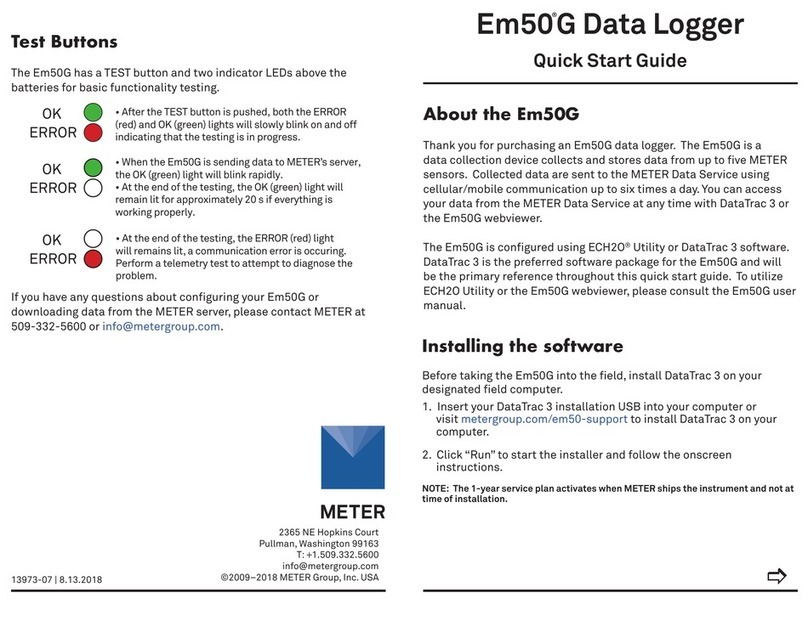
2.3.2 Em50 Series Status Lights............................................................... 3
2.3.3 Em50 Series Test Button..................................................................4
2.4 Software ....................................................................................................4
2.4.1 Em50 Series Data Logging Scheme .................................................. 5
2.4.2 Em50 Measurement Interval............................................................5
2.5 How the Em50 Stores Data ........................................................................5
2.5.1 Data Storage Format........................................................................ 5
2.5.2 Data Storage Size............................................................................. 6
2.5.3 Measurement Span..........................................................................6
2.5.4 Compatible Sensors.........................................................................6
3. Setup and Installation........................................................................7
3.1 Installing the Batteries ..............................................................................7
3.2 Installing Software ....................................................................................7
3.3 Configuring in ECH20 Utility.......................................................................8
3.4 Field Installation........................................................................................ 9
4. Software and Configuration.......................................................... 10
4.1 ECH20 Utility Software Installation ......................................................... 10
4.2 Common Tasks in ECH20 Utility ............................................................... 11
13453-16
11.30.2019

ii
4.2.1 Configuring the Em50/Em50R/Em50G........................................... 11
4.2.2 Downloading Data when Directly Connected ................................. 12
4.2.3 Other Data Download Options........................................................ 13
4.2.4 Erasing Data .................................................................................. 14
4.2.5 Instantaneous Measurements (Scan) ............................................ 14
4.3 ECH20 Utility Menus ................................................................................ 15
4.3.1 File Menu ....................................................................................... 15
4.3.2 Edit Menu....................................................................................... 15
4.3.3 Data Menu...................................................................................... 20
4.3.4 Actions Menu ................................................................................. 20
4.3.5 Window Menu ................................................................................ 21
4.3.6 Help Menu...................................................................................... 21
4.4 ZENTRA Cloud.......................................................................................... 22
5. Em50G Cellular Communication................................................. 23
5.1 METER Data Service ................................................................................ 23
5.2 Cellular Service........................................................................................ 23
5.3 Cellular Coverage..................................................................................... 23
5.4 Em50G Configuration and Settings.......................................................... 24
5.5 Communication Testing ........................................................................... 25
5.6 Downloading Data.................................................................................... 26
5.6.1 Direct Download ............................................................................ 26
5.6.2 Internet Downloading .................................................................... 26
6. Em50R Radio Telemetry .................................................................. 27
6.1 Transmit Radio Telemetry ........................................................................ 27
6.1.1 Transmit Radio Modes ................................................................... 27
6.1.2 Transmit Best Practices ................................................................. 28
6.2 Two-Way Radio Telemetry........................................................................ 28

iii
EM50
6.2.1 Two-Way Radio Modes ................................................................... 29
6.2.2 Two-Way Best Practices................................................................. 29
6.3 Radio Settings ......................................................................................... 29
6.4 Radio Performance .................................................................................. 30
6.5 Connecting via Rm-1 Radio Modem ......................................................... 30
6.6 DataStation Networks ............................................................................. 32
6.6.1 Configure a DataStation................................................................. 32
6.6.2 Communication Test ...................................................................... 33
6.7 Download Collected Data......................................................................... 33
6.8 Data Processing....................................................................................... 34
7. Caring for the Em50 ........................................................................... 35
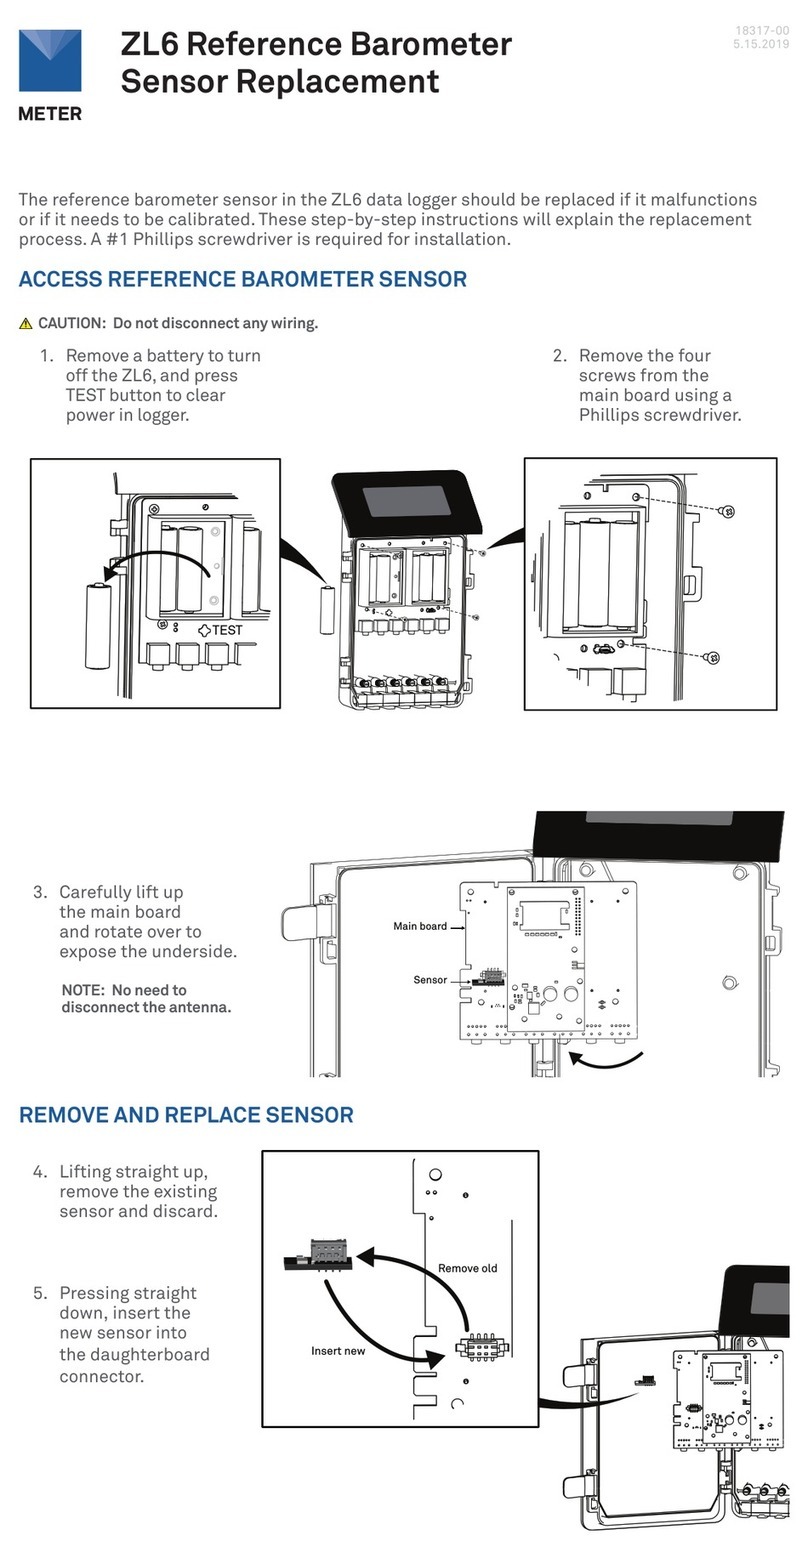
7.1 Replacing the Batteries ........................................................................... 35
7.2 Long-Term Maintenance .......................................................................... 35
7.3 Sending Feedback to METER ................................................................... 35
8. Troubleshooting ................................................................................... 37
8.1 Customer Support.................................................................................... 39
8.2 Terms and Conditions .............................................................................. 40
Index ................................................................................................................. 44


1
EM50
1. INTRODUCTION
Thank you for choosing Em50®series data loggers from METER Group.
The Em50 series loggers (Em50, Em50R, and Em50G) are part of the ECH20 System, a
collection of data loggers, software, and compatible sensors to measure soil moisture and
other environmental parameters accurately and cost effectively.
The Em50 series includes three models:
• Em50 is a manual-download logger.
• Em50R is a a remote-download logger that communicates through a radio module.
• Em50G is a remote-download logger that communicates through a cellular module to
transmit data over the internet.
Throughout this manual, references to Em50 apply to all versions of the logger unless
otherwise specified.
Verify all instrument components are included and appear in good condition:
• Em50 series logger with five batteries
• Micro-USB communications cable
• Zip ties for mounting the logger
• USB drive containing ECH20 Utility software installer
• Antenna (Em50R and Em50G)
• Device subscription card (Em50G)

2
ABOUT THE EM50 LOGGER SERIES
2. ABOUT THE EM50 LOGGER SERIES
2.1 EM50 LOGGER SERIES OVERVIEW
The ECH2O system is made of data loggers, sensors, telemetry, and software that help you
measure soil moisture and other environmental parameters accurately and cost effectively.
METER's innovative sensors are the heart of the system and we designed it to be very easy to
use (no programming needed).
The Em50 series loggers are 5-port, self-contained data loggers especially suited for
field research and commercial agriculture. The Em50 logger series includes three models:
the Em50, the Em50R, and the Em50G. These devices are housed in a weather-resistant
enclosure, making them suitable for long-term outdoor operation.
Em50: The Em50 is the basic logger. The communication with this model is through a stereo
to USB or stereo to serial cable to a PC or mobile handheld device. An integrated solar panel
is an options for the Em50.
Em50R: The Em50R includes a spread-spectrum radio telemetry module that delivers data
to a DataStation. The radio module is available in long-range 900 MHz. Use the telemetry in
energy efficient transmit mode or two-way mode. (Section6 provides more information on
telemetry.)
Em50G: The Em50G includes a GSM/GPRS (Global System for Mobile communications/
General Packet Radio Service) cellular module to allow environmental measurement data
transmission over the Internet. METER partners with a provider of global cellular data
service to make data transmission and maintenance easy and inexpensive. Measurements
from the Em50G are sent wirelessly to METER internet server and are available for download
using ZENTRA Cloud. An integrated solar panel is an option for the Em50G.
Em50 Compatible Sensors: You can use the Em50 to log data for almost all of the legacy
sensors that METER sell. Please see metergroup.com or our catalog for an up-to-date list of
supported sensors.
2.2 SPECIFICATIONS
Sensor Input Ports Five 12-bit analog or 32-bit digital
Sensor Port Type 3.5-mm stereo plug connector
Data Storage 1 MB (36,800 scans for all five ports)
Memory Type Nonvolatile flash
Battery Capacity Five AA alkaline or lithium batteries

3
EM50
Computer Communication Dedicated serial port 3.5-mm stereo plug connector for use
with the METER USB cable adapter (UCA)
Radio (Em50R) 900 MHz or 2.4 GHz (discontinued)
Cellular (Em50G) GSM/GPRS cellular technology. Cellular service and data
hosting service provided by METER
Enclosure Weather-, impact-, and UV-resistant polymer
Operating Environment –40 to +60 °C (0% to 100% relative humidity)
COMPLIANCE
Manufactured under ISO 9001:2015
EM ISO/IEC 17050:2010 (CE Mark)
2.3 FUNCTIONALITY
2.3.1 RESET BUTTON
All Em50 logger types have a "Reset" button. If your logger does not respond to connection
attempts or does not appear to be working, press the reset button. This reboots the logger
and the Status light turns on momentarily. The internal data storage of the logger is
nonvolatile so you do not lose data or settings if you press the reset button.
2.3.2 EM50 SERIES STATUS LIGHTS
The green and red lights indicate the current status of your Em50/Em50G logger and the
logger self test function. A short, single blink of the green light every 5 s indicates the
Em50/Em50R/Em50G is configured to log sensor data. The light does not blink if the logger
measurement interval is set to 0 or "Off."
The green light blinks slowly on and off to indicate the logger is connected to a serial port
or the cellular module is powered on. The green light pulses when the Em50G is actively
sending data over the cellular network.
The red light blinks continuously to indicate the logger date and time are not set correctly.
This can happen when the batteries have been disconnected. You must connect to your
Em50 series logger using any ECH2O System software to reset the logger internal clock. The
logger stops error blinking when the date is reset or after 2 min have elapsed (to preserve
battery power).

4
ABOUT THE EM50 LOGGER SERIES
2.3.3 EM50 SERIES TEST BUTTON
The Em50 series loggers have a "Test" button to perform basic functionality testing. When
you press the Test button, the logger performs several checks on internal systems and with
the Em50G attempts a communication session over the cellular network. The logger uses the
lights during the test to indicate connection status.
Pressing the Test button may also reset the logger clock by using the time of the cellular
network if the connected network supports time information.
Both the green and red lights blink slowly while the Em50G performs tests. Please be
patient. It can take as many as 60 s or more to finish the cellular communication tests in
theEm50G.
A solid green light indicates that internal tests passed and there is successful
communication over the cellular network to the METER Data Service. The Em50G leaves
the light on for approximately 20 s. A solid red light indicates an error in the logger or in
communicating to the METER Data Service. Please use the Communication Test feature in
ECH2O®Utility to find the specific error.
2.4 SOFTWARE
The Em50 series has three software options for working with hardware and collected data.
METER recommends using ECH20 Utility software to set up, configure, and download Excel®
files directly from your logger. Use ZENTRA Cloud with an Em50G to download data remotely.
Access the latest versions of these programs at metergroup.com.
NOTE: See Section4 for a detailed breakdown of available software for the Em50 series loggers.
ECH2O Utility: ECH20 Utility software is included with the Em50 purchase. It provides a
simple way to connect to and configure your loggers. The ECH2O Utility makes downloading
and processing your data fast and easy.
• Connect to Em50 loggers directly.
• Set all logger configuration parameters.
• Make real-time sensor measurements (scan sensors).
• Create Microsoft®Excel®or text files with raw or processed data.
• Create configuration and data files for use with DataTrac3.
DataTrac3: DataTrac3 was the legacy Em50 series system software designed to help
organize and visualize measurement data.
ZENTRA Cloud: ZENTRA Cloud is a subscription-based web application that allows you to
remotely view and download data from EM50G devices. See Section4 for more information
on ZENTRA Cloud.
NOTE: Em50 cannot be configured with ZENTRA Cloud; please see Section4 for logger configuration information.

5
EM50
2.4.1 EM50 SERIES DATA LOGGING SCHEME
The Em50 does not make sensor measurements until you set a measurement interval. You
also need to configure the Em50 ports with the type of sensor plugged into each port. You
can set these values using either ECH2O Utility or DataTrac3.
2.4.2 EM50 MEASUREMENT INTERVAL
The measurement interval controls how often the Em50 records data to internal data
storage. The interval you choose applies to all five ports on the Em50. So, it is impossible to
have one port measuring sensors more or less frequently than another port.
The measurement interval works relative to the Em50 internal real-time, 24-h clock. For
example, if you choose a measurement interval of 120 min, the Em50 stores data every
2 h, on the hour. The resulting data shows sensor measurements hourly at 12:00 a.m.,
2:00 a.m.,..., 10:00 p.m. Choosing a measurement interval greater than 720 results in one
set of data stored per day. For most applications, a measurement interval of 60 or 120 min is
appropriate.
NOTE: Setting the Em50 measurement interval to zero turns off sensor measurement and data storage.
For most sensor types, the Em50 makes a measurement from each of the five sensor ports
every 60 s, regardless of the measurement interval value. When the Em50 internal clock
reaches the user-programmed measurement interval, the Em50 stores the average of all
the 60-s sensor readings taken since the last storage interval. Therefore, if you set the
measurement interval to 60, the Em50 stores an average of the past 60 sensor readings.
If you choose an interval of 1,440, the Em50 stores one value that represents the average
sensor value for the entire 24-h period.
NOTE: The Em50G supports 5 min as the minimum value for the measurement interval setting.
2.5 HOW THE EM50 STORES DATA
2.5.1 DATA STORAGE FORMAT
The Em50 stores raw data for each sensor. The stored values are not in millivolt units. Please
review your individual sensors operators manual or visit metergroup.com for up to date
equations to convert raw data to meaningful sensor values.
The Em50 stores data for all five sensor ports for each measurement interval. If no sensor
is connected to one or more of the logger ports, the Em50 stores a "0" for that port. The
Em50 data memory is nonvolatile flash. Removing the batteries or performing a system reset
does not erase your data.
Removing batteries or resetting the system also resets the clock in the data logger. To set
the clock to the correct time, simply connect your Em50 to a computer or handheld device
running ECH2O software.

6
ABOUT THE EM50 LOGGER SERIES
2.5.2 DATA STORAGE SIZE
The Em50 stores more than 36,800 data scans. When the logger has filled its data memory, it
begins overwriting the oldest data in the memory.
2.5.3 MEASUREMENT SPAN
Depending on the set measurement interval, the Em50 can read for several weeks to several
years before its memory has filled. When you set up your Em50 using ECH20 Utility, the
software displays how many days of data the Em50 can hold based on the measurement
interval that you have chosen. You can determine how many days of data your Em50 can hold
by dividing the size of the data memory (36,864 scans) by the measurement interval. For
example, an Em50 set on an hourly measurement interval stores 1,500 days, or about 4 years,
worth of data. An Em50 set to 5 min stores data for 125 days, or about 4 months.
2.5.4 COMPATIBLE SENSORS
The Em50 logger is only compatible with sensors made by METER. Please refer to
Data logger compatibility tables (metergroup.com/environment/articles/data-logger-
compatibility-tables) for a list of supported sensors. To learn more about individual sensors
and their respective calibrations, please visit metergroup.com.

7
EM50
3. SETUP AND INSTALLATION
Remember, the service plan for the Em50G activates when METER ships the instrument and
not at the time of installation.
3.1 INSTALLING THE BATTERIES
With the exception of the solar-powered Em50 and Em50G, all Em50 series loggers ship
with a new set of AA alkaline batteries. Open the case and install the batteries in the proper
orientation as indicated in the battery locations (Figure1). After installing the batteries,
press the silver Reset button located directly above the batteries.
Figure1 Batteries and indicators
NOTE: Em50/50G solar data loggers come with batteries installed.Remove battery pull-tab to activate batteries.
NOTE: Use only NiMH (Nickel-Metal Hydride) batteries with the Em50/50G solar data loggers.
NOTE: Installing or changing the batteries in your Em50 resets the internal real-time clock. You must connect to your
Em50 using any ECH2O System software to reset the logger clock. If you do not set the logger clock, the time and date
associated with each measurement record incorrectly.
Five AA-size Alkaline batteries power the Em50. With the radio or cellular modules disabled,
a set of Alkaline or Lithium batteries can last for several years. The battery life for Em50Gs
and Em50Rs varies depending on how you set up the transmission (Section6). Battery power
in the Em50R and Em50G can last from 6 months to over 1 year. You can check the battery
level status when the Em50 is connected using any ECH2O software. When the battery life
indicator shows that your Em50 batteries are <5%, you should replace them.
3.2 INSTALLING SOFTWARE
The ECH20 Utility software (installation USB Drive attached to the cover of this manual)
allows you to collect and manage data from your device.
To install ECH20 Utility, plug the USB Drive into your computer and wait for it to autolaunch. If
it does not launch, go to My Computer, select the USB Drive, and double click on the software
file. A driver for the accompanying USB cable can also be installed at this time.
Occasionally, new versions of ECH2O System software are available on the METER website.

8
SETUP AND INSTALLATION
You can find your current software version in the "About" option of the Help menu in the
ECH20 Utility. If you are connected to the Internet, select "Check for Updates" in the Help
menu to see if there is a newer version available.
The METER USB Cable driver should install automatically. However if it does not, you must
install a driver for the USB Cable Adapter (UCA) before you can use it to communicate with
your logger. You can find the driver installer on your ECH2O System software USB drive or on
METER's website at metergroup.com.
3.3 CONFIGURING IN ECH20 UTILITY
Before field installation, the Em50 needs to have certain parameters set, such as name, date,
time, measurement interval, and communication mode. The Em50R and the Em50G do not
communicate wirelessly until properly configured. Follow steps 1 through 6 to configure the
logger.
1. Open the ECH20 Utility program.
2. Plug the USB cable (included with your Em50) into the logger COM port and then the USB
port of your computer.
Figure2 Port diagram
3. At the top of the screen, select the appropriate COM port from the "Connect Via" drop-
down menu, then click on the Connect icon. If you are using the USB Cable Adapter, look
for the Connect Via option that includes "METER UCA" in the COM port name.
NOTE: If you cannot connect to your Em50, you may need to install the driver for the USB cable.To download a
driver go to metergroup.com.
4. Once you have successfully connected, the menus on the main screen become active.
5. At the device setup screen that appears, click on the various fields to enter a name for
your logger and choose sensor types for each port.
When using the Em50R, select the radio settings you plan to use (Section6). Click
"Apply" to save the changes. When using the EM50G, select your communication
configurations (Section4).
6. Press the "Disconnect" icon when finished.

9
EM50
3.4 FIELD INSTALLATION
The Em50 can serve as a collection station for up to five sensors. The Em50 is compatible
only with sensors made by METER such as the ECH2O water content probes, rain gauge,
temperature sensors, etc. Follow steps 1 through 5 to perform a field installation the
Em50 and sensors.
1. If you are using the Em50R or Em50G, perform a telemetry test to check the wireless
signal. If your signal is low or does not exist, move to an alternative location. (Sometimes
only a few feet away is sufficient.)
2. Install your sensors as directed in their respective manuals.
3. Plug the sensor stereo cable connector firmly into the Em50 input port.
4. On the top and bottom of the Em50, there are two loopholes. Use these holes to fasten
the Em50 to a mounting post using the included zip ties or a similar fastener. Make sure
it is installed in an upright position, with the five input ports underneath. In this position,
rain and spray are shed by the enclosure and drip off without affecting the contents of
the Em50 enclosure.
5. Configure the Em50 using ECH20 Utility.
6. Install the Em50/Em50G Solar data loggers in a location that ensures the solar panel
receives the maximum amount of sunlight. In the northern hemisphere, this typically
means that the data logger faces the south. In the southern hemisphere, this typically
means that the data logger face the north.
NOTE: Never immerse the Em50 in liquids.
NOTE: Make sure to install the Em50 upright to reduce the possibility of water entering the Em50 enclosure.
NOTE: Do not install Em50R or Em50G wireless loggers near large metallic objects, as these can attenuate the
radiosignal.

10
SOFTWARE AND CONFIGURATION
4. SOFTWARE AND CONFIGURATION
METER designed the Em50 series data loggers to have a simple configuration and no data
logger programming. The software packages are key to the effectiveness and ease of the
Em50 Series data loggers. The software fits a variety of users and allows quick and easy
access to the data logger.
• ECH20 Utility: Use ECH20 Utility for basic data logger configuration and direct connect
data download in Excel format. Customers can use ECH2O Utility on any Windows laptop,
netbook, or desktop computers.
NOTE: ECH20 Utility cannot download Em50G data from METER Data Service.
NOTE: For Mac users, use ZENTRA Utility (preliminary Em50 support) for configuration and data download.See
metergroup.com for a ZENTRA Utility download.
• DataTrac3: DataTrac3 is a legacy software for downloading and collecting data from
Em50R or Em50G systems.
• ZENTRA Cloud: Use the subscription-based ZENTRA Cloud software for organizing data
from multiple Em50G series loggers. Data are automatically updated, and graphs of the
complete data sets are created for each logger. Remote configuration is not available for
Em50G loggers. If this is a requirement, contact METER to learn about the ZL6 upgrade
program.
DataTrac3 has a user manual available from the support section of the product page at
metergroup.com/em50-support.
4.1 ECH20 UTILITY SOFTWARE INSTALLATION
ECH20 Utility provides a user-friendly interface for configuring and downloading data from
the Em50 logger. After installing the program (Section3.2), launch it and you should see the
Main screen.

11
EM50
Figure3 ECH2O Utility Main screen
In the Main Screen, you can set all logger configuration parameters with visual controls.
At the top of the program window is a toolbar for interacting with the Em50. To the left is a
battery indicator.
To the right is the Connect Via menu, where you can select a COM port, the Connect button
(which displays Disconnect when you are connected to an Em50), the Download button that
downloads data saved on the Em50 onto your computer, and the Scan button, which scans
all of the sensors connected to each port on the Em50 and returns a real-time reading. This
section covers these functions in detail.
4.2 COMMON TASKS IN ECH20 UTILITY
4.2.1 CONFIGURING THE EM50/EM50R/EM50G
The Em50 does not require any programming, but it does have several parameters that
control identity and function. To change a parameter, connect to your device, change the
parameter, then click Apply to send the parameter changes to your device.

12
SOFTWARE AND CONFIGURATION
Name: Each Em50 device should have a unique name. The default name is the unit serial
number. You can change this to any legal name you want. A legal device name uses upper
and lower case letters, numbers, underscores, and hyphens. Spaces and most punctuation
are not legal name characters. ECH20 Utility prevents you from choosing a name containing
illegal characters.
Serial Number: When set in the factory, this is a read-only value.
Measurement Interval: The Em50 and Em50R loggers allow you to select a measurement
interval between 1 and 1,440 min while the Em50G allows you to set a measurement interval
between 5 and 1,440 min. A measurement interval of zero (0) or "off" stops the logger from
making measurements.
Port Sensor: The Em50 requires you to identify the sensor type for each of the five sensors.
Cellular Settings: To turn the cellular network of the Em50G on or off, click the "Configure"
button in the "Communication Option" section. The cellular network is active when "Upload
data to ECH2OData.com" box is checked and is off when the box is not checked. The
Em50G is uploading data to the METER Data Service (on) by default. See Section5 for more
information on the Em50G.
Choose up to six upload times. Default upload times are: 6-7 AM, 10-11 AM, 1-2 PM, 4-5 PM.
To conserve battery power, choose fewer upload times. The Em50G high data use logger
allows you to transmit data every 15 min.
Click Ok after making configuration changes. Click Apply to save communication settings in
your Em50G. Your current settings show up in the communications option field.
ECH20 Utility helps you evaluate the quality of the cellular connection on your Em50G with
the Communication Test feature. Please see Section5 for a step-by-step guide to running the
Em50G Communication Test.
Radio Settings: Only devices that have a radio module support these options (Em50R,
DataStation). See Section6 for more information on using the radio settings.
4.2.2 DOWNLOADING DATA WHEN DIRECTLY CONNECTED
Once you properly configure and install the Em50, it is ready to begin making and storing
sensor measurements. Stored data can be downloaded from the logger starting at two
places in the logger memory. The "Download New" option downloads the data stored since
the last successful download. The "Download All" option downloads all the data currently
stored in the Em50. The "Download" button on the toolbar corresponds to the Download New
option. Any model of Em50 data logger supports downloading data when directly connected
to the logger with ECH2O System software.

13
EM50
Follow steps 1 through 5 to download data.
1. Use the USB cable to connect the Em50 to your computer.
2. Choose "Direct on" the appropriate COM port from the Connect Via drop-down list and
press the "Connect" button. If you encounter connection errors, please see Section8 or
the ECH20 Utility Help File.
3. Once connected to an Em50, either click the Download button on the toolbar, or go to the
Data Menu and select a download option as described above.
4. When saving data, the File > Save dialog suggests a name based on the connected logger
name and the time and date. However, you can enter any name by typing it into the "File
name" field.
5. Choose the file format (Common formats include .xls, .csv, or .dxd) you prefer then click
Save. ECH20 Utility then downloads the data and creates the file.
ECH20 Utility can save your data in several different file formats.
Excel Workbook File (.xls): Converts the raw downloaded measurement data into
engineering values appropriate for each sensor type. The converted data saves to sheet 1 of
the workbook and raw data saves to sheet 2. You can use the raw measurement data to apply
custom calibration to your sensor data.
DataTrac3 Data File (.dxd): Saves the file in a format that DataTrac3 can import. Each .dxd
file contains information about the ECH2O logger settings, identity, and status along with the
raw data for each sensor.
Processed Data Text File (.txt): Converts the raw downloaded data into engineering values
appropriate for each sensor type. Data are saved as a tab delimited text file.
Raw Data (.csv): Saves the raw data in the form downloaded from the logger.
NOTE: The DataTrac3 file format (.dxd) is a useful way to store data for later manipulation. Each .dxd file contains
information about the ECH2O logger settings, identity, and status along with the raw data for each sensor. ECH20 Utility
can process a .dxd file into an Excel file or a processed text file.This allows you to process your raw data again with
different settings or file formats.
4.2.3 OTHER DATA DOWNLOAD OPTIONS
METER designed the Em50R to be part of a wireless sensor network. In this mode, Em50R
transmits measurement data to a data station. You can then download the measurement
data from all the Em50R loggers in your network from one location. The communication
protocol also confirms delivery of the data and continues to request data until it receives the
complete data package. See Section6 for more information on setting up logger networks.
We designed the Em50G logger to upload your measurement data to METER Data Service
using the cellular network. This makes it easy for you to use the Internet to download your
measurement data from anywhere in the world. Please see Section5 for more information.
NOTE: ECH20 Utility uses the default conversion equation for each sensor when converting raw data to processed
data. For more information about the default conversion equations, please see your logger or sensor manual.

14
SOFTWARE AND CONFIGURATION
An Em50R supports wireless data downloading. ECH20 Utility can establish a two-way radio
connection between your computer and a remote Em50R through the Rm-1 Radio Modem.
Once you establish this connection, you may download data from the Em50R just like it is
directly connected to the logger. Section6 provides more information on setting up two-way
wireless communications.
4.2.4 ERASING DATA
If you need to erase the data on your Em50, go to Data > Erase Stored Data. You should erase
your data if you change the Em50 configuration settings, such as what type of sensor is in
each port. After selecting the Erase option, it asks if you want to continue. Click Cancel to
return to the program, or Erase Data to continue.
NOTE: Activating this feature permanently erases all stored data.
4.2.5 INSTANTANEOUS MEASUREMENTS SCAN
ECH20 Utility gives you the ability to take real-time sensor measurements with your
Em50 logger. This is most useful as a troubleshooting feature to test if a sensor is reading
properly. You can also see how sensors react to environmental changes. Follow steps 1 and
2 to take real time measurements.
1. Click the "Scan" button in the toolbar, or go to Actions > Scan Logger Ports. The
Em50 takes a reading on each of the ports, then displays the Em50 Port Scan screen.
Figure4 Em50 Port Scan screen
2. The Port Scan screen displays all five ports should display with the measurement for
each port in the units appropriate for the sensor. You can change measurement units
in the Preferences Menu (Section4.3.2). Click the sensor name to see the reading as
rawdata.

15
EM50
The five ports should display with the measurement for each port in the current selected
unit. If nothing is plugged in to a port, the reading for that port is zero.
NOTE: The Em50 does not store data that it measures with the scan function.
4.3 ECH20 UTILITY MENUS
ECH20 Utility features six menus that allow you to access the program features. These six
menus are the File, Edit, Data, Actions, Window, and Help menus. Section6 discusses all
menu features.
4.3.1 FILE MENU
Save Settings File:Selecting the "Save Settings File" option from the File menu creates a
data file that contains all of the settings and information associated with the connected
Em50. This feature is useful for transferring logger configurations between ECH20 Utility and
DataTrac3. By default, the name of the settings file is the name of the selected Em50. After
naming the file and selecting where it saves, click Save to create the file.
Convert Data File:ECH20 Utility "processes" or converts raw ECH2O sensor data to
processed data. This feature works by reading .dxd files containing raw data and
outputting the processed data into a different file format (such as .xls or .txt). You can
convert DataTrac3 data files (.dxd). Only files saved with ECH20 Utility can be converted to
processed files. You can choose to save your processed files as an Excel file or text file.
4.3.2 EDIT MENU
THE PREFERENCES WINDOW
The Preferences Window is the main feature of the Edit Menu, it has four tabs for navigation:
The Measurements, Data Files, Communications, and Application tabs.

16
SOFTWARE AND CONFIGURATION
Figure5 ECH2O Utility Preferences: Measurements tab
1. Measurements Tab
The Measurement Units feature is the main function of the Measurement tab. These field
entries determine the unit values that display when you save downloaded data as Excel,
processed, or raw data files. ECH20 Utility supports displaying some measurement data in
multiple units. For example, it allows you to choose degree Celsius or degree Fahrenheit for
temperature sensors.
To set your preferences for measurement units, choose the Measurements tab in the
ECH20 Utility Preferences window. Locate the type of measurement and select a unit from
the drop-down menu next to it. Click Close to apply the changes.
The Power Noise Filter is the other feature of the Measurements tab. The AC electrical
power in your office or home can add a subtle amount of noise to the data logger sensor
measurements. The logger Power Noise Filter setting is designed to eliminate this electrical
noise that comes from the AC power distribution system. You should set the value of the
Power Noise Filter to match the frequency of the power cycle where you live. In North
America and most of Asia, this is 60 Hz (the default value). In most of Europe the electrical
frequency is 50 Hz. This feature only needs to be set once, as the program automatically
updates each connected device filter.
Other manuals for EM50 Series
2
This manual suits for next models
3
Table of contents
Other METER Data Logger manuals
METER
METER EM60 Series User manual
METER
METER ZL6 Use and care manual
METER
METER EM50 Series User manual

METER
METER EM50 Series User manual

METER
METER ZL6 User manual
METER
METER EM50G User manual

METER
METER ZL6 User manual
METER
METER ZL6 Operating and safety instructions
METER
METER ZL6 User manual

METER
METER ZL6 User manual


