manuals.online logo
Brands
  1. Home
  2. •
  3. Brands
  4. •
  5. Metra Electronics
  6. •
  7. Automobile Accessories
  8. •
  9. Metra Electronics 99-9326B User manual

Metra Electronics 99-9326B User manual

Metra. The World’s Best Kits.®MetraOnline.com © COPYRIGHT 2020 METRA ELECTRONICS CORPORATION REV. 4/7/20 INST99-9326B
INSTALLATION INSTRUCTIONS
99-9326B
Attention! Let the vehicle sit with the key
out of the ignition for a few minutes before
removing the factory radio. When testing the
aftermarket equipment, ensure that all factory
equipment is connected before cycling the
key to ignition.
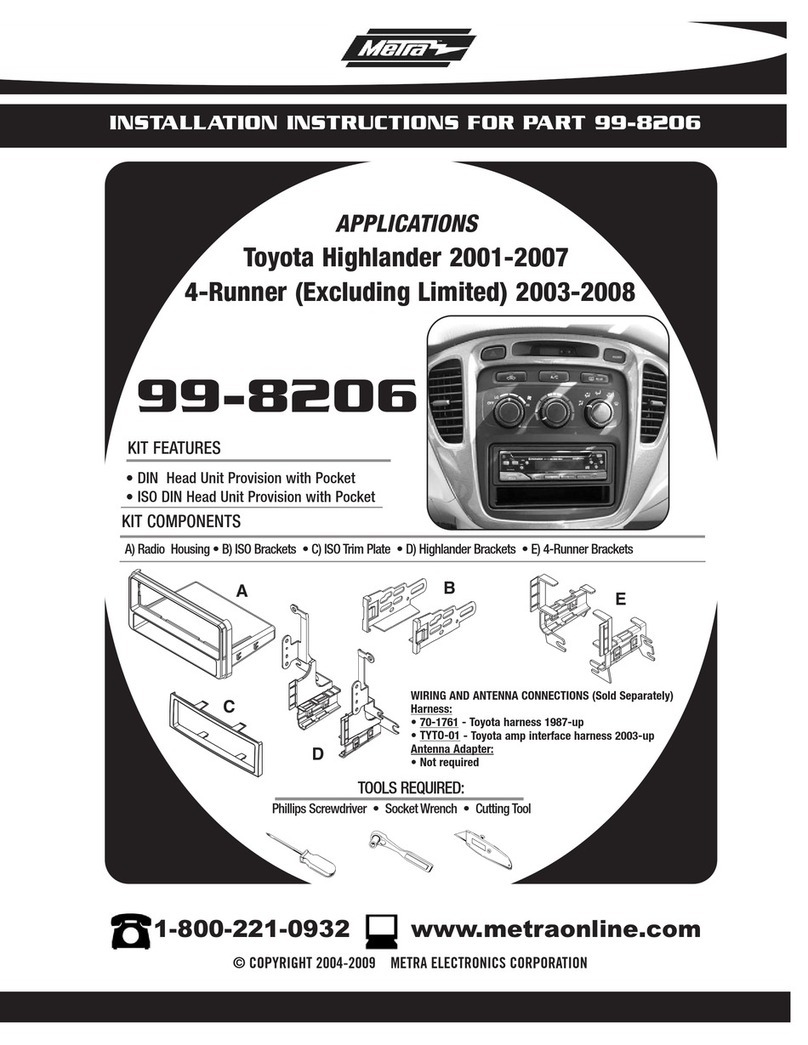
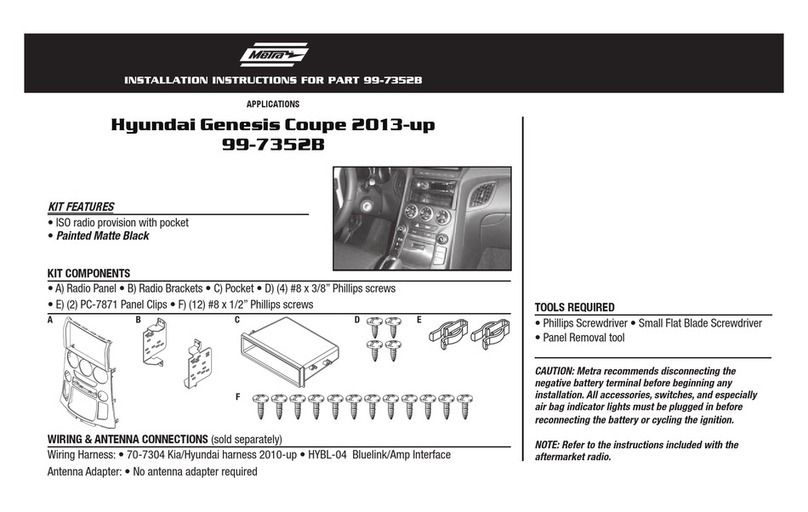
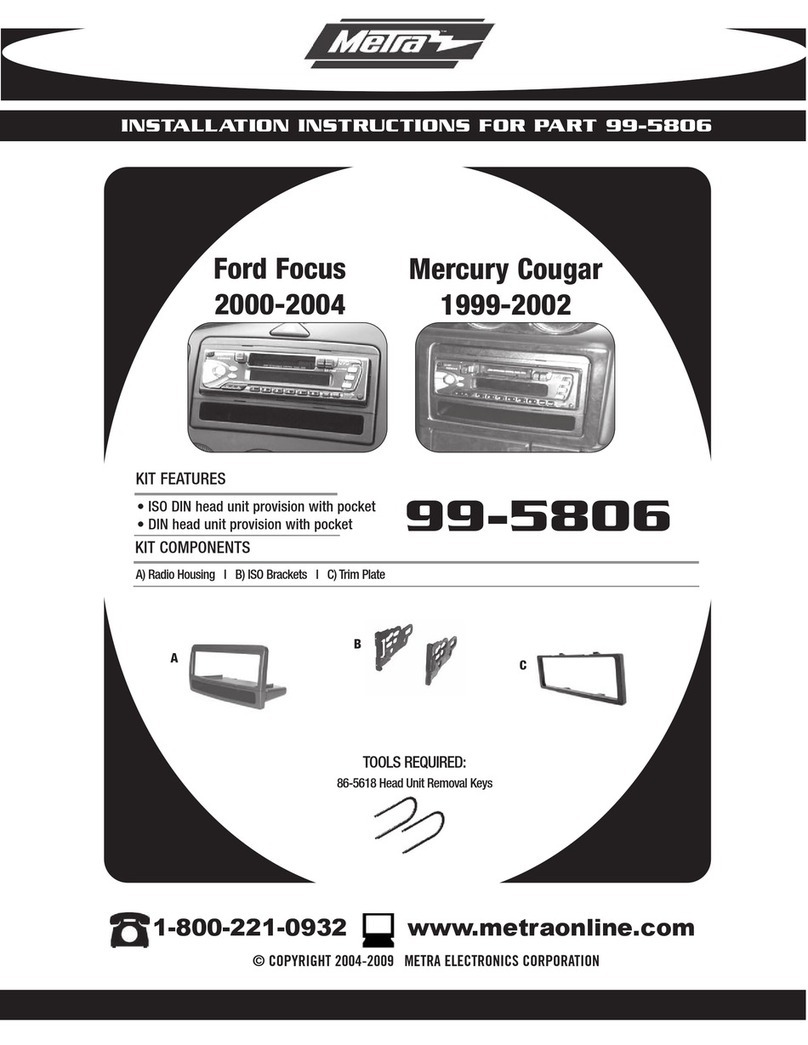
KIT FEATURES
• ISO DIN radio provision with pocket
• ISO DDIN radio provision
• Retains the factory hazard button
• Painted high gloss black with
a matte black trim to match the
factory appearance
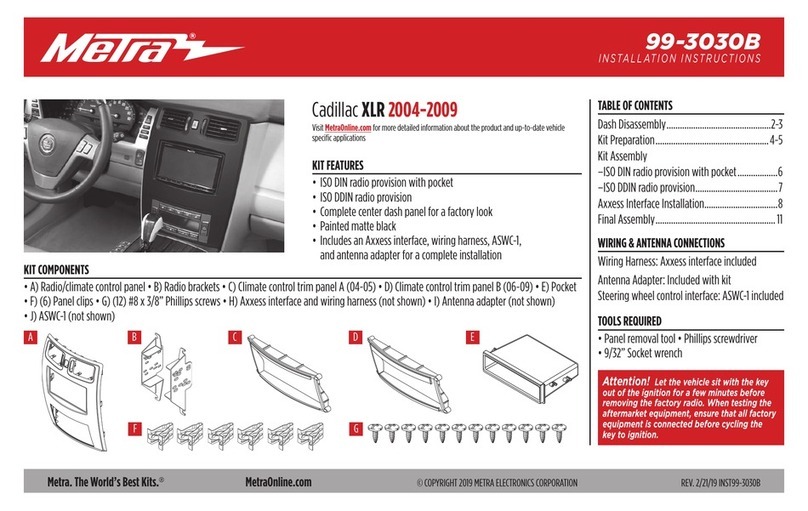
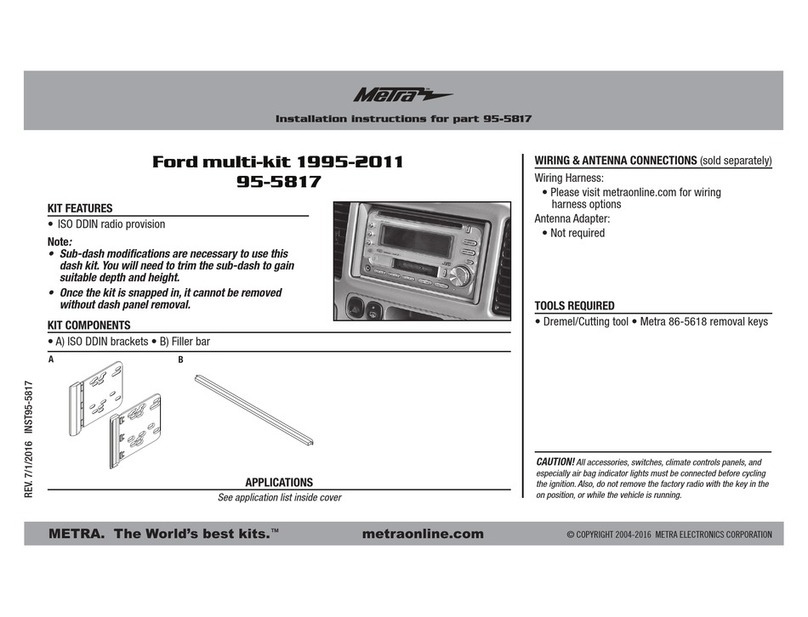
KIT COMPONENTS
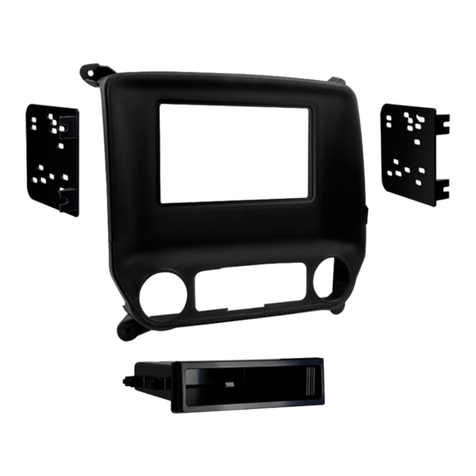
• A) Radio bezel • B) Bezel mount • C) Radio brackets • D) Pocket • E) Phillips screws (4) • F) Panel clips (4)
TOOLS REQUIRED
• Panel removal tool • Phillips screwdriver
• Heavy duty pick tool (or flat-blade screwdriver)
• T-20 Torx screwdriver
TABLE OF CONTENTS
Dash Disassembly ..................................................2
Kit Preparation .......................................................3
Kit Assembly
–ISO DIN radio provision with pocket ..................4
–ISO DDIN radio provision .....................................5
WIRING & ANTENNA CONNECTIONS
(sold separately)
Wiring Harness: • See metraonline for harness
interface solutions
Antenna Adapter: 40-EU55 (sold separately)
A B C
F
D E
Mini Cooper Hardtop coupe 3-dr (F56) 2014-2017 †
Mini Cooper Hardtop sedan 5-dr (F55) 2014-2017
†
Visit MetraOnline.com for more detailed information about the product and up-to-date vehicle
specific applications
† Base model radio without a high-def display
386.257.1187
|
MetraOnline.com
2
1. Remove (2) expanding rivets securing
the bottom of the radio bezel, then
unclip and remove the bezel. (Figure A)
2. Remove (2) Torx T-20 screws securing
the bottom of the radio. (Figure B)
3. Unclip and remove the speaker grille on
top of the dash. (Figure C)
4. Locate the access hole under the speaker
grille. Using a heavy duty pick tool or
flat-blade screwdriver, push down on
the locking clip holding the top of the
radio. It may be best to have a helper
assist by pulling the top of the radio
outward. (Figure D)
5. Slide the radio out, then unplug and
remove.
Continue to Kit Preparation
(Figure B) (Figure D)
(Figure A) (Figure C)
DASH DISASSEMBLY
REV. 4/7/2020 INST99-9326B 3
From the factory radio panel:
1. Remove (2) metal retainer clips. Attach
the clips onto the bezel mount.
(Figure A)
2. Unclip and remove the hazard switch
(Figure A)
To the radio bezel provided with the kit:
3. Attach (4) panel clips provided.
(Figure B)
Continue to Kit Assembly
KIT PREPARATION
(Figure A) (Figure B)
386.257.1187
|
MetraOnline.com
4
ISO DIN radio provision with pocket
1. Remove (2) T-20 Torx screws securing
the a/c vents. (Figure A)
2. Route the hazard switch wiring harness
through the bezel mount, then clip the
mount to the dash. (Figure B)
3. Secure the pocket to the radio brackets
using (4) Phillips screws provided.
(Figure C)
4. Remove the metal DIN sleeve and trim
ring from the aftermarket radio.
5. Slide the radio into the bracket/pocket
assembly, then secure using screws
supplied with the radio. (Figure D)
KIT ASSEMBLY
(Figure B) (Figure D)
(Figure A) (Figure C)
REV. 4/7/2020 INST99-9326B 5
(Figure E) (Figure G)
(Figure F)
KIT ASSEMBLY (CONT.)
6. Locate the factory wiring harness and
antenna connector in the dash and
complete all necessary connections to the
radio. Metra recommends using the proper
mating adapter from Metra and/or Axxess.
Test the radio for proper operation.
7. Slide the radio into the dash, then secure
using (2) a/c vent screws up top, and
(2) Torx T-20 screws removed in Dash
Disassembly down below.
(Figure E)
8. Route the hazard switch wiring harness
through the radio bezel, then clip the bezel
to the dash. Make sure to line up the two
channels (keyways) on the inner sides of
the bezel. (Figure F)
9. Connect the hazard switch, then clip it in to
complete the installation. (Figure G)
386.257.1187
|
MetraOnline.com
6
KIT ASSEMBLY
ISO DDIN radio provision
1. Remove (2) T-20 Torx screws securing
the a/c vents. (Figure A)
2. Route the hazard switch wiring harness
through the bezel mount, then clip the
mount to the dash. (Figure B)
3. Secure the radio brackets to the radio
using screws supplied with the radio.
(Figure C)
4. Locate the factory wiring harness and
antenna connector in the dash and
complete all necessary connections to
the radio. Metra recommends using
the proper mating adapter from Metra
and/or Axxess. Test the radio for proper
operation.
(Figure A) (Figure B) (Figure C)
REV. 4/7/2020 INST99-9326B 7
5. Slide the radio into the dash, then
secure using (2) a/c vent screws up top,
and (2) Torx T-20 screws removed in
Dash Disassembly down below.
(Figure D)
6. Route the hazard switch wiring harness
through the radio bezel, then clip the
bezel to the dash. Make sure to line up
the two channels (keyways) on the inner
sides of the bezel. (Figure E)
7. Connect the hazard switch, then clip it in
to complete the installation. (Figure F)
(Figure F)(Figure D) (Figure E)
KIT ASSEMBLY (CONT.)
KNOWLEDGE IS POWER
Enhance your installation and fabrication skills by
enrolling in the most recognized and respected
mobile electronics school in our industry.
Log onto www.installerinstitute.com or call
800-354-6782 for more information and take steps
toward a better tomorrow.
®
Metra recommends MECP
certified technicians
Metra. The World’s Best Kits.®MetraOnline.com © COPYRIGHT 2020 METRA ELECTRONICS CORPORATION REV. 4/7/20 INST99-9326B
INSTALLATION INSTRUCTIONS
99-9326B
If you are having difficulties with the installation
of this product, contact our Tech Support line
either by phone at 386-257-1187, or email at
techsupport@metra-autosound.com. Before
doing so, look over the instruction booklet a
second time and ensure that the installation was
performed exactly as the instruction booklet
is stated. Have the vehicle apart and ready to
perform troubleshooting steps before contacting
Metra/Axxess Tech Support.

Other Metra Electronics Automobile Accessories manuals
Metra Electronics 99-7389B User manual

Metra Electronics

Metra Electronics 99-7389B User manual

Metra Electronics 99-5807 User manual

Metra Electronics

Metra Electronics 99-5807 User manual

Metra Electronics 95-7326 User manual

Metra Electronics

Metra Electronics 95-7326 User manual

Metra Electronics 99-6536 User manual

Metra Electronics

Metra Electronics 99-6536 User manual

Metra Electronics 99-3410 User manual

Metra Electronics

Metra Electronics 99-3410 User manual

Metra Electronics 95-7018 User manual

Metra Electronics

Metra Electronics 95-7018 User manual

Metra Electronics AW-200GM User manual

Metra Electronics

Metra Electronics AW-200GM User manual

Metra Electronics GMOS-11 User manual

Metra Electronics

Metra Electronics GMOS-11 User manual

Metra Electronics 95-7867 User manual

Metra Electronics

Metra Electronics 95-7867 User manual

Metra Electronics GMLAN29-100 User manual
Metra Electronics

Metra Electronics GMLAN29-100 User manual

Metra Electronics 99-5801 User manual

Metra Electronics

Metra Electronics 99-5801 User manual

Metra Electronics 99-7407 User manual

Metra Electronics

Metra Electronics 99-7407 User manual

Metra Electronics 95-7318 User manual

Metra Electronics

Metra Electronics 95-7318 User manual

Metra Electronics 99-7339B User manual

Metra Electronics

Metra Electronics 99-7339B User manual

Metra Electronics 70-7003 User manual

Metra Electronics

Metra Electronics 70-7003 User manual

Metra Electronics 99-3305 User manual

Metra Electronics

Metra Electronics 99-3305 User manual

Metra Electronics iBeam TE-AHD7M User manual

Metra Electronics

Metra Electronics iBeam TE-AHD7M User manual

Metra Electronics 95-7339S User manual

Metra Electronics

Metra Electronics 95-7339S User manual

Metra Electronics LEXUS 99-8150 User manual

Metra Electronics

Metra Electronics LEXUS 99-8150 User manual

Metra Electronics 95-6556 User manual

Metra Electronics

Metra Electronics 95-6556 User manual

Metra Electronics 99-5850B User manual

Metra Electronics

Metra Electronics 99-5850B User manual

Metra Electronics 99-7343 User manual

Metra Electronics

Metra Electronics 99-7343 User manual

Metra Electronics 95-5703B User manual

Metra Electronics

Metra Electronics 95-5703B User manual

Metra Electronics HONDA RIDGELINE 99-7870G User manual

Metra Electronics

Metra Electronics HONDA RIDGELINE 99-7870G User manual

Popular Automobile Accessories manuals by other brands

Whelen Engineering Company SA315 installation guide

Whelen Engineering Company

Whelen Engineering Company SA315 installation guide

Clifford Garage Door Receiver Premier owner's guide

Clifford

Clifford Garage Door Receiver Premier owner's guide

Audi Volkswagen PXDXVW2 installation guide

Audi

Audi Volkswagen PXDXVW2 installation guide

BRP 715003701 manual

BRP

BRP 715003701 manual

hymer ERIBA Clothes line quick start guide

hymer

hymer ERIBA Clothes line quick start guide

DV8 OFFROAD RBJL-11 installation manual

DV8 OFFROAD

DV8 OFFROAD RBJL-11 installation manual

Toro 07145 installation instructions

Toro

Toro 07145 installation instructions

Romik 1014 installation instructions

Romik

Romik 1014 installation instructions

Yakima HoldUp manual

Yakima

Yakima HoldUp manual

Whispbar S55W Fitting instructions

Whispbar

Whispbar S55W Fitting instructions

Whispbar K189W Fitting instructions

Whispbar

Whispbar K189W Fitting instructions

Keba KeContact P20 manual

Keba

Keba KeContact P20 manual

Techart 096.100.880.009 Mounting instructions

Techart

Techart 096.100.880.009 Mounting instructions

Renkforce RF-4453520 operating instructions

Renkforce

Renkforce RF-4453520 operating instructions

Viessmann 8400 Operation manual

Viessmann

Viessmann 8400 Operation manual

V8 equipment E.BEX manual

V8 equipment

V8 equipment E.BEX manual

Fisher TopLine L operating instructions

Fisher

Fisher TopLine L operating instructions

Prorack 8062003 Assembly manual

Prorack

Prorack 8062003 Assembly manual

manuals.online logo
manuals.online logoBrands
  • About & Mission
  • Contact us
  • Privacy Policy
  • Terms and Conditions

Copyright 2025 Manuals.Online. All Rights Reserved.