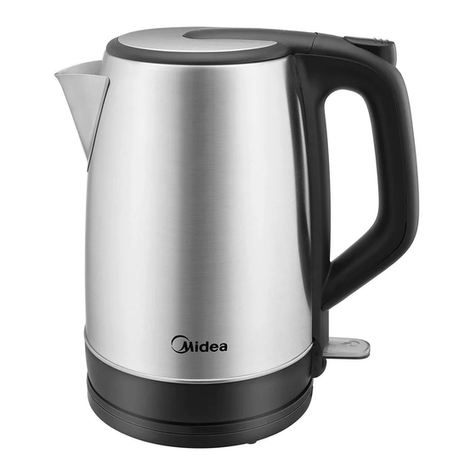
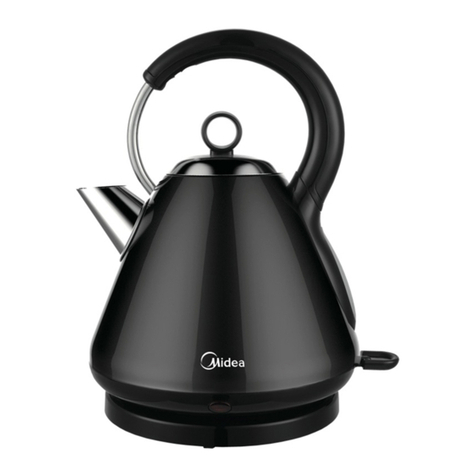
Midea 350123 User manual

USER MANUAL
350123
CONTENT
IMPORTANT SAFEGUARDS......................................................................... 1
Part Name ..................................................................................................... 5
Brief introduction............................................................................................. 5
Technical Date of the Product......................................................................... 6
How to use...................................................................................................... 7
Cleaning ......................................................................................................... 9
IMPORTANT NOTE: Please read the manual carefully before operating your
product. Retain it for future reference.
ELECTRIC KETTLE

1
IMPORTANT SAFEGUARDS
SAFETY PRECAUTIONS
When using electrical appliances, basic safety precautions
should always be followed, including the following:
1. Read all instructions.
2. Do not touch hot surfaces. Use handles or knobs.
3. To protect against fire,electric shock and injury to persons,
do not immerse cord,plugs, base or kettle in water or other
liquid.
4. Never leave the appliance unattended when in use.
Close supervision is necessary when any appliance is used
by or near children.
5. Unplug from outlet when not in use, no water in kettle,
flling water, moving kettle and before cleaning. Allow to cool
before putting on or taking off parts, and before cleaning
the appliance.
6. Do not operate any appliance with a damaged cord or plug
or after the appliance malfunctions, or has been damaged
in any manner. Call our toll-free Customer Assistance
Number for examination, repair or adjustment.
7. Do not use a base unit other than the one supplied. The
use of accessory attachments not recommended by the
appliance manufacturer may result in fire, electric shock or
injury to persons.
8. Do not use outdoors.
9. Do not let cord hang over edge of table or counter, or
touch hot surfaces. Always store excess portion of the
power cord in the compartment of the base unit.
10. Electric kettle must be operated on a flat surface. Do not
place on or near a hot gas or electric burner, or in a
heated oven, or on the top of other electric appliances.
11. Always attach plug to appliance first, then plug cord into
the wall outlet. To disconnect, turn control to off, then . -Staff kitchen areas in shops, office and other working

2
IMPORTANT SAFEGUARDS
remove plug from wall outlet.
12. Do not use appliance for other than intended use.
13. To avoid circuit overload, do not operate another high
wattage appliance on the same circuit.
14. Do not fill kettle when positioned on base. Dry the water
on the bottom of the body before placing it onto the power
base.
15. Be aware of steam being emitted from spout or lid espe-
cially during refilling. Do not remove lid during boiling cycle.
16. Do not use the kettle to heat anything other than water.
17. Do not fill above the “max” indication marking. Do
not operate kettle if water is below miniumum
marking. If the kettle is overfilled, boiling water may be
ejected. The kettle is only to be used with the base unit
provided.
18. Do not insert any object into slots or holes of the kettle.
19. Open the lid with the release button only. Push lid down
to lock in place.
20. Scalding may occur if the lid is removed during the
brewing cycles.
21. This appliance is for HOUSEHOLD USE ONLY.
DO NOT OPERATE APPLIANCE IF THE LINE CORD
SHOWS ANY DAMAGE OR IF APPLIANCE WORKS
INTERMITTENTLY OR STOPS WORKING ENTIRELY.
22.This appliance can be used by children aged from 8 years
and above and persons with reduced physical, sensory or
mental capabilities or lack of experience and knowledge if
they have been given supervision or instruction concerning
use of the appliance in a safe way and understand the
hazards involved. Children shall not play with the appli-
ance. Cleaning and user maintenance shall not be made by . -Staff kitchen areas in shops, office and other working
SAFETY PRECAUTIONS

IMPORTANT SAFEGUARDS
3
children unless they are older than 8 and supervised. Keep
the appliance and its cord out of reach of children aged less
than 8 years.
23.This appliance is intended to be used in household and
similar applications such as:
-Staff kitchen areas in shops, office and other working
environments;
-farm houses;
-by clients in hotels, motels and other residential type envi-
ronments;
-In bed and breakfast type environments;
24.If the supply cord is damaged, it must be replaced by the
manufacturer, its service agentor similarly qualified persons
in order to avoid a hazard.
25.Warning: Avoid spillage on the connector.
26.The heating element surface is subject to residual heat
after use.
SAFETY PRECAUTIONS

4
IMPORTANT SAFEGUARDS
. -Staff kitchen areas in shops, office and other working
SAVE THESE INSTRUCTIONS.
Warning: Misuse may cause potential injury.
The heating element surface is subject to
residual heat after use.
The appliance must not be disposed of with regular household
waste. At the end of its service life, the appliance must be properly
delivered to a collection point for the recycling of electrical and
electronic equipment. By Collection and recycling of old appliances,
you are making an important contribution to the conservation of our
natural resources and provide for environmentally sound and
healthy disposal.

5
Technical Date of the Product
Model No. Rated voltage CapacityRated power Dimensions
220-240V~ 50/60Hz 1.5L1850-2200W 221.4*153.7*246.8mm
350123
Weight
1.25kg
Part Name
Brief introduction
1. Rapid boiling,save time and energy for you.
2. Automatically cuts out for boil-dry protection.
3. 360 Rotational power base.
4. Screen Hologram.
5. Thermostat of high quality.
Rational design, bring convenience and enjoyment to your life
No. Description
1
2
3
4
5
6
Spout
Lid
Lid opening button
Menu Bottom
Handle
Power base
12
3
4
5
6

Product Function Description
6
1.Standby: After power-on, the whole function is brightened for 1-2 seconds (a
long sound prompt), then only real-time temperature is displayed. After 5 minutes
of standby state, screen hologram (not counting the holding time) requires 0.5W
power consumption. 。How to use
Product Menu
For the first time to use or no use for a long time, it is recommended that you
fill to the maximum level mark with fresh tap water, boil and empty the kettle
at least 2 times to clear kettle of any tiny particles. Do not drink such water.
1. Press the lid lock on the handle, and you can open it.
2. Remove the kettle from the base to the filling place. Fill the kettle with
desired amount (no less than the minimum and no more than the maxi-
mum.) Put back the lid; place the kettle back on the base unit.
3. Connect the plug into a power outlet (220-240V, AC), switch the kettle on
by pressing the switch. The light will illuminate to indicate the kettle is
heating.
4. The kettle will automatically switch off once the water has boiled and the
neon light goes off.
5. Lift the kettle from the base, and you can pour out the water into contain-
er.
Menu START/CANCEL
(note: # 1 is Menu and # 2 is START/CANCEL)

Product Function Description
7
2.Function 1: One button boiling, press the switch button directly, display 100
degree 5 seconds, then boil water, no heat preservation.After completion, it will
enter standby mode.
3.Function 2: Boiling water at constant temperature without heat preservation。Press the menu key for the first time, M1 40 degree, M2 80 degree for the
second time, M3 90 degree for the third time, then press the switch key to start,
(40-80-90), press three temperature cycles many times. Burn to the selected
temperature, no heat preservation, no boiling. Repeatedly according to three
function cycles.
If you don't press the switch key, it will automatically enter the working state
(buzzing prompt) after 5 seconds and automatically heat up.
4.Function 3: Boiling water at constant temperature and keeping warm.
Long press menu key once, BOIL switch to WARM, default display M1 40 degree
+ WARM, short press menu key to select temperature (40-80-90), press three
temperature cycles many times, then press switch key to start. Burn to the
selected temperature, heat preservation, not boiling.
5.Function 4: Switching between non-thermal insulation and thermal insulation.
First use the machine default BOIL (i.e. no heat preservation), long press the
menu key to switch WARM (i.e. heat preservation). Next use the memory of this
setting, i.e. if you choose WARM this time, when you choose the temperature
next time, the default M1 40 degrees + WARM.
6.Function 5: Switching of Buzzing Tips.
At the same time, press the switch key and menu key, and select the menu
prompt to cancel.At the same time, press the switch key and menu key, select
the menu prompt sound to restore.
7.Function 6: Screen Display and Extinction Settings.
When boiling water, the temperature is always bright (including heat preserva-
tion). After 5 minutes of standby operation, the screen hologram (not counting
heat preservation time) is displayed.
8.Function 7: Start and cancel.
After each selection of temperature, start heating after touching the switch key
(or waiting for five seconds to work automatically), then press the cancel
program, enter standby, you can re-select the program.
9.Function 8: Activate the screen, press the switch key or menu key for the first
time after the screen is extinguished, and the screen can be activated without
any operation;

8
•Fixed temperature boiling water, no heat preservation operation steps:
(1) Turn on the power supply, the buzzer whistles, the light emitting diode lights
up about 1S and enters the standby mode, and displays the current water
temperature; the standby state is not operated for 5 minutes, then the screen
hologram;If boiling water is needed without heat preservation, jump to step (2);If
you need to boil water to the specified menu temperature for boiling water
without insulation (BOIL mode), jump to step (3);
(2) Standby status, directly press the #2 button, display 100 C 5 seconds, then
boil water, no heat preservation, after completion, buzzer sounds 3 times, into
standby status. (In standby mode, only real-time temperature is displayed, BOIL
and WARM are not displayed)
(3) In standby state, click the #1 button, select the menu, When the boiling
water.reaches the temperature value of the corresponding menu, the buzzer
sounds three times and enters the standby state. In the process of boiling water,
click the #2 button again and cancel the boiling water corresponding to the menu
to enter the standby state.
•Insulation and Warm function switching operation steps:
Long press 1 key to switch the mode of BOIL (i.e. no heat preservation) and
WARM (i.e. heat preservation). The default BOIL mode is used for the first time.
Memorize the settings of BOIL and WARM (that is, after shutdown, boot into
standby mode, click the #1 button, and remember the previous mode).
•Fixed temperature boiling water, heat preservation operation steps:
If you need to boil water to the specified menu temperature for boiling, thermal
insulation (WARM mode), the operation steps are as follows;
(1) If in WARM mode, jump directly to step (2), otherwise, switch to WARM mode
and proceed to step (2).
(2) In standby state, click the #1 button, select the menu, "M1 40 C", "M2 80 C",
"M3 90 C". After choosing the corresponding menu, click the #2 button to start
boiling water. If no #2 button is clicked, it will automatically enter the working
state for 5 seconds. When the boiling water reaches the temperature value of the
corresponding menu, the buzzer sounds 3 times, enters the heat preservation
state, the heat preservation ends, the buzzer sounds 2 times, enters the standby
state. In the process of boiling water and keeping warm, click M2 button again
and cancel the boiling water and keeping warm corresponding to the menu and
enter standby state.
(3) Warm mode, enter standby state, press #2 button directly, display 100 C 5
seconds, then boil water, no heat preservation, after completion, buzzer sounds 3
times, enter standby state. You need to remember the previous WARM mode,
that is, when you click the # 1 button, or in WARM mode. (In standby mode, only
real-time temperature is displayed, BOIL and WARM are not displayed)
•After entering the shutdown mode, click the 1 button or the 2 button to enter
Botton Function Description
9
Cleaning
Note
To prolong the kettle's life, please clean the mineral deposits in the kettle
regularly.
Always unplug from the plug socket and allow to cool down before cleaning.
Do not use chemical, steel wool, or abrasive cleaners to clean the outside
of the kettle, as these will scratch the surface and fade the outside color.
1. Fill the kettle with 0.5L white vinegar and the remainder with water and
allow to stand for over 1 hours ;
2. Empty the solution from the kettle. Wipe off the deposits remained with
damp cloth
3. Fill the kettle with clean water, bring to boil and then discard the water.
Repeat and the kettle will be ready to use;
4. If necessary, repeat the operations above for several times;
5. Do not immerse into water. The surface of the kettle may be wiped over
with a damp cloth and polished with a soft dry cloth.
6. Grasp the top of the scale filter and pull upwards to remove. Wash with
clean water and dry thoroughly before replacing in the kettle.
Botton Function Description
standby mode.
•In standby mode, press # 2 button for a long time and enter shutdown mode.
•At the same time, click # 1 and # 2 buttons, select the menu prompt voice cancel ,
and then click # 1 and # 2 buttons, select the menu prompt voice recovery. At the
same time, click the # 1 button and # 2 button to cancel and restore the buzzer
prompt.
*Note: 1 is TEMP and 2 is START/CANCEL
*Note:From high altitude areas to low altitude areas, you need to power on within
2 seconds At the same time, click the two buttons twice to enter the self-test
mode, update the boiling point, and when the self-test mode ends,It can be used
normally after being powered on again.
Table of contents
Other Midea Kettle manuals

Midea
Midea MKS1723D User manual

Midea
Midea MK-17DC-GN User manual

Midea
Midea 3000 Series User manual

Midea
Midea FP-68PKL017LDTM-T User manual

Midea
Midea MK-17S26E2 User manual

Midea
Midea MK-HE1533 User manual

Midea
Midea MK-17S30B2-E5 User manual

Midea
Midea MK-15H01A User manual

Midea
Midea MK-17S26C2 User manual

Midea
Midea MEK17GT-E8 User manual

Midea
Midea MK-17S31B User manual

Midea
Midea MK-17S31A User manual

Midea
Midea MK-HE1508 User manual

Midea
Midea MK-15H01A2E User manual

Midea
Midea MEK17DW-W User manual

Midea
Midea MK-17G02A2 User manual

Midea
Midea 350125 User manual

Midea
Midea MK-17S18D User manual

Midea
Midea MKS1723J User manual

Midea
Midea 350130 User manual