Mitel 5603 Instruction sheet

MITEL
COMMUNICATIONS DIRECTOR
AND 5000 COMMUNICATIONS
PLATFORMS
CONFIGURATION MANUAL
MITEL 5603 WIRELESS HANDSET

ii
NOTICE
The information contained in this document is believed to be accurate in all respects but is not
warranted by Mitel Networks™ Corporation (MITEL®). The information is subject to change without
notice and should not be construed in any way as a commitment by Mitel or any of its affiliates or
subsidiaries. Mitel and its affiliates and subsidiaries assume no responsibility for any errors or
omissions in this document. Revisions of this document or new editions of it may be issued to
incorporate such changes.
No part of this document can be reproduced or transmitted in any form or by any means - electronic
or mechanical - for any purpose without written permission from Mitel Networks Corporation.
Trademarks
Mite is a registered trademark of Mitel Networks Corporation.
Other product names mentioned in this document may be trademarks of their respective companies
and are hereby acknowledged.
Mitel 5603 Wireless Handset
Configuration Guide
Release 6.0
March 2013
®,™ Trademark of Mitel Networks Corporation
© Copyright 2013, Mitel Networks Corporation
All rights reserved

iii
Table of Contents
1 Introduction ....................................................................................................................................... 1
1.1 Prerequisites ................................................................................................................................ 1
1.2 Abbreviations and Glossary ........................................................................................................ 1
1.3 Functionality matrix .................................................................................................................... 2
2 Getting started with Configuration of the Handset........................................................................ 3
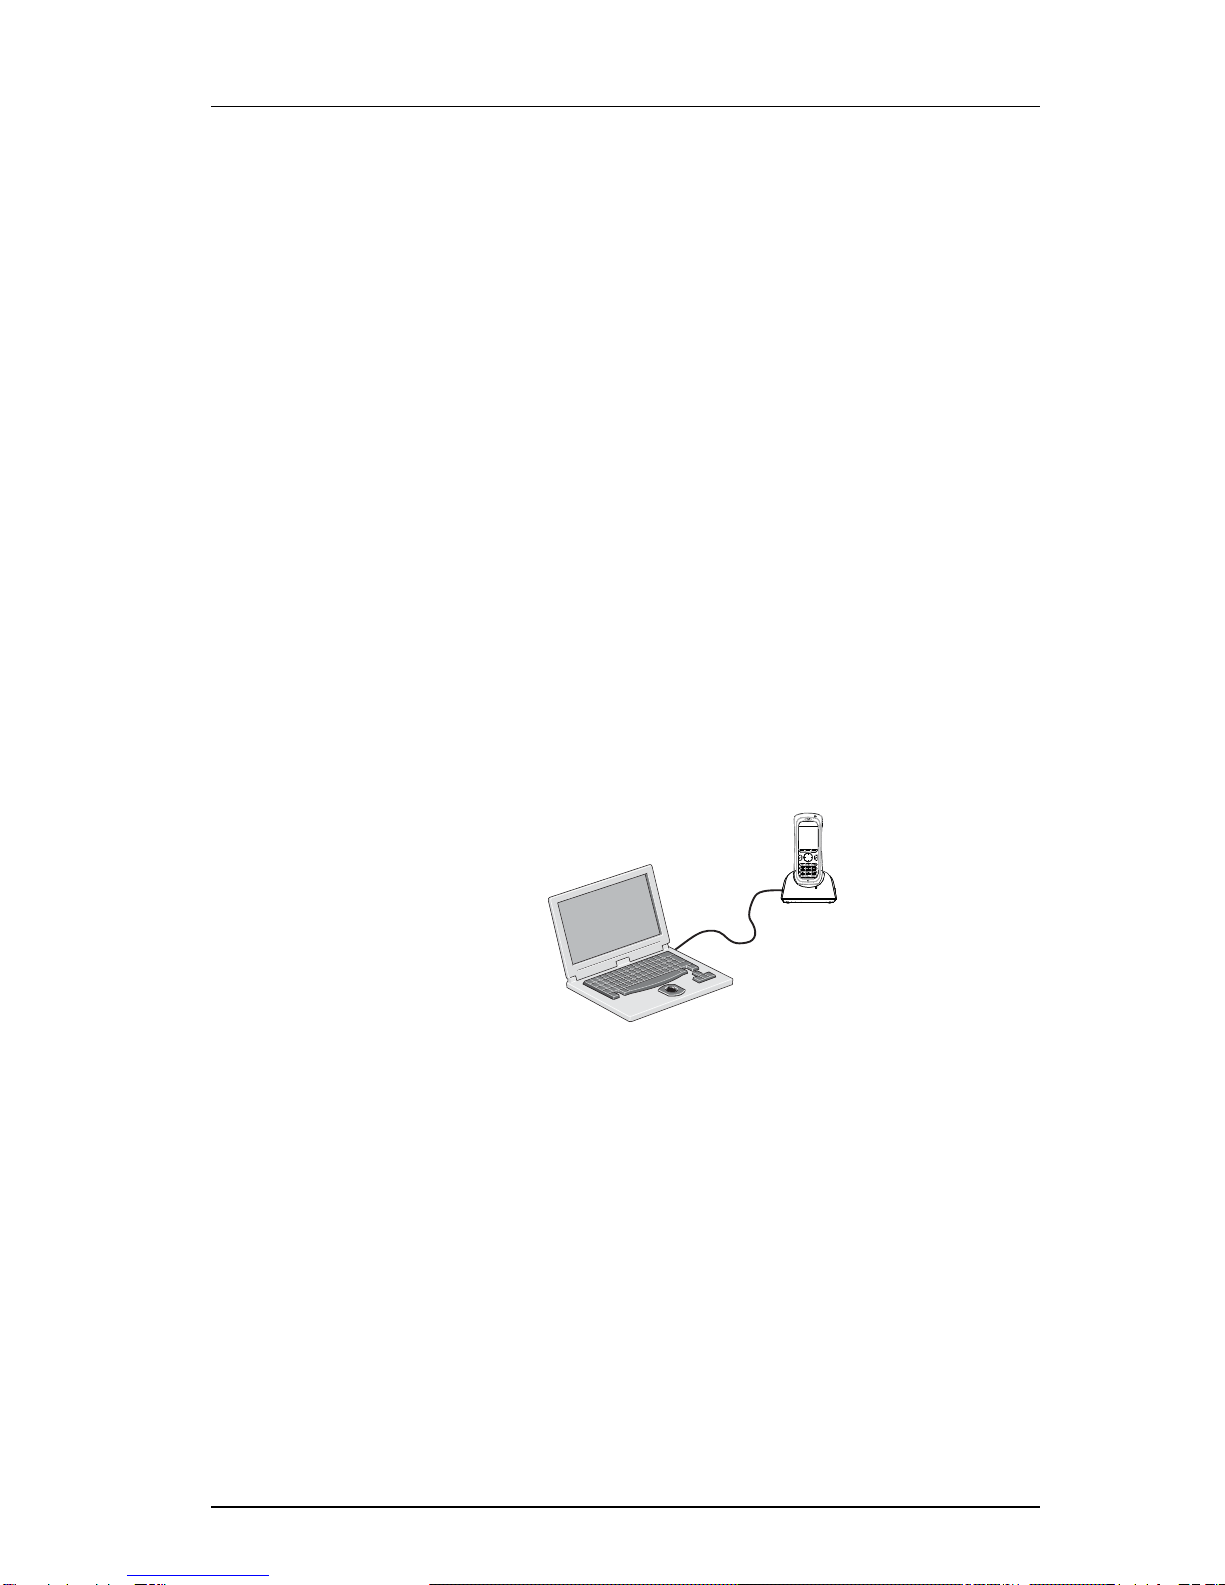
2.1 PDM ............................................................................................................................................ 3
2.2 WSM3 ......................................................................................................................................... 3
2.2.1 Via Chargers .......................................................................................................................3
2.2.2 Over-the-air via IP-DECT ..................................................................................................4
3 Installation of Handsets .................................................................................................................... 5
3.1 Preparing PDM or WSM3 for handling of the Handset ............................................................. 5
3.2 Installation of a new Handset ...................................................................................................... 5
3.2.1 Installation of Handset in IP-DECT System using Easy Registration ...............................5
3.2.2 Installation of Handset in IP-DECT System (Manually) ...................................................6
4 Maintenance....................................................................................................................................... 7
4.1 Definitions .................................................................................................................................. 7
4.2 Upgrade handset software ........................................................................................................... 7
4.3 Perform a Factory reset ............................................................................................................... 7
4.4 Replacement procedure choice guide .........................................................................................7
4.4.1 Data included in a replacement transfer .............................................................................8
4.5 Replacement of handset with the WSM3 ................................................................................... 8
4.5.1 Handset Replacement with WSM3 in IP-DECT System ...................................................8
4.6 Replacement of the handset with the PDM ................................................................................ 9
4.6.1 Handset Replacement with PDM in IP-DECT System ......................................................9
4.7 Brazil or other Latin America countries – DECT frequency configuration ............................. 10
5 Handset Configuration..................................................................................................................... 11
5.1 Configure a Handset with a Template ........................................................................................11
5.1.1 Create a template .............................................................................................................. 11
5.1.2 Apply a template .............................................................................................................. 11
5.1.3 Save a Handset Configuration as a Template ...................................................................12
5.1.4 Synchronizing a Handset with PDM/WSM3 ...................................................................12
5.2 Voice Mail ................................................................................................................................. 12
5.2.1 Wildcard characters in voice mail phone numbers ..........................................................13
5.3 Central Phonebook .................................................................................................................... 13
5.4 Company Phonebook ................................................................................................................ 13
5.4.1 Create a Phonebook File ..................................................................................................13
5.4.2 Upload a Company Phonebook File ................................................................................13
5.4.3 Remove Company Phonebook Entries .............................................................................13
5.5 Call Services ............................................................................................................................. 13
5.6 In Call Menu ............................................................................................................................. 14

Mitel 5603 Wireless Handset Configuration Guide
iv
5.6.1 Configure Own In Call Functions .....................................................................................14
5.7 Customize Soft Keys .................................................................................................................15
5.7.1 Create a Soft Key to an In Call Function ..........................................................................15
5.7.2 Hide a Soft Key to an In Call Function ............................................................................15
5.7.3 Configure Contact Soft Key .............................................................................................15
5.8 Own Line Settings .....................................................................................................................15
5.9 Uploadable Language ................................................................................................................15
5.10 Personalizing the Menu ...........................................................................................................16
5.10.1 Show/Hide Missed Call Window ....................................................................................16
5.11 Set Action when Handset Placed in Charger ...........................................................................16
5.11.1 Actions when not in Call .................................................................................................16
5.11.2 Clear Lists when inserted in Charger ..............................................................................17
5.12 Disable Homebase GAP Registration .....................................................................................17
5.13 Require Encrypted Base Station ..............................................................................................17
5.14 Protect registration from user deletion ....................................................................................17
5.15 Emergency Call Number .........................................................................................................18
5.16 Audio adjustment .....................................................................................................................18
5.17 Headset configuration ..............................................................................................................18
5.18 Owner identification in the idle display. ..................................................................................19
5.19 Import Contacts .......................................................................................................................19
5.19.1 Create a Local Phonebook File .......................................................................................19
5.19.2 Upload a Local Phonebook File ......................................................................................19
6 Administration.................................................................................................................................. 20
6.1 Admin Menu Tree .....................................................................................................................20
6.2 Quick Access to the handset’s Device Information ...................................................................21
6.3 LED indications .........................................................................................................................21
7 Troubleshooting................................................................................................................................ 22
7.1 Fault Symptoms .........................................................................................................................22
7.2 Display Information ...................................................................................................................22
8 Related Documents........................................................................................................................... 24

1
Introduction
1 Introduction
This document is a guide for installing, configuring and maintaining functionality of the Mitel®
5603 DECT handsets.
1.1 Prerequisites
• Make sure that the following documents are available:
- Mitel 5603 Wireless Handset User Guide
- Portable Device Manager (PDM) Windows Version Installation and Operation Manual
- IP-DECT Wireless Messaging Gateway (WSM3) Installation and Operation Manual.
- Mitel 5603/5604/5607 Programmer Installation and Operation Manual
-Mitel 5603/5604/5607/5624 Rack Charger Installation and Operation Manual
• Install PDM or WSM3.
See the corresponding Installation and Operation Manual above. This enables customizing
of the behaviour of the handset to suite each user profile and the specific PBX used in the
system. Some functions can also be configured directly in the handset. The PDM is aimed
for smaller sites where the handsets are within reach. The WSM3 makes it possible to
administrate the handsets centrally via a web interface without the need to collect them.
• Install a 5603/5604/5607 Programmer or 5603/5604/5607/5624 Rack Charger.
See the corresponding Installation and Operational Manual above.
Note: In the case of IP-DECT and when WSM3 is used, the charger is not needed.
It is recommended that the reader has basic knowledge of the Ascom system and basic
knowledge of subscribing handsets to the PBX.
1.2 Abbreviations and Glossary
DECT Digital Enhanced Cordless Telecommunications:
global standard for cordless telephony.
WSM3 Wireless Services and Message gateway
An application running on an ELISE3 module, that enables wireless services to and
from portable devices and chargers.
IPDI International Portable DAM Identity
DAM (DECT Authentication Module)
See IPEI for more information.
IPEI International Portable Equipment Identity:
IPEI/IPDI is needed to enable network subscription of the handset. At delivery of
the handset, IPEI and IPDI are the same and either can be used for network
subscription. If one handset is replaced with another using the Easy replacement
procedure the IPDI will be exchanged and IPEI and IPDI will no longer be the
same. If the IPEI and the IPDI differ, the IPDI shall be used for network
subscription.
OTA Over The Air
PBX Private Branch Exchange:
Telephone system within an enterprise (Mitel 3300 ICP or Mitel 5000 CP) that
switches calls between local lines and allows all users to share a certain number of
external lines.
PDM Portable Device Manager
An application, running on a PC, for management of portable devices, charging
racks, etc.

Mitel 5603 Wireless Handset Configuration Guide
2
1.3 Functionality matrix
The following matrix shows the features that require settings via PDM/Device Manager.
User ID User ID identifies the set of user parameters possible to save and administrate via
PDM. It can be moved together with user parameters between handsets. It is
normally set automatically at DECT subscription to be equal to call number.
Company Phonebook
Central Phonebook
Voice mail access
Upload language
Call services
Emergency number
Base station encryption
Upload Language

3
Getting started with Configuration of the Handset
2 Getting started with Configuration of the Handset
It is possible to configure the handset by inserting it into a 5603/5604/5607 Programmer or
5603/5604/5607/5624 Rack Charger. The charger is connected via USB to PDM, or via
Ethernet to WSM3.
In the case of IP-DECT, it is possible to configure the handset over the air.
This chapter describes how to configure handsets in different system setups:
• with PDM
• with WSM3 via chargers
• with WSM3 over-the air
2.1 PDM
The Windows Version is run on a PC. The handset is configured via PDM as follows:
• Connect a 5603/5604/5607 Programmer or 5603/5604/5607/5624 Rack Charger via USB to
the computer running PDM.
•StartPDM.
• Place the handset in this charger which shall be connected to PDM. The handset can either
be turned off or turned on when placing it in the charger. A handset that is turned off will
start up automatically and the battery charging symbol will be displayed.
For instructions on how to use PDM, see the Portable Device Manager (PDM), Windows
Version Installation and Operation Manual.
Figure 1. Configuration of handsets via PDM Windows Version
2.2 WSM3
The WSM3 runs on an ELISE3 module.
For instructions on how to use the WSM3, see the IP-DECT Wireless Messaging Gateway
(WSM3) Installation and Operation Manual.
2.2.1 Via Chargers
• Connect a 5603/5604/5607 Programmer or 5603/5604/5607/5624 Rack Charger via the
Ethernet port to the network.
The charger is by default configured to connect to the network using DHCP. If DHCP is not
used in the network, connect each charger via USB to a PDM Windows Version and
configure a static IP address.
• Start the WSM3.
Figure1.
PDM

Mitel 5603 Wireless Handset Configuration Guide
4
• Place the handset in a charger that is connected to the WSM3.
Figure 2. Configuration of handsets via WSM3 and chargers.
2.2.2 Over-the-air via IP-DECT
There is no external equipment needed besides WSM3 and IP-DECT. Please proceed with
3 Installation of Handsets on page 4.
Figure 3. Configuration of handsets via WSM3 and over-the-air.
Figure2.
Figure3.
Client
WSM
IP
Client
WSM
IPBS
IP-DECT
System

5
Installation of Handsets
3 Installation of Handsets
This section describes the recommended procedure for installing and configuring handsets.
There are several ways to install a handset but the procedures described here guarantees simple
maintenance of the system.
It is recommended to use the WSM3 to install and maintain handsets in a large system. The
reason is that it enables to install, upgrade and configure a large amount of handsets
simultaneously. Another benefit is that the collection of the handsets from the user is not
needed. They can be maintained while placed in network connected Advanced Desktop
Chargers on the users desks. Network connected Charging Racks can also be used, or over the
air in the case of IP-DECT.
The PDM enables administration of handsets inserted in a 5603/5604/5607 Programmer or
5603/5604/5607/5624 Rack Charger connected via USB to the administrator’s computer.
3.1 Preparing PDM or WSM3 for handling of the Handset
If the parameter definition file (.def file) for the handset is not present in the PDM Windows
Version or WSM3, it can be added by following the procedure below. The parameter definition
file and software files are delivered as a package file with the extension '.pkg'. Note that
template files (.tpl) may also be included in a package file.
1 Open the PDM or the WSM3.
2IntheFile menu, select Import > Packages.
3 Select the package and click "OK".
The package will imported and the files will be created; one definition file with the extension
.def and one software file with the extension .bin. Template files may also be created.
File extensions are further explained in an appendix in Portable Device Manager (PDM),
Windows Version Installation and Operation Manual.
3.2 Installation of a new Handset
The installation basically contains three steps:
• Subscription towards the IP-DECT system – needed to be able to make calls and send
messages (Mandatory).
• Create an identity for the handset in the PDM/WSM3 – needed to be able to configure the
behaviour of the handset and take backups of the handset configuration (Recommended).
• Configure the handset using PDM/WSM3 – customize the behaviour of the handset to suite
each user profile and the specific PBX used in the system (Recommended).
How to install the handset depends on the system to be used. Before starting, check which
chapter that suits best.
3.2.1 Installation of Handset in IP-DECT System using Easy Registration
A handset can subscribe to an IP-DECT system automatically if the following are fulfilled:
• The IP-DECT system is configured for Easy Registration, see the IP-DECT Base Station V2
Installation and Operation Manual.
• The handset’s extension number and IPEI are registered in the IP-DECT system, see the
IP-DECT Base Station V2 Installation and Operation Manual.
• The handset is not subscribed to any systems.
• The handset software is version 4.0.2 or higher.

Mitel 5603 Wireless Handset Configuration Guide
6
Subscribe
Subscribe the handset towards the IP-DECT system. The subscription procedure is described in
the Mitel 5603 Wireless Handset User Guide. The User ID is used to identify the handset when
it is connected to PDM/WSM3 and will be visible in the Number column.
Note: The User ID can be viewed by navigating to the menu:
Admin menu > Device info > User ID
To find the Admin menu, see 6.1 Admin Menu Tree on page 18.
See also examples of handset configurations that can be made in chapter 5 Handset
Configuration on page 13.
3.2.2 Installation of Handset in IP-DECT System (Manually)
Subscribe the handset
1 Assign the extension number for the handset in the IP-DECT system. See the IP-DECT
Base Station V2 Installation and Operation Manual.
2 Subscribe the handset towards the IP-DECT system. The subscription procedure is
described in Mitel 5603 Wireless Handset User Guide.
In order to easily identify the handset, both the IPDI and the User ID are shown in the handset
when initiating the subscription procedure.
See also examples of handset configurations that can be made in chapter 5 Handset
Configuration on page 13.

7
Maintenance
4 Maintenance
4.1 Definitions
In the replacement descriptions, the handsets are defined as:
• "old handset" is the handset to be replaced, possibly damaged but still working
• "new handset" is the replacement handset that will get the settings used in the old handset
4.2 Upgrade handset software
It is possible to upgrade or reinstall the software on a handset. All data is left intact on the
handset when upgrading the software.
See also Installation and Operation Manual for PDM or WSM3.
1 Open the PDM or the Device Manager in the WSM3.
2IntheDevices tab, right-click the handset you want to upgrade.
3 Select "Upgrade software...".
4IntheAvailable software drop-down list, select the desired software file (.bin). If needed,
import the software file to be used by clicking "Import". Locate the software file (.bin or
.pkg) and click "Open".
4.3 Perform a Factory reset
When a factory reset is done on a handset, all configuration settings will be restored to default
values, PBX subscriptions will be removed and all data are removed. This includes contacts,
call lists etc. The software will be left intact.
Factory Reset using PDM
1 In PDM, click the Device tab and mark the handset to be factory reset. Note that the
handset must be online.
2 In the Device menu, select "Factory reset". Alternatively, right-click the handset and
select "Factory reset".
3AReset devices dialog appears, click "Yes". The handset will be restarted.
Factory Reset using Handset
It is possible to factory reset a handset from its Admin menu.
1 To activate the Admin Menu, enter the Call time screen and press > * < < * <.
2 Select "Factory Reset".
3AReset portable? dialog appears, press "Yes". The handset will be restarted.
4.4 Replacement procedure choice guide
Depending on situation, two different replacement procedures can be chosen; replacement via
PDM/WSM3 and Easy Replacement. Use the following list as a guide to choose which
procedure to use.
• If a handset needs to be replaced due to for example a broken display, see the Mitel 5603
Wireless Handset User Guide.

Mitel 5603 Wireless Handset Configuration Guide
8
• If the electrical connection is damaged, it might not be possible to follow the Easy
Replacement procedure. Depending on fault, it might work to do a replacement via PDM/
WSM3, see 4.6 Replacement of the handset with the PDM on page 10 or 4.5 Replacement of
handset with the WSM3
• If two handsets and their settings shall be switched between two users, follow 4.6
Replacement of the handset with the PDM or 4.5 Replacement of handset with the WSM3.
4.4.1 Data included in a replacement transfer
The following data is replaced during a replacement:
• User parameters (including User ID)
• Contacts (entered by the user)
Note that the following data is not replaced:
• DECT registration
• Call list
• Company phonebook
• Downloaded Language
4.5 Replacement of handset with the WSM3
Both the old handset and the new handset must be of the same device type. The same extension
number is assigned to the new handset. To see which data that is replaced during this process,
see 4.4.1 Data included in a replacement transfer on page 8
Make sure that the old handset is saved in the WSM3. Start the Device Manager in the WSM3
and navigate to the "Numbers" tab. There shall be a tick in the "Saved" column for the old
handset.
If the handset is not saved, insert it into a desktop charger or rack charger connected to WSM3
and perform a save, see Portable Device Manager (PDM), Windows Version Installation and
Operation Manual.
If it would be impossible to save the old handset settings, stop this replacement procedure.
Instead unsubscribe the old handset from the PBX, register the new handset and follow the
instructions for installing a handset, see 3.2 Installation of a new Handset on page 4.
When the handset is saved, unsubscribe the old handset from the PBX.
The following steps are described in two different scenarios, check which one suits the best
before proceeding.
4.5.1 Handset Replacement with WSM3 in IP-DECT System
Note: The handset to be installed must not have any previous valid registrations. If it has a valid
registration, unsubscribe the handset.
1 Unsubscribe the old handset. If the unsubscription cannot be performed in the handset,
unsubscribe the handset via the IP-DECT interface. See the corresponding IP-DECT
documentation.
2 Subscribe the new handset with the same extension number as the old handset had. The
subscription procedure is described in the Mitel 5603 Wireless Handset User Guide.
3 During the subscription procedure, the handset’s User ID will automatically be set to be
the same as the extension number.

9
Maintenance
Note: The User ID can be viewed in the handset by navigating to the menu
Admin menu > Device info > User ID
4 Insert the handset into a desktop charger or rack charger connected to WSM3 (not
needed if an over the air connection is used). Navigate to the Numbers tab in WSM3
Device Manager.
The new handset now has the same User ID as the old handset. It will automatically be
synchronized and data and parameter settings from the old handset will be transferred to
the new handset.
The synchronization will take a while if the Contacts in the original handset contains a
large number of contacts.
4.6 Replacement of the handset with the PDM
To see which data that is replaced during this process, see 4.4.1 Data included in a replacement
transfer on page 8.
Both the old handset and the new handset must be of the same device type. The same extension
number is assigned to the new handset.
The new handset should not be subscribed towards the PBX yet.
1 Perform a factory reset, see 4.3 Perform a Factory reset on page 7, if the new handset
has been previously used.
2 Make sure that the handset is saved in the PDM. In the Numbers tab, a saved handset has
the symbol in the Saved column. If not, right-click the handset and select "Save" in
order to transfer the settings to the new handset later on.
Note: If it is impossible to save the old handset settings, stop this replacement procedure.
Instead register the new handset and follow the instructions for installing a handset, see 3.2
Installation of a new Handset on page 5.
The following steps are described in two different scenarios, check which one suits the best
before proceeding.
4.6.1 Handset Replacement with PDM in IP-DECT System
Note: The handset to be installed must not have any previous valid registrations. If it has a valid
registration, unsubscribe the handset
1 Unsubscribe the old handset. If the unsubscription cannot be performed in the handset,
unsubscribe the handset via the IP-DECT interface. See the corresponding IP-DECT
documentation.
2 Subscribe the new handset with the same extension number as the old handset had. The
subscription procedure is described in the Mitel 5603 Wireless Handset User Guide.
During the subscription procedure, the handset’s User ID will automatically be set to the
same as the extension number. The User ID is used to identify the handset when it is
connected to PDM and will be visible in the Number column.
Tip: The User ID can be viewed by navigating to the menu:
Admin menu > Device info > User ID.
3 Insert the new handset into a desktop charger or rack charger connected to the PDM.

Mitel 5603 Wireless Handset Configuration Guide
10
4 A dialog window appears, asking the user to decide whether to use the Number settings
in PDM or the Number settings in the device. Select "PDM".
The handset will automatically be synchronized and all data and parameter settings will
be transferred to the new handset. The synchronization will take a while if the Contacts
in the original handset contains a large number of contacts.
4.7 Brazil or other Latin America countries – DECT frequency configuration
Note: This chapter is only applicable if the handset is used in Brazil or other Latin American
countries.
In order to change the operating frequency band, the following preconditions must be fulfilled:
• The frequency set to "Not initiated". This can be checked by entering the Admin menu, see 6
Administration on page 20, follow the path:
Admin menu > Device info > Hardware.
Scroll down to “Frequency band”.
• The handset must not have a DECT registration. If it already has, perform a Factory reset,
see 4.3 Perform a Factory reset on page 7.
1 Enter the Admin Menu, see 6 Administration on page 20.
2 Select "Frequency band" and select the desired band.
• LA (Latin America): 1910-1930 MHz
• Brazil: 1910-1920 MHz
3 Restart the handset.
4 Register the handset.
5 The frequency band option will no longer be available.
Note: The selection is persistent and will stand a factory reset.

11
Handset Configuration
5 Handset Configuration
Note: This chapter describes settings in parameter definition files (.def). These files are
regularly updated and settings may change slightly. For example "On" to "Enable" or a
parameter can be moved to another directory.
5.1 Configure a Handset with a Template
A template contains one or more parameter settings. By using a template, the same
configuration can easily be applied to many handsets simultaneously. Templates are also an
efficient way to give good control over which changes that are applied to each handset.
Templates enables configuration of all aspects of a handset from sound volume to keypad short
cuts.
Your supplier can provide example templates for different PBX’s. The handset will have full
functionality towards the PBX even without such a template. By using such a template, though,
the handset will be customized for that PBX with menu options for PBX specific functions such
as Callback.
A template can be created (see 5.1.1 Create a template) and/or imported (see the Portable
Device Manager (PDM), Windows Version Installation and Operation Manual).
Note: The 5603 Wireless Handset ships with default in-call and out-of-call menus tailored for
operation with the MCD (3300 ICP). Templates for these same menus for use with the Mitel
5000 CP Release 6.0 and higher are available and can be applied using the Desktop PDM with
the Desktop Programmer or WSM3.
To access the 5603 Feature Menu Template for 5000CP:
1. In your browser, go to www.mitel.com, click Login, and log in to Mitel OnLine.
2. Move your cursor over Support, and select Software Downloads.
3. Click on IP-DECT.
4. Click on the 5603 Feature Menu Template for 5000 CP.
5.1.1 Create a template
1 Open the PDM or the Device Manager in the WSM3.
2 Select the Templates tab and open the menu "Template > New...". The Create Template
window is opened.
3 Select the device and parameter version that matches the software version installed on
the handset. Give the template a descriptive name.
The parameters that are not part of the template will be left unchanged on the handset.
The parameter version of an installed handset is visible under the Numbers tab or the
Devices tab.
4 Select the checkbox of each parameter that you want to be part of this template and enter
the proper value.
5 Click "OK" to save your template.
5.1.2 Apply a template
1 Open the PDM or the Device Manager in the WSM3.

Mitel 5603 Wireless Handset Configuration Guide
12
2IntheNumbers tab, right-click the handsets you want to apply the template to.
3 Select "Run template...".
Only templates with a parameters version matching the selected handsets will be shown.
Select the template you want to apply and click "OK".
4 The template is applied. The number of parameters in the template will affect the time it
takes to apply the template to the selected handsets.
When looking at a handset under the Numbers tab, the column Last run template will
show the name of the most recently applied template.
5.1.3 Save a Handset Configuration as a Template
It is possible to save all settings of a handset as template. Please note that this does not include
contacts and other personal data. The template will only contain configuration data.
This template can be used as a backup if your want to restore the configuration of the handset at
a later stage or as a template that can be applied to a number of handsets.
1 Some parameters are user specific. If it is decided to apply this type of template to
several handsets, the following parameters may be excluded:
• Owner ID - A text string specified in standby mode. The parameter is located directly
under "Settings".
• Phone lock PIN code - The security code used to unlock the keypad. The parameter is
located under Settings > Locks.
2 Open the PDM or the Device Manager in the WSM3.
3IntheNumbers tab, right-click the handset you want to save as a template.
4 Select "Use as a template...". Enter a descriptive name for the template.
5 The Edit template window is opened. By default, all parameters are selected and are
saved when clicking on "OK".
If one or more parameters should be excluded, remove them by de-selecting the
checkbox next to the parameter.
6 Click "OK".
5.1.4 Synchronizing a Handset with PDM/WSM3
After installing and saving a handset, it will be synchronized each time it is connected to the
PDM/WSM3. The synchronization transfers parameter changes between the handset and the
PDM/WSM3 and vice versa as follows:
• If a parameter has been changed in the handset, it will be transferred to the PDM/WSM3.
• If a parameter has been changed in the PDM/WSM3 while the handset was disconnected, it
will be transferred to the handset.
• If the same parameter has been changed in both the PDM/WSM3 and the handset, the value
in PDM/WSM3 will be transferred to the handset.
5.2 Voice Mail
In some systems it is needed to assign the handset number of the Voice Mail service. The
parameter can be set specifically for each PBX subscription on the handset and is accessed from
Systems > System x > PBX Settings > Numbers. "System x" is replaced with the subscription
(System A - System H) that is configured.

13
Handset Configuration
5.2.1 Wildcard characters in voice mail phone numbers
When programming voice mail dial strings in PDM it is possible to use a wildcard character, N,
to represent the phone’s extension number.
For example, a PBX uses voice mail numbers that are a combination of a base voice mail
number and the phone’s extension number. If the base voice mail number is 2222 and the
extension number is 4455, the voice mail number is 22224455. Using the N wildcard character
this can be written as:
2222N
5.3 Central Phonebook
If the system is equipped with a messaging server with a phonebook service, the Central
Phonebook on that server can be accessed from the handset. The number to be used is set to
default 999999. It can be changed by editing parameters in a Number or a template.
If the system is not equipped with a Central Phonebook, this menu option can be removed from
the handset by entering an empty value for the corresponding parameter.
The parameter can be set specifically for each PBX subscription on the handset and is accessed
from Systems > System x > PBX Settings > Numbers. "System x" is replaced with the
subscription (System A - System H) that is configured.
5.4 Company Phonebook
It is possible to create a phonebook that is administered centrally and uploaded to the handset
from PDM/WSM3. If this feature is used, entries from Contacts and Company Phonebook are
merged. The Company Phonebook entries are locked and cannot be edited in the handset.
5.4.1 Create a Phonebook File
The phonebook file (.cpb) is created from an Excel file using a script to extract the information
and create to the phonebook file (.cpb). The Excel file is provided by your supplier.
The handset supports a maximum length of 24 characters in each field, additional characters are
truncated when the phonebook file is created. The following characters are accepted in the
handset number field in the phonebook file, but are ignored when the phonebook file is created:
"(", ")", "-" and " "(space).
5.4.2 Upload a Company Phonebook File
In PDM or Device Manager in WSM3, go to the Devices tab and select device(s). In the Device
menu, select "Upload phonebook".
5.4.3 Remove Company Phonebook Entries
It is possible to delete all company phonebook entries in the handset by importing an empty
company phonebook file. Create the empty file using the Excel tool provided by your supplier.
5.5 Call Services
Call services is a configurable menu in the handset. The purpose of the Call services menu is to
provide a user friendly access to system dependent functionality such as absence handling and
call diversion.

Mitel 5603 Wireless Handset Configuration Guide
14
The menu is described in the Mitel 5603 Wireless Handset User Guide.
Besides the default Call services functions, it is possible to define 10 extra system specific call
services by codes. The codes can be programmed with digits 0-9, #, *, P – pause, H – hook (auto
disconnection).
Using the PDM and the "Edit template" feature, the parameters can be found at
Systems > System X > PBX Settings > In call functionality
Tip: Ask your supplier for a template example that will configure the call services menu for the
PBX.
5.6 In Call Menu
In Call Menu is a configurable menu in the handset. The purpose of the In Call Menu is to
provide a user friendly access to system dependent functionality during a call such as:
• Start a new call during a conversation
• Switch between calls
• End a call
• Transfer a call
• Transfer to a new call
• Make a conference call
• Activate call back
• Sending call waiting
• Open Contacts
• Send DTMF
• Viewing DECT information
• Turning the microphone on/off
The menu is described in the Mitel 5603 Wireless Handset User Guide.
Note: It is also possible to configure own In call functions, see 5.6.1 Configure Own In Call
Functions, or create a shortcut to a certain In call function, see 5.7 Customize Soft Keys.
Ask your supplier for example templates that will configure the in call menu for your PBX.
5.6.1 Configure Own In Call Functions
Besides the default In call functions, it is possible to define 10 extra system specific call
services by codes. The codes can be programmed with digits 0-9, #, *, P – pause, H – hook (auto
disconnection).
1 Select Systems > System X > PBX Settings > In call functionality > General purpose X.
2IntheName field, enter the name to be displayed in the In call menu.
3IntheData field, enter the applicable code to be used for the function.
4 Click "OK" to save the settings.
Tip: Your supplier may have a template example that will configure the In call functions menu
for the PBX.

15
Handset Configuration
5.7 Customize Soft Keys
It is possible to configure the right Soft key as a shortcut to a certain In call function, or hide the
Soft key. By default, the right Soft key is configured as R-key.
5.7.1 Create a Soft Key to an In Call Function
1 If needed, configure the In Call functionality to be used. See 5.6 In Call Menu. This is
not needed if the Loudspeaking function or R-key shall be used.
2 Select Systems > System X > PBX Settings > In call functionality > Soft key Right
3IntheName field, enter a descriptive name of the Soft key. This is not needed if the
functions Loudspeaking function or R-key shall be used.
4IntheFunction drop-down list, select the function to be used.
5 Click "OK" to save the settings.
5.7.2 Hide a Soft Key to an In Call Function
1 Select Systems > System X > PBX Settings > In call functionality > Soft key Right
2IntheFunction drop-down list, select "Not used".
3 Click "OK" to save the settings. The Soft key will not be visible during a call.
5.7.3 Configure Contact Soft Key
When the handset is in idle mode, the middle Soft key is by default configured to access the
Contacts list. It is possible to configure the Soft key to access the Central phonebook or the
Contacts menu instead.
1 Select Settings > Soft key Middle.
2IntheFunction drop-down list, select which phonebook to be accessed when pressing
the Soft key.
5.8 Own Line Settings
Use the own line settings when it is desired to use the same phonebook in different systems and
in different countries.
The own line settings enables:
• Calling numbers stored with a "+" sign for the international access code. The same
phonebook can be used in different countries.
• Recognizing incoming internal or external calls as numbers stored on international format in
the phonebook. The same phonebook can be used in different systems.
In order for this feature to work, numbers must be stored in the phonebook in international
format with a "+" sign for the international access code. Also, the Own Line parameters must be
configured via PDM/WSM3.
5.9 Uploadable Language
It is possible to upload one additional language to the handset. The language file is generated
via an Excel file. The Excel file used to generate language files is delivered from your supplier.
Note: If another language file is uploaded, the first additional language is overwritten.

Mitel 5603 Wireless Handset Configuration Guide
16
Certain special characters are allowed when generating the language file, see information in the
Excel file.
To upload an additional language, the PDM/WSM3 is used, go to the Devices tab and select
device(s). In the Device menu, select "Upload language...".
A parameter can be altered to match the uploaded language. The parameter controls:
• The characters available for text input
• The sort order in the phonebook.
This parameter is only used when language is set. The parameter can be found in the Settings
folder.
5.10 Personalizing the Menu
It is possible to customize the handset’s menu by turning certain menus on/off. This is done in
the PDM by editing a template (or a Number setting) for the corresponding handset (or
Number).
The path to these settings in the template depends on the version of the parameter definition file
(.def). In the current version the path is:
Customization > Visibility
The settings for the parameters may have two alternatives:
• Show
•Hide
5.10.1 Show/Hide Missed Call Window
A missed call is by default indicated by a Missed call window. It is possible to hide this window
and is recommended if a user has, for example, both a handset and a mobile.
Example:
If configured in the PBX, an incoming call to the handset can either be answered using the
handset or mobile. If the user answers the call using the mobile, the Missed call window will not
be displayed in the handset.
1 Select Settings > Answering.
2IntheShow missed calls popup drop-down list, select "No" to hide the Missed call
window.
5.11 Set Action when Handset Placed in Charger
5.11.1 Actions when not in Call
The handset can be configured to perform an action when it is placed in a charger. The selected
action is only performed when no call is established. When the handset is removed from the
charger, it returns to previous settings.
1 Select Connections > In Charger
Other manuals for 5603
3
Table of contents
Other Mitel Handset manuals

Mitel
Mitel 5604 User manual

Mitel
Mitel Telepo 6940IP User manual

Mitel
Mitel 5603 User manual

Mitel
Mitel 5634 User manual

Mitel
Mitel MiVoice Business 5624 User manual

Mitel
Mitel 3300 User manual

Mitel
Mitel 5602 User manual

Mitel
Mitel OpenPhone OpenPhone 27 User manual

Mitel
Mitel 5604 User manual

Mitel
Mitel MiVoice 6940 User manual