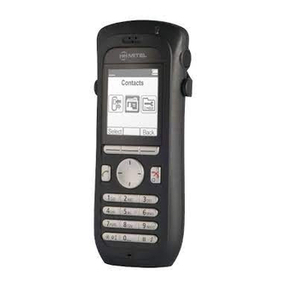
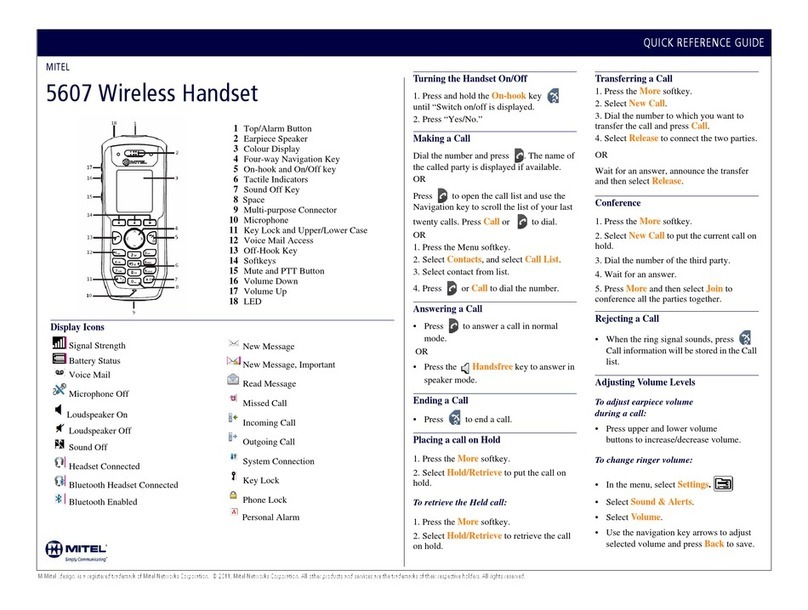
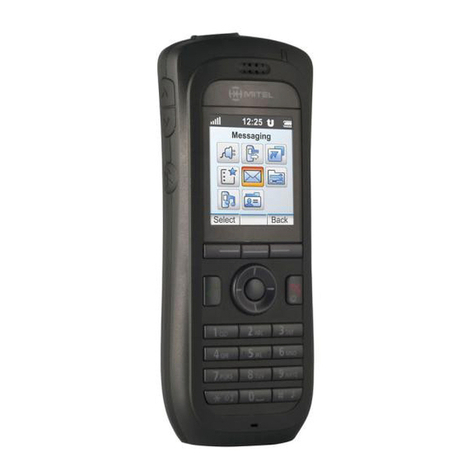
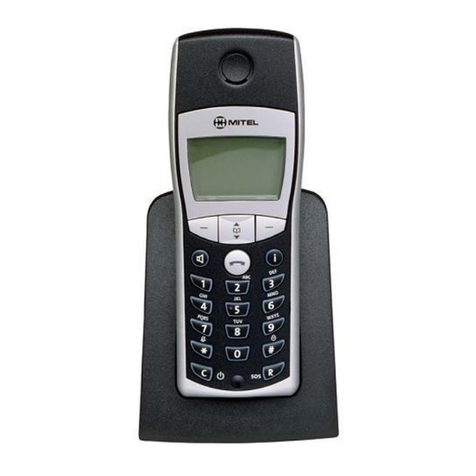
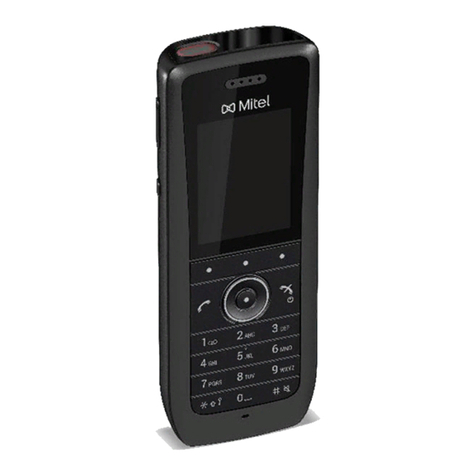
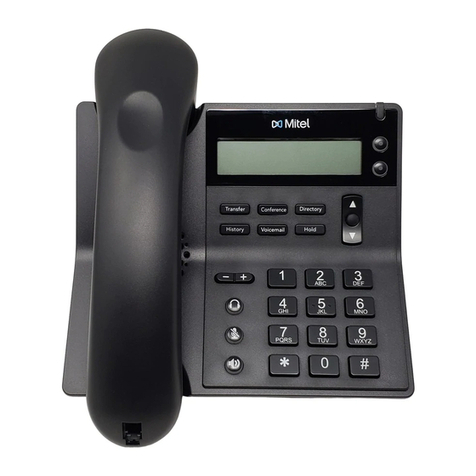
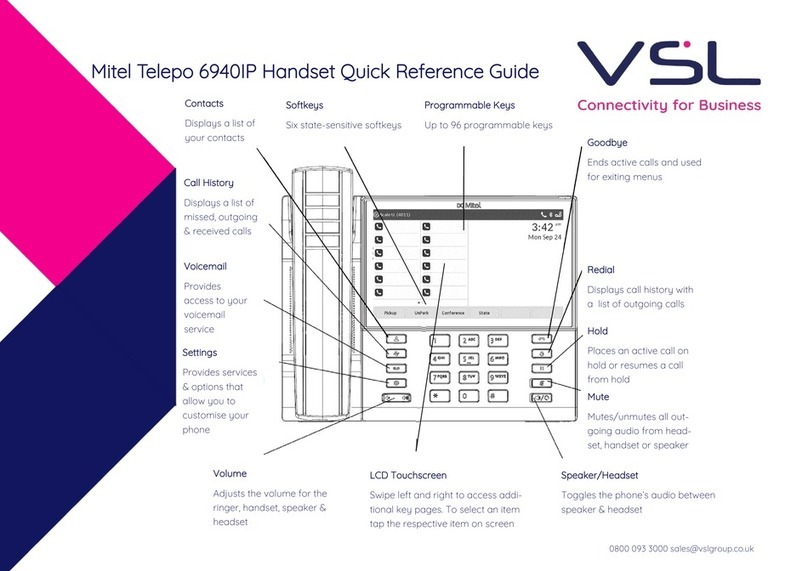
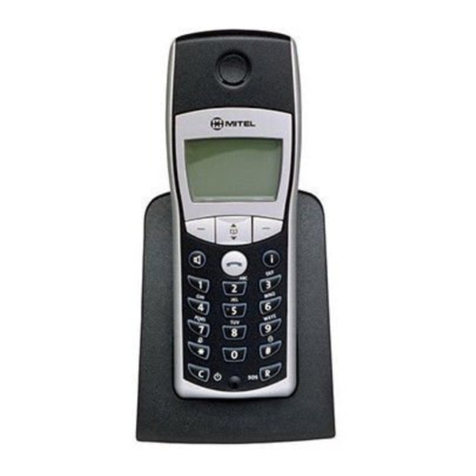
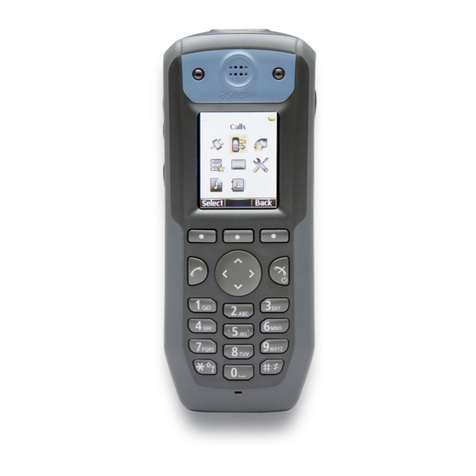
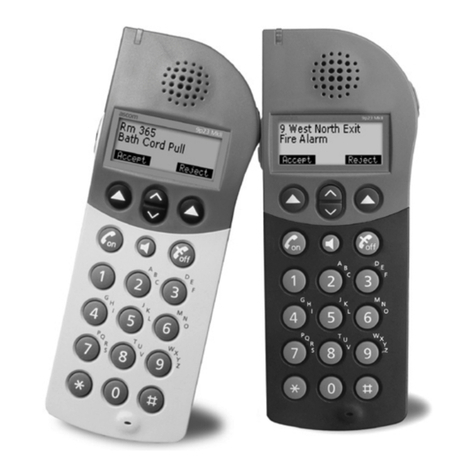
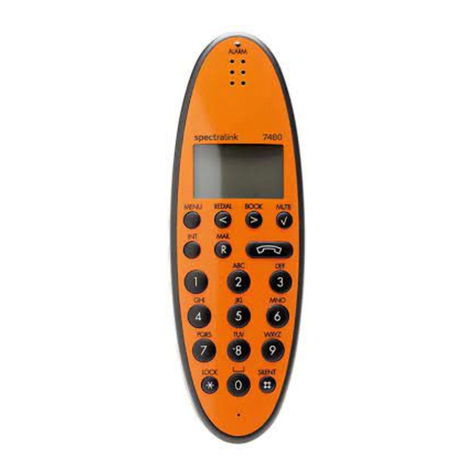
Mitel 5606 User manual

IP-DECT System (Global)
5606 Wireless Handset User Guide
MITEL
3300 IP Communications Platform

ii
NOTICE
The information contained in this document is believed to be accurate in all respects but is not warranted
by Mitel Networks™ Corporation (MITEL®). The information is subject to change without notice and should
not be construed in any way as a commitment by Mitel or any of its affiliates or subsidiaries. Mitel and its
affiliates and subsidiaries assume no responsibility for any errors or omissions in this document. Revisions
of this document or new editions of it may be issued to incorporate such changes.
No part of this document can be reproduced or transmitted in any form or by any means - electronic or
mechanical - for any purpose without written permission from Mitel Networks Corporation.
Trademarks
Mitel is a trademark of Mitel Networks Corporation.
Other product names mentioned in this document may be trademarks of their respective companies and
are hereby acknowledged.
Mitel 5606 Wireless Handset
User Guide
February 2010
®,™ Trademark of Mitel Networks Corporation
© Copyright 2010, Mitel Networks Corporation
All rights reserved

Table of Contents
iii
About Your Phone . . . . . . . . . . . . . . . . . . . . . . . . . . . . . . . . . . . . . . . . . . . . . . . . . . . . . . . . . . . . 1
Elements of Your Handset . . . . . . . . . . . . . . . . . . . . . . . . . . . . . . . . . . . . . . . . . . . . . . . . . . . . . . 1
Features and Functions . . . . . . . . . . . . . . . . . . . . . . . . . . . . . . . . . . . . . . . . . . . . . . . . . . . . .1
Contacting Emergency Services . . . . . . . . . . . . . . . . . . . . . . . . . . . . . . . . . . . . . . . . . . . . . . 2
Tips for your Comfort and Safety . . . . . . . . . . . . . . . . . . . . . . . . . . . . . . . . . . . . . . . . . . . . . . 2
Frequency Range . . . . . . . . . . . . . . . . . . . . . . . . . . . . . . . . . . . . . . . . . . . . . . . . . . . . . . . . . . 2
Exposure to Radio Frequency Signals . . . . . . . . . . . . . . . . . . . . . . . . . . . . . . . . . . . . . . . . . . 3
Environmental Requirements . . . . . . . . . . . . . . . . . . . . . . . . . . . . . . . . . . . . . . . . . . . . . . . . . 3
Chemical Resistance . . . . . . . . . . . . . . . . . . . . . . . . . . . . . . . . . . . . . . . . . . . . . . . . . . . . . . . 3
Icons and Text in the Display . . . . . . . . . . . . . . . . . . . . . . . . . . . . . . . . . . . . . . . . . . . . . . . . . . . . 3
Keys and Buttons . . . . . . . . . . . . . . . . . . . . . . . . . . . . . . . . . . . . . . . . . . . . . . . . . . . . . . . . . . . . . 6
Navigation Key . . . . . . . . . . . . . . . . . . . . . . . . . . . . . . . . . . . . . . . . . . . . . . . . . . . . . . . . . . . . 6
ON Button . . . . . . . . . . . . . . . . . . . . . . . . . . . . . . . . . . . . . . . . . . . . . . . . . . . . . . . . . . . . . . . . 6
OFF Button . . . . . . . . . . . . . . . . . . . . . . . . . . . . . . . . . . . . . . . . . . . . . . . . . . . . . . . . . . . . . . 6
Soft keys . . . . . . . . . . . . . . . . . . . . . . . . . . . . . . . . . . . . . . . . . . . . . . . . . . . . . . . . . . . . . . . . . 6
Hot keys . . . . . . . . . . . . . . . . . . . . . . . . . . . . . . . . . . . . . . . . . . . . . . . . . . . . . . . . . . . . . . . . . 6
Volume Button . . . . . . . . . . . . . . . . . . . . . . . . . . . . . . . . . . . . . . . . . . . . . . . . . . . . . . . . . . . . 7
Mute Button . . . . . . . . . . . . . . . . . . . . . . . . . . . . . . . . . . . . . . . . . . . . . . . . . . . . . . . . . . . . . . 7
Alpha Numeric Keys . . . . . . . . . . . . . . . . . . . . . . . . . . . . . . . . . . . . . . . . . . . . . . . . . . . . . . . . 7
Customizing Your Phone . . . . . . . . . . . . . . . . . . . . . . . . . . . . . . . . . . . . . . . . . . . . . . . . . . . . . . . 8
Volume/Mute Controls . . . . . . . . . . . . . . . . . . . . . . . . . . . . . . . . . . . . . . . . . . . . . . . . . . . . . . . . . 8
Adjust the Volume During a Call . . . . . . . . . . . . . . . . . . . . . . . . . . . . . . . . . . . . . . . . . . . . . . . 8
Mute the Microphone During a Call . . . . . . . . . . . . . . . . . . . . . . . . . . . . . . . . . . . . . . . . . . . . 8
Turn off Alert Signal at Incoming Call . . . . . . . . . . . . . . . . . . . . . . . . . . . . . . . . . . . . . . . . . . . 8
Turn Audible Signals On/Off . . . . . . . . . . . . . . . . . . . . . . . . . . . . . . . . . . . . . . . . . . . . . . . . . . 8
Turn Loudspeaking Function On/Off . . . . . . . . . . . . . . . . . . . . . . . . . . . . . . . . . . . . . . . . . . . 8
Lock/Unlock the Keypad . . . . . . . . . . . . . . . . . . . . . . . . . . . . . . . . . . . . . . . . . . . . . . . . . . . . . . . 8
Making and Answering Calls . . . . . . . . . . . . . . . . . . . . . . . . . . . . . . . . . . . . . . . . . . . . . . . . . . . . 9
Call List . . . . . . . . . . . . . . . . . . . . . . . . . . . . . . . . . . . . . . . . . . . . . . . . . . . . . . . . . . . . . . . . . . . . 9
Make a Call . . . . . . . . . . . . . . . . . . . . . . . . . . . . . . . . . . . . . . . . . . . . . . . . . . . . . . . . . . . . . . . . . 9
Answer a Call . . . . . . . . . . . . . . . . . . . . . . . . . . . . . . . . . . . . . . . . . . . . . . . . . . . . . . . . . . . . . . . 10
End a Call . . . . . . . . . . . . . . . . . . . . . . . . . . . . . . . . . . . . . . . . . . . . . . . . . . . . . . . . . . . . . . . . . 10
Decline an incoming call . . . . . . . . . . . . . . . . . . . . . . . . . . . . . . . . . . . . . . . . . . . . . . . . . . . . . . 10

5606 Wireless Handset User Guide
iv
Call Handling . . . . . . . . . . . . . . . . . . . . . . . . . . . . . . . . . . . . . . . . . . . . . . . . . . . . . . . . . . . . . . . . 11
Hold . . . . . . . . . . . . . . . . . . . . . . . . . . . . . . . . . . . . . . . . . . . . . . . . . . . . . . . . . . . . . . . . . . . . . .11
Transfer . . . . . . . . . . . . . . . . . . . . . . . . . . . . . . . . . . . . . . . . . . . . . . . . . . . . . . . . . . . . . . . . . . .11
Conference . . . . . . . . . . . . . . . . . . . . . . . . . . . . . . . . . . . . . . . . . . . . . . . . . . . . . . . . . . . . . . . . 11
Answer Call Waiting . . . . . . . . . . . . . . . . . . . . . . . . . . . . . . . . . . . . . . . . . . . . . . . . . . . . . . . . . .11
Callback . . . . . . . . . . . . . . . . . . . . . . . . . . . . . . . . . . . . . . . . . . . . . . . . . . . . . . . . . . . . . . . . . . .12
Call Park . . . . . . . . . . . . . . . . . . . . . . . . . . . . . . . . . . . . . . . . . . . . . . . . . . . . . . . . . . . . . . . . . .12
Call Forward . . . . . . . . . . . . . . . . . . . . . . . . . . . . . . . . . . . . . . . . . . . . . . . . . . . . . . . . . . . . . . . . 12
Call Pickup . . . . . . . . . . . . . . . . . . . . . . . . . . . . . . . . . . . . . . . . . . . . . . . . . . . . . . . . . . . . . . . . . 13
Do Not Disturb . . . . . . . . . . . . . . . . . . . . . . . . . . . . . . . . . . . . . . . . . . . . . . . . . . . . . . . . . . . . . .13
Direct Page . . . . . . . . . . . . . . . . . . . . . . . . . . . . . . . . . . . . . . . . . . . . . . . . . . . . . . . . . . . . . . . .13
Group Page . . . . . . . . . . . . . . . . . . . . . . . . . . . . . . . . . . . . . . . . . . . . . . . . . . . . . . . . . . . . . . . .13
Loudspeaker Page . . . . . . . . . . . . . . . . . . . . . . . . . . . . . . . . . . . . . . . . . . . . . . . . . . . . . . . . . . .14
Music . . . . . . . . . . . . . . . . . . . . . . . . . . . . . . . . . . . . . . . . . . . . . . . . . . . . . . . . . . . . . . . . . . . . .14
Mobile Extension . . . . . . . . . . . . . . . . . . . . . . . . . . . . . . . . . . . . . . . . . . . . . . . . . . . . . . . . . . . .14
Messaging . . . . . . . . . . . . . . . . . . . . . . . . . . . . . . . . . . . . . . . . . . . . . . . . . . . . . . . . . . . . . . . . . . 15
Message List . . . . . . . . . . . . . . . . . . . . . . . . . . . . . . . . . . . . . . . . . . . . . . . . . . . . . . . . . . . . . . .15
Receive a Text Message . . . . . . . . . . . . . . . . . . . . . . . . . . . . . . . . . . . . . . . . . . . . . . . . . . . . . .15
Delete a received message . . . . . . . . . . . . . . . . . . . . . . . . . . . . . . . . . . . . . . . . . . . . . . . . .15
Close message . . . . . . . . . . . . . . . . . . . . . . . . . . . . . . . . . . . . . . . . . . . . . . . . . . . . . . . . . . .15
Read a Stored Text Message . . . . . . . . . . . . . . . . . . . . . . . . . . . . . . . . . . . . . . . . . . . . . . . . . .15
Delete a Stored Text Message . . . . . . . . . . . . . . . . . . . . . . . . . . . . . . . . . . . . . . . . . . . . . . . . .16
Receive a Message with Request for Answer . . . . . . . . . . . . . . . . . . . . . . . . . . . . . . . . . . . . . .16
SMS (Short Message Service) . . . . . . . . . . . . . . . . . . . . . . . . . . . . . . . . . . . . . . . . . . . . . . . . . . 16
Send an SMS . . . . . . . . . . . . . . . . . . . . . . . . . . . . . . . . . . . . . . . . . . . . . . . . . . . . . . . . . . . .16
Send an SMS to a predefined Destination Address . . . . . . . . . . . . . . . . . . . . . . . . . . . . . . .16
Display and Scroll between SMS Messages . . . . . . . . . . . . . . . . . . . . . . . . . . . . . . . . . . . . 17
Voice Mail . . . . . . . . . . . . . . . . . . . . . . . . . . . . . . . . . . . . . . . . . . . . . . . . . . . . . . . . . . . . . . . . .17
To access the Voice Inbox . . . . . . . . . . . . . . . . . . . . . . . . . . . . . . . . . . . . . . . . . . . . . . . . . .17
Navigate the Menu . . . . . . . . . . . . . . . . . . . . . . . . . . . . . . . . . . . . . . . . . . . . . . . . . . . . . . . . . . . 18
Enter/Exit the Menu Mode . . . . . . . . . . . . . . . . . . . . . . . . . . . . . . . . . . . . . . . . . . . . . . . . . . . . . 18
Menu Operation. . . . . . . . . . . . . . . . . . . . . . . . . . . . . . . . . . . . . . . . . . . . . . . . . . . . . . . . . . . . . . 19
Messages Menu . . . . . . . . . . . . . . . . . . . . . . . . . . . . . . . . . . . . . . . . . . . . . . . . . . . . . . . . . . . . .19
Contacts Menu . . . . . . . . . . . . . . . . . . . . . . . . . . . . . . . . . . . . . . . . . . . . . . . . . . . . . . . . . . . . . . 20
Local Phonebook . . . . . . . . . . . . . . . . . . . . . . . . . . . . . . . . . . . . . . . . . . . . . . . . . . . . . . . . .20
Central Phonebook . . . . . . . . . . . . . . . . . . . . . . . . . . . . . . . . . . . . . . . . . . . . . . . . . . . . . . . .21

Table of Contents
v
Call List . . . . . . . . . . . . . . . . . . . . . . . . . . . . . . . . . . . . . . . . . . . . . . . . . . . . . . . . . . . . . . . . . 21
Modes Menu . . . . . . . . . . . . . . . . . . . . . . . . . . . . . . . . . . . . . . . . . . . . . . . . . . . . . . . . . . . . . . . 22
Overview . . . . . . . . . . . . . . . . . . . . . . . . . . . . . . . . . . . . . . . . . . . . . . . . . . . . . . . . . . . . . . . . 23
Setting Modes . . . . . . . . . . . . . . . . . . . . . . . . . . . . . . . . . . . . . . . . . . . . . . . . . . . . . . . . . . . . 23
Services Menu . . . . . . . . . . . . . . . . . . . . . . . . . . . . . . . . . . . . . . . . . . . . . . . . . . . . . . . . . . . . . . 25
Activate a Service . . . . . . . . . . . . . . . . . . . . . . . . . . . . . . . . . . . . . . . . . . . . . . . . . . . . . . . . . 25
Create a new Service . . . . . . . . . . . . . . . . . . . . . . . . . . . . . . . . . . . . . . . . . . . . . . . . . . . . . .25
Edit a Service . . . . . . . . . . . . . . . . . . . . . . . . . . . . . . . . . . . . . . . . . . . . . . . . . . . . . . . . . . . . 25
Delete a Service . . . . . . . . . . . . . . . . . . . . . . . . . . . . . . . . . . . . . . . . . . . . . . . . . . . . . . . . . . 26
Settings Menu . . . . . . . . . . . . . . . . . . . . . . . . . . . . . . . . . . . . . . . . . . . . . . . . . . . . . . . . . . . . . . 26
Change the Volume . . . . . . . . . . . . . . . . . . . . . . . . . . . . . . . . . . . . . . . . . . . . . . . . . . . . . . .27
Change the Ring Signal . . . . . . . . . . . . . . . . . . . . . . . . . . . . . . . . . . . . . . . . . . . . . . . . . . . . 27
Key Beep On/Off . . . . . . . . . . . . . . . . . . . . . . . . . . . . . . . . . . . . . . . . . . . . . . . . . . . . . . . . . 27
Vibrator On/Off . . . . . . . . . . . . . . . . . . . . . . . . . . . . . . . . . . . . . . . . . . . . . . . . . . . . . . . . . . . 27
Deactivate/Activate No-movement alarm . . . . . . . . . . . . . . . . . . . . . . . . . . . . . . . . . . . . . . . 28
Deactivate/Activate Man-down alarm . . . . . . . . . . . . . . . . . . . . . . . . . . . . . . . . . . . . . . . . . . 28
Edit a Soft key . . . . . . . . . . . . . . . . . . . . . . . . . . . . . . . . . . . . . . . . . . . . . . . . . . . . . . . . . . . 28
Edit a Hot key . . . . . . . . . . . . . . . . . . . . . . . . . . . . . . . . . . . . . . . . . . . . . . . . . . . . . . . . . . . . 29
Select Language . . . . . . . . . . . . . . . . . . . . . . . . . . . . . . . . . . . . . . . . . . . . . . . . . . . . . . . . . . 29
Change Text Size . . . . . . . . . . . . . . . . . . . . . . . . . . . . . . . . . . . . . . . . . . . . . . . . . . . . . . . . . 30
Lock the Handset Manually . . . . . . . . . . . . . . . . . . . . . . . . . . . . . . . . . . . . . . . . . . . . . . . . . 30
Change the Lock Code . . . . . . . . . . . . . . . . . . . . . . . . . . . . . . . . . . . . . . . . . . . . . . . . . . . . . 30
Clock Settings . . . . . . . . . . . . . . . . . . . . . . . . . . . . . . . . . . . . . . . . . . . . . . . . . . . . . . . . . . . . 30
Turn On/Off Automatic Keypad Lock . . . . . . . . . . . . . . . . . . . . . . . . . . . . . . . . . . . . . . . . . . 31
Enable/Disable Quick Answer . . . . . . . . . . . . . . . . . . . . . . . . . . . . . . . . . . . . . . . . . . . . . . . 31
Set New Messages to be Displayed Upside down . . . . . . . . . . . . . . . . . . . . . . . . . . . . . . . . 31
Set Owner ID . . . . . . . . . . . . . . . . . . . . . . . . . . . . . . . . . . . . . . . . . . . . . . . . . . . . . . . . . . . . 32
General Handset Information . . . . . . . . . . . . . . . . . . . . . . . . . . . . . . . . . . . . . . . . . . . . . . . . . . .32
Select IP DECT Base Station . . . . . . . . . . . . . . . . . . . . . . . . . . . . . . . . . . . . . . . . . . . . . . . . . .32
Alarm Operation (5606 Alarm Model Only). . . . . . . . . . . . . . . . . . . . . . . . . . . . . . . . . . . . . . . . 33
Push-button Alarm . . . . . . . . . . . . . . . . . . . . . . . . . . . . . . . . . . . . . . . . . . . . . . . . . . . . . . . . . . . 33
Test Alarm . . . . . . . . . . . . . . . . . . . . . . . . . . . . . . . . . . . . . . . . . . . . . . . . . . . . . . . . . . . . . . . . . 33
No-movement Alarm . . . . . . . . . . . . . . . . . . . . . . . . . . . . . . . . . . . . . . . . . . . . . . . . . . . . . . . . . 33
Man-down Alarm . . . . . . . . . . . . . . . . . . . . . . . . . . . . . . . . . . . . . . . . . . . . . . . . . . . . . . . . . . . . 33
Send man-down alarm . . . . . . . . . . . . . . . . . . . . . . . . . . . . . . . . . . . . . . . . . . . . . . . . . . . . . 34

5606 Wireless Handset User Guide
vi
Acoustic Localisation Signal . . . . . . . . . . . . . . . . . . . . . . . . . . . . . . . . . . . . . . . . . . . . . . . . . . . 34
Delay Time before Warning for No-movement and Man-down Alarms . . . . . . . . . . . . . . . . . . . 34
Alarm with Data . . . . . . . . . . . . . . . . . . . . . . . . . . . . . . . . . . . . . . . . . . . . . . . . . . . . . . . . . . . . .34
Automatic Call after an Alarm . . . . . . . . . . . . . . . . . . . . . . . . . . . . . . . . . . . . . . . . . . . . . . . . . .35
Connection method Speech Monitoring . . . . . . . . . . . . . . . . . . . . . . . . . . . . . . . . . . . . . . . . 35
Connection method Loud . . . . . . . . . . . . . . . . . . . . . . . . . . . . . . . . . . . . . . . . . . . . . . . . . . . 35
Connection method Ordinary . . . . . . . . . . . . . . . . . . . . . . . . . . . . . . . . . . . . . . . . . . . . . . . .35
Alarm Management with Automatic Calls . . . . . . . . . . . . . . . . . . . . . . . . . . . . . . . . . . . . . . . . .36
Registration . . . . . . . . . . . . . . . . . . . . . . . . . . . . . . . . . . . . . . . . . . . . . . . . . . . . . . . . . . . . . . . . . 37
Over Air Registration . . . . . . . . . . . . . . . . . . . . . . . . . . . . . . . . . . . . . . . . . . . . . . . . . . . . . . 37
Operation Notice . . . . . . . . . . . . . . . . . . . . . . . . . . . . . . . . . . . . . . . . . . . . . . . . . . . . . . . . . . . . . 38
Accessibility and Voice Quality . . . . . . . . . . . . . . . . . . . . . . . . . . . . . . . . . . . . . . . . . . . . . . . . .38
Maintenance . . . . . . . . . . . . . . . . . . . . . . . . . . . . . . . . . . . . . . . . . . . . . . . . . . . . . . . . . . . . . . . . 39
Charge the Battery . . . . . . . . . . . . . . . . . . . . . . . . . . . . . . . . . . . . . . . . . . . . . . . . . . . . . . . . . . .39
Charging Spare Batteries . . . . . . . . . . . . . . . . . . . . . . . . . . . . . . . . . . . . . . . . . . . . . . . . . . . 39
Change the Clip . . . . . . . . . . . . . . . . . . . . . . . . . . . . . . . . . . . . . . . . . . . . . . . . . . . . . . . . . . . . . 40
Troubleshooting . . . . . . . . . . . . . . . . . . . . . . . . . . . . . . . . . . . . . . . . . . . . . . . . . . . . . . . . . . . . . 41
Maintenance . . . . . . . . . . . . . . . . . . . . . . . . . . . . . . . . . . . . . . . . . . . . . . . . . . . . . . . . . . . . . . . . 42
Desktop Charger . . . . . . . . . . . . . . . . . . . . . . . . . . . . . . . . . . . . . . . . . . . . . . . . . . . . . . . . . .42
Charging Rack . . . . . . . . . . . . . . . . . . . . . . . . . . . . . . . . . . . . . . . . . . . . . . . . . . . . . . . . . . . 42

About Your Phone
1
About Your Phone
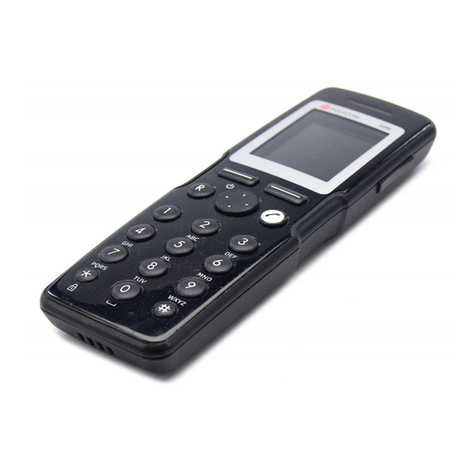
The Mitel 5606 Wireless Handset is a robust, feature-rich handset designed to function in tough
environments. It operates in conjunction with a DECT base station and the 3300 ICP. The 5606
is ideal for users who need mobile voice and messaging functions contained in a durable, water-
and dust-protected package.
Elements of Your Handset
• To turn the handset ON, press and hold the ON button and then, when prompted, press
the Yes soft key.
• To turn the handset OFF, press and hold the OFF button and then, when prompted, press
the Yes soft key.
Features and Functions
The 5606 Wireless Handset has the following features:
Antenna: The antennae are integrated inside the handset.
1. Loudspeaker
2. Display
3. Mute Button
4. Soft keys
5. ON Button
6. Alphanumeric Keys
7. Microphone
8. Navigation Key
9. OFF Button
10. Menu soft key
11. Volume Up/Down
12. LED
13. Alarm Button (Optional)

5606 Wireless Handset User Guide
2
Display: The display is an illuminated 128 x 64 pixels LCD, covered by anti-reflex treated plastic
glass for maximum readability. Display contrast is manually adjustable.
Keypad: The illuminated keypad is ideal for low light environments. When not in use, the keypad
can be locked to prevent accidental key presses.
SIM Card: The SIM card contains all personal settings such as phonebook, identity, alert signal
and your defined functions for soft keys and hot keys. All personal settings are retained if the
SIM card is moved to another handset.
Battery: The battery is a rechargeable Lithium Ion battery.
Contacting Emergency Services
This handset, like any wireless phone, communicates using radio signals. As with any wireless
phone, you may not be able to establish a connection under all conditions, therefore, you should
not rely solely on a wireless telephone for essential, emergency communication. The key lock
feature disables the handset keypad and prevents the accidental dialing of numbers that may
result in nuisance calls. It also prevents accidental calls to emergency services numbers like
911, 999, or 112.
To disable the key lock feature, press the key and then press YES.
Currently, mobile IP phones do not support Enhanced 911 (E911) operation. If emergency
services are required, it is necessary to keep the system administrator and the location database
current.
Tips for your Comfort and Safety
Don't cradle the handset!
Prolonged use of the handset can lead to neck, shoulder, or back discomfort, especially if you
cradle the handset between your ear and shoulder. If you use your phone a lot, you may find
it more comfortable to use a headset. See the section on headset usage elsewhere in this guide
for more information.
Protect your hearing
Your phone has a control for adjusting the volume of the handset receiver or headset. Because
continuous exposure to loud sounds can contribute to hearing loss, keep the volume at a
moderate level.
Frequency Range
The handset is a radio transmitter and receiver. When it is on, it receives and sends out radio
frequency (RF) energy. The handset operates on different frequency ranges depending on
market and employs commonly used modulation techniques:
•EU:1880 - 1900 MHz
• USA: 1920 - 1930 MHz

About Your Phone
3
•LA: 1910 - 1930 MHz
Exposure to Radio Frequency Signals
This device complies with FCC SAR limit of 1.6 W/kg. The maximum SAR value measured
when used at the ear is 0.0081 W/kg. The telephone has also been tested when worn on the
body using belt clip, maximum measured SAR value in this configuration is 0.0255 W/kg.
Environmental Requirements
• Only use the handset in temperatures between 0C to +40C (32F to 140F).
• Avoid exposing the handset for direct sunlight or close to other heat sources.
• Keep the handset away from excessive heat and moisture.
• Do not expose the handset to open flame.
• Keep the handset away from strong electromagnetic fields.
Chemical Resistance
The alpha and numeric characters printed on the exterior of the handset have been tested and
found resistant to chipping, fading or wearing off when the handset is treated with common
cleaners and disinfectants or perspiration. The following chemicals have shown no harmful
effect:
• 3% Hydrochloric Acid
• M-alcohol (70% Methylated Ethanol)
• 60% Chlorhexidin 0.5mg/ml
Acetone can be damaging to the plastic casing of the handset and should not be used.
Icons and Text in the Display
The icons and text in the display indicate functions and settings to which you have access. The
display normally shows the owner ID and the system ID, for example “System A”. This indicates
that the handset is in contact with System A. The owner ID is manually set by the user.
Figure 1: Example of a display configuration in standby mode.
Figure 1.
Shows time and icons
User information: User defined
in stand-by mode
Info Doctor Jobs Shows the Soft keys function:
User defined in stand-by mode
Alarm icons and
status information, i.e. current mode
13:22
System A
A Brown 4321
}
}
}
}
In charger
}
System information
004

5606 Wireless Handset User Guide
4
In standby mode the upper row is used for icons and the clock. The next three rows are used
for information. The first row shows system information, the second row shows user information,
and the third row shows alarm icons and handset status.(For example, "Muted", "In Charger".) .
The bottom row (below the line) is the soft key field. In standby mode it shows the user defined
names of the three soft keys beneath the display. In menu mode this line displays the function
of each soft key. Examples of soft key functions are "Back", "Option", "Save".
Icon Title Description
ON button indicates that your handset is off hook.
Audio signal off shown when all alert signals, including ring signal, message
tone, key beep, etc. are turned off.
NOTE: High priority messages will override this setting.
Battery shown in the display in standby mode. When the level is low
it is time to charge the battery.
Speaker shown when the loudspeaker is activated and the handset
is in loudspeaking mode.
New voice mail appears when a new voice mail exists. The icon remains
until all voice mails have been heard and/or removed.
New message appears when a new message is received. The number to
the right of the icon shows the total number of unread
messages. The icon remains until the message is marked
as read.
New voice mail and
New message
flashing icon appears when there are both voice mail and
new messages.
(Flashing)
Unread message appears when reading one message and there are unread
messages in the message list.
Unanswered calls added to unanswered calls in the call list. The number to the
right of the icon shows the total number of missed calls.
Key indicates when your keypad is locked.
Padlock indicates that the handset has been locked and must be
unlocked with a code before it can be used.
Headset indicates that a headset is connected to the handset.
No-movement alarm on indicates that the no-movement alarm is activated.
Man-down alarm on indicates that the man-down alarm is activated.
ABC ABC indicates that you can type upper case letters and numbers
in text input mode.
3
5

About Your Phone
5
abc abc indicates that you can type lower case letters and numbers
in text input mode.
123 123 indicates that you can type numbers in text input mode.
Incoming call displayed in front of incoming calls in the call list.
Outgoing call displayed in front of outgoing calls in the call list.
Unread message displayed in front of unread messages in the message list.
Read message displayed in front of read messages in the message list.
Add contact appears on a soft key when a phone number is highlighted
in the call list, indicating that you can add the phone number
to the local phonebook.
Contacts appears when it is possible to get a phone number from the
local phonebook.
Menu Tabs: These tabs are displayed when you press the Menu button:
Messages provides access to your message list . See “Messages
Menu” on page 19.
Contacts provides access to local and central phonebooks and the
call list. See “Contacts Menu” on page 20.
Modes provides access to mode selection and editing. See “Modes
Menu” on page 22.
Services provides access to selection, addition, deletion, or editing of
service functions. “Activate a Service” on page 25.
Settings provides access to handset settings such as alert settings,
ring signals, and softeky programming. See “Settings Menu”
on page 26.

5606 Wireless Handset User Guide
6
Keys and Buttons
Some keys have different functions depending on the state of the phone, or the length of time
that you press a key.
Short press = Press and release the key in less than one second.
Long press = Press and hold down the key for longer than one second and then release.
Navigation Key
The Navigation key controls the movement of the cursor in the display. In standby mode,
use the Down arrow to enter the Call list, the Up arrow to enter the Message list and
the Left arrow to show the current date in the display window. You also use the arrow keys
to navigate through menu lists: up , down , back (left), or next (right).
ON Button
The ON button is used for connecting calls and for switching the handset on.
OFF Button
The OFF button is used for disconnecting calls and switching the handset off. It is also used
to return to an idle display.
Soft keys
Figure 2: Soft keys
The three soft keys are located just beneath the display. The function of each soft key is indicated
by text in the display above the keys.
You can define specific functions for the soft keys in standby mode, for example, a soft key can
be set to dial a number or as a shortcut key to a menu. In other modes (like menu navigation),
the soft keys may be preset for certain menu choices.
Hot keys
Any keypad key (0 -9) can be programmed as a hot key to access frequently used functions
such as dialing a specific telephone number, sending mobile data, or as a shortcut to a menu.
Note: Hot key programming may be disabled by your system administrator.
Soft keys
Optional Soft keys defined by
the user.
Max. seven characters can be
used for naming a Soft key
005
Default setting

About Your Phone
7
Volume Button
The Volume button is used for increasing/decreasing the loudspeaker volume.
Mute Button
The Mute button is used for silencing audible signals in standby mode. You can use it to silence
the ring signal for incoming calls and to toggle the microphone on/off during a call.
Alpha Numeric Keys
You can enter letters and/or numbers using the keypad. Figure 3 shows the characters available
on each key.
Figure 3: Alpha Numeric Keys
In Standby Mode
In standby mode short press the keys to enter digits and the characters and #.
Long press keys 0 to 9 to activate any pre-programmed hot key function.
In Text input Mode
In text input mode pressing a key displays the first available character on that key. Continue
pressing the key to view subsequent characters. The highlighted character is selected after a
a short time out or when another key is pressed. Press the -key to switch between upper case
and lower case letters. A long press on any numeric key in text input mode displays the number.
Note: You may also be able to answer incoming calls using the Volume UP button,
however, this option may be disabled by your system administrator.
Note: Depending on setting, the mute function during ringing may be disabled.
Figure 2.
A B C Å Ä Æ À Á Â Ã Ç 2 D E F È É Ê Ë 3
G H I Ï Ì Î Í 4 J K L 5
M N O Ñ Ö Ø Ò Ó Ô Õ 6
P Q R S ß 7 T U V Ü Ù Ú Û 8
W XY Z Ý 9
Space + & @
/ $ % £ \ ± ½ 0
Switch between upper
and lower case
- ? ! , . : " ' ( )1
# * < = > ^ _ ° µ ¿ §
1
3
6
5
4
7
8
9
0
2
D
E
F
M
N
O
J
K
L
G
H
I
P
Q
R
S
T
U
V
W
X
Y
Z
A
B
C
006

5606 Wireless Handset User Guide
8
Customizing Your Phone
Volume/Mute Controls
Adjust the Volume During a Call
• Press the upper part of the Volume button to increase the volume; press the lower part to
decrease the volume.
Mute the Microphone During a Call
• Press the Mute button to disconnect/connect the microphone. The word “Muted” is shown
in the display when the microphone is turned off during a call.
Turn off Alert Signal at Incoming Call
• Press the Mute button before answering the call. All alert signals, including the vibrator,
will silence for that specific call.
Turn Audible Signals On/Off
• In standby mode long press the Mute button to turn audible signals on/off. The “Audio
signal off” icon indicates a completely silenced handset.
Turn Loudspeaking Function On/Off
Loudspeaker activation is dependent upon the call state. An incoming call can be connected
with loudspeaker active by pressing the Volume Up button or the middle soft key. During a call,
press the middle soft key to activate the loudspeaker. Press the middle soft key again to turn it off.
You can also activate this function by selecting another answering method in the Modes menu.
For more information, see “Choose the Modes Answering Method” on page 24.
Lock/Unlock the Keypad
To prevent accidental key presses, the keypad can be locked.
• Press the Menu key and then the key to lock/unlock the keypad. The “Locked keypad”
icon indicates a locked keypad. It is possible to lock the keypad during a call.
The keypad can also be locked automatically. For more information, see “Turn On/Off Automatic
Keypad Lock” on page 31.
Note: Only highest priority messages will override this silent mode

Customizing Your Phone
9
Making and Answering Calls
Call List
The twenty last received/dialed telephone numbers are stored in a Call List. Press the Down
navigation key to access the list. If the Time and Date function is set, you will see the time of
the call for all calls received during the current day. Calls received during a previous day display
only a date stamp.
You can also access the Call List from the Contacts menu, see page 18.
Make a Call
Pre-dial
• Dial the number and press the ON button to get the line. If you make a mistake, press the
Csoft key to edit the number. Use the Left and Right navigation keys to add/delete a digit
in the middle of a number.
To turn the tone sender on/off, long press the asterisk key ( ). Tone sender ON is indicated
by a “T” in the number. Tone sender OFF is indicated by a “-”.
To add a pause to the number, long press the pound key (#). A pause is indicated by a “P” in
the number.
Post-dial
• Press the ON button to get the line and then dial the number. When this method is used,
the number is not added to the Call List.
Dial using a pre-programmed hot key or soft key
A hot key or soft key can be programmed with a telephone number. To call the pre-programmed
number, press the appropriate hot key or soft key (or headset button if parameter is set). For
information about programming hot keys, see “Edit a Hot key” on page 29. For information
about programming soft keys, see “Edit a Soft key” on page 28.
Dial a number from the Call list (internal calls only)
• Use the Down navigation key to enter the call list. Select a number and press the ON button.
Dial a number from the Local Phonebook
1. Press the Menu soft key.
2. Use the Left or Right navigation key to select the Contacts tab ..
Note: The number in the call list can be edited before the call is started. Press the Edit
soft key, make the changes, and then press the ON button.
Note: Only internal numbers calls can be called from the call list. External numbers must
be dialed.

5606 Wireless Handset User Guide
10
3. Use the Down navigation key to highlight Local Phonebook.
4. Press the Right navigation key to display the name list.
5. Navigate the list using the Up and Down navigation keys. When the appropriate selection
is highlighted, press the ON button.
Answer a Call
Incoming calls are indicated by a flashing LED accompanied by a ring signal and/or a vibrating
handset. Both the ring signal and the vibrator can be disabled. If supported by your ICP, the
calling party’s phone number and/or name is shown. The name is also shown if the calling
party’s phone number is stored in your Local phonebook.
•PresstheON button
to answer the call. When a headset is connected to the handset, the
answering button on the headset can be used to answer the call.
You can set custom answering methods using the Modes menu (see “Modes Menu” on
page 22). You can also enable the Quick Answer feature (see “Enable/Disable Quick Answer”
on page 31).
End a Call
• Press the OFF button or place the handset in the charger. When a headset is connected
to the handset, the button on the headset can be used to end the call. All connected calls
are ended. The total call time is shown in the display.
Decline an incoming call
• Press the OFF button to decline an incoming call.
Note: Depending on settings, it is possible to answer a call using the "Volume up" button.
To avoid an accidental press on the "Volume up" button or "Mute" button, either or both
of these settings can be disabled.

Call Handling
11
Call Handling
Hold
1. During a call, press the Rsoft key to put the call on hold. After 30 seconds, “Hung Up” is
displayed and a busy tone sounds.
2. Press the Rsoft key again to retrieve the call.
Transfer
Blind Transfer
1. During a call, press the Rsoft key twice to put the call on hold.
2. Dial the number to which you want to transfer the call.
The call is automatically transferred.
Supervised Transfer
1. During a call, press the Rsoft key to put the call on hold.
2. Dial the number to which you want to transfer the call.
3. Wait for an answer, announce the transfer, and then press OFF to hang up and connect
the other two parties.
To terminate the transfer and return to the held call, press the R key and then press 1.
Conference
To conference with another party during an active call:
1. Put the active call on hold. (Press the Rkey.)
2. Dial the number of the third party with whom you want to conference.
3. Press the Rkey twice to put the third party on hold.
4. Enter the feature access code for Conference Call.
5. Press the Rkey again to start the conferenced call.
Answer Call Waiting
While on a call, you hear a call waiting beep.
1. Press the Rkey and then press 2to answer the incoming call.
2. Press the Rkey and then press 2to swap the calls.

5606 Wireless Handset User Guide
12
Callback
Callback lets you request that the system notify you when a busy extension has become free.
1. Dial the feature access code for Callback and then press ON.
2. Listen for re-order tone and then hang up.
Your extension will ring when the called extension becomes free and automatically dials the
extension back.
Call Park
The Call Park feature allows you to place a call in a special hold state.You can then retrieve
the call from any extension in the system.
To park an active call:
1. Press the Rsoft key twice to place the call on hold.
2. Dial the feature access code for Call Park immediately followed by the directory number
on which to park the call and then press the ON button.
3. Inform the called party of the waiting call.
To retrieve a parked call:
1. Press the ON button to go off hook.
2. Dial the feature access code for Call Park - Retrieve immediately followed by the directory
number on which the call is parked, and then press the ON button.
Call Forward
To set Call Forwarding:
1. Press the ON button to go off hook.
2. Dial the feature access code for the Call Forwarding mode you want to use, followed
immediately by the extension number to which you want to forward. (For example, if *62*
is your FAC for Call Fwd - Busy, and you want to forward calls to extension 1234, then
press *62*1234.)
3. Press the ON button.
To cancel Call Forwarding:
1. Dial the feature access code for Call Forwarding - Cancel and then press ON.
2. When you hear a dial tone, press OFF to hang up. Forwarding is cancelled.

Call Handling
13
Call Pickup
To answer a call that is ringing at another station in your Pickup Group:
1. Dial the feature access code for Call Pickup-Dialed and then press ON.
2. Answer the call.
To answer a call that is ringing at an extension not in your Pickup Group:
1. Dial the feature access code for Call Pickup-Directed, followed by the number of the
ringing extension and then press ON.
Do Not Disturb
To activate Do Not Disturb:
1. Dial the feature access code for Do Not Disturb and then press the ON button.
2. When you hear a dial tone, press the OFF button to hang up. Do Not Disturb is activated.
To deactivate Do Not Disturb:
1. Dial the feature access code for Do Not Disturb - Cancel and then press the ON button.
2. When you hear a dial tone, press the OFF button to hang up. Do Not Disturb is deactivated
Direct Page
Direct Paging allows you to page a party through the party’s handsfree speaker.
1. Dial the feature access code for Direct Page and then press ON.
2. Dial the extension number.
3. Announce the page.
Group Page
Group Paging allows you to page a group of telephones through their built-in speakers.
1. Dial the feature access code for Group Page and then press ON.
2. Do one of the following:
• To page your prime page group, press #.
• To page a specific page group, dial the page group directory number.
3. Speak to the dial party after the tone.

5606 Wireless Handset User Guide
14
Loudspeaker Page
1. Press the More softkey.
2. Select Loudspeaker Page.
3. Dial the paging zone number, if required.
4. Wait for ringback and announce the page.
Music
Music on Hold is supplied by the ICP. For more information, see your administrator.
Mobile Extension
Mitel Mobile Extension is a software solution that enables you to twin your desk phone with an
external PSTN-connected phone (your cell phone, for example). Calls arriving at the desk phone
ring the cell phone simultaneously, until one or the other is answered, or if unanswered, are
forwarded to voice mail. You can use the 5606 wireless handset as a destination (twinned)
device for your desk phone. For information about using your handset with Mobile Extension,
refer to the Mobile Extension documentation available at www.mitel.com or contact your
Administrator.
Note: Ask your Administrator for the paging zone number.
Other manuals for 5606
1
This manual suits for next models
1
Table of contents
Other Mitel Handset manuals

Mitel
Mitel OpenPhone OpenPhone 27 User manual

Mitel
Mitel 142d User manual

Mitel
Mitel 5606 User manual

Mitel
Mitel 3300 User manual

Mitel
Mitel MiVoice 6900 Series User manual

Mitel
Mitel 5505H User manual

Mitel
Mitel Telepo 6920IP User manual

Mitel
Mitel SUPERSET 420 Instruction manual

Mitel
Mitel IP8630M User manual

Mitel
Mitel 5603 User manual