manuals.online logo
Brands
  1. Home
  2. •
  3. Brands
  4. •
  5. Mocka
  6. •
  7. Indoor Furnishing
  8. •
  9. Mocka Hobart User manual

Mocka Hobart User manual

mocka.co.nz I mocka.com.au
ASSEMBLY INSTRUCTIONS
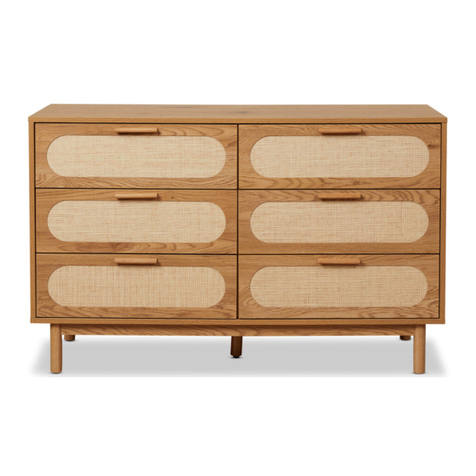
Hobart Six Drawer
Thank you for your purchase.
Please follow the instructions below for correct assembly.
A
48 x
bolt
B
48 x
locking
nut
C
20 x
dowel
W
1x
safety
strap
HARDWARE SUPPLIED
D
10 x
long
screw
E
48 x
small
screw
40 mm
10 mm
12 x 12 x
L+R
slide rail
1x
long
screw
XY
Z
1x
wall
anchor
1x
screw
1x
washer
L+R
slide rail
I
F
30 x
medium
screw
30 mm
*We recommend using a Flathead screwdriver to tighten all locking nuts 100% before first use.
Phillips & Flathead screwdrivers and hammer required
WARNING: Any furniture that is not anchored to a wall has the potential to
tip over in certain circumstances, i.e. if a child attempts to climb up on the
furniture or in the event of an earthpuake. Accordingly, we recommend that
all furniture is anchored to a wall. We supply a free safety wall anchor with
all furniture sold and we recommend these are used to prevent your product
tipping. The fixing device provided should fit most wall types, but please note
that dierent wall materials may require dierent fixing devices from those
supplied.
CL
CR
DL
DR
J K L
24 x
cover
1 x
shelf plug
1 x
long screw
6 x
handle
mocka.co.nz I mocka.com.au
ASSEMBLY INSTRUCTIONS
Hobart Six Drawer
1 2
Attach 3 x left slide rails (CL) to panel [3] and secure with 6 x small screws (E).
Insert 2 x bolts (A) into panel [3]. Tighten with a screwdriver.
A
CL
CL
E
3
A
A
E
E
E
E
E
E
E
CL
CL
Attach 1 x wall strap (W) to panel [1] using 1 x screw (Y). Insert 10 x bolts (A) into
panel [1]. Tighten with a screwdriver.
A
A
AA
A
A
Y
W
AA
A
A
1
mocka.co.nz I mocka.com.au
ASSEMBLY INSTRUCTIONS
Hobart Six Drawer
3 4
Attach 3 x right slide rails (CR) to panel [4] and secure with 6 x small screws (E).
Insert 2 x bolts (A) into panel [4]. Tighten with a screwdriver.
E
E
E
E
E
E
A
A
CR
CR
CR
4
CR
E
CL
E
5
E
E
E
E
E
E
A
A
CL
CL
CL
Attach 3 x left slide rails (CL) to panel [5] and secure with 6 x small screws (E).
Insert 2 x bolts (A) into panel [5]. Tighten with a screwdriver.
mocka.co.nz I mocka.com.au
ASSEMBLY INSTRUCTIONS
Hobart Six Drawer
5 6
Insert 4 x dowels (C) to panels [4], [5] and [6]. Attach panels [4] and [5] to panels
[6] and secure with 4 x locking nuts (B). Tighten with a screwdriver.
E
E
E
E
E
E
A
5
CR
CR
CR
CR
E
Attach 3 x right slide rails (CR) to panel [5] and secure with 6 x small screws (E).
Insert 2 x bolts (A) into panel [5]. Tighten with a screwdriver.
4
5
6
6
B
B
C
C
C
C
B
B
B
A
mocka.co.nz I mocka.com.au
ASSEMBLY INSTRUCTIONS
Hobart Six Drawer
7
8
Insert 6 x dowels (C) into panels [3], [4] and [5]. Attach panel [2] to panels
[3], [4], [5] and [7], securing with 10 x long screws (D).
C
5
4
C
C
C
B
B
B
B
6
6
3
B
Insert 4 x dowels (C) to panels [3], [5] and [6]. Attach panels [3] and [5] to panels
[6] and secure with 4 x locking nuts (B). Tighten with a screwdriver.
4
3
5
7
7
C
C
C
C
C
C
D
D
DD
D
D
DD
D
D
2
mocka.co.nz I mocka.com.au
ASSEMBLY INSTRUCTIONS
Hobart Six Drawer
9
10
K
N
K
J
8
8
8
8
Attach 1 x long screw (K) to centre support (J) as shown. Firmly screw 4 legs
[8] to the base of panel [2]. Tighten with a screwdriver. Once the legs are
attached, always LIFT the unit, never drag.
4
5
3
Slide panels [9] and [10] between the grooves on panels [3] and [4] and [7] to
form theback of the unit as shown.
4
3
5
10
10
9
7
7
2
mocka.co.nz I mocka.com.au
ASSEMBLY INSTRUCTIONS
Hobart Six Drawer
11 12
Attach panels [12], [13] and [14] to panels [16], secure with 30 x medium screws (F).
Tighten with a screwdriver.
C
14
12
13
16
F
F
F
F
F
3
5
4
1
7
7
B
B
B
BB
BB
BB
B
B
C
C
C
C
C
C
Insert 6 x dowels (C) into panel [3], [4] and [5]. Attach panel [1] to panels [3],
[4], [5] and [7], secuure with 10 x locking nuts (B). Tighten with a screwdriver.
Drawers x 6
mocka.co.nz I mocka.com.au
ASSEMBLY INSTRUCTIONS
Hobart Six Drawer
13 14
Slide panels [15] between the grooves on panels [12], [13] and [16] to form the
base of the drawer as shown.
Attach 30 x bolts (A) into panels [11]. Insert 6 x handles (I) into panels [11].
Tighten with a screwdriver.
15
13
12
Drawers x 6 Drawers x 6
16
11
A
A
A
A
A
I
I
mocka.co.nz I mocka.com.au
ASSEMBLY INSTRUCTIONS
Hobart Six Drawer
15
16
Attach panels [11] to panels [12], [13] and [14], secure with 30 x locking nuts
(B). Cover locking nuts (B) with 24 covers (L). Tighten with a screwdriver.
Drawers x 6 Drawers x 6
11
B
BB
B
B
14
13
12
B
I
II
BL
x 24
Attach 12 x slide rails (DL) and (DR) to panels [12] and [13], secure with 24 x small
screws (E). Tighten with a screwdriver.
12
13
E
E
E
E
11
DL
DR
mocka.co.nz I mocka.com.au
ASSEMBLY INSTRUCTIONS
Hobart Six Drawer
17
18
Strap
Washer
Wall
anchor
Wall
screw
X
Z
Wall
screw
Once assembled lift furniture into place, do not drag. Use a drill to create a
small hole lining up with the top of the safety stap (W). Fasten to wall using
wall anchor (X), washer (Z) and screw. Ensure the unit is balaced and steady
before use. You’re done, enjoy!
11
Slide drawers x 6 between the grooves on panels [3], [4] and [5] to form
the back of the unit as shown.
DL
CL
CR
DR

Other manuals for Hobart

2

Other Mocka Indoor Furnishing manuals

Mocka Aspen User manual

Mocka

Mocka Aspen User manual

Mocka Milton 5 Shelf Plant Stand User manual

Mocka

Mocka Milton 5 Shelf Plant Stand User manual

Mocka Sadie User manual

Mocka

Mocka Sadie User manual

Mocka Marlow Four Drawer User manual

Mocka

Mocka Marlow Four Drawer User manual

Mocka Sadie User manual

Mocka

Mocka Sadie User manual

Mocka Asta Recline User manual

Mocka

Mocka Asta Recline User manual

Mocka Porto User manual

Mocka

Mocka Porto User manual

Mocka Addi Entertainment Unit User manual

Mocka

Mocka Addi Entertainment Unit User manual

Mocka Storage Box User manual

Mocka

Mocka Storage Box User manual

Mocka Pippin User manual

Mocka

Mocka Pippin User manual

Mocka Solid Wooden Stool User manual

Mocka

Mocka Solid Wooden Stool User manual

Mocka Hamptons Entertainment Unit User manual

Mocka

Mocka Hamptons Entertainment Unit User manual

Mocka Eros Buffet User manual

Mocka

Mocka Eros Buffet User manual

Mocka Edmond User manual

Mocka

Mocka Edmond User manual

Mocka Inca Console Table User manual

Mocka

Mocka Inca Console Table User manual

Mocka Sadie User manual

Mocka

Mocka Sadie User manual
Mocka Peta User manual

Mocka

Mocka Peta User manual

Mocka Hudson User manual

Mocka

Mocka Hudson User manual

Mocka Vigo Bedside Table User manual

Mocka

Mocka Vigo Bedside Table User manual

Mocka Lewis User manual

Mocka

Mocka Lewis User manual

Mocka Avoca User manual

Mocka

Mocka Avoca User manual

Mocka Zara User manual

Mocka

Mocka Zara User manual

Mocka Hudson User manual

Mocka

Mocka Hudson User manual

Mocka Eliza Desk User manual

Mocka

Mocka Eliza Desk User manual
Popular Indoor Furnishing manuals by other brands

TecTake 404356 instruction manual

TecTake

TecTake 404356 instruction manual

ROUILLARD WISP installation guide

ROUILLARD

ROUILLARD WISP installation guide

KEUCO Universe 12702 Mounting

KEUCO

KEUCO Universe 12702 Mounting

rst brands ASTER SL-CT-2 Assembly instructions

rst brands

rst brands ASTER SL-CT-2 Assembly instructions

KITALY Mister Assembly instructions

KITALY

KITALY Mister Assembly instructions

Steelcase Virtual PUCK manual

Steelcase

Steelcase Virtual PUCK manual

Songmics VASAGLE LSC053 manual

Songmics

Songmics VASAGLE LSC053 manual

Atlantic LOFT & Luv Montana 38408158 Assembly instructions

Atlantic

Atlantic LOFT & Luv Montana 38408158 Assembly instructions

Coaster June 315926QF Assembly instructions

Coaster

Coaster June 315926QF Assembly instructions

GFW AZTEC Assembly instructions

GFW

GFW AZTEC Assembly instructions

Twoey 4100 Reading Corner manual

Twoey

Twoey 4100 Reading Corner manual

Cavity Sliders CAVILOCK CL400 Magnetic Bi-Parting ADA installation instructions

Cavity Sliders

Cavity Sliders CAVILOCK CL400 Magnetic Bi-Parting ADA installation instructions

StrongHandTool nomad owner's manual

StrongHandTool

StrongHandTool nomad owner's manual

MAY SCHATTELLO 357453 Mounting instruction and Manual

MAY

MAY SCHATTELLO 357453 Mounting instruction and Manual

kingsley-bate Amalfi Ottoman AM10 Assembly instructions

kingsley-bate

kingsley-bate Amalfi Ottoman AM10 Assembly instructions

Next 136660 Assembly instructions

Next

Next 136660 Assembly instructions

Ashley Signature Design Socalle Light Natural Three Drawer... Assembly instructions

Ashley

Ashley Signature Design Socalle Light Natural Three Drawer... Assembly instructions

Homelegance 194S9469DBR-LC Assembly instruction

Homelegance

Homelegance 194S9469DBR-LC Assembly instruction

manuals.online logo
manuals.online logoBrands
  • About & Mission
  • Contact us
  • Privacy Policy
  • Terms and Conditions

Copyright 2025 Manuals.Online. All Rights Reserved.