manuals.online logo
Brands
  1. Home
  2. •
  3. Brands
  4. •
  5. Mocka
  6. •
  7. Indoor Furnishing
  8. •
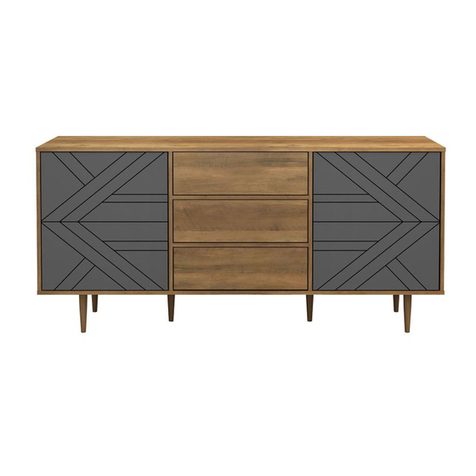
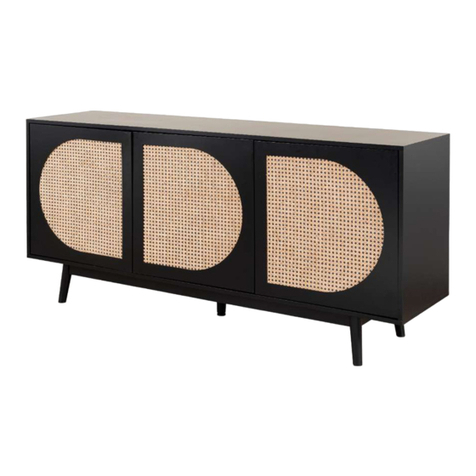
  9. Mocka Eclipse Buffet User manual

Mocka Eclipse Buffet User manual

mocka.co.nz I mocka.com.au I PO BOX 18, Pinkenba QLD 4008
ASSEMBLY I N S TRUCTION S
Eclipse
Buet
Thank you for your purchase.
Please follow the instructions below for correct assembly
WARNING: Any furniture that is not anchored to a wall has the potential to tip over in certain
circumstances, i.e. if a child attempts to climb up on the furniture or in the event of an earth-
quake. Accordingly, we recommend that all furniture is anchored to a wall. We supply a free safety
wall anchor with all furniture sold and we recommend these are used to prevent your product
tipping. The fixing device provided should fit most wall types, but please note that dierent wall
materials may require dierent fixing devices from those supplied.
For quicker assembly, we recommend the
use of a power drill on a low-speed setting.
.
Phillips & Flathead screwdrivers
Wall Strap
x4
washer
Z
Y
wall
x2
X
anchor
safety
WV
strap x2 x2
screw wall
x2
screw
x16
Hardware Supplied
A B C D EFGH
J K L M N
I O P
dowel
x20
screw
x6
bolt
x14 x18
screw
x48
screw
nut x 14
locking
wedge
x16
bolt
x10
buffer
plate
screw
x4
Allen
Key
x1
hinge
x8
screw
x2
height
adjuster
x2
handle
x4 screw
handle
x8
1
Eclipse
mocka.co.nz I mocka.com.au I PO BOX 18, Pinkenba QLD 4008
ASSEMBLY I N S TRUCTION S
2
Buet
2
Insert 6x bolts (C) into panel [1] and tighten with a screwdriver. Attach 2x
panels [8] to panel [1] and secure with 8x screws (E).
Tighten with a screwdriver.
Insert 4x bolts (C) into panels [3] and [4]. Tighten with a screwdriver.
1
3
4
8
8
C
E
C
C
C
C
C
E
E
E
E
E
E
E
C
C
C
C
Eclipse
Buet
mocka.co.nz I mocka.com.au I PO BOX 18, Pinkenba QLD 4008
ASSEMBLY I N S TRUCTION S
Insert 4x bolts (C) into panel [5]. Tighten with a screwdriver.
3 4
Attach 2x panels [6] to panel [5] with 4x dowels (A) and secure with
4x locking nuts (D). Tighten with a screwdriver.
5
5
6
6
5
FLIP
C
C
C
C
A
D
D
A
A
D
D
mocka.co.nz I mocka.com.au I PO BOX 18, Pinkenba QLD 4008
ASSEMBLY I N S TRUCTION S
Eclipse
Buet
5 6
Attach panel [3] to panel [6] with 2x dowels (A) and secure with 2x locking nuts (D).
Tighten with a screwdriver.
Attach panel [4] to panel [6] with 2x dowels (A) and secure with 2x
locking nuts (D). Tighten with a screwdriver.
3
4
6
6
D
D
A
A
D
A
A
D
Eclipse
Buet
mocka.co.nz I mocka.com.au I PO BOX 18, Pinkenba QLD 4008
ASSEMBLY I N S TRUCTION S
Slide 2x panels [7] down along the grooves between panels [3], [4] and
[5] to form the back of the unit as shown.
Attach panel [1] to panels [3] ,[4] and [5] with 6x dowels (A) and secure
with 6x locking nuts (D). Tighten with a screwdriver.
7 8
33
44
1
55
7
7
A
A
A
A
D
A
A
D
D
Eclipse
Buet
mocka.co.nz I mocka.com.au I PO BOX 18, Pinkenba QLD 4008
ASSEMBLY I N S TRUCTION S
Slide 2x panels [7] down along the grooves between panels [3], [4] and
[5] to form the back of the unit as shown.
Attach panel [2] to the unit with 6x dowels (A) and secure with 6x screws (B).
Tighten with a screwdriver.
109
B
B
B
B
B
B
A
A
A
A
33
44
55
2
7
7
11
Eclipse
Buet
mocka.co.nz I mocka.com.au I PO BOX 18, Pinkenba QLD 4008
ASSEMBLY I N S TRUCTION S
Attach panel [10] to panel [9]. Attach panel [11] to panels [9] and [10] and secure with 2x bolts (L).
Tighten with an Allen Key (P).
12
9
10
x2
10
9
9
10
11
L
L
L
P
13
Eclipse
Buet
mocka.co.nz I mocka.com.au I PO BOX 18, Pinkenba QLD 4008
ASSEMBLY I N S TRUCTION S
Attach panels [12] to panels [9] and [13] and secure with 8x bolts (L).
Tighten with an Allen Key (P). Attach 2x height adjuster (I)
to panels [9] as shown.
Attach panels [13] to panel [2] and secure with 10x screws (E). Attach
panels [10] to panel [2] and secure with 2x screws (H).
Tighten with a screwdriver.
14
9
9
10
10
12
12
12
12
13
13
13
13
E
E
E
E
E
E
E
E
H
H
E
E
L
P
L
L
L
L
L
2
2
I
I
E
H
15
Eclipse
Buet
mocka.co.nz I mocka.com.au I PO BOX 18, Pinkenba QLD 4008
ASSEMBLY I N S TRUCTION S
Attach 2x hinges (G) to panel [14] using 4x screws (F), and attach 1x
handle (M) to panel [14] and secure with 2x screw (N).
Tighten with a screwdriver.
Attach hinges on panels [14] to panels [3], [4] and [5] and secure with 3
2x screws (F). Tighten with a screwdriver. Attach 4x buer plates (O)
to panels [6] as shown. Ensure the doors open and close easily.
16
3
6
6
14
14
14
4
5
14
Door x 4
NOTE: If the doors are
uneven or there is a gap
in the middle, loosen or
tighten the screw on the
door hinge until they are
sitting flush.
FF
F
FF
F
F
F
F
OF
O
FG
G
G
M
NN
4141
Tighten the
screws 90%..
17
Eclipse
Buet
mocka.co.nz I mocka.com.au I PO BOX 18, Pinkenba QLD 4008
ASSEMBLY I N S TRUCTION S
Attach 16x wedges (J) into the corners of the back of the unit and
secure with 16x screws (K). Tighten with a screwdriver. Attach 2x
safety straps (V) to the top of the back side of the unit as shown
using 2x washers (Z) and 2x screws (W). Tighten with a screwdriver.
Once assembled lift furniture into place, do not drag. Use a drill to create
a small hole lining up with the top of the safety strap (V). Fasten to the wall
using 2x washers (Z), 2x wall anchors (X) and 2x wall screws (Y). Ensure unit
is balanced and steady before use. You’re done, enjoy!
18
7
7
7
7
K
J
V
Z
W
V
Z
W
V
Z
W
X
Y
Z
X
Y
Z
anchor
wall
screw
strap
washe
r
19
Eclipse
Buet
mocka.co.nz I mocka.com.au I PO BOX 18, Pinkenba QLD 4008
ASSEMBLY I N S TRUCTION S
After installation, if the two handles are not aligned, loosen the screws
in the back, adjust the two handles to align them, and then
tighten the screws back up.
MM
MM
MM

Other Mocka Indoor Furnishing manuals

Mocka Sintra Entertainment Unit User manual

Mocka

Mocka Sintra Entertainment Unit User manual

Mocka Vigo Shelf - Slim User manual

Mocka

Mocka Vigo Shelf - Slim User manual

Mocka Edmond Bedside Table User manual

Mocka

Mocka Edmond Bedside Table User manual

Mocka Maisie Scalloped Desk User manual

Mocka

Mocka Maisie Scalloped Desk User manual

Mocka Bronte User manual

Mocka

Mocka Bronte User manual

Mocka Aspiring Change User manual

Mocka

Mocka Aspiring Change User manual

Mocka Easton Buffet User manual

Mocka

Mocka Easton Buffet User manual

Mocka Maya Entertainment Unit User manual

Mocka

Mocka Maya Entertainment Unit User manual

Mocka Sadie User manual

Mocka

Mocka Sadie User manual

Mocka Denham Bedside Table User manual

Mocka

Mocka Denham Bedside Table User manual

Mocka Eliza Three Drawer User manual

Mocka

Mocka Eliza Three Drawer User manual

Mocka Sintra User manual

Mocka

Mocka Sintra User manual

Mocka Hamptons Bedside Table 40 mm User manual

Mocka

Mocka Hamptons Bedside Table 40 mm User manual

Mocka Parker Console User manual

Mocka

Mocka Parker Console User manual

Mocka Alps Bedside Table User manual

Mocka

Mocka Alps Bedside Table User manual

Mocka Zara Coffee Table User manual

Mocka

Mocka Zara Coffee Table User manual

Mocka Locka Bedside Table User manual

Mocka

Mocka Locka Bedside Table User manual

Mocka Olsen User manual

Mocka

Mocka Olsen User manual

Mocka Nava User manual

Mocka

Mocka Nava User manual

Mocka Jesse User manual

Mocka

Mocka Jesse User manual

Mocka Leon Dining Table User manual

Mocka

Mocka Leon Dining Table User manual

Mocka Hamptons User manual

Mocka

Mocka Hamptons User manual
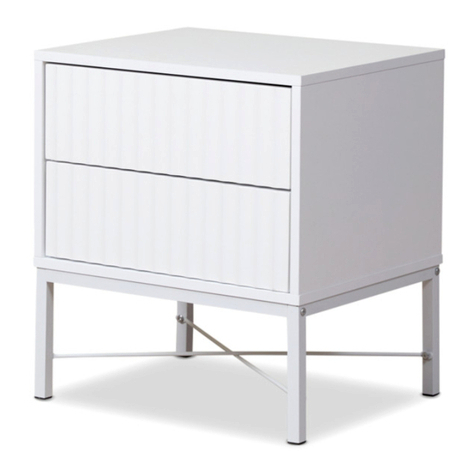
Mocka Hamptons Three Drawer User manual

Mocka

Mocka Hamptons Three Drawer User manual

Mocka Eclipse Bedside Table User manual

Mocka

Mocka Eclipse Bedside Table User manual

Popular Indoor Furnishing manuals by other brands

Knight Cubit Tambour Assembly instructions

Knight

Knight Cubit Tambour Assembly instructions

Kohler K-2526 Installation and care guide

Kohler

Kohler K-2526 Installation and care guide

meubar OLIVIA DR7 Assembly instruction

meubar

meubar OLIVIA DR7 Assembly instruction

Coleman DS-D534-133 manual

Coleman

Coleman DS-D534-133 manual

Walker Edison LNAL8K Assembly instructions

Walker Edison

Walker Edison LNAL8K Assembly instructions

Allen + Roth WHITTAKER LPWVT2439 manual

Allen + Roth

Allen + Roth WHITTAKER LPWVT2439 manual

Manual Thinking MT-WT L99-D Assembly instructions

Manual Thinking

Manual Thinking MT-WT L99-D Assembly instructions

URBAN OUTFITTERS MABELLE BED Assembly instructions

URBAN OUTFITTERS

URBAN OUTFITTERS MABELLE BED Assembly instructions

Unfinished Furniture of Wilmington WC-3222 Assembly instructions

Unfinished Furniture of Wilmington

Unfinished Furniture of Wilmington WC-3222 Assembly instructions

Linon Vanity Set 64023BLKCHY01KDU Assembly instructions

Linon

Linon Vanity Set 64023BLKCHY01KDU Assembly instructions

Epoch Design Dakota 5104 DA-TT-BB-WH manual

Epoch Design

Epoch Design Dakota 5104 DA-TT-BB-WH manual

Flair Furnishings Woodland Trundle House Assembly instructions

Flair Furnishings

Flair Furnishings Woodland Trundle House Assembly instructions

ROOMS TO GO DVDR HD1622-352C Assembly instruction

ROOMS TO GO

ROOMS TO GO DVDR HD1622-352C Assembly instruction

Royal garden FTS90042G Assembly instructions

Royal garden

Royal garden FTS90042G Assembly instructions

Tech Craft XLN48 Assembly instruction

Tech Craft

Tech Craft XLN48 Assembly instruction

Twin-Star International TC48-6356 manual

Twin-Star International

Twin-Star International TC48-6356 manual

Cooper Lighting Lumiere Zuma 1201 Specification sheet

Cooper Lighting

Cooper Lighting Lumiere Zuma 1201 Specification sheet

Teknion Interpret installation guide

Teknion

Teknion Interpret installation guide

manuals.online logo
manuals.online logoBrands
  • About & Mission
  • Contact us
  • Privacy Policy
  • Terms and Conditions

Copyright 2025 Manuals.Online. All Rights Reserved.