manuals.online logo
Brands
  1. Home
  2. •
  3. Brands
  4. •
  5. Mocka
  6. •
  7. Indoor Furnishing
  8. •
  9. Mocka Chelsea Low Sideboard User manual

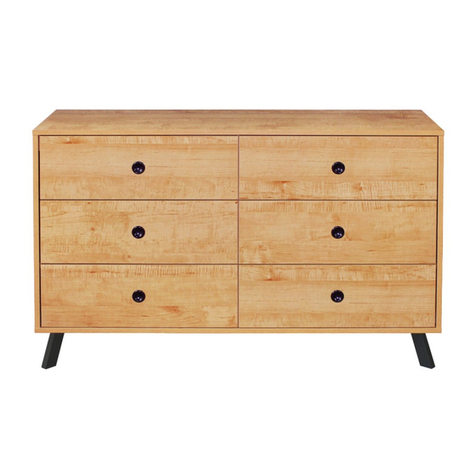
Mocka Chelsea Low Sideboard User manual

A B C D E F G H
JI
Phillips & Flathead screwdrivers
and hammer required
Hardware Supplied
dowel
x24
bolt
x12
locking
nut x12
small
screw x20
screw
x12
plastic
glide x4
*We recommend using a Flathead screwdriver to tighten all locking nuts 100% before first use.
Please clear any loose wood from the locking nut holes before inserting the nut to ensure it locks 100%.
nut
x4
WARNING: Any furniture that is not anchored to a wall has the
potential to tip over in certain circumstances, i.e. if a child
attempts to climb up on the furniture or in the event of an
earthquake. Accordingly, we recommend that all furniture is
anchored to a wall. We supply a free safety wall anchor with all
furniture sold and we recommend these are used to prevent
your product tipping. The fixing device provided should fit most
wall types, but please note that different wall materials may
require different fixing devices from those supplied.
long
dowel x4
bolt
x4
washer
x2
V W
X Y
screw
x1
screw
x1
wall
anchor x1
safety
strap x1
Z
Wall Strap
slide
rail x2
slide
rail x2
slide
rail x2
slide
rail x2
small
bolt x10
small
locking
x10
KLNM OP
screw
x9
Q
R
wedge
x4
screw
x4
S
dowel
x4
T
allen
key x1
Chelsea Low Sideboard
1
mocka.co.nz | mocka.com.au
Assembly Instructions
Thank you for your purchase.
Please follow the instructions below for correct assembly.
12
Attach panel [6] to panel [4] using 2x long dowels (B) and 2x screws (P).
Attach 2x bolts (C) to panel [4]. Tighten with a screwdriver.
6
4C
B
P
C
BP
Attach 1x slide rail (G) to the side of panel [7] as shown above. Secure
with 3x small screws (E). Flip panel [7] over and attach 1x slide rail (F).
Secure with 3x small screws (E) and tighten with a screwdriver.
FLIP
7
7
F
G
E
E
E
E
E
E
Chelsea Low Sideboard
2
mocka.co.nz | mocka.com.au
Assembly Instructions
12
Attach panel [6] to panel [4] using 2x long dowels (B) and 2x screws (P).
Attach 2x bolts (C) to panel [4]. Tighten with a screwdriver.
6
4C
B
P
C
BP
Attach 1x slide rail (G) to the side of panel [7] as shown above. Secure
with 3x small screws (E). Flip panel [7] over and attach 1x slide rail (F).
Secure with 3x small screws (E) and tighten with a screwdriver.
FLIP
7
7
F
G
E
E
E
E
E
E
34
Attach panel [7] to panel [4] and secure with 2x locking nuts (D). Tighten
with a screwdriver.
D
D
4
7
D
7
5
5
B
B
Attach panels [5] either side of panel [7] using 2x long dowels (B) as
shown.
Chelsea Low Sideboard
3
mocka.co.nz | mocka.com.au
Assembly Instructions
56
Attach 1x slide rail (F) to panel [2] and secure with 3x small screws (E).
Now insert 4x small dowels (A) and 2x bolts (C) into panel [2]. Attach 1x
slide rail (G) to panel [3] and secure with 3x small screws (E). Tighten
with a screwdriver. Insert 4x dowels (A) and 2x bolts (C) into panel [3].
Attach panels [2] and [3] to panels [4]/[5] and secure with 4x locking nuts
(D). Tighten with a screwdriver.
5
4
3
2
F
G
EE
E
EE
E
C
C
C
C
A
A
A
A
AA
3
2
D
D
D
D
D
5
Chelsea Low Sideboard
Assembly Instructions
4
mocka.co.nz | mocka.com.au
Jolt Wardrobe
ASSEMBLY INSTRUCTIONS
5
mocka.co.nz | mocka.com.au
56
Attach 1x slide rail (F) to panel [2] and secure with 3x small screws (E).
Now insert 4x small dowels (A) and 2x bolts (C) into panel [2]. Attach 1x
slide rail (G) to panel [3] and secure with 3x small screws (E). Tighten
with a screwdriver. Insert 4x dowels (A) and 2x bolts (C) into panel [3].
Attach panels [2] and [3] to panels [4]/[5] and secure with 4x locking nuts
(D). Tighten with a screwdriver.
5
4
3
2
F
G
EE
E
EE
E
C
C
C
C
A
A
A
A
AA
3
2
D
D
D
D
D
5
78
3
2
1
Insert 6x bolts (C) into panel [1].
C
C
C
C
C
C
Attach panel [1] to panels [2], [3] and [6] using 6x small dowels (A) and
secure with 6x locking nuts (D). Tighten with a screwdriver.
A
A
D
D
D
A
A
1
6
Chelsea Low Sideboard
Assembly Instructions
5
mocka.co.nz | mocka.com.au
910
Slide panel [9] down the grooves between panels [2] and [3] to form the
back of the unit.
9
3
2
S
M
S
10
10
8
Attach two leg panels [10] to the underside of panel [8] as shown, using
2x dowels (S) and 2x bolts (M). Secure with 2x nuts (N). Tighten the
bolts with the allen key (T) and the nuts with a flathead screwdriver.
N
S
×
T
Chelsea Low Sideboard
Assembly Instructions
6
mocka.co.nz | mocka.com.au
910
Slide panel [9] down the grooves between panels [2] and [3] to form the
back of the unit.
9
3
2
S
M
S
10
10
8
Attach two leg panels [10] to the underside of panel [8] as shown, using
2x dowels (S) and 2x bolts (M). Secure with 2x nuts (N). Tighten the
bolts with the allen key (T) and the nuts with a flathead screwdriver.
N
S
×
T
11
12
Attach two leg panels [10] to panel [8] using 2x dowels (S) and 2x bolts (M).
Secure with 2x nuts (N). Tighten the bolts with the allen key (S) and the nuts with
a flathead screwdriver. Attach 4x plastic glides (O) to the end of each leg. Attach
panel [11] to panel [8] using 2x small dowels (A) and secure with 1x screw (P).
Attach panel [8] to the main unit as shown, using 6x small dowels (A) and
secure with 6x screws (P). Tighten with a screwdriver.
10
8
11
P
S
M
S
O
O
O
O
10
N
S
A
A
P
A
P
P
P
P
P
A
A
A
8
3
2
T
Chelsea Low Sideboard
Assembly Instructions
7
mocka.co.nz | mocka.com.au
13 14
Insert 1x dowel (A) and 5x small bolts (J) into panel [12]/[18]. Secure
panels [13], [14] and [17] to panel [12]/[18] with 5x small locking nuts
(K). Tighten with a screwdriver. Slide panel [15] down along the
grooves between panels [13] and [14] to form the base of the drawer.
Attach panel [16] to panels [13] and [14] using 6x screws (L). Now attach 1x
slide rail (I) to panel [14] and 1x slide rail (H) to panel [13] as shown. Secure
with 4x small screws (E) and tighten with a screwdriver. Insert the
assembled drawers into the unit ensuring they slide smoothly along the rails.
A
14 15
18
17
J
J
J
JJ
K
K
KK
13
12
13
12 14
E
E
E
E
H
I
13
14
16
L
L
LL
LL
14
13
K
Drawers x2
12
18
18
Chelsea Low Sideboard
Assembly Instructions
8
mocka.co.nz | mocka.com.au
13 14
Insert 1x dowel (A) and 5x small bolts (J) into panel [12]/[18]. Secure
panels [13], [14] and [17] to panel [12]/[18] with 5x small locking nuts
(K). Tighten with a screwdriver. Slide panel [15] down along the
grooves between panels [13] and [14] to form the base of the drawer.
Attach panel [16] to panels [13] and [14] using 6x screws (L). Now attach 1x
slide rail (I) to panel [14] and 1x slide rail (H) to panel [13] as shown. Secure
with 4x small screws (E) and tighten with a screwdriver. Insert the
assembled drawers into the unit ensuring they slide smoothly along the rails.
A
14 15
18
17
J
J
J
JJ
K
K
KK
13
12
13
12 14
E
E
E
E
H
I
13
14
16
L
L
LL
LL
14
13
K
Drawers x2
12
18
18
15 16
Attach 4x wedges (Q) to each corner of back panel [9] as shown, and
secure with 4x screws (R). Attach 1x safety strap (V) to the back edge
of panel [1] using 1x washer (Z) and 1x screw (W). Tighten all screws
with a screwdriver.
Once assembled lift furniture into place, do not drag. Use a drill to create
a small hole lining up with the top of the safety strap (V). Fasten to wall
using 1x wall plug (X), 1x washer (Z) and 1x screw (Y). Ensure unit is
balanced and steady before use. You’re done, enjoy!
9
V
W
Z
X
Y
Z
Wall Strap
screw
strap
washer
wall
plug
screw
strap
washer
Q
R
Q
R
Q
R
12
18
Chelsea Low Sideboard
Assembly Instructions
9
mocka.co.nz | mocka.com.au

Other Mocka Indoor Furnishing manuals

Mocka Hudson User manual

Mocka

Mocka Hudson User manual

Mocka Zara User manual

Mocka

Mocka Zara User manual

Mocka Henley Teepee User manual

Mocka

Mocka Henley Teepee User manual

Mocka Sonata User manual

Mocka

Mocka Sonata User manual
Mocka Kennedy Three Drawer User manual

Mocka

Mocka Kennedy Three Drawer User manual

Mocka Billy Three Drawer Basket User manual

Mocka

Mocka Billy Three Drawer Basket User manual

Mocka Sadie Queen bed User manual

Mocka

Mocka Sadie Queen bed User manual

Mocka Jesse Entertainment Unit User manual

Mocka

Mocka Jesse Entertainment Unit User manual

Mocka Ora User manual

Mocka

Mocka Ora User manual

Mocka Brixton User manual

Mocka

Mocka Brixton User manual

Mocka Dahlia Four Drawer User manual

Mocka

Mocka Dahlia Four Drawer User manual

Mocka Safari Tent User manual

Mocka

Mocka Safari Tent User manual

Mocka Canyon User manual

Mocka

Mocka Canyon User manual

Mocka Tahoe User manual

Mocka

Mocka Tahoe User manual

Mocka Jolt Six Drawer - Wide User manual

Mocka

Mocka Jolt Six Drawer - Wide User manual

Mocka Luka Velvet User manual

Mocka

Mocka Luka Velvet User manual

Mocka Kennedy User manual

Mocka

Mocka Kennedy User manual

Mocka Savannah User manual

Mocka

Mocka Savannah User manual

Mocka Scarborough Tallboy User manual

Mocka

Mocka Scarborough Tallboy User manual

Mocka Kennedy Entertainment Unit User manual

Mocka

Mocka Kennedy Entertainment Unit User manual

Mocka Edmond User manual

Mocka

Mocka Edmond User manual

Mocka Portia User manual

Mocka

Mocka Portia User manual

Mocka Zander Side Table User manual

Mocka

Mocka Zander Side Table User manual

Mocka Darcy User manual

Mocka

Mocka Darcy User manual

Popular Indoor Furnishing manuals by other brands

Simpli Home Wynden Hall brooklyn + max AXCBAN-06 manual

Simpli Home

Simpli Home Wynden Hall brooklyn + max AXCBAN-06 manual

Simpli Home WyndenHall Brooklyn + Max 3AXCCON-03 quick start guide

Simpli Home

Simpli Home WyndenHall Brooklyn + Max 3AXCCON-03 quick start guide

Simpli Home WyndenHall Brooklyn + Max AXCRED15-HIC Assembly instructions

Simpli Home

Simpli Home WyndenHall Brooklyn + Max AXCRED15-HIC Assembly instructions

West Elm Mid century hall stand Acorn Assembly instructions

West Elm

West Elm Mid century hall stand Acorn Assembly instructions

SouthShore 3680034 Assembly instructions

SouthShore

SouthShore 3680034 Assembly instructions

HAMPTON BAY A211029800 Use and care guide

HAMPTON BAY

HAMPTON BAY A211029800 Use and care guide

Nurseryworks NOVELLA instruction manual

Nurseryworks

Nurseryworks NOVELLA instruction manual

Simpli Home Amherst AXCAMH09-BL manual

Simpli Home

Simpli Home Amherst AXCAMH09-BL manual

DREVONA Nicole Assembly instructions

DREVONA

DREVONA Nicole Assembly instructions

West Elm Fashion 7704711 quick start guide

West Elm

West Elm Fashion 7704711 quick start guide

Little Seeds 6828321COM Assembly manual & user guide

Little Seeds

Little Seeds 6828321COM Assembly manual & user guide

home star Z1310007-W Assembly instructions

home star

home star Z1310007-W Assembly instructions

Etac Immedia TurningMattress Instructions for use

Etac

Etac Immedia TurningMattress Instructions for use

Home Styles 20 08000 0101 Assembly instructions

Home Styles

Home Styles 20 08000 0101 Assembly instructions

Z.I.P.P.ER MASCHINEN ZI-WS9F user manual

Z.I.P.P.ER MASCHINEN

Z.I.P.P.ER MASCHINEN ZI-WS9F user manual

Bellamy MARYLOU instruction manual

Bellamy

Bellamy MARYLOU instruction manual

Smart Flex SF-850 manual

Smart Flex

Smart Flex SF-850 manual

West Elm Waldorf Coffee Table 7838329 Assembly instructions

West Elm

West Elm Waldorf Coffee Table 7838329 Assembly instructions

manuals.online logo
manuals.online logoBrands
  • About & Mission
  • Contact us
  • Privacy Policy
  • Terms and Conditions

Copyright 2025 Manuals.Online. All Rights Reserved.