manuals.online logo
Brands
  1. Home
  2. •
  3. Brands
  4. •
  5. Mocka
  6. •
  7. Indoor Furnishing
  8. •
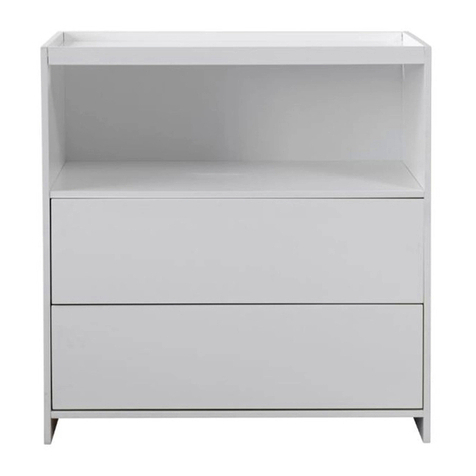
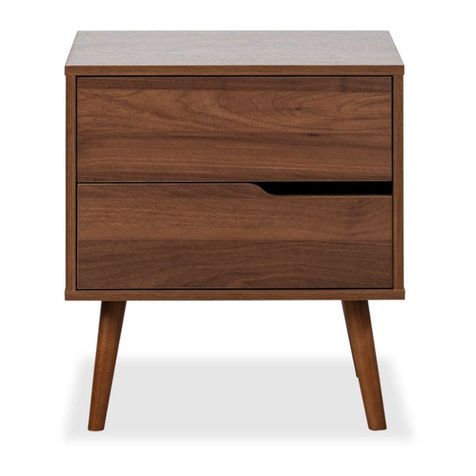
  9. Mocka Hobart Bedside Table User manual

Mocka Hobart Bedside Table User manual

Phillips & Flathead screwdrivers and hammer required
Assembly Instructions
Thank you for your purchase.
Please follow the instructions below for correct assembly.
1
X
Z
Y
W
safety
strap
x1
screw
x1
long
screw
x1
wall
anchor
x1
washer
x1
mocka.co.nz | mocka.com.au
B
ACDE
FGH
12 mm
Hardware Supplied
*We recommend using a Flathead screwdriver to tighten all locking nuts 100% before first use.
WARNING: Any furniture that is not anchored to a wall has the potential
to tip over in certain circumstances, i.e. if a child attempts to climb up on
the furniture or in the event of an earthquake. Accordingly, we
recommend that all furniture is anchored to a wall. We supply a free
safety wall anchor with all furniture sold and we recommend these are
used to prevent your product tipping. The fixing device provided should
fit most wall types, but please note that different wall materials
may require different fixing devices from those supplied.
bolt
x16
locking
nut x 16
dowel
x10
small
screw x16
I
L + R
slide rail
x4
L + R
slide rail
x4
screw x 10
Hobart Bedside Table
40 mm
long
screw x 4
handle
x 2
30 mm
medium
2
12
Hobart Bedside Table
Assembly Instructions
Thank you for your purchase.
Please follow the instructions below for correct assembly.
mocka.co.nz | mocka.com.au
A
1
Insert 4 x bolt (A) into panels [1] . Tighten with a screwdriver.
A
E
EE
E
A
E
E
A
EE
34
G
G
GG
G
G
Attach 2 x left slide rail (G) topanel [3] and secure with 4 x small screw (E).
Tighten with a screwdriver.
Attach 2 x right slide rail (G) to panel [4] and secure with 4 x small screw (E).
Insert 2 x bolt (A) into panel [3] and [4].
A
A
A
Attach 1 x wall strap (W) to panel [1] using 1x screw(Y).
W
Y
3
34
Hobart Bedside Table
Assembly Instructions
Thank you for your purchase.
Please follow the instructions below for correct assembly.
mocka.co.nz | mocka.com.au
B
4
3
B
C
C
5
B
Insert 2 x dowel (C) into panel [5]. Attach panel [5] to panels [3] and [4] secure
with 2 x locking nuts (B). Tighten with a screwdriver.
2
8
8
8
8
Firmly screw 4 leg [8] to the base of panel [2]. Tighten with a screwdriver.
4
56
Hobart Bedside Table
Assembly Instructions
Thank you for your purchase.
Please follow the instructions below for correct assembly.
mocka.co.nz | mocka.com.au
D
4
3
2
D
D
D
C
C
C
C
Insert 4 x dowel (C) into panel [3] and [4]. Attach panels [3] and [4] to panel
[2] and secure with 4 x long screws(D). Tighten with a screwdriver.
6
3
4
Slide panel [6] between the grooves on panels [3] and [4] to form the
back of the unit as shown.
Tighten with a screwdriver.
5
78
Hobart Bedside Table
Assembly Instructions
Thank you for your purchase.
Please follow the instructions below for correct assembly.
mocka.co.nz | mocka.com.au
4
3
C
1
C
CC
B
B
B
B
Drawers (x2)
BB
B
B
A
AA
A
10
7
9
Tighten with a screwdriver.
Insert 8 x bolts (A) into panel [7] .Attach panels [9] and [10] to panel
[7] secure with 8 x locking nuts (B).
Insert 4 x dowel (C) into panel [3] and [4]. Attach panels [3] and [4] to panel
[1] and secure with 4 x l locking nuts (B). Tighten with a screwdriver.
6
910
Hobart Bedside Table
Assembly Instructions
Thank you for your purchase.
Please follow the instructions below for correct assembly.
mocka.co.nz | mocka.com.au
Drawers (x2)
10
79
Drawers (x2)
B
A
11
12
Insert 2 x bolts (A) into panel [7] .Slide panels [12] between the
panel [11] to panel [7] and secure with 2 x locking nut (B).
grooves
on panels [9] and [10] to form the base of the drawer as shown.
F
F
F
F
F
11
13
10
Tighten with a screwdriver.
Attach panel [13] to panels [9],[10] and [11] Secure with 10 x medium
screws (F).
12
9
Attach
7
11 12
Hobart Bedside Table
Assembly Instructions
Thank you for your purchase.
Please follow the instructions below for correct assembly.
mocka.co.nz | mocka.com.au
Drawers (x2)
E
E
E
H
H
7
I
Attach 4 x slide rails (H) to panels [9] and [10] and secure with 8 x small
screw (E). Insert 2 x handle (I) into panel [7] .
I
10
9
Once assembled lift furniture into place, do not drag. Use a drill to create
a small hole lining up with the top of the safety strap (W). Fasten to wall
using wall anchor (X), washer (Z) and screw. Ensure the unit is balaced
and steady before use. You’re done, enjoy!
X
Z
x1
wall
screw
wall
anchor
wall
screw
Washer
Strap

Other Mocka Indoor Furnishing manuals

Mocka Peyton Bed Queen User manual

Mocka

Mocka Peyton Bed Queen User manual

Mocka Sadie Coffee Table User manual

Mocka

Mocka Sadie Coffee Table User manual

Mocka Sadie User manual

Mocka

Mocka Sadie User manual

Mocka Eden Low Shelf User manual

Mocka

Mocka Eden Low Shelf User manual

Mocka Hamptons Barstool User manual

Mocka

Mocka Hamptons Barstool User manual

Mocka Tahoe User manual

Mocka

Mocka Tahoe User manual

Mocka Luna Cube 4 User manual

Mocka

Mocka Luna Cube 4 User manual

Mocka Vibe Puzzle Drawers User manual

Mocka

Mocka Vibe Puzzle Drawers User manual

Mocka Luka Velvet Queen Bed User manual

Mocka

Mocka Luka Velvet Queen Bed User manual

Mocka Inca Buffet User manual

Mocka

Mocka Inca Buffet User manual

Mocka Six Cube User manual

Mocka

Mocka Six Cube User manual

Mocka Chelsea Cabinet User manual

Mocka

Mocka Chelsea Cabinet User manual

Mocka Jesse User manual

Mocka

Mocka Jesse User manual

Mocka Zara User manual

Mocka

Mocka Zara User manual
Mocka Mod User manual

Mocka

Mocka Mod User manual

Mocka Livi Bench Seat User manual

Mocka

Mocka Livi Bench Seat User manual

Mocka Savannah Buffet User manual

Mocka

Mocka Savannah Buffet User manual

Mocka Watson Four Drawer User manual

Mocka

Mocka Watson Four Drawer User manual

Mocka Locka User manual

Mocka

Mocka Locka User manual

Mocka Vibe Desk User manual

Mocka

Mocka Vibe Desk User manual

Mocka Chelsea Tallboy Drawers User manual

Mocka

Mocka Chelsea Tallboy Drawers User manual

Mocka Jesse User manual

Mocka

Mocka Jesse User manual
Mocka Sadie Bedside Table User manual

Mocka

Mocka Sadie Bedside Table User manual

Mocka Chelsea Bedside Table User manual

Mocka

Mocka Chelsea Bedside Table User manual

Popular Indoor Furnishing manuals by other brands

Germania 3263 Assembly instructions

Germania

Germania 3263 Assembly instructions

SAUTHON easy TOKYO XV951A Technical manua

SAUTHON easy

SAUTHON easy TOKYO XV951A Technical manua

Signature Design by Ashley H309-10 Assembly manual

Signature Design by Ashley

Signature Design by Ashley H309-10 Assembly manual

Langria 457399001 user manual

Langria

Langria 457399001 user manual

FIAM. SHELL 051 Product information

FIAM.

FIAM. SHELL 051 Product information

Lee Industries POWER RELAXOR Guide

Lee Industries

Lee Industries POWER RELAXOR Guide

Costway JV10967 manual

Costway

Costway JV10967 manual

OSP Home Furnishings GIG25 Assembly instructions

OSP Home Furnishings

OSP Home Furnishings GIG25 Assembly instructions

KLIM K120E user manual

KLIM

KLIM K120E user manual

Walker Edison BU56SBD3DR Assembly instructions

Walker Edison

Walker Edison BU56SBD3DR Assembly instructions

Futureglass Semplice Bistro Table Assembly instructions

Futureglass

Futureglass Semplice Bistro Table Assembly instructions

LOWE'S BM172030 Assembly instructions

LOWE'S

LOWE'S BM172030 Assembly instructions

aspenhome I349-464-WST Assembly instructions

aspenhome

aspenhome I349-464-WST Assembly instructions

U-Line H-4118 quick start guide

U-Line

U-Line H-4118 quick start guide

Manis-h 10780-10 Assembly instructions and directions for use

Manis-h

Manis-h 10780-10 Assembly instructions and directions for use

Politorno FENIX Assembly lnstructions

Politorno

Politorno FENIX Assembly lnstructions

Dorel Living DA7359 Instruction booklet

Dorel Living

Dorel Living DA7359 Instruction booklet

Linon 826302AWHT01U manual

Linon

Linon 826302AWHT01U manual

manuals.online logo
manuals.online logoBrands
  • About & Mission
  • Contact us
  • Privacy Policy
  • Terms and Conditions

Copyright 2025 Manuals.Online. All Rights Reserved.