manuals.online logo
Brands
  1. Home
  2. •
  3. Brands
  4. •
  5. Mocka
  6. •
  7. Indoor Furnishing
  8. •
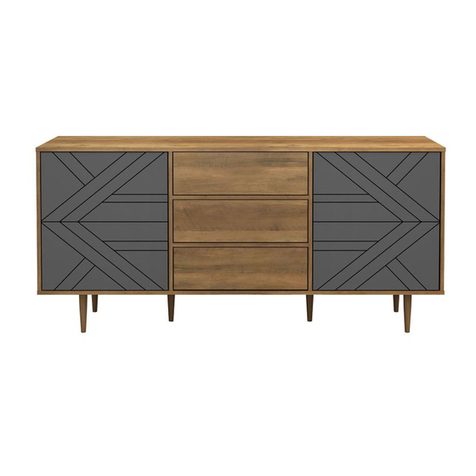
  9. Mocka Jimmy Console User manual

Mocka Jimmy Console User manual

A B C D E F
GHJ K LI
Hardware Supplied
dowel
x8
screw
x4
bolt
x32
locking
nut x32
screw
x8
*We recommend using a Flathead screwdriver to tighten all locking nuts 100% before first use.
Please clear any loose wood from the locking nut holes before inserting the nut to ensure it locks 100%.
washer
x8
WARNING: Any furniture that is not anchored to a wall has the
potential to tip over in certain circumstances, i.e. if a child
attempts to climb up on the furniture or in the event of an
earthquake. Accordingly, we recommend that all furniture is
anchored to a wall. We supply a free safety wall anchor with all
furniture sold and we recommend these are used to prevent
your product tipping. The fixing device provided should fit most
wall types, but please note that different wall materials may
require different fixing devices from those supplied.
x2
washer
Z
wall
screw x2
r/washer
screw
x2
Y
wall
anchor
x2
X
safety
strap x2
Wall Strap
W
Phillips & Flathead screwdrivers required
screw
x4
nut
x4
bolt
x4
slide
rail x2
slide
rail x2
bolt
x8
Jimmy Console
1
mocka.co.nz | mocka.com.au
Assembly Instructions
Thank you for your purchase.
Please follow the instructions below for correct assembly.
12
Attach panels [4], [5] and [6] to panel [3] using 8x bolts (A) and secure
with 8x locking nuts (B). Tighten using a flathead screwdriver.
Attach panel [7] to panels [4] and [5] and attach panel [8] to panels [6]
and [4] using 8x bolts (A) and 8x locking nuts (B). Ensure the two holes
shown are on the underside of panels [7] and [8] and are on at the top
left and top right hand corners when putting the panels on.
A
B
A
AA
AA
AA
B
B
B
6
5
4
3
4AA
AA
AA
AA
8
7
6
5
4
4
B
B
B
B
D
Jimmy Console
2
mocka.co.nz | mocka.com.au
Assembly Instructions
12
Attach panels [4], [5] and [6] to panel [3] using 8x bolts (A) and secure
with 8x locking nuts (B). Tighten using a flathead screwdriver.
Attach panel [7] to panels [4] and [5] and attach panel [8] to panels [6]
and [4] using 8x bolts (A) and 8x locking nuts (B). Ensure the two holes
shown are on the underside of panels [7] and [8] and are on at the top
left and top right hand corners when putting the panels on.
A
B
A
AA
AA
AA
B
B
B
6
5
4
3
4AA
AA
AA
AA
8
7
6
5
4
4
B
B
B
B
D
34
Attach panel [1] to the rest of the unit as shown using 12x bolts (A) and
8x dowels (C). Secure the bolts using 12x locking nuts (B) and tighten
with a flathead screwdriver. Slot panel [2] between panels [7] and [8] as
shown.
Secure panel [2] using 4x screws (D) and tighten with a screwdriver.
8
7
2
1
A
B
CA
CCC
A
AA
AAAA
CCCC
B
B
B
28
7
DD
DD
Jimmy Console
3
mocka.co.nz | mocka.com.au
Assembly Instructions
56
Attach the legs [9] and [10] to the corners of the unit as shown and
secure with 8x washers (L) and 8x bolts (K). Tighten with a screwdriver.
Carefully turn the unit on its side. Attach panel [11] between the legs as
shown and secure with 4x bolts (G) and 4x nuts (H). Tighten with a
screwdriver.
10
9
10
9
LK
GG
GG
H
H
11
10
Jimmy Console
Assembly Instructions
4
mocka.co.nz | mocka.com.au
Jolt Wardrobe
ASSEMBLY INSTRUCTIONS
5
mocka.co.nz | mocka.com.au
56
Attach the legs [9] and [10] to the corners of the unit as shown and
secure with 8x washers (L) and 8x bolts (K). Tighten with a screwdriver.
Carefully turn the unit on its side. Attach panel [11] between the legs as
shown and secure with 4x bolts (G) and 4x nuts (H). Tighten with a
screwdriver.
10
9
10
9
LK
GG
GG
H
H
11
10
78
Attach 2x slide rails (I) to the inner cavity of the unit and secure with 4x
screws (E) as shown. Tighten with a screwdriver.
Attach panel [13], [14] and [15] together with 4x screws (F). Slide panel
[16] along the grooves to form the base of the drawer. Insert 4x bolts (A)
into panel [12] and secure to side panels [13] and [14] with 4x locking
nuts (B). Attach 2x slide rails (J) to side panels [13 and [14] using 4x
screws (E) and tighten with a screwdriver..
E
I
E
I
E
IE
B
E
F
F
13
12
14
15
16
12
B
A
13
14
13
E
E
J
J
E
Drawer
Jimmy Console
Assembly Instructions
5
mocka.co.nz | mocka.com.au
910
Insert the assembled drawer, ensuring it slides smoothly and easily
along the rails.
Attach 2x safety straps (W) to the the back side of the unit [3] using 2x
r/washer screws (Y). Tighten with a screwdriver.
3
Y
W Y
W
Wall Strap
Jimmy Console
Assembly Instructions
6
mocka.co.nz | mocka.com.au
910
Insert the assembled drawer, ensuring it slides smoothly and easily
along the rails.
Attach 2x safety straps (W) to the the back side of the unit [3] using 2x
r/washer screws (Y). Tighten with a screwdriver.
3
Y
W Y
W
Wall Strap
11
12
Once assembled lift furniture into place, do not drag. Use a drill to create
two small holes lining up with the top of the safety straps (W). Fasten to
wall using 2x wall plugs (X), 2x washers (Z) and 2x wall screws (not
supplied).
Ensure unit is balanced and steady before use. You’re done, enjoy!
X
XZ
Z
Wall Strap
W
W
Jimmy Console
Assembly Instructions
7
mocka.co.nz | mocka.com.au

Other Mocka Indoor Furnishing manuals

Mocka Hamptons Change Table User manual

Mocka

Mocka Hamptons Change Table User manual

Mocka Savannah Two Door Cabinet User manual

Mocka

Mocka Savannah Two Door Cabinet User manual

Mocka Inca Four Drawer User manual

Mocka

Mocka Inca Four Drawer User manual

Mocka Claremont User manual

Mocka

Mocka Claremont User manual

Mocka Milton Medium Plant Stand User manual

Mocka

Mocka Milton Medium Plant Stand User manual

Mocka Sadie Buffet User manual

Mocka

Mocka Sadie Buffet User manual

Mocka Theo User manual

Mocka

Mocka Theo User manual

Mocka Jack Buffet User manual

Mocka

Mocka Jack Buffet User manual

Mocka Easton Buffet User manual

Mocka

Mocka Easton Buffet User manual

Mocka Boucle User manual

Mocka

Mocka Boucle User manual

Mocka Livi Bar Stool User manual

Mocka

Mocka Livi Bar Stool User manual

Mocka Harlin Kids Bedside Table User manual

Mocka

Mocka Harlin Kids Bedside Table User manual

Mocka Eclipse Coffee Table User manual

Mocka

Mocka Eclipse Coffee Table User manual

Mocka Sadie User manual

Mocka

Mocka Sadie User manual

Mocka Kent Ladder Bookcase User manual

Mocka

Mocka Kent Ladder Bookcase User manual

Mocka Sadie User manual

Mocka

Mocka Sadie User manual

Mocka Sadie Entertainment Unit - Large User manual

Mocka

Mocka Sadie Entertainment Unit - Large User manual

Mocka Zara User manual

Mocka

Mocka Zara User manual

Mocka Zara User manual

Mocka

Mocka Zara User manual

Mocka Vibe Desk User manual

Mocka

Mocka Vibe Desk User manual

Mocka Dakota Coffee Table User manual

Mocka

Mocka Dakota Coffee Table User manual

Mocka Dakota User manual

Mocka

Mocka Dakota User manual

Mocka Portia User manual

Mocka

Mocka Portia User manual

Mocka Sadie User manual

Mocka

Mocka Sadie User manual

Popular Indoor Furnishing manuals by other brands

Amart Furniture CHARTREUX 71675 Assembly instruction

Amart Furniture

Amart Furniture CHARTREUX 71675 Assembly instruction

RiverRidge Madison 06-110 Assembly instructions

RiverRidge

RiverRidge Madison 06-110 Assembly instructions

Escea KSE installation manual

Escea

Escea KSE installation manual

Next BRONX 550779 Assembly instructions

Next

Next BRONX 550779 Assembly instructions

Kinfine HOMEPOP K4286 Assembly instructions

Kinfine

Kinfine HOMEPOP K4286 Assembly instructions

modway Nomad EEI-6204 Assembly instructions

modway

modway Nomad EEI-6204 Assembly instructions

Vela Tango 700 Mounting instructions

Vela

Vela Tango 700 Mounting instructions

Leick Home 84100 Assembly instructions

Leick Home

Leick Home 84100 Assembly instructions

Pulsar RWA666 installation guide

Pulsar

Pulsar RWA666 installation guide

Pinolino Kinderträume Polar Assembly plan

Pinolino Kinderträume

Pinolino Kinderträume Polar Assembly plan

Whittier Wood 5202AFGMS Assembly instructions

Whittier Wood

Whittier Wood 5202AFGMS Assembly instructions

Steelcase Migration SE Height-Adjustable Desk and... user guide

Steelcase

Steelcase Migration SE Height-Adjustable Desk and... user guide

BACKHOME BRAVO Assembly instructions

BACKHOME

BACKHOME BRAVO Assembly instructions

DITALIA CD-368 Assembly manual

DITALIA

DITALIA CD-368 Assembly manual

Prepac DC-2422 Assembly instructions

Prepac

Prepac DC-2422 Assembly instructions

IKEA GODMORGON quick start guide

IKEA

IKEA GODMORGON quick start guide

Bayside CSC72LBK-2 manual

Bayside

Bayside CSC72LBK-2 manual

pols potten Table disc marble look POL530-010-006 instruction manual

pols potten

pols potten Table disc marble look POL530-010-006 instruction manual

manuals.online logo
manuals.online logoBrands
  • About & Mission
  • Contact us
  • Privacy Policy
  • Terms and Conditions

Copyright 2025 Manuals.Online. All Rights Reserved.