manuals.online logo
Brands
  1. Home
  2. •
  3. Brands
  4. •
  5. Mocka
  6. •
  7. Indoor Furnishing
  8. •
  9. Mocka Tahoe User manual

Mocka Tahoe User manual

mocka.co.nz I mocka.com.au I PO BOX 18, Pinkenba QLD 4008
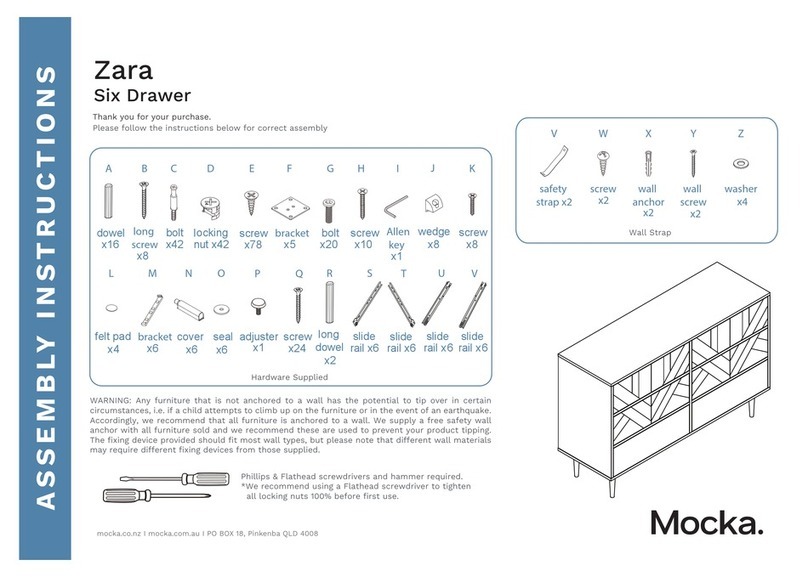
ASSEMBLY I N S TRUCTION S
Tahoe
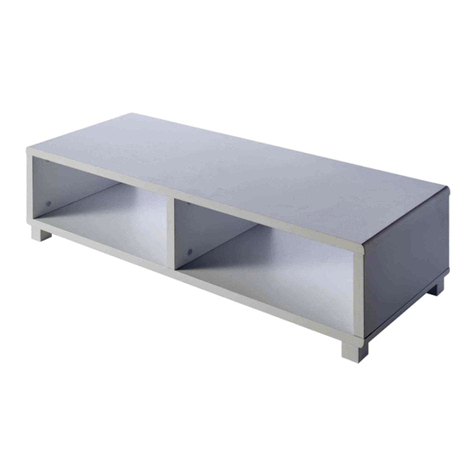
Entertainment Unit
Thank you for your purchase.
Please follow the instructions below for correct assembly
WARNING: Any furniture that is not anchored to a wall has the potential to
tip over in certain circumstances, i.e. if a child attempts to climb up on the
furniture or in the event of an earthquake. Accordingly, we recommend that
all furniture is anchored to a wall. We supply a free safety wall anchor with
all furniture sold and we recommend these are used to prevent your prod-
uct tipping. The fixing device provided should fit most wall types, but
please note that dierent wall materials may require dierent fixing devic-
es from those supplied.
Phillips & Flathead screwdrivers and hammer required.
*We recommend using a Flathead screwdriver to tighten
all locking nuts 100% before first use.
M
long
screw x2
shelf
plug x2
A B C D E
FH I JG
dowel
Hardware Supplied
x24
bolt
x21
locking
nut x 21
small
long
screw x8
screw x 5
x18
long screw
L + R
x 2
slide rail
L + R
x 2
slide rail
2
40
x
4
nu
tlong
screw x 4
K L
hinge
x 4
screw
x24
4
N
x 4
O
cover
X
Z
Y
W
safety
x1
strap
x1
screw
long
x1
screw
wall
x1
anchor
x1
washer
1
Tahoe
mocka.co.nz I mocka.com.au I PO BOX 18, Pinkenba QLD 4008
ASSEMBLY I N S TRUCTION S
2
Entertainment Unit
2
Insert 8 x bolts (A) into panels [5]. Tighten with a screwdriver. Insert 4 x locking nuts (B) into panel [1]. Attach 4 x bolts (A) into panel [1].
Attach 4 x dowels (C) to panel [1] and secure with [5]. Attach 1 x wall
strap (W) to panel [1] using 1x screw (Y). Tighten with a screwdriver.
A
Curved panel piece x 2
5
5
5
1
A
A
A
A
A
A
B
B
CBC
B
CC
A
A
YW
Tahoe
Entertainment Unit
mocka.co.nz I mocka.com.au I PO BOX 18, Pinkenba QLD 4008
ASSEMBLY I N S TRUCTION S
Attach 1 x left slide rail (G) to panel [6] and secure with 2 x small screws (E).
Attach 1 x right slide rail (G) to panel [9] and secure with 2 x small screws (E).
Insert 4 x bolts (A) into panels [6] and [9]. Tighten with a screwdriver.
3 4
Insert 4 x dowels (C) into panel [10]. Attach panel [10] to panels [6] and [9]
and secure with 4 x locking nuts (B). Tighten with a screwdriver.
6
9
A
A
AA
9
6
10
B
B
B
B
C
C
B
EE
G
EE
G
G
G
mocka.co.nz I mocka.com.au I PO BOX 18, Pinkenba QLD 4008
ASSEMBLY I N S TRUCTION S
Tahoe
Entertainment Unit
5 6
Insert 8 x dowels (C) into panel [1]. Attach panel [1] to panels [3], [4],[6]
and [9] and secure with 8 x locking nuts (B). Cover locking nuts (B) with
4 x covers (O).
Slide panel [11], [12] and [13] between the grooves on panels [3],[4], [6] and [9] to
form the back of the unit as shown.Tighten with a screwdriver.
9
6
10
B
3
4
1BC
C
C
C
C
C
B
B
B
C
C
12
13
11
3
6
9
4
B
x4
1
2I
O
O
Tahoe
Entertainment Unit
mocka.co.nz I mocka.com.au I PO BOX 18, Pinkenba QLD 4008
ASSEMBLY I N S TRUCTION S
Insert 4 x nuts (I) into panels [8] . Attach panels [7] to panels [8] and secure
with 4 x long bolts (J). Tighten with a screwdriver.
Insert 8 x dowels (C) into panel [3], [4], [6] and [9]. Attach panels [2] to
panel [3], [4], [6] and [9] and secure with 8 x long screws (D).
Tighten with a screwdriver.
7 8
I
I
8
8
7
7
I
J
J
J
J
II
3
4
6
9
2
CC
CC
C
C
C
B
D
D
D
D
D
D
D
D
C
Tahoe
Entertainment Unit
mocka.co.nz I mocka.com.au I PO BOX 18, Pinkenba QLD 4008
ASSEMBLY I N S TRUCTION S
Attach panels [8] to panel [2] with 10 x long screws (D). Attach 2 x
centre support (N) to panel [2]. Attach 2 x long screws (M) to centre
support (N) as shown.
Attach 4 x hinges (K) to panels [19] and [20] and secure with 8 x small screws (L).
109
8M
2
N
N
M
M
D
D
D
D
D
D
D
D
D
D
LL
K
KLL
K
LLK
19
LL
20
K
L
11
Tahoe
Entertainment Unit
mocka.co.nz I mocka.com.au I PO BOX 18, Pinkenba QLD 4008
ASSEMBLY I N S TRUCTION S
Insert 5 x bolts (A) into panel [17] .Attach panels [14] and [15] to panels [17],
secure with 5 x locking nuts (B).Slide panels [16] between the grooves on
panels [14] and [15] to form the base of the drawer as shown.
Tighten with a screwdriver.
Attach panel [21] to panels [14] and [15] secure with 5 x medium screws
(F). Attach 2 x slide rails (H) to panels [14] and [15] and secure with 4 x
small screws (E). Tighten with a screwdriver.
12
15
14
17
B
B
B
B
A
A
A
A
21
15
14
21
H
E
E
17
18
16
B
17 14
15
FF
F
F
14
15
18
16
F
A
E
E
H
13
Tahoe
Entertainment Unit
mocka.co.nz I mocka.com.au I PO BOX 18, Pinkenba QLD 4008
Attach panels [19] and [20] to panel as shown. Secure with 16 x screws (L).
Tighten with a screwdriver.
Move the unit into the desired location up against a wall. Use a drill to create
a small hole lining up with the top of the 1 x safety strap (W). Fasten to the wall
using 1x wall anchor (X), 1 x washer (Z) and 1x long screw. Ensure the unit is
balanced and steady before use. You’re done, enjoy!
14
ASSEMBLY I N S TRUCTION S
17
19
20
K
NOTE: If the doors are
uneven or there is a gap in
the middle, loosen or tighten
the screw on the hinge until
they are sitting flush.
W
X
Z

Other manuals for Tahoe

8

Other Mocka Indoor Furnishing manuals

Mocka Aspiring User manual

Mocka

Mocka Aspiring User manual

Mocka Brixton Bookcase User manual

Mocka

Mocka Brixton Bookcase User manual

Mocka Kennedy Three Drawer User manual

Mocka

Mocka Kennedy Three Drawer User manual

Mocka Inca Coffee Table User manual

Mocka

Mocka Inca Coffee Table User manual

Mocka Detroit Trolley Side Table User manual

Mocka

Mocka Detroit Trolley Side Table User manual

Mocka Asha Coffee Table User manual

Mocka

Mocka Asha Coffee Table User manual

Mocka Southport Rattan Decor Stand User manual

Mocka

Mocka Southport Rattan Decor Stand User manual

Mocka Jack Three Drawer User manual

Mocka

Mocka Jack Three Drawer User manual

Mocka Porto User manual

Mocka

Mocka Porto User manual

Mocka Octavia Change Table User manual

Mocka

Mocka Octavia Change Table User manual

Mocka Vibe/Olsen Tallboy User manual

Mocka

Mocka Vibe/Olsen Tallboy User manual

Mocka Kennedy Bedside Table User manual

Mocka

Mocka Kennedy Bedside Table User manual

Mocka Urban Buffet User manual

Mocka

Mocka Urban Buffet User manual

Mocka Savannah Coffee Table User manual

Mocka

Mocka Savannah Coffee Table User manual

Mocka Kennedy User manual

Mocka

Mocka Kennedy User manual

Mocka Scarborough Four Drawer User manual

Mocka

Mocka Scarborough Four Drawer User manual

Mocka Sadie Three Drawers User manual

Mocka

Mocka Sadie Three Drawers User manual

Mocka Aspen User manual

Mocka

Mocka Aspen User manual

Mocka Vigo Tallboy User manual

Mocka

Mocka Vigo Tallboy User manual

Mocka Edmond User manual

Mocka

Mocka Edmond User manual

Mocka Sintra Side Table User manual

Mocka

Mocka Sintra Side Table User manual

Mocka Locka User manual

Mocka

Mocka Locka User manual

Mocka Marlow Desk User manual

Mocka

Mocka Marlow Desk User manual

Mocka Sadie Coffee Table User manual

Mocka

Mocka Sadie Coffee Table User manual

Popular Indoor Furnishing manuals by other brands

BOPITA FOLDABLE DRAWER 90X200 Assembly instruction

BOPITA

BOPITA FOLDABLE DRAWER 90X200 Assembly instruction

Riverside Furniture Cora Assembly instructions

Riverside Furniture

Riverside Furniture Cora Assembly instructions

BDI Sequel owner's manual

BDI

BDI Sequel owner's manual

FMD Furniture LASSE 289-001 Assembly instructions

FMD Furniture

FMD Furniture LASSE 289-001 Assembly instructions

Multimo ROYAL MOTORLU YATAK Assembly instructions

Multimo

Multimo ROYAL MOTORLU YATAK Assembly instructions

physa DAVOS WHITE user manual

physa

physa DAVOS WHITE user manual

Ergomotion Rio 6.0 owner's manual

Ergomotion

Ergomotion Rio 6.0 owner's manual

Next 260413 Assembly instructions

Next

Next 260413 Assembly instructions

Next BORDEAUX 733966 Assembly instructions

Next

Next BORDEAUX 733966 Assembly instructions

Sanus SFV265 manual

Sanus

Sanus SFV265 manual

Songmics Vasagle LCR101 manual

Songmics

Songmics Vasagle LCR101 manual

Baumax DALIA 50 Assembly instructions

Baumax

Baumax DALIA 50 Assembly instructions

LPD Furniture STOCKHOLM 1 DRAWER BEDSIDE CABINET Assembly instructions

LPD Furniture

LPD Furniture STOCKHOLM 1 DRAWER BEDSIDE CABINET Assembly instructions

Rocker COSMOS RGB 2112001 Assembly instructions

Rocker

Rocker COSMOS RGB 2112001 Assembly instructions

Forte Canne CQNK231B Assembling Instruction

Forte

Forte Canne CQNK231B Assembling Instruction

Seconique GREY TOLEDO Assembly instructions

Seconique

Seconique GREY TOLEDO Assembly instructions

CB2 ACACIA Assembly instructions

CB2

CB2 ACACIA Assembly instructions

Next PARIS 296872 Assembly instructions

Next

Next PARIS 296872 Assembly instructions

manuals.online logo
manuals.online logoBrands
  • About & Mission
  • Contact us
  • Privacy Policy
  • Terms and Conditions

Copyright 2025 Manuals.Online. All Rights Reserved.