manuals.online logo
Brands
  1. Home
  2. •
  3. Brands
  4. •
  5. Mocka
  6. •
  7. Indoor Furnishing
  8. •
  9. Mocka Kennedy Bedside Table User manual

Mocka Kennedy Bedside Table User manual

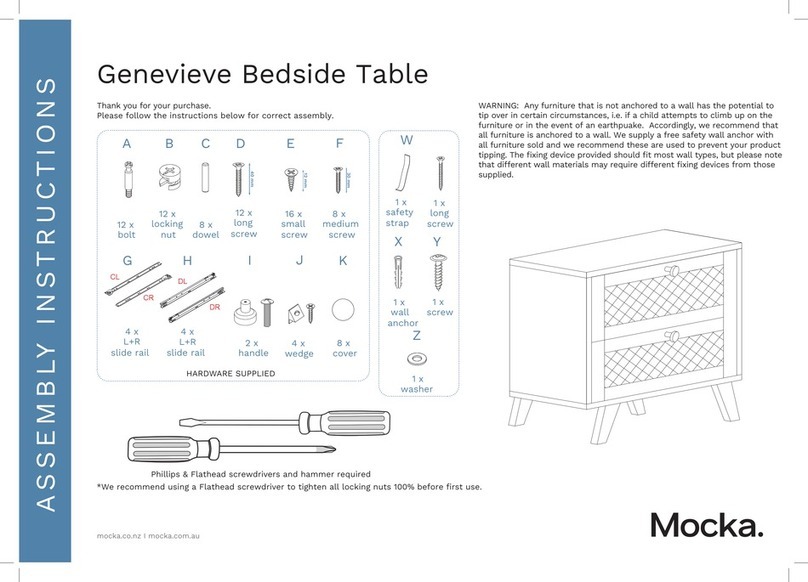
*We recommend using a Flathead screwdriver to
tighten all locking nuts 100% before rst use.
Please clear any loose wood from the locking nut
holes before inserting the nut to ensure it locks 100%.
WARNING: Any furniture that is not anchored to a wall has the potential to tip over in certain circumstances,
i.e. if a child attempts to climb up on the furniture or in the event of an earthquake. Accordingly, we recommend
that all furniture is anchored to a wall. We supply a free safety wall anchor with all furniture sold and we
recommend these are used to prevent your product tipping. The fixing device provided should fit most wall
types, but please note that different wall materials may require different fixing devices from those supplied.
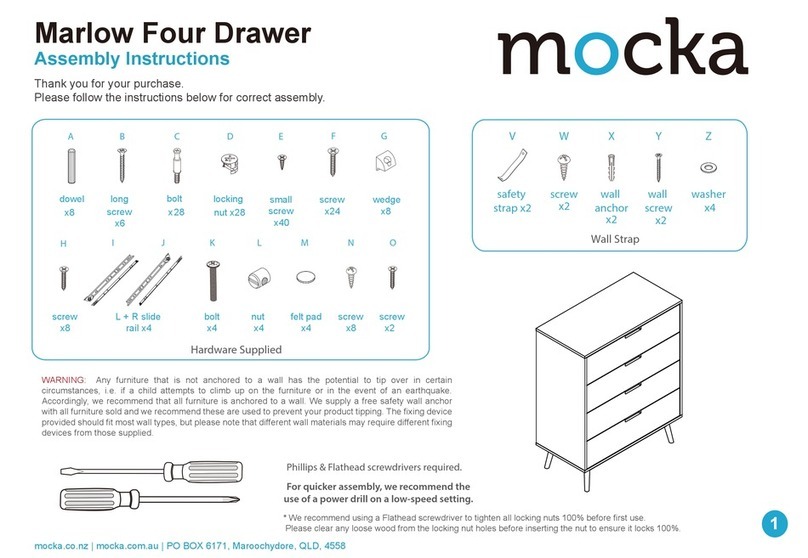
Phillips & Flathead screwdrivers required.
For quicker assembly, we recommend the
use of a power drill on a low-speed setting.
A B C D E F G HJ
KLMN
I
Hardware Supplied
dowel
x8
screw
x22
bolt
x20
locking
nut x20
bracket
x2
bracket
x4
slide
rail x2
slide
rail x2
screw
x8
slide
rail x2
slide
rail x2
bolt
x16
cover
x2
plug
x2
O P Q
wedge
x4
allen
key x1
Wall Strap
x2
washer
Z
Y
wall
anchor
x1
X
safety
strap x1
WV
screw
x1
wall
screw
x1
long
bolt x4
RS
screw screw
x4 x8 x16
washer
T
Kennedy Bedside Table
1
mocka.co.nz | mocka.com.au | PO BOX 6171, Maroochydore BC, QLD, 4558
Assembly Instructions
Thank you for your purchase.
Please follow the instructions below for correct assembly.
12
Attach 1x bracket (E) to panel [2] and secure with 2x screws (D). Tighten
with a screwdriver and attach 1x cover (F) as shown. Insert 4x bolts (B)
into panel [2]. Now attach 1x bracket (E) to panel [5] and secure with 2x
screws (D). Tighten with a screwdriver and attach 1x cover (F).
Insert 2x bolts (B) into panel [3]. Insert 2x bolts (B) into panel [4].
5
4
3
2
B
B
B
B
D
D
D
D
E
E
F
F
E
F
FB
B
B
B
Kennedy Bedside Table
2
mocka.co.nz | mocka.com.au | PO BOX 6171, Maroochydore BC, QLD, 4558
Assembly Instructions
12
Attach 1x bracket (E) to panel [2] and secure with 2x screws (D). Tighten
with a screwdriver and attach 1x cover (F) as shown. Insert 4x bolts (B)
into panel [2]. Now attach 1x bracket (E) to panel [5] and secure with 2x
screws (D). Tighten with a screwdriver and attach 1x cover (F).
Insert 2x bolts (B) into panel [3]. Insert 2x bolts (B) into panel [4].
5
4
3
2
B
B
B
B
D
D
D
D
E
E
F
F
E
F
FB
B
B
B
34
Insert 4x bolts (B) into panel [1]. Attach 1x plug (G) to panel [8] and
secure with 1x screw (D). Tighten with a screwdriver. Insert 4x bolts (B)
into panel [8]. Attach 1x plug (G) to panel [9] and secure with 1x screw
(D). Tighten with a screwdriver. Insert 4x bolts (B) into panel [9].
Attach panel [5] to panels [3] and [4] using 4x locking nuts (C). Tighten
with a screwdriver.
B
9
8
5
4
3
1
B
B
B
B
B
B
B
BB
B
B
D
D
GG
C
C
C
C
C
D
G
Kennedy Bedside Table
3
mocka.co.nz | mocka.com.au | PO BOX 6171, Maroochydore BC, QLD, 4558
Assembly Instructions
56
Attach panel [2] to panels [3] and [4] using 4x dowels (A) and secure
with 4x locking nuts (C). Tighten with a flathead screwdriver.
Attach a leg bracket (I) to each leg [7] using 2x screws (S) and 1x long
bolt (Q). Tighten with the allen key (O) and screwdriver. Attach the leg
panels [7] to panel [2] using 16x bolts (H) and 16x washers (T) as shown.
Tighten with the allen key (O).
A
5
4
3
2
A
A
A
C
C
C
C
Q
S
I
S
O
front front
back
x4
7
2
7
7
7
O
H
T
H
H
H
H
H
H
HT
T
T
T
T
T
T
T
H
O
Kennedy Bedside Table
Assembly Instructions
4
mocka.co.nz | mocka.com.au | PO BOX 6171, Maroochydore BC, QLD, 4558
Jolt Wardrobe
ASSEMBLY INSTRUCTIONS
5
mocka.co.nz | mocka.com.au
56
Attach panel [2] to panels [3] and [4] using 4x dowels (A) and secure
with 4x locking nuts (C). Tighten with a flathead screwdriver.
Attach a leg bracket (I) to each leg [7] using 2x screws (S) and 1x long
bolt (Q). Tighten with the allen key (O) and screwdriver. Attach the leg
panels [7] to panel [2] using 16x bolts (H) and 16x washers (T) as shown.
Tighten with the allen key (O).
A
5
4
3
2
A
A
A
C
C
C
C
Q
S
I
S
O
front front
back
x4
7
2
7
7
7
O
H
T
H
H
H
H
H
H
HT
T
T
T
T
T
T
T
H
O
78
Attach 2x slide rails (J) to panel [3] and secure with 4x screws (D).
Attach 2x slide rails (K) to panel [4] and secure with 4x screws (D).
Tighten with a screwdriver.
Slide panel [6] down along the grooves between the side panels to form
the back of the unit.
6
K
K
J
J
D
D
D
D
D
D
D
4
3
J
D
Kennedy Bedside Table
Assembly Instructions
5
mocka.co.nz | mocka.com.au | PO BOX 6171, Maroochydore BC, QLD, 4558
910
Attach panel [1] using 4x dowels (A) and secure with 4x locking nuts
(C). Tighten with a screwdriver.
Attach panels [10], [11] and [12] as shown using 4x screws (L). Tighten
with a screwdriver. Slide panel [13] along the grooves between the side
panels [10] and [11] to form the base of the drawer.
Drawers x2
A10
1
13
12
11
C
A
A
A
CC
C
C
L
L
L
L
10
11
Kennedy Bedside Table
Assembly Instructions
6
mocka.co.nz | mocka.com.au | PO BOX 6171, Maroochydore BC, QLD, 4558
910
Attach panel [1] using 4x dowels (A) and secure with 4x locking nuts
(C). Tighten with a screwdriver.
Attach panels [10], [11] and [12] as shown using 4x screws (L). Tighten
with a screwdriver. Slide panel [13] along the grooves between the side
panels [10] and [11] to form the base of the drawer.
Drawers x2
A10
1
13
12
11
C
A
A
A
CC
C
C
L
L
L
L
10
11
11
12
Attach front panel [8] to panels [10] and [11] using 4x locking nuts (C).
Attach front panel [9] to panels [10] and [11] using 4x locking nuts (C).
Tighten with a screwdriver.
Attach 2x slide rails (M) and 2x slide rails (N) to the underside of the side
panels as shown. Secure with 8x screws (D) and tighten with a
screwdriver.
10
11
9
8
C
C
C
C
C
C
C
C
10
11
9
D
D
D
D
D
D
N
M
8
D
D
N
Kennedy Bedside Table
Assembly Instructions
7
mocka.co.nz | mocka.com.au | PO BOX 6171, Maroochydore BC, QLD, 4558
13 14
Insert the assembled drawers into the corresponding compartments as
shown. Ensure the drawers slide easily along the rails. If the drawer is
not catching or sitting flush, twist the end of the cover (F) until it catches
on the stopper (G).
Attach 4x wedges (P) into the corners of the back of the unit and secure
with 4x screws (R). Tighten with a screwdriver.
9
8
RR
RR
P
P
P
P
F
Kennedy Bedside Table
Assembly Instructions
8
mocka.co.nz | mocka.com.au | PO BOX 6171, Maroochydore BC, QLD, 4558
13 14
Insert the assembled drawers into the corresponding compartments as
shown. Ensure the drawers slide easily along the rails. If the drawer is
not catching or sitting flush, twist the end of the cover (F) until it catches
on the stopper (G).
Attach 4x wedges (P) into the corners of the back of the unit and secure
with 4x screws (R). Tighten with a screwdriver.
9
8
RR
RR
P
P
P
P
F
15 16
Attach 1x safety strap (V) to the top of the back side of the unit as
shown using 1x washer (Z) and 1x screw (W). Tighten with a
screwdriver.
Once assembled lift furniture into place, do not drag. Use a drill to create
a small hole lining up with the top of the safety strap (V). Fasten to wall
using 1x washer (Z), 1x wall plug (X) and 1x screw (Y). Ensure unit is
balanced and steady before use. You’re done, enjoy!
Wall Mount
wall
plug
long
screw
strap
washer
X
Y
Z
V
V
W
Z
Z
V
W
Kennedy Bedside Table
Assembly Instructions
9
mocka.co.nz | mocka.com.au | PO BOX 6171, Maroochydore BC, QLD, 4558

Other Mocka Indoor Furnishing manuals

Mocka Tahoe Series User manual

Mocka

Mocka Tahoe Series User manual

Mocka Claremont Two Door Cabinet User manual

Mocka

Mocka Claremont Two Door Cabinet User manual

Mocka Inca Tallboy User manual

Mocka

Mocka Inca Tallboy User manual

Mocka Addi Coffee Table User manual

Mocka

Mocka Addi Coffee Table User manual

Mocka Oska Entertainment Unit User manual

Mocka

Mocka Oska Entertainment Unit User manual

Mocka Vigo Desk User manual

Mocka

Mocka Vigo Desk User manual

Mocka Vermont Cot User manual

Mocka

Mocka Vermont Cot User manual

Mocka Newport User manual

Mocka

Mocka Newport User manual

Mocka Sadie Bedside Table User manual

Mocka

Mocka Sadie Bedside Table User manual

Mocka Sadie User manual

Mocka

Mocka Sadie User manual

Mocka Marlow Desk User manual

Mocka

Mocka Marlow Desk User manual

Mocka Nava User manual

Mocka

Mocka Nava User manual

Mocka Easton Buffet User manual

Mocka

Mocka Easton Buffet User manual

Mocka Maya Coffee Table User manual

Mocka

Mocka Maya Coffee Table User manual

Mocka Armadale User manual

Mocka

Mocka Armadale User manual

Mocka Zara User manual

Mocka

Mocka Zara User manual

Mocka Southport Rattan Decor Stand User manual

Mocka

Mocka Southport Rattan Decor Stand User manual

Mocka Hobart User manual

Mocka

Mocka Hobart User manual

Mocka Ashford User manual

Mocka

Mocka Ashford User manual

Mocka Hamptons Desk User manual

Mocka

Mocka Hamptons Desk User manual

Mocka Bronte Bedside Table User manual

Mocka

Mocka Bronte Bedside Table User manual

Mocka Haywood Desk User manual

Mocka

Mocka Haywood Desk User manual

Mocka Olwyn User manual

Mocka

Mocka Olwyn User manual

Mocka Aspen User manual

Mocka

Mocka Aspen User manual

Popular Indoor Furnishing manuals by other brands

Forte Savona SVNV711RB Assembling Instruction

Forte

Forte Savona SVNV711RB Assembling Instruction

Habitat JESSIE JESS-SB-SS20-A Assembly instructions

Habitat

Habitat JESSIE JESS-SB-SS20-A Assembly instructions

TIMBER ART DESIGN SR 930068 Assembly instructions

TIMBER ART DESIGN

TIMBER ART DESIGN SR 930068 Assembly instructions

Forte ZMBM01L-0002 Assembling Instruction

Forte

Forte ZMBM01L-0002 Assembling Instruction

Manhattan Comfort Plaza Panel 64.25 224BMC1 quick start guide

Manhattan Comfort

Manhattan Comfort Plaza Panel 64.25 224BMC1 quick start guide

Lesro Siena Assembly instructions

Lesro

Lesro Siena Assembly instructions

PawHut D06-159V00 manual

PawHut

PawHut D06-159V00 manual

URBAN OUTFITTERS MARIELLA 49189418 Assembly instructions

URBAN OUTFITTERS

URBAN OUTFITTERS MARIELLA 49189418 Assembly instructions

Royalcraft PARLOUSET-WS Assembly instructions

Royalcraft

Royalcraft PARLOUSET-WS Assembly instructions

Merxx Handels 28401-211 Assembly instructions

Merxx Handels

Merxx Handels 28401-211 Assembly instructions

FourStarGroup 12504050 Assembly instructions

FourStarGroup

FourStarGroup 12504050 Assembly instructions

SelectBlinds Inside Mount Spring Roller instructions

SelectBlinds

SelectBlinds Inside Mount Spring Roller instructions

Forte KSMK31 Assembling Instruction

Forte

Forte KSMK31 Assembling Instruction

BLACK RED WHITE REG2D2S Assembly

BLACK RED WHITE

BLACK RED WHITE REG2D2S Assembly

Sundirect LM600-Pro Installation & operation instructions

Sundirect

Sundirect LM600-Pro Installation & operation instructions

Weelko 1021A instruction manual

Weelko

Weelko 1021A instruction manual

Alaterre Furniture ACCA01 manual

Alaterre Furniture

Alaterre Furniture ACCA01 manual

Furniture of America CM2706 Assembly instructions

Furniture of America

Furniture of America CM2706 Assembly instructions

manuals.online logo
manuals.online logoBrands
  • About & Mission
  • Contact us
  • Privacy Policy
  • Terms and Conditions

Copyright 2025 Manuals.Online. All Rights Reserved.