manuals.online logo
Brands
  1. Home
  2. •
  3. Brands
  4. •
  5. Mocka
  6. •
  7. Indoor Furnishing
  8. •
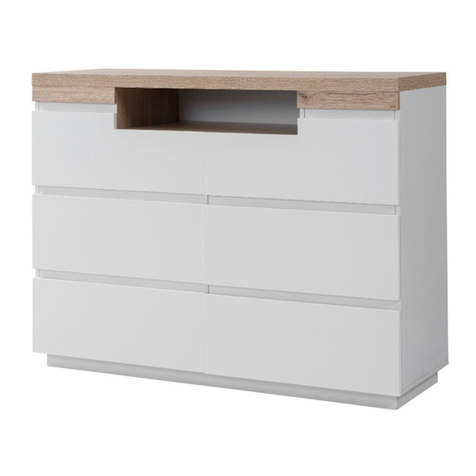
  9. Mocka Kennedy User manual

Mocka Kennedy User manual

Kennedy Tallboy
Assembly Instructions
Thank you for your purchase.
Please follow the instructions below for correct assembly.
mocka.co.nz | mocka.com.au | PO BOX 6171, Maroochydore, QLD, 4558
1
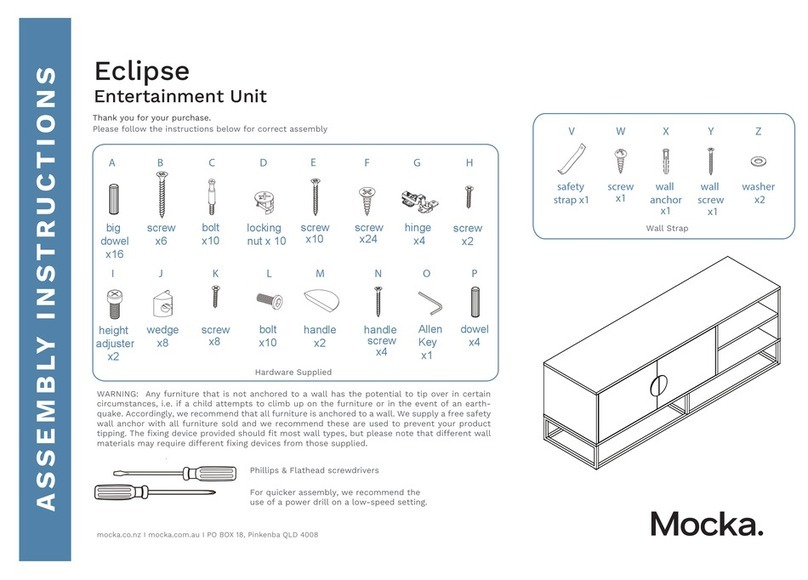
Wall Strap
x2
washer
Z
Y
wall
anchor
x1
X
safety
strap x1
WV
screw
x1
wall
screw
x1
WARNING: Any furniture that is not anchored to a wall has the potential to tip over in certain
circumstances, i.e. if a child attempts to climb up on the furniture or in the event of an earthquake.
Accordingly, we recommend that all furniture is anchored to a wall. We supply a free safety wall anchor
with all furniture sold and we recommend these are used to prevent your product tipping. The fixing device
provided should fit most wall types, but please note that different wall materials may require different fixing
devices from those supplied.
Phillips & Flathead screwdrivers required.
For quicker assembly, we recommend the
use of a power drill on a low-speed setting.
bolt
x54
screw
x33
cover
x6
A B C D E F G HJK
I
Hardware Supplied
dowel
x18
screw
x78
slide
rail x6
slide
rail x6
slide
rail x6
slide
rail x6
bracket
x6
locking
nut x54
bracket
x4
long
bolt x4
wedge
x12
allen
key x1
screw
x12 x16
washer
bolt
x16
screw
x8
plug
x6
L M N O P QR S T U
felt pad
x4
Kennedy Tallboy
Assembly Instructions
mocka.co.nz | mocka.com.au | PO BOX 6171, Maroochydore, QLD, 4558
2
12
C
1
Insert 6x bolts (C) into panel [1] and tighten with a screwdriver. Attach 4x slide rail (F) and 4x slide rail (G) to panels [3] and [4] as shown
with 24x screws (E). Insert 16x bolts (C) into panels [3] and [4]. Tighten
with a screwdriver.
F
CL
E
C
C
C
C
C
E
E
EGE
E
EGE
E
EGE
E
EG
E
E
E
F
E
E
E
F
E
E
E
F
E
E
E
F
C
C
C
C
C
C
C
C
G
CR
E
3
4
CC
CC
CC
CC
Kennedy Tallboy
Assembly Instructions
mocka.co.nz | mocka.com.au | PO BOX 6171, Maroochydore, QLD, 4558
3
34
Attach 1x slide rail (F) to panel [5] as shown with 3x screws (E).
Flip the panel [5], attach 1x slide rail (G) to panel [5] as shown with
3x screws (E). Tighten with a screwdriver.
Attach panel [5] to panel [1] with 2x dowels (A) and secure with 2x locking
nuts (D). Tighten with a screwdriver.
D
D
A
A
FLIP
E
E
E
G
E
E
E
F
G
CR
E
F
CL
E
5
5
5
1
D
Kennedy Tallboy
Assembly Instructions
mocka.co.nz | mocka.com.au | PO BOX 6171, Maroochydore, QLD, 4558
4
56
Attach 5x brackets (J) to panels [6] and [7], secure with 10x screws (E).
Tighten with a screwdriver. Place 5x covers (K) over the brackets (J)
as shown.
Attach panels [6], [7] and [8] to panel [4] with 4x dowels (A) and secure
with 8x locking nuts (D).
EE
J
EE
K
JJ
The round head
is aligned with the
direction of the arrow
6
x3
EE
J
EE
J
7
A
D
A
D
A
D
D
D
D
6
6
6
7
8
8
4
Kennedy Tallboy
Assembly Instructions
mocka.co.nz | mocka.com.au | PO BOX 6171, Maroochydore, QLD, 4558
5
78
Slide panel [9] down along the grooves between the panels [8] and [4]. Attach panel [3] to panels [6], [7] and [8] with 4x dowels (A) and secure
with 8x locking nuts (D). Tighten with a screwdriver.
9
8
8
A
D
A
A
A
D
D
D
D
D
3
6
6
6
7
8
8
Kennedy Tallboy
Assembly Instructions
mocka.co.nz | mocka.com.au | PO BOX 6171, Maroochydore, QLD, 4558
6
910
Slide panel [9] down along the grooves between the panels [3] and [4]. Insert 4x bolts (C) into panels [1]. Attach 1x bracket (J) to panel [2] and
secure with 2x screws (E). Tighten with a screwdriver. Place 1x cover
(K) over bracket (J) as shown.
9
The round head
is aligned with the
direction of the arrow
EE
J
E
K
J
J
2
E
3
4
C
C
C
C
Kennedy Tallboy
Assembly Instructions
mocka.co.nz | mocka.com.au | PO BOX 6171, Maroochydore, QLD, 4558
7
11 12
Attach panel [2] to the unit with 4x dowels (A) and secure with 4x locking
nuts (D), tighten with a screwdriver.
Attach a leg bracket (O) to each leg [10] using 2x screws (Q) and 1x long
bolt (P). Tighten with a screwdriver and an Allen key (T). Attach each leg
[10] to panel [2] using 4x small bolts (R) and 4x washers (S) as shown.
Tighten with the Allen key (T). Attach 4x felt pads (U) to the ends of
the legs.
A
A
A
2
3
4
R
S
R
S
R
S
S
R
front
back
R
S
T
U
x4
P
Q
O
Q
front
10
T
2
3
4
D
DD
D
A
U
U
U
U
Kennedy Tallboy
Assembly Instructions
mocka.co.nz | mocka.com.au | PO BOX 6171, Maroochydore, QLD, 4558
8
1413
Slide panel [9] down along the grooves between the side panels [3]
and [4]. Attach 1x slide rail (F) and 1x slide rail (G) to panels [3] and
[4] as shown with 6x screws (E). Tighten with a screwdriver.
Attach panel [1] to the unit with 4x dowels (A) and secure with 4x locking
nuts (D). Tighten with a screwdriver.
3
4
9
3
4
A
D
ADD
A
1
D
A
E
G
E
E
G
CR
E
F
CL
E
Kennedy Tallboy
Assembly Instructions
mocka.co.nz | mocka.com.au | PO BOX 6171, Maroochydore, QLD, 4558
9
15 16
Insert 4x bolts (C) into panel [11]/[12]. Attach 1x plug (L) to panel [11]/[12]
and secure with 1x screw (E). Tighten with a screwdriver. Attach panels
[13], [14] to front panel [11]/[12] using 4x locking nuts (D). Tighten with
a screwdriver. Slide panel [15] along the grooves between the side
panels [13] and [14] to form the base of the drawer.
Attach panel [7] to panel [5] with 1x screw (B), tighten with a screwdriver.
B
B
1
7
C
C
CC
DD
D
D
11
12
11
12
13
14
15
13
14
E
L
5
11
12
Kennedy Tallboy
Assembly Instructions
mocka.co.nz | mocka.com.au | PO BOX 6171, Maroochydore, QLD, 4558
10
17 18
Attach panels [13], [14] and [16] as shown using 4x screws (B). Tighten
with a screwdriver. Attach slide rail (I) and slide rail (H) to the underside
of the side panels as shown. Secure with 4x screws (E) and tighten with
a screwdriver.
Insert 5x bolts (C) into panel [17]/[18]. Attach 1x plug (L) to panel [17]/
[18] and secure with 1x screw (E). Tighten with a screwdriver. Attach
panels [13], [14] and [19] to front panel [17]/[18] using 5x locking nuts
(D). Tighten with a screwdriver. Slide panel [20] along the grooves
between the side panels [13] and [14] to form the base of the drawer.
14
13
B
B
BB
16
C
C
C
CC
DD
D
D
D
17
13
14
19
20
13
14
E
E
H
14
13
E
E
I
18
E
L
x3
17
18
x3
11 12
E
EI
E
E
H
Kennedy Tallboy
Assembly Instructions
mocka.co.nz | mocka.com.au | PO BOX 6171, Maroochydore, QLD, 4558
11
19 20
Attach panels [13], [14] and [21] as shown using 6x screws (B). Tighten
with a screwdriver. Attach slide rail (I) and slide rail (H) to the underside
of the side panels as shown. Secure with 4x screws (E) and tighten with
a screwdriver.
Insert the assembled drawers into the corresponding compartments as
shown. Ensure the drawers slide easily along the rails. If the door is not
catching or sitting flush, twist the end of the cover (K) until it catches on
the plug (L).
BB
BB
B
21 14
13
17 18
x3
14
13
11
12
17
18
18
18
K
B
M
V
Z
W
Kennedy Tallboy
Assembly Instructions
mocka.co.nz | mocka.com.au | PO BOX 6171, Maroochydore, QLD, 4558
12
21 22
Attach 12x wedges (M) into the corners of the back of the unit and secure with
12x screws (N). Tighten with a screwdriver. Attach 1x safety strap (V) to the top
of the back side of the unit as shown using 1x washer (Z) and 1x screw (W).
Tighten with a screwdriver.
Once assembled lift furniture into place, do not drag. Use a drill to create
a small hole lining up with the top of the safety strap (V). Fasten to the wall
using1x washer (Z), 1x wall plug (X) and 1x screw (Y). Ensure unit is
balanced and steady before use. You’re done, enjoy!
N
M
N
V
Z
W
M
N
9
9
9
1
X
Y
Z
wall
plug
long
screw
strap
washer
M
N
M
N
M
N
M
N
M
N

Other manuals for Kennedy

3

Other Mocka Indoor Furnishing manuals

Mocka Avoca User manual

Mocka

Mocka Avoca User manual
Mocka Georgia Entertainment Unit User manual

Mocka

Mocka Georgia Entertainment Unit User manual

Mocka Hamptons Buffet User manual

Mocka

Mocka Hamptons Buffet User manual

Mocka Brixton Bookcase User manual

Mocka

Mocka Brixton Bookcase User manual

Mocka Aspen User manual

Mocka

Mocka Aspen User manual

Mocka Lacie User manual

Mocka

Mocka Lacie User manual

Mocka Leon User manual

Mocka

Mocka Leon User manual

Mocka Zack User manual

Mocka

Mocka Zack User manual

Mocka Hamptons User manual

Mocka

Mocka Hamptons User manual

Mocka Jolt Six Drawer - Slim User manual

Mocka

Mocka Jolt Six Drawer - Slim User manual

Mocka Edmond User manual

Mocka

Mocka Edmond User manual

Mocka Otto Woven Chair User manual

Mocka

Mocka Otto Woven Chair User manual

Mocka Zander Buffet User manual

Mocka

Mocka Zander Buffet User manual

Mocka Bentley Slim Shelf User manual

Mocka

Mocka Bentley Slim Shelf User manual

Mocka Hamptons Change Table User manual

Mocka

Mocka Hamptons Change Table User manual

Mocka Octavia User manual

Mocka

Mocka Octavia User manual

Mocka Dahlia Four Drawer User manual

Mocka

Mocka Dahlia Four Drawer User manual

Mocka Essentials 2 Cube User manual

Mocka

Mocka Essentials 2 Cube User manual

Mocka Sadie User manual

Mocka

Mocka Sadie User manual

Mocka Aspen Wardrobe User manual

Mocka

Mocka Aspen Wardrobe User manual

Mocka Emmett Bed User manual

Mocka

Mocka Emmett Bed User manual

Mocka Essentials 6 Cube User manual

Mocka

Mocka Essentials 6 Cube User manual

Mocka Luna Cube 8 User manual

Mocka

Mocka Luna Cube 8 User manual

Mocka Ashford User manual

Mocka

Mocka Ashford User manual

Popular Indoor Furnishing manuals by other brands

Moderno OLIER BIURKO OL-01-B Assembly instruction

Moderno

Moderno OLIER BIURKO OL-01-B Assembly instruction

Ameriwood HOME Dakota 9354333COM manual

Ameriwood HOME

Ameriwood HOME Dakota 9354333COM manual

burgbad Essence USZP04T Fitting instructions

burgbad

burgbad Essence USZP04T Fitting instructions

Guide Gear 716493 quick start guide

Guide Gear

Guide Gear 716493 quick start guide

Ameriwood HOME 2464408COM Instruction booklet

Ameriwood HOME

Ameriwood HOME 2464408COM Instruction booklet

Manual Thinking MT-WT S75 Assembly instructions

Manual Thinking

Manual Thinking MT-WT S75 Assembly instructions

Second Story Home Ollie manual

Second Story Home

Second Story Home Ollie manual

Home affaire Premium collection 446909 manual

Home affaire

Home affaire Premium collection 446909 manual

Ergomotion Element owner's manual

Ergomotion

Ergomotion Element owner's manual

Dorel Home Products DA2043329N Instruction booklet

Dorel Home Products

Dorel Home Products DA2043329N Instruction booklet

Pro-Line II HAT6024 operating instructions

Pro-Line II

Pro-Line II HAT6024 operating instructions

Crack JAIPUR TV6 Assembly instruction

Crack

Crack JAIPUR TV6 Assembly instruction

Dorel Living DL8534 manual

Dorel Living

Dorel Living DL8534 manual

Sauder Via 419642 manual

Sauder

Sauder Via 419642 manual

Pressalit INDIVO RK1220 Mounting instruction

Pressalit

Pressalit INDIVO RK1220 Mounting instruction

kreoo Arcaico Assembly instructions

kreoo

kreoo Arcaico Assembly instructions

Forte ENJK211 Assembling Instruction

Forte

Forte ENJK211 Assembling Instruction

Kimball XSEDE Height Adjust Assembly instructions

Kimball

Kimball XSEDE Height Adjust Assembly instructions

manuals.online logo
manuals.online logoBrands
  • About & Mission
  • Contact us
  • Privacy Policy
  • Terms and Conditions

Copyright 2025 Manuals.Online. All Rights Reserved.