manuals.online logo
Brands
  1. Home
  2. •
  3. Brands
  4. •
  5. Monacor
  6. •
  7. Security Camera
  8. •
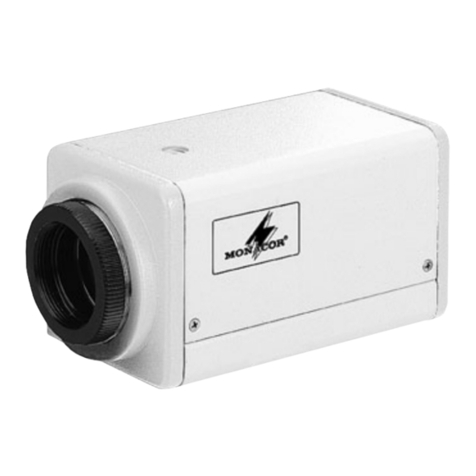
  9. Monacor TVCCD-145COL User manual

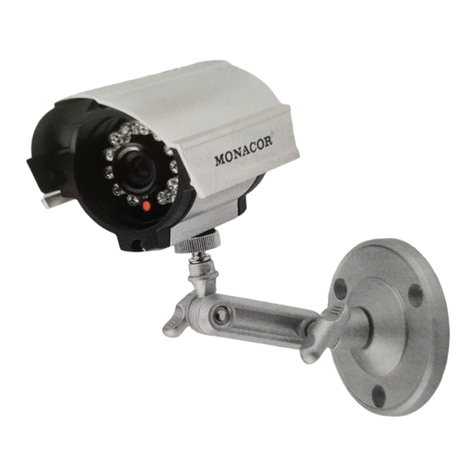
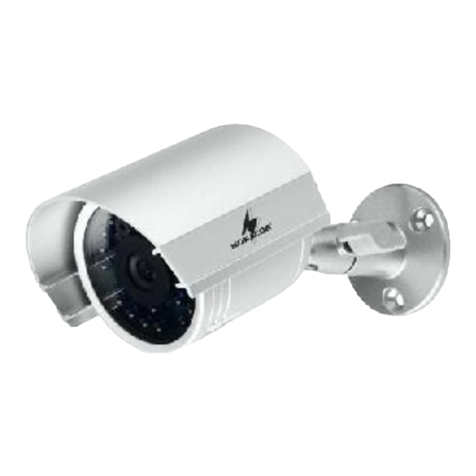
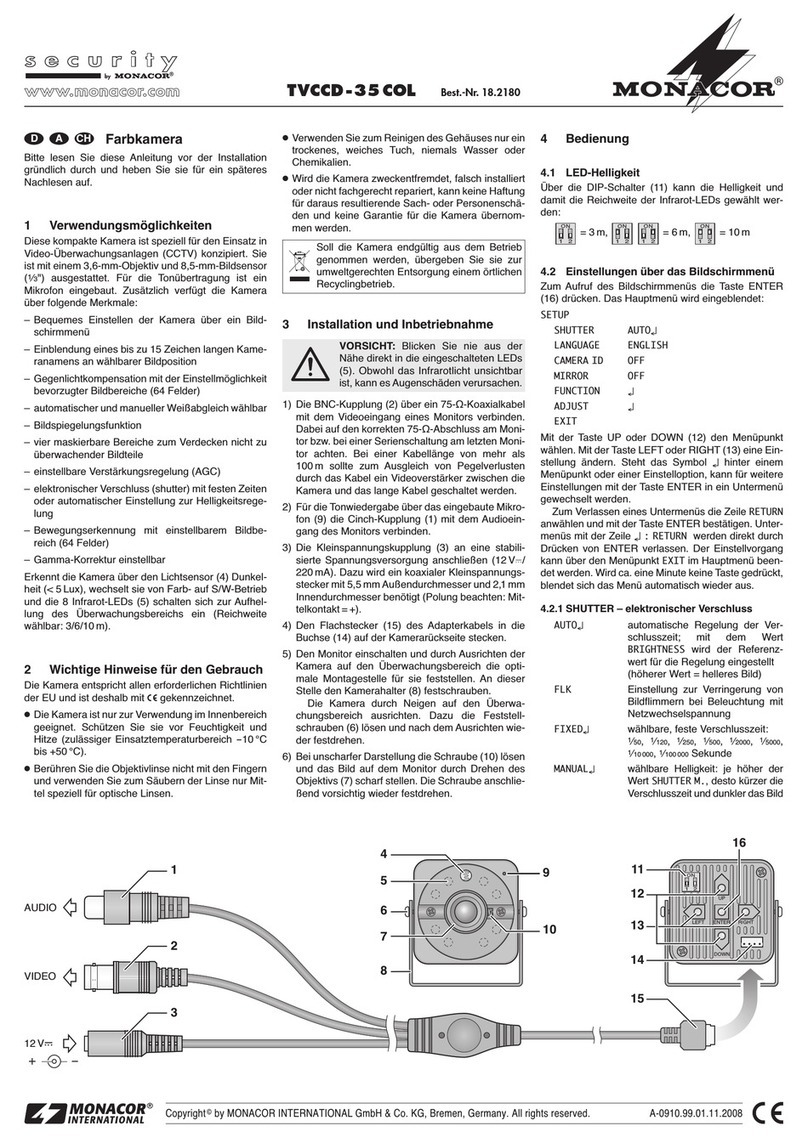
Monacor TVCCD-145COL User manual

Farbkamera
Bitte lesen Sie dieseAnleitung vor der Installation gründlich
durch und heben Sie sie für ein späteres Nachlesen auf.
1Einsatzmöglichkeiten
Die Farbkamera mit 3,6-mm-Objektiv ist für den Einsatz in
Videoüberwachungsanlagen (CCTV) konzipiert. Sie ver-
fügt über einen automatischen elektronischen Shutter,
eine automatische Verstärkungsregelung (AGC) und
einen automatischen Weißabgleich. Durch ihr wetterfes-
tes Gehäuse (IP57) ist sie auch für Außeninstallationen
geeignet.
2Hinweise für den sicheren Gebrauch
Die Kamera entspricht allen erforderlichen Richtlinien der
EU und ist deshalb mit gekennzeichnet.
●Das Kameragehäuse ist wettergeschützt, jedoch nicht
absolut wasserdicht. Tauchen Sie darum die Kamera
nicht dauerhaft in Wasser ein.
●Schützen Sie die Kamera vor extremen Temperaturen
(zulässiger Einsatztemperaturbereich 0–40°C).
●Verwenden Sie für die Reinigung der Kamera keine
scharfen Reinigungsmittel oder Chemikalien.
●Berühren Sie die Objektivlinsen nicht mit den Fingern
und verwenden Sie für ihre Reinigung nur Mittel spe-
ziell für optische Linsen.
●Wird die Kamera zweckentfremdet, falsch angeschlos-
sen oder nicht fachgerecht repariert, kann keine Haftung
für daraus resultierende Sach- oder Personenschäden
und keine Garantie für die Kamera übernommen werden.
3Inbetriebnahme
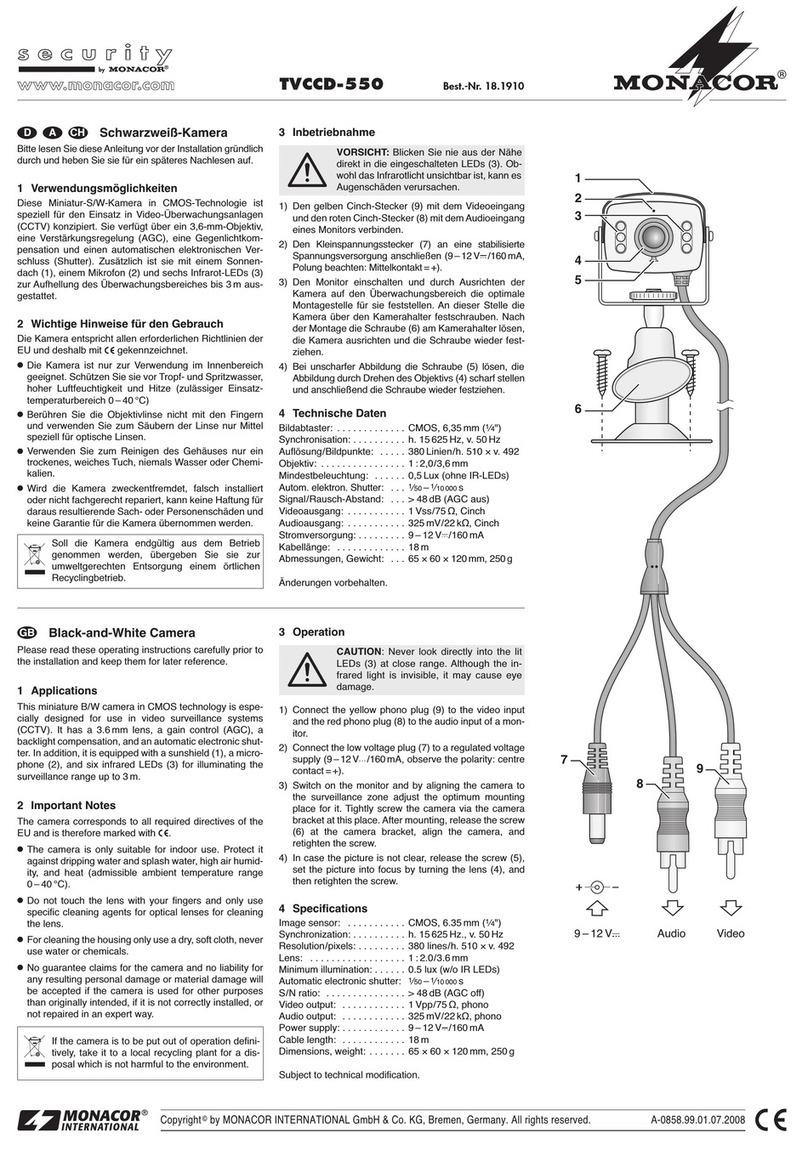
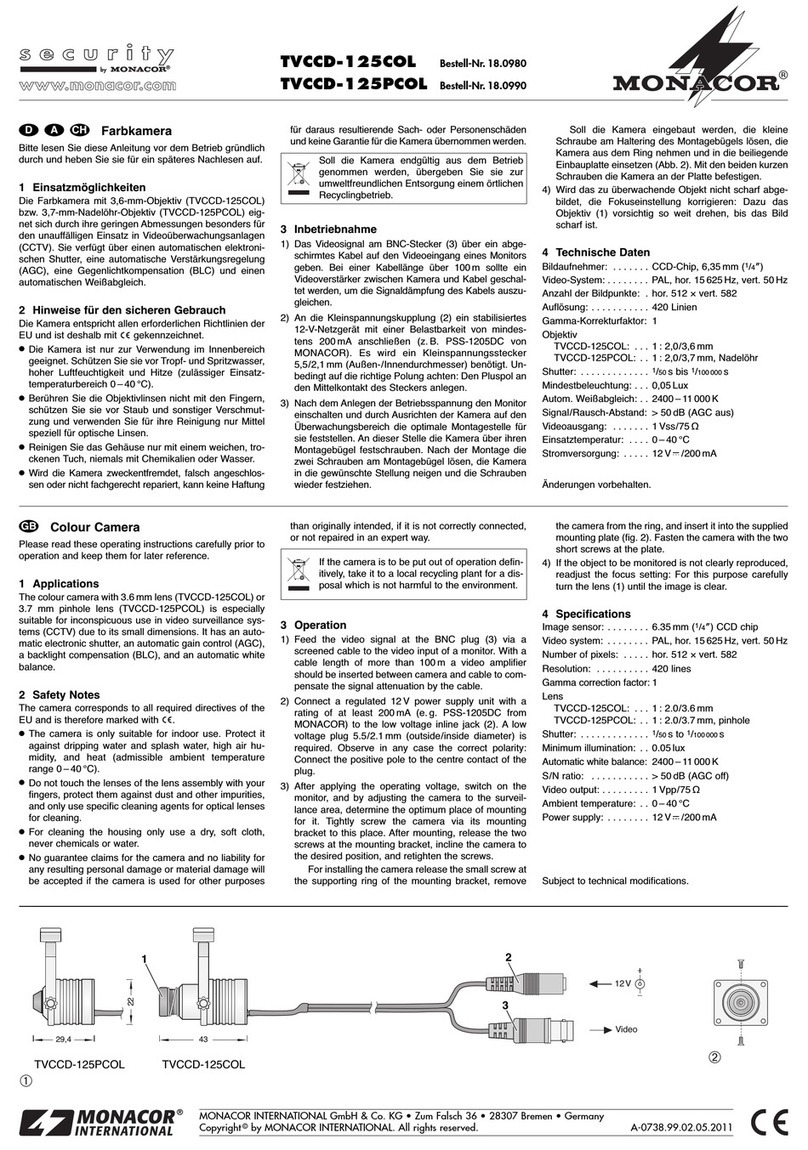
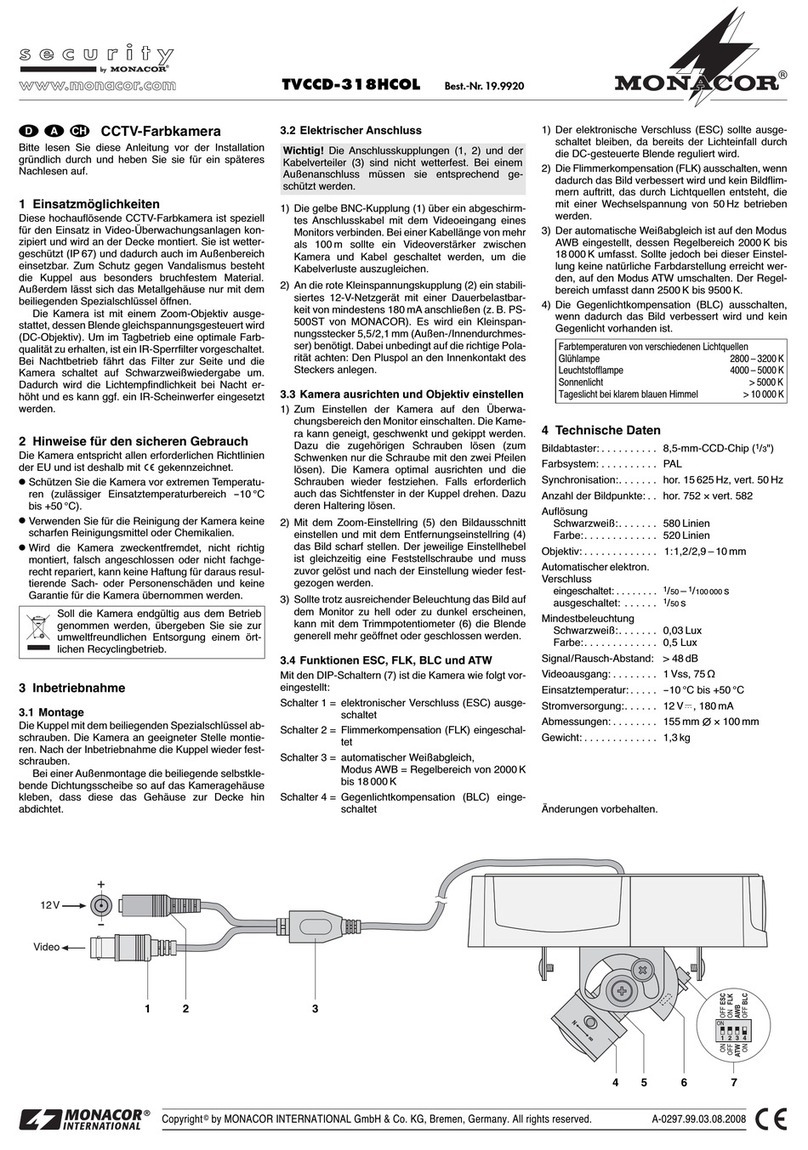
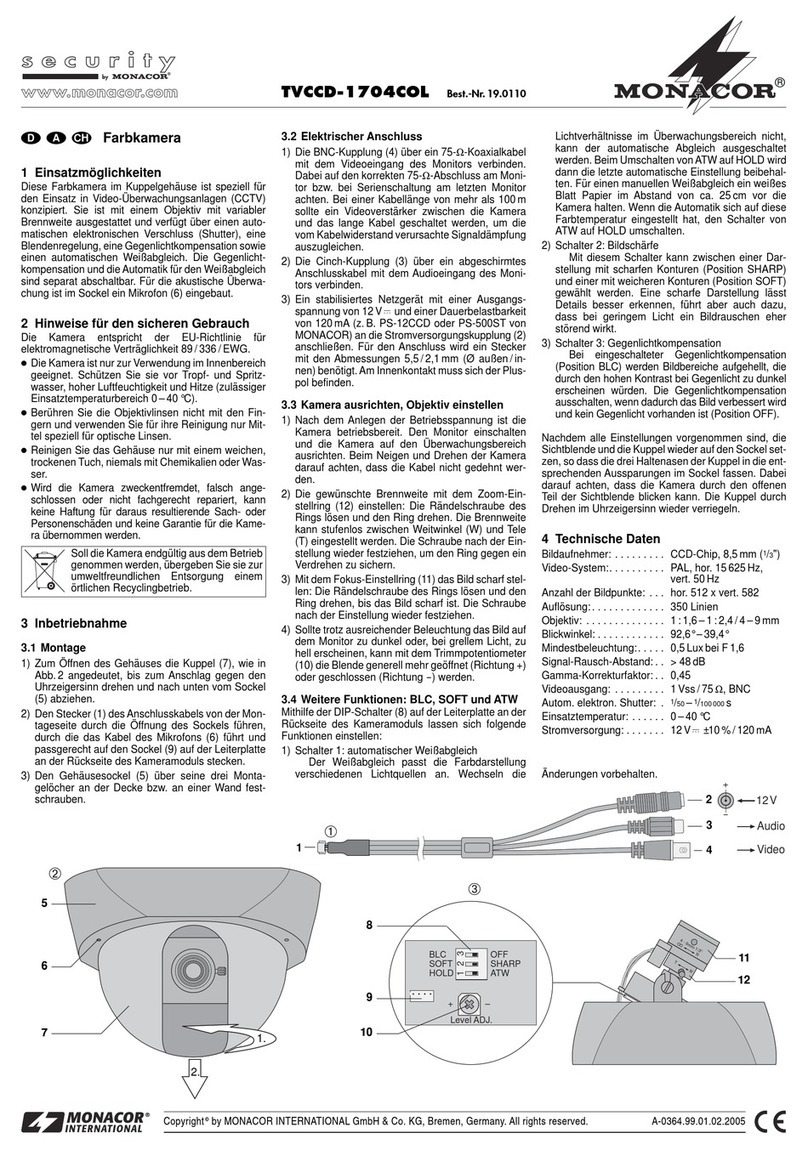
1) Das Videosignal am BNC-Stecker (2) über ein ab-
geschirmtes Kabel auf den Videoeingang eines Moni-
tors geben. Bei einer Kabellänge über 100m sollte ein
Videoverstärker zwischen Kamera und Kabel ge-
schaltet werden, um die Kabelverluste auszugleichen.
2) An die Kleinspannungskupplung (1) ein stabilisiertes
12-V-Netzgerät mit einer Belastbarkeit von mindes-
tens 80mA anschließen (z.B. PS-300ST oder PS-
500ST von MONACOR). Es wird ein Kleinspannungs-
stecker 5,5/2,1mm (Außen-/Innendurchmesser) be-
nötigt. Unbedingt auf die richtige Polung achten: Den
Pluspol an den Mittelkontakt des Steckers anlegen.
3) Nach dem Anlegen der Betriebsspannung den Monitor
einschalten und durch Ausrichten der Kamera auf den
Überwachungsbereich die optimale Montagestelle für
sie feststellen. An dieser Stelle die Kamera über den
Kamerahalter festschrauben. Nach der Montage die
Schraube (4) am Kamerahalter lösen, die Kamera in
die gewünschte Stellung bewegen und die Schraube
wieder festziehen. Die Kamera kann auch hängend,
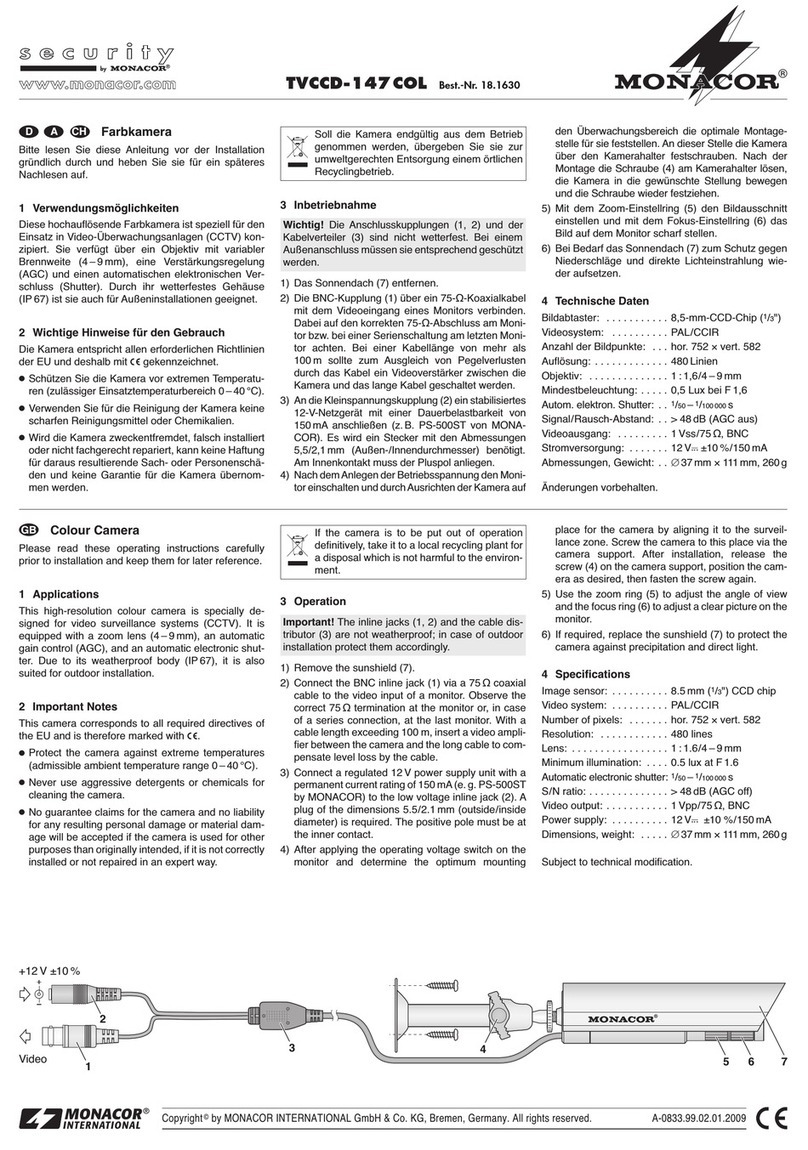
Wichtig! DieAnschlusskupplungen (1, 2) und der Kabel-
verteiler (3) sind nicht wetterfest. Bei einem Außenan-
schluss müssen sie entsprechend geschützt werden.
Soll die Kamera endgültig aus dem Betrieb
genommen werden, übergeben Sie sie zur
umweltfreundlichen Entsorgung einem örtlichen
Recyclingbetrieb.
z.B. unter der Decke montiert werden. Dazu den
Kamerahalter in die Gewindebuchse auf der Oberseite
der Kamera schrauben. Wenn das Gewinde verdeckt
ist, das Sonnendach (6) etwas nach vorne schieben.
4) Wird das zu überwachende Objekt nicht scharf abge-
bildet, die Fokuseinstellung korrigieren: Dazu das
Sonnendach (6) abnehmen und das vordere Gehäu-
seteil (5) abschrauben. Das Objektiv vorsichtig so weit
drehen, bis das Bild scharf ist. Anschließend das
Gehäuse wieder fest zusammenschrauben und das
Sonnendach aufklemmen.
4Technische Daten
Bildaufnehmer: . . . . . . . CCD-Chip, 8,5mm (1/3")
Video-System: . . . . . . . PAL, hor. 15625Hz, vert. 50Hz
Anzahl der Bildpunkte: . hor. 512 x vert. 581
Auflösung: . . . . . . . . . . 380 Linien
Objektiv: . . . . . . . . . . . . 1: 2,0/3,6mm
Blickwinkel: . . . . . . . . . 92°
Shutter: . . . . . . . . . . . . 1/50 s bis 1/100 000 s
Mindestbeleuchtung: . . 1Lux
Signal/Rausch-Abstand: > 48dB
Videoausgang: . . . . . . . 1Vss/75Ω
Einsatztemperatur: . . . . 0–40°C
Stromversorgung: . . . . . 12V ±10%/80mA
Schutzart: . . . . . . . . . . . IP57
Änderungen vorbehalten.
®
TVCCD-145COL Best.-Nr. 19.0100
®
Colour Camera
Please read these operating instructions carefully prior to
the installation and keep them for later use.
1Applications
The colour camera with 3.6mm lens is especially suitable
for use in video surveillance systems (CCTV). It has an
automatic electronic shutter, an automatic gain control
(AGC), and an automatic white balance. Due to its weath-
erproof housing (IP57) it is also suited for outdoor instal-
lations.
2Safety Notes
The camera corresponds to all required directives of the
EU and is therefore marked with .
●The camera is weatherproof, however, not absolutely
watertight. Therefore, do not permanently immerse the
camera in water.
●Protect the camera against extreme temperatures
(admissible ambient temperature range 0–40°C).
●For cleaning of the camera do not use any aggressive
detergents or chemicals.
●Do not touch the lenses of the lens assembly with your
fingers and only use specific cleaning agents for optical
lenses for their cleaning.
●No guarantee claims for the camera and no liability for
any resulting personal damage or material damage will
be accepted if the camera is used for other purposes
than originally intended, if it is not connected correctly,
or not repaired in an expert way.
3Operation
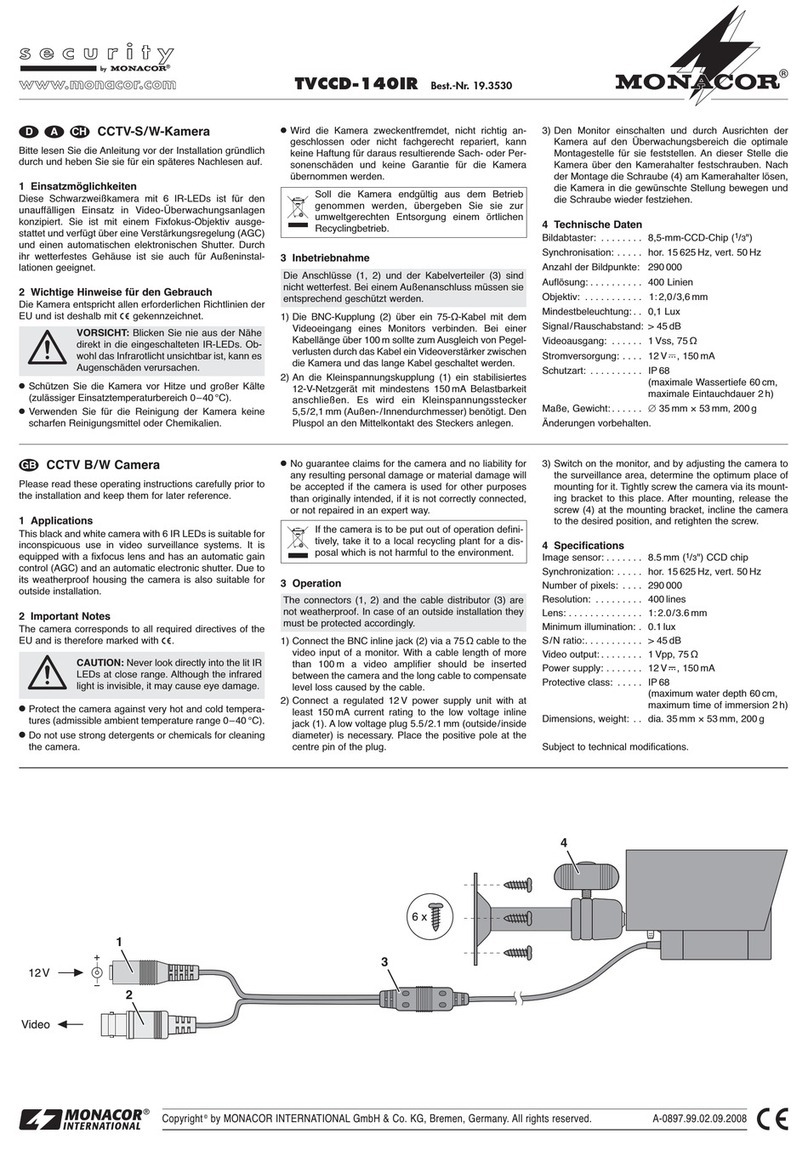
1) Feed the video signal at the BNC plug (2) via a
screened cable to the video input of a monitor. With a
cable length of more than 100m a video amplifier
should be inserted between camera and cable to com-
pensate the cable loss.
2) Connect a regulated 12V power supply unit with a cur-
rent rating of at least 80mA (e.g. PS-300ST or PS-
500ST from MONACOR) to the low voltage inline jack
(1). A low voltage plug 5.5/2.1mm (outside/inside di-
ameter) is required. Observe in any case the correct
polarity: Connect the positive pole to the centre
contact of the plug.
3) After applying the operating voltage, switch on the
monitor, and by adjusting the camera to the surveil-
lance area, determine the optimum place of mounting
for it. Tightly screw the camera via its mounting
bracket to this place.After mounting, release the screw
(4) at the mounting bracket, incline the camera to the
desired position, and retighten the screw. The camera
can also be suspended e.g. from the ceiling. For this
Important! The connection inline jacks (1, 2) and the
cable distributor (3) are not weatherproof. In case of out-
door connection they must be protected accordingly.
If the camera is to be put out of operation defini-
tively, take it to a local recycling plant for a dis-
posal which is not harmful to the environment.
purpose screw the camera bracket in the threaded
jack on the top side of the camera. If the thread is con-
cealed, push the sunshield (6) slightly forward.
4) If the object to be monitored is not clearly reproduced,
readjust the mechanical focus setting: For this purpose
remove the sunshield (6) and screw off the front hous-
ing part (5). Carefully turn the lens until the image is
clear. Then screw the housing tightly together again
and clamp on the sunshield.
4Specifications
Image sensor: . . . . . . . 8.5mm (1/3") CCD chip
Video system: . . . . . . . PAL, hor. 15625Hz,
vert. 50Hz
Number of pixels: . . . . . hor. 512 x vert. 581
Resolution: . . . . . . . . . . 380 lines
Lens: . . . . . . . . . . . . . . 1: 2.0/3.6mm
Angle of view: . . . . . . . 92°
Shutter: . . . . . . . . . . . . 1/50 s to 1/100000 s
Minimum illumination: . . 1 lux
S/N ratio: . . . . . . . . . . . > 48dB
Video output: . . . . . . . . 1Vpp/75Ω
Ambient temperature: . . 0–40°C
Power supply: . . . . . . . 12V ±10%/80mA
Protection class: . . . . . . IP57
Subject to technical modifications.
D A CH
GB
Copyright©by MONACOR INTERNATIONAL GmbH & Co. KG, Bremen, Germany. All rights reserved. A-0363.99.02.08.2006
®
12V
Video CCD COLOUR CAMERA
1
3
4
2
6
5
Caméra couleur
Veuillez lire la présente notice avec attention avant l’in-
stallation et conservez-la pour pouvoir vous y reporter
ultérieurement.
1Possibilités d’utilisation
La caméra couleur avec objectif 3,6mm est conçue pour
une utilisation dans des installations de vidéosurveillance
(CCTV). Elle dispose d’une obturation électronique auto-
matique, d’un réglage automatique d’amplification (AGC)
et d’une compensation automatique du blanc. Grâce à
son boîtier résistant aux intempéries (IP57), elle est
également adaptée à des installations en extérieur.
2Conseils d’utilisation et de sécurité
La caméra répond à toutes les directives nécessaires de
l’Union Européenne et porte donc le symbole .
●Le boîtier de la caméra est protégé contre les intem-
péries mais il n’est pas absolument étanche. Ne plongez
jamais la caméra dans l’eau de manière permanente.
●Protégez la caméra des températures extrêmes (plage
de température de fonctionnement autorisée 0–40°C).
●Pour nettoyer la caméra, n’utilisez jamais de produits
chimiques ou détergents abrasifs.
●Ne touchez pas les lentilles de l’objectif avec les doigts
et pour les nettoyer, utilisez uniquement des produits
spécifiques pour les lentilles optiques.
●Nous déclinons toute responsabilité en cas de domma-
ges corporels ou matériels résultants si la caméra est
utilisée dans un but autre que celui pour lequel elle a
été conçue, si elle n’est pas correctement branchée ou
n’est pas réparée par une personne habilitée, de
même, la garantie deviendrait caduque.
3Fonctionnement
1) Appliquez le signal vidéo présent à la prise BNC (2) via
un câble blindé à l’entrée vidéo d’un moniteur. Pour
une longueur de câble supérieure à 100m, il est re-
commandé d’installer un amplificateur vidéo entre la
caméra et le câble pour compenser les pertes en ligne.
2) Connectez une alimentation stabilisée 12V avec une
puissance de 80mA au moins (p.ex. PS-300ST ou
PS-500ST de MONACOR) à la prise alimentation (1).
Une fiche basse tension 5,5/2,1mm (diamètre extér-
ieur/diamètre intérieur) est nécessaire. Veillez à res-
pecter impérativement la polarité : mettez le pôle plus
au contact médian de la fiche.
3) Une fois la tension de fonctionnement appliquée, allu-
mez le moniteur et en orientant la caméra sur la zone
de surveillance, déterminez le lieu de montage le
mieux adapté. Vissez la caméra à cet emplacement
Important ! Les fiches de branchement (1, 2) et le ré-
partiteur de câble (3) ne sont pas résistants aux intem-
péries. Pour un branchement en extérieur, ils doivent
être protégés en conséquence.
Lorsque la caméra est définitivement retirée du
service, vous devez la déposer dans une usine
de recyclage de proximité pour contribuer à son
élimination non polluante.
via son étrier de montage. Une fois l’installation réa-
lisée, desserrez la vis (4) sur l’étrier de montage, incli-
nez la caméra dans la position voulue et revissez la
vis. La caméra peut également être suspendue, par
exemple à un plafond. Pour ce faire, vissez l’étrier de
caméra dans la prise filetée sur la partie supérieure de
la caméra. Si le filetage est caché, poussez un peu le
pare-soleil (6) vers l’avant.
4) Si l’objet à surveiller n’est pas reproduit avec netteté,
corrigez le réglage du focus : retirez le pare-soleil (6)
et dévissez la partie avant du boîtier (5). Tournez avec
précaution l’objectif jusqu’à ce que l’image soit nette.
Revissez ensuite le boîtier et replacez le pare-soleil.
4Caractéristiques techniques
Système : . . . . . . . . . . . puce CCD, 8,5mm (1/3")
Système vidéo : . . . . . . PAL, hor. 15625Hz,
vert. 50Hz
Nombre de points : . . . . hor. 512 x vert. 581
Résolution : . . . . . . . . . 380 lignes
Objectif : . . . . . . . . . . . 1: 2,0/3,6mm
Angle de vue : . . . . . . . 92°
Obturation : . . . . . . . . . 1/50 s à 1/100000 s
Luminosité minimale : . . 1 lux
Rapport signal/bruit : . . > 48dB
Sortie vidéo : . . . . . . . . 1Vcc/75Ω
Température fonc :. . . . 0–40°C
Alimentation : . . . . . . . . 12V ±10%/80mA
Classe de protection : . . IP57
Tout droit de modification réservé.
®
TVCCD-145COL Best.-Nr. 19.0100
®
Telecamera a colori
Vi preghiamo di leggere attentamente le presenti istruzioni
prima dell’installazione e di conservarle per un uso futuro.
1Possibilità d’impiego
La telecamera a colori con obiettivo di 3,6mm è stata rea-
lizzata per l’impiego in impianti di sorveglianza video
(CCTV). Dispone di un otturatore automatico, di regola-
zione automatica del guadagno (AGC) e di bilanciamento
automatico del bianco. Grazie al contenitore resistente
alle intemperie (IP57) à adatta anche per le installazioni
all’esterno.
2Avvisi di sicurezza
La telecamera è conforme a tutte le direttive richieste
dell’UE e pertanto porta la sigla .
●La telecamera è resistente alle intemperie, ma non è a
tenuta assoluta dell’acqua. Perciò non immergerla per
sempre nell’acqua.
●Proteggere la telecamera da temperature estreme
(temperatura d’impiego ammessa fra 0 e 40°C).
●Per la pulizia della telecamera non impiegare deter-
genti aggressivi o prodotti chimici.
●Non toccare le lenti degli obiettivi con le dita, e per pulir-
le usare solo mezzi per lenti ottiche.
●Nel caso d’uso improprio, di collegamenti sbagliati o di
riparazione non a regola d’arte della telecamera, non si
assume nessuna responsabilità per eventuali danni
consequenziali a persone o a cose e non si assume
nessuna garanzia per la telecamera.
3Messa in funzione
1) Portare il segnale video presente al connettore BNC
(2) sull’ingresso video di un monitor servendosi di un
cavo schermato. Se il cavo supera i 100m di lunghez-
za conviene inserire un amplificatore del segnale
video fra telecamera e cavo per compensare le perdi-
te dovute al cavo.
2) Alla presa per alimentazione DC (1) si collega un ali-
mentatore 12V con potenza minima di 80 mA (p.es.
PS-300ST o PS-500ST della MONACOR). È richiesta
una spina per alimentazione DC 5,5/2,1mm (diametro
esterno/interno). Fare assolutamente attenzione alla
corretta polarità: collegare il polo positivo con il contat-
to centrale della spina.
3) Dopo aver applicato la tensione d’esercizio, accende-
re il monitor e individuare il posto ottimale per il mon-
taggio della telecamera orientandola in direzione della
zona da sorvegliare. Avvitare la telecamera in quel
punto per mezzo del suo supporto. Dopo il montaggio,
allentare la vite (4) sul supporto, orientare la teleca-
mere nella direzione desiderata e stringere di nuovo la
Importante! I connettori (1, 2) e il distributore dei cavi
(3) non sono resistenti alle intemperie. Nel caso di colle-
gamento all’esterno occorre proteggerli appositamente.
Se si desidera eliminare la telecamera definiti-
vamente, consegnarla per lo smaltimento ad
un’istituzione locale per il riciclaggio.
vite. La telecamera può essere montata anche sospe-
sa, p. es. al soffitto. In questo caso avvitare il suppor-
to alla filettatura presente nel lato superiore della tele-
camera. Se la filettatura dovesse essere nascosta,
basta spostare leggermente il parasole (6) in avanti.
4) Se l’oggetto da sorvegliare non è a fuoco, correggere
l’impostazione del fuoco: per fare ciò togliere il para-
sole (6) e svitare la parte anteriore (5) del contenitore.
Girare l’obiettivo delicatamente finché l’immagine è a
fuoco. Quindi riassemblare il contenitore e rimettere il
parasole.
4Dati tecnici
Sensore ottico: . . . . . . . chip CCD, 8,5mm (1/3")
Sistema video: . . . . . . . PAL, orizz. 15625Hz,
vert. 50Hz
Numero pixel: . . . . . . . . orizz 512 x vert. 581
Risoluzione: . . . . . . . . . 380 linee
Obiettivo: . . . . . . . . . . . 1: 2,0/3,6mm
Angolo visivo: . . . . . . . . 92°
Otturatore : . . . . . . . . . . 1/50 s a 1/100000 s
Illuminazione minima: . . 1 Lux
Rapporto S/R: . . . . . . . > 48dB
Uscita video: . . . . . . . . 1Vpp/75Ω
Temperatura d’esercizio: 0–40°C
Alimentazione: . . . . . . . 12V ±10%/80mA
Grado di protezione: . . . IP57
Con riserva di modifiche tecniche.
F B CH
I
Copyright©by MONACOR INTERNATIONAL GmbH & Co. KG, Bremen, Germany. All rights reserved. A-0363.99.02.08.2006
®
12V
Video CCD COLOUR CAMERA
1
3
4
2
6
5
Cámara de color
Por favor, lea atentamente estas instrucciones antes de la
instalación y consérvelas para usos posteriores.
1Posibilidades de utilización
La cámara de color con objetivo 3,6mm está fabricada
para una utilización en instalaciones de vídeo vigilancia
(CCTV). Dispone de una obturación electrónica automáti-
ca, de un reglaje automático de amplificación (AGC) y de
una compensación automática del blanco. Por su carca-
sa resistente a las intemperies (IP57), también se adap-
ta a instalaciones en exterior.
2Consejos de utilización y de seguridad
La cámara corresponde a todas las directivas requeri-
das por la UE y por ello está marcada con .
●La carcasa de la cámara está protegida en contra de las
intemperies pero no es totalmente estanca. No sumerja
nunca la cámara en agua de manera permanente.
●Proteja la cámara de temperaturas extremas (tempera-
tura de funcionamiento autorizada 0–40°C).
●Para limpiar la cámara, no utilice nunca productos quí-
micos o detergentes abrasivos.
●No toque las lentes del objetivo con los dedos y para
limpiarlas, utilice únicamente productos específicos
para las lentes ópticas.
●Declinamos toda responsabilidad en caso de daños cor-
porales o materiales resultántes, si la cámara se utiliza
en otro para fin para el cual ha sido fabricada, so ni está
correctamente conectada o reparada por una persona
habilitada, además carecería de todo tipo de garantía.
3Funcionamiento
1) Aplique la señal vídeo presente a la toma BNC (2) vía
un cable blindado a la entrada vídeo de un monitor.
Para una longitud de cable superior a 100m, le acon-
sejamos instalar un amplificador vídeo entre la cáma-
ra y el cable para compensar las perdidas en línea.
2) Conecte una alimentación estabilizada 12V con una
potencia de e 80mA como mínimo (p.ej. PS-300ST o
PS-500ST de MONACOR) a la toma de alimentación
(1). Una toma baja tensión de 5,5/2,1mm (diámetro
exterior/diámetro interior) es necesaria. Respecte im-
perativamente la polaridad: ponga el polo positivo en
el contacto del medio de la toma.
3) Una vez la tensión de funcionamiento aplicada,
encienda el monitor y orientando la cámara hacia la
zona de vigilancia, determine el lugar de montaje el
mejor adaptado. Atornille la cámara en este lugar vía
su soporte de montaje. Una vez la instalación realiza-
da, desatornille la tuerca (4) del soporte de montaje,
incline la cámara en la posición deseada y atornille la
¡Importante! Las tomas de conexión (1, 2) y el reparti-
dor de cable (3) no son resistentes a las intemperies.
Para una conexión en exterior, deben estar protegidos
en consecuencias.
Cuando la cámara se retira definitivamente de
servicio, deposítela en una fábrica de reciclaje
de proximidad para contribuir a su eliminación
no contaminante.
tuerca. La cámara también puede suspenderse, por
ejemplo a un techo. Para eso, atornille el soporte de la
cámara en la toma enroscada de la parte superior de
la cámara. Si la rosca está escondida, pulse un poco
el parasol (6) hacia delante.
4) Si el objetivo a vigilar no se reproduce con nitidez,
corrija el reglaje del enfoque: saque el parasol (6) y
atornille la parte delantera de la carcasa (5). Gire con
precaución el objetivo hasta que la imagen sea nítida.
Atornille después la carcasa y coloque el parasol.
4Características técnicas
Optica: . . . . . . . . . . . . . Sistema CCD, 8,5mm (1/3")
Sistema vídeo: . . . . . . . PAL, hor. 15625Hz,
vert. 50Hz
Píxeles: . . . . . . . . . . . . hor. 512 x vert. 581
Resolución: . . . . . . . . . 380 líneas
Objetivo: . . . . . . . . . . . 1: 2,0/3,6mm
Angulo de vista: . . . . . . 92°
Obturación: . . . . . . . . . 1/50 s a 1/100000 s
Luminosidad mínima: . . 1 lux
Relación señal/ruido: . . > 48dB
Salida vídeo: . . . . . . . . 1Vcc/75Ω
Temperatura fun.: . . . . . 0–40°C
Alimentación: . . . . . . . . 12V ±10%/80mA
Clase de protección: . . . IP57
Nos reservamos el derecho de modificación.
®
TVCCD-145COL Best.-Nr. 19.0100
®
Kamera kolorowa
Prosimy o uważne przeczytanie poniższej instrukcji przed
użyciem urządzenia oraz o zachowanie tekstu do wglądu.
1Zastosowania
Kamera wyposażona w obiektyw 3,6mm jest przezna-
czona do użytku w systemie nadzoru wideo (CCTV).
Posiada elektroniczną migawkę, automatyczną regu-
lację wzmocnienia (AGC) i automatyczny balans bieli. Ze
względu na odporną na wpływy atmosferyczne obu-
dowę (IP 57) kamera jest również przeznaczona do
użytku na zewnątrz pomieszczeń.
2Informacje dotyczące bezpieczeństwa
Ponieważ urządzenie spełnia wszelkie normy obowiązują-
ce w Unii Europejskiej, zostało oznaczone symbolem .
●Kamera jest odporna na czynniki atmosferyczne, jed-
nak nie jest całkowicie wodoszczelna. Z tego względu
kamery nie należy zanurzać w wodzie.
●Nie należy wystawiać kamery na bardzo wysokie lub
bardzo niskie temperatury (dopuszczalna temperatura
pracy 0 – 40 °C).
●Do czyszczenia nie należy stosować silnych deter-
gentów ani substancji chemicznych.
●Nie dotykać soczewek palcami. Do czyszczenia so-
czewek stosować tylko odpowiednie detergenty do
szkieł optycznych.
●Producent ani dostawca nie ponosi odpowiedzialności
za wynikłe szkody materialne, jeśli urządzenie było
używane niezgodnie z przeznaczeniem, zostało zain-
stalowane lub obsługiwane niepoprawnie lub podda-
wane nieautoryzowanym naprawom.
3Działanie
1) Podaj sygnał video z gniazda BNC (2) za pomocą
ekranowanego kabla na wejście wideo monitora.
Jeśli długość kabla przekracza 100m, należy zain-
stalować wzmacniacz wideo pomiędzy kamerą i
kablem w celu skompensowania strat związanych z
długim okablowaniem.
2) Podłącz zasilacz o wyjściowym napięciu 12 V, o wy-
dajności przynajmniej 80 mA (np. PS-300ST lub PS-
500ST z oferty MONACOR) do niskonapięciowej wty-
czki zasilania (1). Należy zastosować niskonapięciową
wtyczkę o wymiarach 5,5/2,1 mm (średnica wewnę-
trzna/zewnętrzna). Proszę zawsze przestrzegać pra-
widłowej biegunowości: biegun dodatni powinien zna-
jdować się na wewnętrznym styku wtyczki.
3) Po podłączeniu zasilania, włącz monitor i ustaw ka-
merę tak, aby optymalnie monitorowała dane miejs-
ce. Kamerę należy solidnie przymocować, używając
do tego uchwytu montażowego. Po przykręceniu
uchwytu, kamerę można ustawić pod odpowiednim
kątem za pomocą śruby (4) na uchwycie. Kamera
Ważne! Wbudowane gniazda (1, 2) i rozdzielacz (3) nie
są wodoodporne. W przypadku zastosowania na
wolnym powietrzu elementy te musza być odpowiednio
zabezpieczone.
Jeśli urządzenie nie będzie już nigdy więcej
używane, wskazane jest przekazanie go do
miejsca utylizacji odpadów, aby zostało utylizo-
wane bez szkody dla środowiska.
może być również podwieszona na suficie. W tym
celu przymocuj uchwyt montażowy do górnej części
kamery. Jeżeli gwint jest niewidoczny, należy lekko
odsunąć osłonę przeciwsłoneczną (6).
4)Jeżeli monitorowany obszar nie jest wyraźny, należy
ręcznie ustawić ostrość: W tym celu zdejmij osłonę
przeciwsłoneczną (6) i zdejmij górną część obudowy
(5). Delikatnie ustaw obiektyw, aż obraz wyostrzy się.
Po ustawieniu ostrości załóż i dokręć obudowę i
osłonę.
4Dane techniczne
Przetwornik obrazu: . . . . . układ scalony CCD,
8,5 mm (1/3")
System wideo: . . . . . . . . . PAL, poziomy 15 625 Hz,
pionowy 50 Hz
Liczba pikseli: . . . . . . . . . . poziomo 512 x pionowo 581
Rozdzielczość: . . . . . . . . . 380 linii
Obiektyw: . . . . . . . . . . . . . 1 : 2,0/3,6 mm
Kąt widzenia: . . . . . . . . . . . 92°
Migawka: . . . . . . . . . . . . . . 1/50 s do 1/100000 s
Minimalne oświetlenie: . . . 1 luks
Stosunek S/N: . . . . . . . . . . > 48 dB
Wyjście wideo: . . . . . . . . . . 1 Vpp/75 Ω
Dopuszczalna temp. pracy: 0 – 40 °C
Zasilanie: . . . . . . . . . . . . . . 12 V±10 %/80mA
Klasa zabezpieczenia: . . . . IP 57
Może ulec zmianie.
E
PL
Copyright©by MONACOR INTERNATIONAL GmbH & Co. KG, Bremen, Germany. All rights reserved. A-0363.99.02.08.2006
®

12V
Video CCD COLOUR CAMERA
1
3
4
2
6
5

This manual suits for next models

1

Other Monacor Security Camera manuals

Monacor TVCCD-800ECOL User manual

Monacor

Monacor TVCCD-800ECOL User manual

Monacor TVCCD-30 User manual

Monacor

Monacor TVCCD-30 User manual

Monacor TVCCD-130S User manual

Monacor

Monacor TVCCD-130S User manual

Monacor TVCCD-123COL User manual

Monacor

Monacor TVCCD-123COL User manual

Monacor TVCCD-34COL User manual

Monacor

Monacor TVCCD-34COL User manual

Monacor INC-2622BV User manual

Monacor

Monacor INC-2622BV User manual

Monacor TVCCD-623 User manual

Monacor

Monacor TVCCD-623 User manual

Monacor AV-3010CCD User manual

Monacor

Monacor AV-3010CCD User manual

Monacor TVCCD-162SCOL User manual

Monacor

Monacor TVCCD-162SCOL User manual

Monacor TVCCD-600COL User manual

Monacor

Monacor TVCCD-600COL User manual

Monacor TVCCD-120 User manual

Monacor

Monacor TVCCD-120 User manual

Monacor TVCCD-162S User manual

Monacor

Monacor TVCCD-162S User manual

Monacor TVCCD-182HCOL User manual

Monacor

Monacor TVCCD-182HCOL User manual

Monacor TVCCD-182HCOL User manual

Monacor

Monacor TVCCD-182HCOL User manual

Monacor TVCCD-320/SW User manual

Monacor

Monacor TVCCD-320/SW User manual

Monacor AXOC-4312BV User manual

Monacor

Monacor AXOC-4312BV User manual

Monacor TVCCD-152SET User manual

Monacor

Monacor TVCCD-152SET User manual

Monacor INC-2722BCP User manual

Monacor

Monacor INC-2722BCP User manual

Monacor TVCCD-318HCOL User manual

Monacor

Monacor TVCCD-318HCOL User manual

Monacor TVCCD-180 User manual

Monacor

Monacor TVCCD-180 User manual

Monacor TVCCD-257SET User manual

Monacor

Monacor TVCCD-257SET User manual

Monacor TVCCD-462COL User manual

Monacor

Monacor TVCCD-462COL User manual

Monacor AV-432SET User manual

Monacor

Monacor AV-432SET User manual

Monacor TVCCD-147COL User manual

Monacor

Monacor TVCCD-147COL User manual

Popular Security Camera manuals by other brands

TeleEye DM720 Series user manual

TeleEye

TeleEye DM720 Series user manual

TBK TBK-D45PDV user manual

TBK

TBK TBK-D45PDV user manual

Dahua HAC-HFW2501T-Z-A user manual

Dahua

Dahua HAC-HFW2501T-Z-A user manual

Idis DC-E4212WR Operation manual

Idis

Idis DC-E4212WR Operation manual

Andatech ASC-200 user manual

Andatech

Andatech ASC-200 user manual

Centrix MW20IR user manual

Centrix

Centrix MW20IR user manual

Polaroid IP100 user manual

Polaroid

Polaroid IP100 user manual

Philips LDH1362/10 installation instructions

Philips

Philips LDH1362/10 installation instructions

Digital Watchdog STAR-LIGHT PLUS DWC-D3853WTIRW quick start guide

Digital Watchdog

Digital Watchdog STAR-LIGHT PLUS DWC-D3853WTIRW quick start guide

Sanyo VDC-DP7584S - 1/4" Color CCD Vandal-Resistant Dome... A&E Specifications

Sanyo

Sanyo VDC-DP7584S - 1/4" Color CCD Vandal-Resistant Dome... A&E Specifications

Dahua N64CG52 quick start guide

Dahua

Dahua N64CG52 quick start guide

Tiandy TC-D5622H-R80 Installation and user manual

Tiandy

Tiandy TC-D5622H-R80 Installation and user manual

Burg Wächter BURGcam BULLET 3040 Quick installation guide

Burg Wächter

Burg Wächter BURGcam BULLET 3040 Quick installation guide

Bosch NEI-Series user manual

Bosch

Bosch NEI-Series user manual

Vicon CRUISER S660V Installation and operation guide

Vicon

Vicon CRUISER S660V Installation and operation guide

Digital Watchdog OMNI-PLUS Snapit DWC-D4382D manual

Digital Watchdog

Digital Watchdog OMNI-PLUS Snapit DWC-D4382D manual

TRENDnet TV-IP512WN - ProView Wireless N Internet Surveillance... Quick installation guide

TRENDnet

TRENDnet TV-IP512WN - ProView Wireless N Internet Surveillance... Quick installation guide

Lorex C883DA Series quick start guide

Lorex

Lorex C883DA Series quick start guide

manuals.online logo
manuals.online logoBrands
  • About & Mission
  • Contact us
  • Privacy Policy
  • Terms and Conditions

Copyright 2025 Manuals.Online. All Rights Reserved.