Monark 828E User manual

Manual
English/Svensk
Monark 828 E
Ergomedic 828 E


© 2008 MONARK EXERCISE AB, Vansbro, Sweden
Contents 3
Monark Exercise AB 4
Product Information 5
Operating Instruction 6
Workload device 6
Cycle adjustments 6
Computer specifications 7
Computer Instruction 7
Service 8
Warranty 8
Service check & maintenance 8
Transport 8
Batteries 9
Replacement of brake belt 9
Brake belt contact surface 10
Crank bearing 10
Flywheel bearing 10
Chain 1/2“ x 1/8“ 11
Scale - zero adjustment 12
Calibration 12
Freewheel sprocket 13
Spare parts 14
Innehållsförteckning 17
Monark Exercise AB 18
Produktinformation 19
Funktionsbeskrivning 20
Belastningsreglering 20
Cykelinställningar 20
Mätarspecifikationer 21
Mätarinstruktioner 21
Service 22
Garanti 22
Regelbunden servicekontroll & Underhåll 22
Transport 22
Batterier 23
Bromsbandsbyte 23
Bromsbana 24
Bromshjulslagring 24
Vevlager 24
Kedja 1/2” x 1/8” 25
Nollställning av mätartavla och skala 26
Kalibrering pendelvåg 26
Frigångskrans 27
Reservdelslista 28
Contents
Contents

Monark Ergomedic 828 E
4
Monark Exercise AB
Monark Exercise AB
Monark has 100 years’ experience of bicycle production. The Monark tradition
has yielded know-how, experience, and a real feel for the product and quality. Since
the early 1900s, Monark’s cycles have been living proof of precision, reliability,
strength and service. That is one of the reasons why we are now the word lead-
er in cycle ergometers and the market leader in Scandinavia in transport cycles.
We manufacture, develop and market ergometers and exercise bikes, transport bikes
and specialised bicycles. Our largest customer groups are within health care, sports
medicine, public authorities, industry and postal services.
For more information: www.monark.net

Monark Ergomedic 828 E 5
Product Information
Product Information
Congratulations on your new Ergometer.
The Monark 828 E is the world’s most commonly
used exercise ergometer. The adjustable brake sys-
tem and the force can be set and read Kiloponds
(kp) and Newton (N). The actual brake power is
showed in Watts on the electronic meter.
The cycle is equipped with an electronic meter
showing pedal revulotions per minute (RPM),
heart rate in bpm (HR), exercise time in minu-
tes and seconds (TIME), speed in km per hour
or miles per hour (SPEED), covered distance in
km or mile (DISTANCE), burned Calories (CAL)
and the power on the cycle(WATT). The watt
level depends on pedaling speed, it can be fine
tuned by increasing or decreasing the speed or
pedal rpm.
Features
Large, well-balanced flywheel 22kg (48 lbs)•
Pendulum scale, easy to calibrate•
Adjustable seat height•
Adjustable handlebar with quick release lever•
Stable frame, solid steel tube•
Powder painted•
Wheels for easy transport•
Electronic display with heart rate•
Width
530 mm (21”) at handlebar
640 mm (25”) at support tubes
Length
1120 mm (44”)
Height
890-1130 mm (35-44,5”) at handlebar
800-1120 mm (31,5-44”) at seat
Weight
52 kg (114,5 lbs)
Included
Chestbelt, PC software
All 828 E Ergometers are calibrated at the fac-
tory. This means that you can begin to use the
ergometer directly after assembly. However , if
the user wishes to verify the scale please read the
instruction for “Calibration” in this manual.
NOTE!
The use of Ergomedic 828 E can be physically
strenuous. Always consult a doctor before begin-
ning an exercise program and stop immediately if
feeling faint or dizzy.

Monark Ergomedic 828 E
6
Operating Instruction
Workload device
The 828 E uses a brake belt system to control
the resistance. The brake power can be changed
by increasing or decreasing the tension of the
brake belt against the tension knob(1). See fig:
Workload device.
Cycle adjustments
Seat height should be adjusted to a comfortable
position. A suitable height is when your knee is
slightly bent and the middle of the foot is straight
above the pedal axle with the pedal is in its lo-
west position. To adjust the seat height loosen the
lever on the seat tube. See fig: Adjustments.
The handlebar setting shall give a comfortable
position when cycling. During longer exercise
sessions it is recommended to occasionally chan-
ge the handlebar position. To adjust the handle-
bar loosen the quick release lever. See fig: Adjust-
ments.
NOTE! The handlebar stem should be inserted
into the frame tube at least 3 inches (about 8 cm).
this measure is marked out on the stem(3).
Fig: Workload device (1)
1
Fig: Adjustments
1) Lever, seat post
2) Lever, handlebar
3) Inserted min. 3”
1
min. 3”
2
3

Monark Ergomedic 828 E 7
Operating Instruction
Display
RPM 0 - 250 rev./min
HR 50 - 240 bpm
TIME 0:00-99:59 min:sec
SPEED 0 - 99 km/h or mph
DISTANCE 0.0 - 99.9 km or mile
FORCE 0.0 - 7.0 kp
CALORIES 0 - 999 kcal
WATT 0 - 7 x rpm watt
Computer specifications
Batteries: 1.5 V x 2 R6 (AA)
Storing temp.: -10ºC - +60ºC
Operating temp.: 0ºC - 50ºC
Computer Instruction
Press any button or move the pedal to turn on the
meter. At the display for heart rate (HR) a ♥is lit
which means that the meter is trying to find a pulse
signal from an external source (chest belt with
electrodes, our part.no 9339-91). If the meter can
not find the heart rate signal the HR function is
automatically turned off after 30 seconds. When
the function is turned off the ♥ symbol is not lit
any more. The heart rate function can be turned
on again by preessing a button.
The timerer starts automatically when the pedals
are moved. Meter values for Time, Distance and
Calories can be set to zero by pressing the RESET
button for more than 2 seconds. To get correct
readings for calories and watts the kp value on
the electronic meter has to be set to the same
value as the pendulum or the kp window, shown
to the left of the electronic meter.
Example: The pendulum and the kp-window is
showing 2 kp. Press the kp button to the left on
the meter. The lower display window is now sho-
wing figures in kp. Increase or decrease in steps of
0.1 kp by pressing the kp button() or the Reset
button() until the reading corresponds with the
actual or desired kp values on the pendulum scale
or in the kp window. After that press the CAL/
WATT button to either show the CAL or WATT
figures. The watt reading in the display is depen-
ding on the pedaling speed. The watt reading can
then be fine tuned through increase or decrease
of the pedaling speed. Calories are calculated all
the time.
Do not expose the electronic meter to direct
sunlight or extremely high temperature. Do not
use any dissolvent when cleaning. Use only dry
cloth.

Monark Ergomedic 828 E
8
Service
1
Service
Warranty
As on any quality product there may be an ex-
ceptional fault due to material or manufacture.
If such a fault should arise on your Ergometer,
contact your place of purchase to inquire about
repair.
Monark products and parts are guaranteed
against defects in materials and workmanship
for a period of one year from the initial date of
purchase of the unit.
Parts found to need replacement due to normal
wear and tear, such as brake belts, are not cove-
red. This guarantee covers parts only, not labor
costs associated with the repair. This guarantee
does not apply to cases of abuse or vandalism,
nor does it extend to any injury or loss to person
or property caused directly or indirectly by any
Monark products.
In the event of a defect in material or workman-
ship during the warranty period, Monark Exer-
cise will repair or replace (at its option) the pro-
duct. Monark Exercise will do so at its expense
for the cost of materials but not for labor or ship-
ping.
Service check & maintenance
To keep your Ergometer in good shape you should
make a regular service.
Keep your Ergometer clean and properly lub-•
ricated.
Periodically wipe the surface with a rust pre-•
ventative, especially when it has been cleaned
and the surface is dry. This is done to protect
the chrome and zinc parts as well as the pain-
ted parts.
When cleaning and lubricating be sure to•
check that all screws and nuts are properly
tightened.
Be sure that all moving parts as crank and•
flywheel are working normal and that no
abnormal play or sound excsists. I.e. play in
bearings causes fast wearing and with that
follows a highly reduced lifetime.
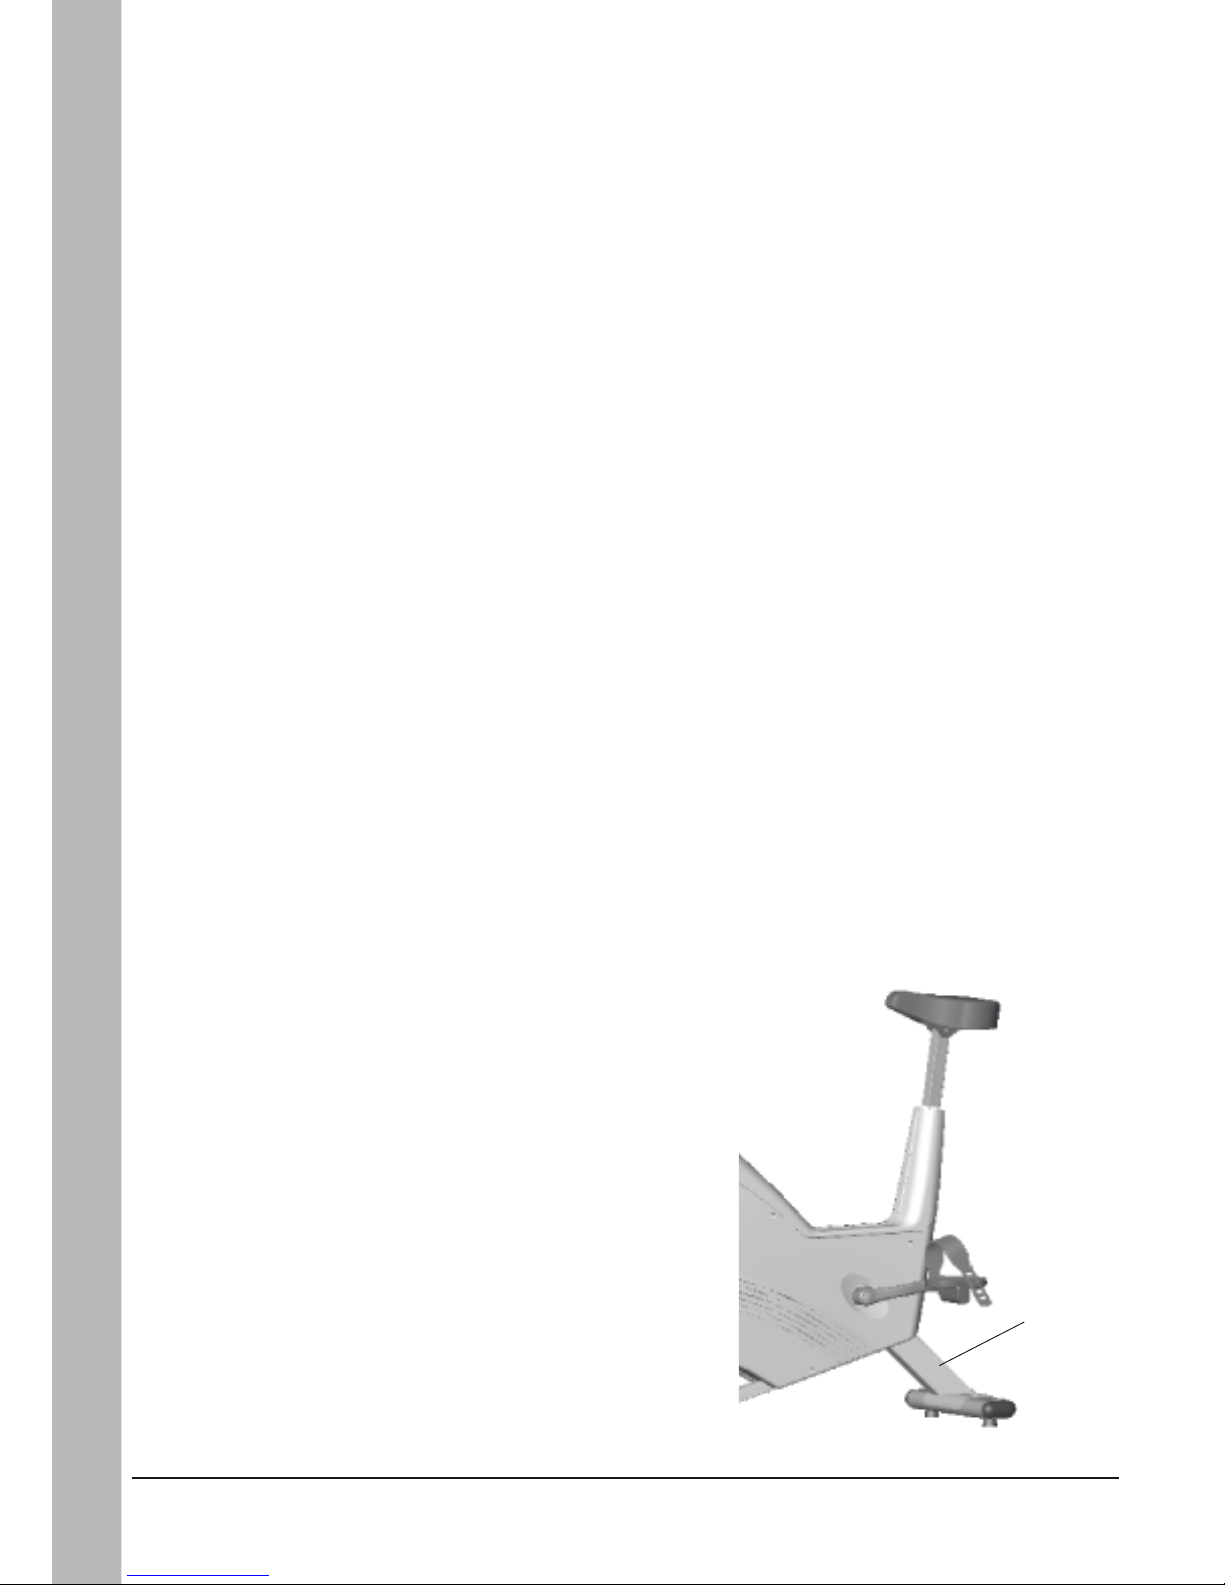
Check now and then that both pedals are•
firmly tightened. If not the threading in the
pedal arms will be damaged. Also check that
pedal arms are firmly tightened on the crank
axle, tighten if necessary. When the Ergome-
ter is new it is important to tighten the pedals
after 5 hours of pedaling.
Check that the chain is snug and there is no•
play in the pedal crank
Be sure that the pedals are moving smoothly,•
and that pedal axle is clear of dirt and fibers
Check that the pedal crank is secure to the•
crank axle
Check that pedals, chain and freewheel sp-•
rocket are lubricated
Check that the handlebars and seat adjust-•
ment screws are lubricated
Be sure that the brake belt does not show sig-•
nificant signs of wear
Transport
At transport the tension device should be so-
mewhat tightened to prevent the brake belt from
falling off of the fltwheel.
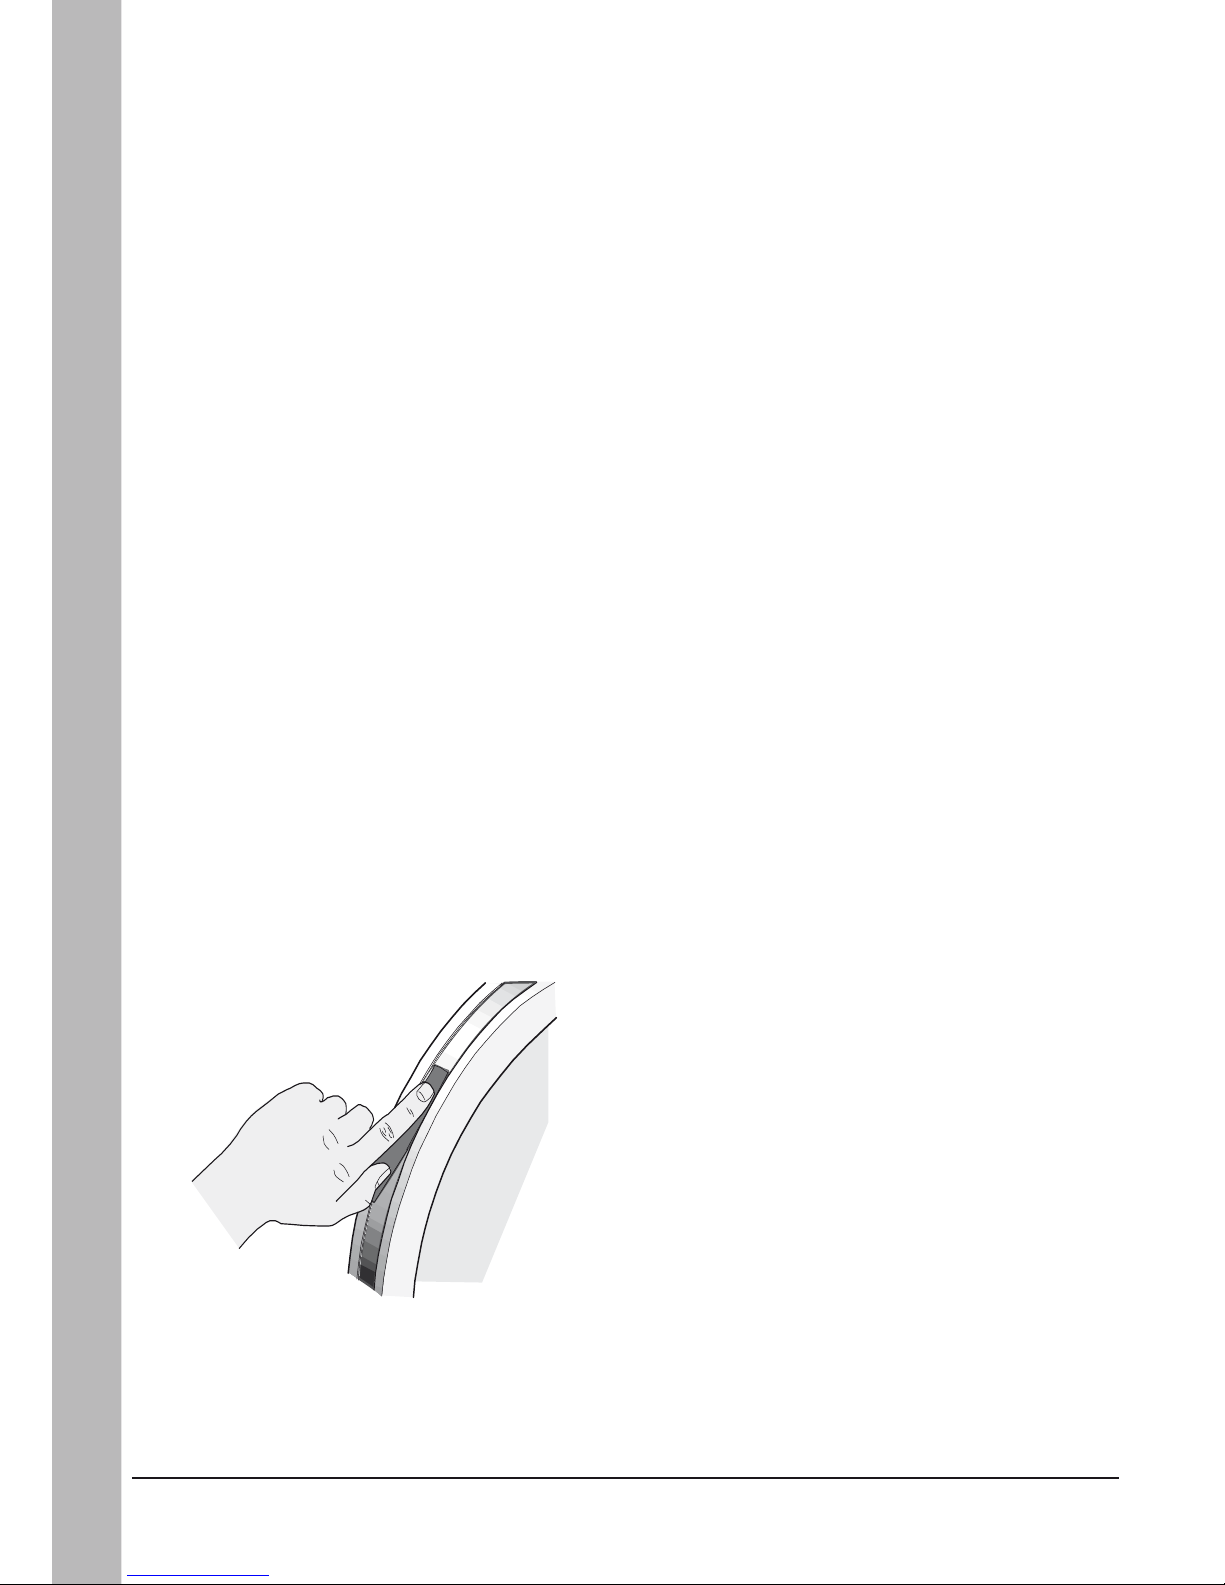
Please note: The production number of your
Ergometer is placed according to fig: Serial
number.
Fig: Serial number (1)

Monark Ergomedic 828 E 9
Service
1
2
Fig: Batteries
1) Batteries
2) km/mile
Batteries
The batteries are in a separate package at deli-
very. The batteries may need to be replaced upon
assembly. To replace the batteries at any time,
take the meter out of the housing by bending up
in the lower end with a coin or similar. The bat-
teries, 2 x 1.5V size AA(R6), which are placed in
the holder on the backside of the meter, can then
easily be changed. See fig: Batteries.
After the batteries has been replaced all segments
in the display are visible and a buzzer will sound
for two seconds. After 2 seconds the meter turns
to main display again and normal function. Put
the meter into the housing again.
Note: On the backside of the meter is a switch to
change meter function from km to mile or mile
to km(2).
1
2
3
Fig: Brake belt
1) Tension lever
2) Lock washer
3) Clip
Replacement of brake belt
Remove the tension lever(1). Dismantle the front
cover over the pendulum weight by detaching the
4 screws underneath. Remove the left or the right
frame cover by undoing the mounting screws
(5pcs). Put the crank in a backward position.
Move the cover somewhat out in the front end
and then pull it backwards to remove it. Loosen
the brake belt from the pendulum at the screw
and lock washer(2). See fig: Brake belt.
Take it apart at the spring and clip(3) and remove
it from the bike. Attach the new brake belt and
assemble the bike in reverse order. Adjust the
brake belt so that the resistance increases as soon
as the tension device is turned a little.
When replacing the brake belt it is recommen-
ded to clean the brake surface. See section ”Brake
belt contact surface”.

Monark Ergomedic 828 E
10
Service
Crank bearing
The crank bearing is long term greased and needs
normally no supplementary lubrication. If pro-
blem arises, please contact your Monark dealer.
Flywheel bearing
The bearings in the flywheel are lifetime greased
and require normally no maintenance. If problem
arises, please contact your Monark dealer.
Brake belt contact surface
The brake belt should be regularly checked to en-
sure that it has not suffered excessive wear. If it
looks worn it should be replaced. Deposits of dirt
on the brake belt and on the contact surface may
cause the unit to operate unevenly and will also
wear down the brake belt. The brake belt contact
of the flywheel surface should then be ground off
with fine sand paper and any dust removed with
a clean dry cloth.
Remove left cover. Set the tension device to mi-
nimum load/tension. Take off the brake belt to
the side. Grind with a fine sand paper. See fig:
Brake belt contact surface. Grinding is easier to
perform if a second individual cautiously and ca-
refully pedals the cycle.
Irregularities on the brake belt contact surface
are removed by means of a fine sand paper or an
abrasive cloth. Otherwise unnecessary wear on
the brake belt may occur and the unit can be-
come noisy.
Always keep the brake belt contact surface clean
and dry. No lubricant should be used. We recom-
mend to replacing the brake belt when cleaning
the contact surface. In regard to assembly and
adjustment of the brake belt, see ”Replacement
of brake belt”.
Fig: Brake belt contact surface

Monark Ergomedic 828 E 11
Service
Chain 1/2“ x 1/8“
It is strongly recommended to keep the chain
clean. Dirt build-up on the chain will cause ex-
cess wear. A chain lubricant and solvent for nor-
mal road bikes may be used.
Check the lubrication and tension of the chain in
regular intervals. In the middle of its free length
the chain should have a minimum play of 10 mm
(1/4in). See fig: Chain adjustments. When the play
in the chain is about 20 mm (3/4 inch) the chain
must be tightened otherwise it will cause abnor-
mal wear of the chin and chainwheels. Because of
this it is always recommended to keep the chain
play as little as possible. When the chain has be-
come so long that it can no longer be tightened
with the chain adjusters it is worn out and shall
be replaced with a new one.
To replace the chain remove left and right frame
cover. To adjust the chain the hub nuts should be
loosened. Loosening or tightening the nuts on the
chain adjusters will then move the hub and axle
forward or backward. Adjust according to above
recommendation. Then tighten the nuts on the
hub axle again. See fig: Chain adjustments.
Loosen the chain adjuster as much as possible.
Dismantle the chain lock and remove the chain.
Put on a new chain and assemble the chain lock.
The spring of the chain lock should be assembled
with the closed end in the movement direction
of the chain. Use a pair of tongs for dismantling
and assembling the spring. See fig: Chain
replacement.
Adjust chain adjusters to allow chain play accor-
ding to above. Tighten axle nuts firmly. Put on
frame covers again.
NOTE: At assembly the flywheel has to be paral-
lel with the centerline of the frame otherwise the
chain and chain wheels makes a lot of noise and
wears out rapidly.
Fig: Chain replacement
4) Lock spring
5) Movement direction
6) Chain lock
4
6
5
3
21
Fig: Chain adjustments
1) Chain adjuster
2) Axel nut
3) Chain play

Monark Ergomedic 828 E
12
Service
1
3
2
9
Fig: Scale adjustment
1) Locking nut
2) 0-index
3) Adjustment weight, pendulum
Fig: Adjustment kp-scale window
9) Lock screw f. scale indicator
4
5
7
86
Fig: Calibration
4) Calibration weight, 4kg
5) kp-scale
6) Attachment of calibration weight
7) Pendulum at 4kp
8) Screw to adjustment weight
Calibration
Although all Ergometers are calibrated at the fac-
tory the user may wish to verify this by perfor-
ming a mechanical scale calibration. If so please
do the following.
Remove the brake belt from the spring. Lean
the bike forward so that the calibration weight,
4kg(4) (our part no: 9000-211) is hanging inde-
pendently from the frame cover. Be sure that the
scale board is set to zero before the weight is put
on, see section ”Scale - zero adjustment”. Put the
weight on on the spring(6). When correctly set,
it should be possible to read this weight from the
corresponding place on the scale board(7). See
fig: Calibration.
Should there be a deviation, adjust the pendulum
to the correct weight on the scale by means of the
adjusting weight inside the pendelum(3). See fig:
Scale adjustment. To change the position of the
adjusting weight, loosen the lock screw(8) on the
back of the pendelum weight. Should the index
of the pendulum weight be too low, move the
adjusting weight upwards in the weight and if the
index should be too high the adjusting weight is
moved somewhat downwards and locked in the
new position. Repeat until the correct reading is
achieved.
Check the calibration of the pendulum weight
once a year or when needed.
Scale - zero adjustment
Loosen tension device so that the brake belt feels
loose. Check that the pendulum will hang in ver-
tical position.
Scale board:
Check that the index on the pendulum(2) weigh
is aligned with the index at the 0-position on
the scale board. If adjustment is necessary, first
loosen the lock nut(1) and then change the posi-
tion of the board. Tighten the lock nut after the
adjustment. See fig: Scale adjustments.
Kp-scale:
At the same time, check that the kilopond scale(5)
to the left of the meter, shows 0 in line with the
index. To adjust the kp-scale lossen the lock
screw for scale indicator(9). Tighten the screw
firmly after the adjustment. See fig: Calibration,
Adjustment kp-scale window.
Ergomedic

Monark Ergomedic 828 E 13
Service
Freewheel sprocket
When replacing the freewheel sprocket remove
left and right frame cover. Dismantle the chain as
described in part ”Chain 1/2” x 1/8” ”.
Loosen the axle nuts and lift off the flywheel.
Remove the axle nut, washer, chain adjuster and
spacer on the freewheel side. Place the special
remover (part No. 9100-14) in the adapter and
place the spacer and axle nut outside. See fig:
Special remover.
NOTE: Do not tighten the axle nut completely. It
must be possible to loosen the adapter-sprocket
half a turn.
The sprocket should be lubricated with a few
drops of oil once a year. Tolt the cycle somewhat
to make it easier for the oil to reach the ball bea-
ring. See fig: Lubrication.
Fig: Lubrication
Fig: Hub assembly
Fig: Special remover
(part no: 9100-14)

Monark Ergomedic 828 E
14
Spare parts
Spare parts
36
5
4
1
29
30
31
32
33
34
35
36
37
2
6
3
26
25
27
28
24
23
7
8
9
10
11
12
13
14
15
16
17
18
19
20 21
22
Pos. Qty. Art.No. Description Pos. Qty. Art.No. Description
1 1 9301-15 Support tube, front 20 1 9300-115 Bushing f. saddle post
2 1 9301-16 Support tube, rear 21 1 9300-123 Top cover
3 4 9328-51 Plastic cap, blue 22 1 9300-280 Handlebar complete
4 4 9328-26 Rubber foot 23 1 9100-180 -Lever M8
5 1 9328-37 Transport wheel compl. (pair) 24 1 9126-72 -Handgrip (pair)
6 4 5845 Locking nut M8 25 1 9300-291 Expander wedge
7 2 9300-12 Screw MVBF M8x16 mm 26 1 9300-61 Frame cover, left
8 1 9300-55 Chain 1/2 x 1/8”, 116 l 27 1 9300-60 Frame cover, right
9 1 9326-164 Magnet 28 4 5673-9 Mounting screw LKT-TT 5x12mm
10 2 8523-2 Dust cover 29 10 9306-12 Plastic plug
11 2 8523-115 Screw M6S 8.8 M8 x 20 FZB 30 1 9301-5 Frame
12 1 9300-430 Steel crank set, complete 31 1 9300-24 Wheel suspension complete set
13 1 9300-220 Pedal, (pair) 32 1 9000-12 -Chain adjuster (pair)
14 1 9300-207 Pedal strap, (pair) 33 1 9106-13 -Sprocket
15 1 8966-175 BB cartridge bearing, complete 34 1 9106-14 -Connection
16 1 9300-138 Saddle post 35 3 91001-6 -Bearing 6001 - 2z
17 1 9300-122 Locking screw 36 1 9300-118 -Axle
18 1 9300-134 Pressure washer 37 1 9322-117 -Bush, 23 mm
19 1 4994-5 Saddle 1 9339-98 Chest belt
1 9300-114 -Saddle bracket 1 9300-365 PC program

Monark Ergomedic 828 E 15
Spare parts
12
14 13 15
2
31
1
3
9
5
4
7
3 10 8 17 6 25 26 20 18 37 16 11
24
21
35
34
22
33
23
24
20271818371936
31
32
30
29
28
Pos. Qty. Art.No. Description Pos. Qty. Art.No. Description
1 1 9300-30 Frame for equipment 18 3 5866 Washer
2 4 9300-21 Screw MVBF 6x16 mm 1 9300-36 Meter panel, complete
4 5863 Washer 19 1 9339-100 -Meter panel
3 5 5843-9 Nut M6 20 2 9000-17 -Spacer
4 1 9300-22 Tension lever 21 1 9300-93 -Meter reader 7kp
5 1 14333-9 Screw M6x45 mm 22 1 9000-103 -Screw
6 1 9300-25 Tension screw M8, complete 23 1 9300-88 -Weight lever
7 1 9100-20 Spring 24 2 19001-6 -Ball bearing 6001-2Z
8 1 9100-26 Tension cylinder complete 25 1 9300-86 -Axle
9 1 14358 Screw M8x40 mm 26 1 9300-87 -Lock ring SgA 12
10 1 5844 Locking nut M8 27 1 9339-21 Screw
11 1 9300-170 Digitalmeter 28 1 5862 Washer
2 2142 Battery 14 x 50 mm 29 1 9000-102 Wing nut
12 1 9326-162 Crank sensor with cable 30 1 9300-94 Stop
2 9103-40 Screw for crank sensor 31 2 9300-99 Plastic stop
13 1 9126-75 Screw RXS B8 x 9.5 FZB 32 1 5671-9 Screw M5 x 10 mm
14 1 9326-166 Sensor holder 33 1 9103-62 Brake belt, complete
15 1 9326-263 Cable 620 mm 34 1 9300-92 Washer
5 9300-66 Holder for cable 35 1 5675-9 Mounting screw
16 1 9300-142 Instrument cover 36 1 9300-3 Brake wheel
17 4 5768 Mounting screw for cover 37 2 5799 Nut

Notes:
.............................................................................................................................................................
.............................................................................................................................................................
.............................................................................................................................................................
.............................................................................................................................................................
.............................................................................................................................................................
.............................................................................................................................................................
.............................................................................................................................................................
.............................................................................................................................................................
.............................................................................................................................................................
.............................................................................................................................................................
.............................................................................................................................................................
.............................................................................................................................................................
.............................................................................................................................................................
.............................................................................................................................................................
.............................................................................................................................................................
.............................................................................................................................................................
.............................................................................................................................................................
.............................................................................................................................................................
.............................................................................................................................................................
.............................................................................................................................................................
.............................................................................................................................................................
.............................................................................................................................................................
.............................................................................................................................................................
.............................................................................................................................................................
.............................................................................................................................................................
.............................................................................................................................................................
.............................................................................................................................................................
.............................................................................................................................................................
.............................................................................................................................................................
.............................................................................................................................................................
.............................................................................................................................................................

© 2008 MONARK EXERCISE AB, Vansbro, Sweden
Contents 3
Monark Exercise AB 4
Product Information 5
Operating Instruction 6
Workload device 6
Cycle adjustments 6
Computer specifications 7
Computer Instruction 7
Service 8
Warranty 8
Service check & maintenance 8
Transport 8
Batteries 9
Replacement of brake belt 9
Brake belt contact surface 10
Crank bearing 10
Flywheel bearing 10
Chain 1/2“ x 1/8“ 11
Scale - zero adjustment 12
Calibration 12
Freewheel sprocket 13
Spare parts 14
Innehållsförteckning 17
Monark Exercise AB 18
Produktinformation 19
Funktionsbeskrivning 20
Belastningsreglering 20
Cykelinställningar 20
Mätarspecifikationer 21
Mätarinstruktioner 21
Service 22
Garanti 22
Regelbunden servicekontroll & Underhåll 22
Transport 22
Batterier 23
Bromsbandsbyte 23
Bromsbana 24
Bromshjulslagring 24
Vevlager 24
Kedja 1/2” x 1/8” 25
Nollställning av mätartavla och skala 26
Kalibrering pendelvåg 26
Frigångskrans 27
Reservdelslista 28
Innehållsförteckning

Monark Ergomedic 828 E
18
Monark Exercise AB
Monark har 100 års erfarenhet av cykeltillverkning. En tradition som gett kunskap,
erfarenhet, och känsla för produkt och kvalitet. Sedan början av 1900-talet har Mo-
narks cyklar varit ett levande bevis på exakthet, pålitlighet, hållfasthet och service.
Det är en av anledningar till att vi idag är världsledande på Ergometercyklar och
marknadsledande i Skandinavien på Transportcyklar.
Vi tillverkar, utvecklar och marknadsför ergometer och träningscyklar, transport
och specialcyklar. Våra största kundgrupper hittar vi inom sjukvård, idrottsmedicin,
myndigheter, industri och postverksamhet.
För mer information: www.monarkexercise.se
Monark Exercise AB

Monark Ergomedic 828 E 19
Produktinformation
Vi gratulerar till din nya motionscykel.
Monark Ergometercykel modell 828E är en test-
cykel, försedd med en broms, vars bromskraft
kan avläsas i Newton (N) eller i kilopond (kp).
Bromseffekten kan direkt avläsas i watt på den
elektroniska mätaren när den rätta bromskraf-
ten ställts in. Den energi som en person måste
utveckla under en viss tid för att övervinna
denna bromseffekt, kan därigenom beräknas.
Energin uttrycks vanligen i kJ (kilo Joule) eller
cal (kilokalorier, kcal).
Ergometer modell 828E är också utrustad med
en elektronisk mätare som visar pedalvarv per
minut (RPM), hjärtfrekvens i slag per minut
(HR), körtid i minuter och sekunder (TIME),
tänkt cyklingshastighet i km per timma (SPEED)
samt tillryggalagd körsträcka i km (DISTAN-
CE). Dessutom kan bromskraften i kp ställas in
vilket ger avläsning av kaloriförbrukning (CAL)
Produktinformation
Fakta
Stort välbalanserat svänghjul på ca 22 kg•
Lättkalibrerad pendelvåg•
Höj- och sänkbar sadel och styre•
Stabil ram•
Pulverlackerad•
Praktiska transporthjul•
Elektronisk mätare med puls•
Bredd
530 mm vid styre
640 mm vid stödben
Längd
1120 mm
Höjd
890-1130 mm vid styre
800-1120 mm vid sadel
Vikt
52 kg
Ingår
Pulsbälte, PC-program
samt effekt i watt (WATT). Effekten är beroende
av trampvarvtalet vilket gör att watt talet kan
finjusteras genom att öka alternativt minska
hastigheten.
Alla 828 E Ergometrar är kalibrerade från fabrik.
Det betyder att du kan börja använda din Ergo-
meter direkt efter att du monterat ihop den. Om
du ändå önskar att göra en kalibrering se instruk-
tioner under avsnitt ”Kalibrering pendelvåg” i
denna manual.
OBS!
Då användning av Ergomedic 828 E kan inne-
bära ansenlig fysisk påfrestning rekommenderas
personer som inte är vana vid konditionsträning
alt. ej känner sig helt friska att först kontakta en
läkare för rådgivning.

Monark Ergomedic 828 E
20
Funktionsbeskrivning
Belastningsreglering
Genom cykling tillförs rörelseenergi till broms-
hjulet som bromsas upp med ett bromsband
vilket löper runt större delen av bromshjulets
bromsbana. Ändring av bromseffekten sker an-
tingen genom annan tramphastighet eller att med
hjälp av belastningsratten(1) öka eller minska
bromsbandets spänning mot bromshjulet. Se fig:
Belastningsreglering.
Cykelinställningar
Sadelhöjden ställs in så att man sitter bekvämt.
Lämplig höjd kan vara att ha knäet lätt böjt när
fotbladet är mitt över pedalaxeln samtidigt som
pedalen är i bottenläge. Vid justering av sadelhöj-
den lossa låsratten. Se fig: Justeringar.
Styrets inställning skall ge en bekväm körställ-
ning. Vid längre körning kan det vara lämpligt
att någon gång under träningen ändra styrinställ-
ning. Genom att lossa på styrets låsvred justeras
styret. Se fig: Justeringar.
OBS! Var noga med att styrets isättningslängd i
styrhuvudet är minst 8 cm. Detta är markerat på
styrstammen(3).
Funktionsbeskrivning
Fig: Justeringar
1) Låsratt, sadel
2) Låsvred, styre
3) Minsta isättningslängd
Fig: Belastningsreglering (1)
1
1
min. 8 cm
2
3
Other manuals for 828E
3
Table of contents
Languages:
Other Monark Exercise Bike manuals

Monark
Monark 828E User manual

Monark
Monark 915E User manual

Monark
Monark 928 E Pro VO2 User manual

Monark
Monark 828E User manual

Monark
Monark LC2 User manual

Monark
Monark 928 User manual

Monark
Monark Sprint Bike Ergomedic 884E User manual

Monark
Monark 928 E User manual

Monark
Monark 928 G2 User manual

Monark
Monark Ergomedic 874 E User manual

Monark
Monark LC6 novo User manual

Monark
Monark LC6 novo User manual

Monark
Monark 808 User manual

Monark
Monark 915E User manual

Monark
Monark Ergomedi 894 E User manual

Monark
Monark 827E User manual

Monark
Monark Ergomedic 874 E User manual

Monark
Monark LC2 User manual

Monark
Monark LC6 novo User manual

Monark
Monark 928 E User manual