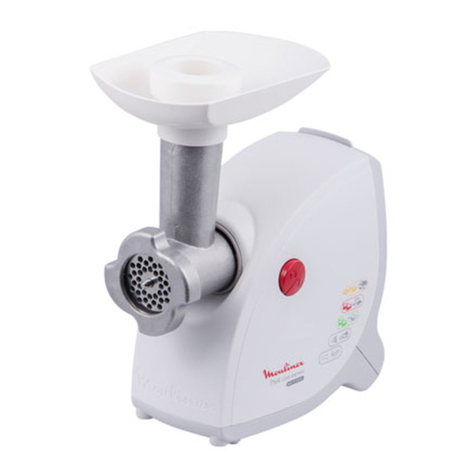
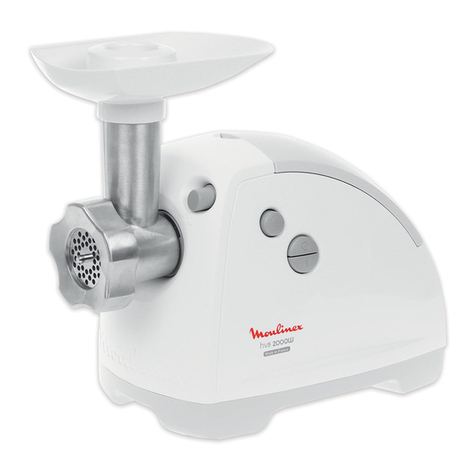
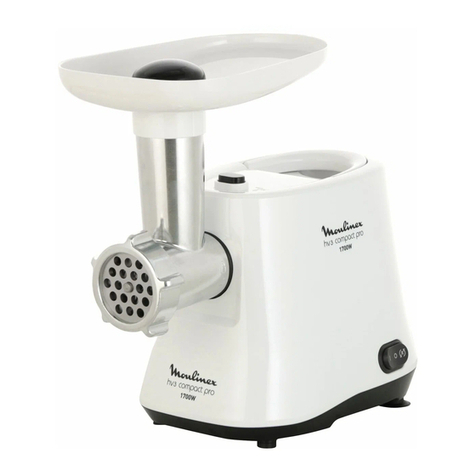
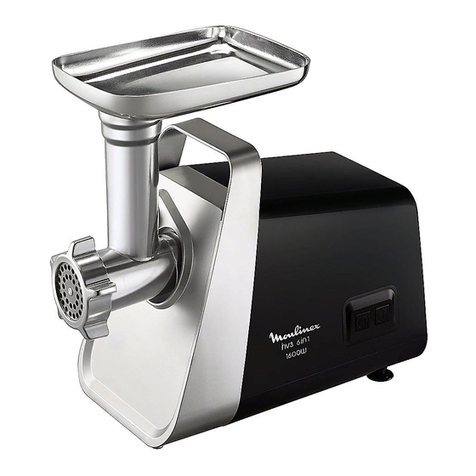
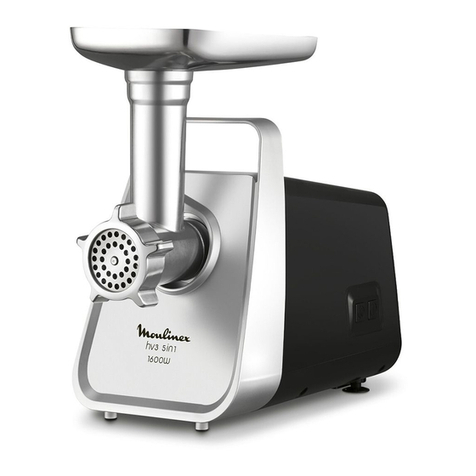
Moulinex LS-123456 User manual

Réf. 1520000779-02
www.moulinex.com
23
45
67
89
10 11
12 13
14
16
15
NOTICE HACHOIR ME657/658 ”ZELMER KILLER”
le 2/07/2012
NOT 3
2 4 5 6
3
1
2
1
3
2
"click"
K
A
C
B(ME657)
D
H
B(ME658)
GE
F
A4a
A4b A4c
A5 A3
I1I2
K1
A2 A1
!!
!! 1
2
1
2
I
J1J2
J
L
L3a L3b L3c
L3d L3e
L2
L1
1
2
L3e
L3d
1
2
1.11.2
1
2
4
3
!!
M
M5
M3
M4
M2
M1
M6
EN p 1 –p 8
RU p 9 – p 17
UK p 18 – p 26
KK p 27 – p 35
www.moulinex.com
23
45
67
89
10 11
12 13
14
16
15
NOTICE HACHOIR ME657/658 ”ZELMER KILLER”
le 2/07/2012
NOT 3
2 4 5 6
3
1
2
1
3
2
"click"
K
A
C
B(ME657)
D
H
B(ME658)
GE
F
A4a
A4b A4c
A5 A3
I1I2
K1
A2 A1
!!
!! 1
2
1
2
I
J1J2
J
L
L3a L3b L3c
L3d L3e
L2
L1
1
2
L3e
L3d
1
2
1.11.2
1
2
4
3
!!
M
M5
M3
M4
M2
M1
M6
EN
RU
UK
KK

www.moulinex.com
23
45
67
89
10 11
12 13
14
16
15
NOTICE HACHOIR ME657/658 ”ZELMER KILLER”
le 2/07/2012
NOT 3
2 4 5 6
3
1
2
1
3
2
"click"
K
A
C
B(ME657)
D
H
B(ME658)
GE
F
A4a
A4b A4c
A5 A3
I1I2
K1
A2 A1
!!
!! 1
2
1
2
I
J1J2
J
L
L3a L3b L3c
L3d L3e
L2
L1
1
2
L3e
L3d
1
2
1.11.2
1
2
4
3
!!
M
M5
M3
M4
M2
M1
M6

Caution : safety instruction booklet LS-123456
is supplied with the appliance.
Before using your appliance for the first time, read
the booklet carefully and keep it in a safe place.
Thank you for choosing an appliance from the Moulinex range.
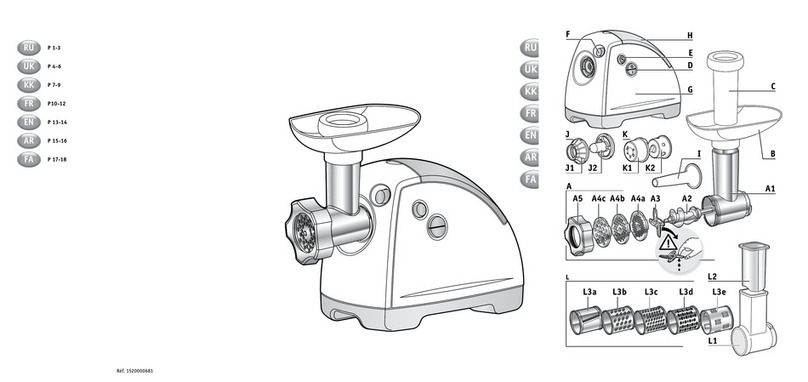
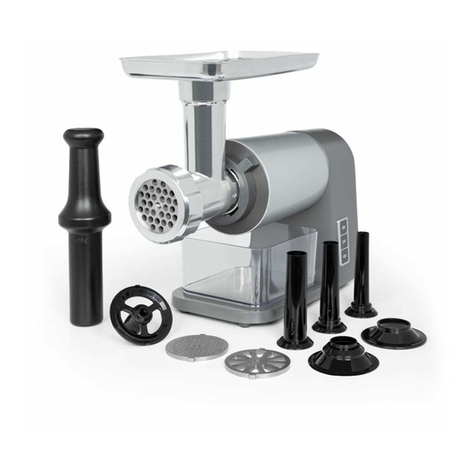
ARemovable mincer head
A1 Aluminium casing
A2 Screw feeder
A3 Self-sharpening stainless steel blades
A4 Screens
A4a Fine hole screen (very fine mincing)
A4b Medium hole screen (fine mincing)
A4c Large hole screen (coarse mincing)
A5 Aluminium locking nut
BRemovable tray
CMeat pusher
DAccessory storage compartment
EMincer head release button
FOn/off switch
GReverse button (momentary reverse action)
HMotor unit
IKEBBE accessory
I1 Ring fitting
I2 Ring
JBiscuit nozzle (availability depends on model)
J1 Support
J2 Nozzle
KSausage unit
K1 Nozzle
LVegetable cutter
L1 Drum holder / hopper
L2 Pusher
L3 Drums
L3a Shredder
L3b Slicer
L3c Grater
L3d Dicer
L3e Dicing attachment
DESCRIPTION:
1
EN

MCoulis accessory (depending on model)
M1 Waterproof seal
M2 Screw
M3 Mixed-hole filter for coulis
M4 Small-hole filter for juice
M5 Juice guide
M6 Cleaning brush
- Always read the instructions carefully before using your appliance for the
first time: Moulinex will not accept responsibility for any use which does not
comply with the instructions for use.
- This appliance is not intended to be used by persons (including children)
with reduced physical, sensory or mental capacities or lack of experience
and knowledge, unless they are supervised or have been given instructions
beforehand concerning use of the appliance by a person responsible for their
safety.
- Children should be supervised to ensure they do not play with the appliance.
- Check that the voltage of your appliance corresponds to your domestic power supply.
- Any incorrect connection to the power supply will invalidate the guarantee.
- This product has been designed for domestic use only. Any commercial use,
inappropriate use or failure to comply with the instructions, the manufacturer
accepts no responsibility and the guarantee will not apply
- Do not leave the appliance unattended when switched on and in use.
- Use the appliance on a flat, clean and dry surface.
- Never allow long hair, scarves or ties to hang down over the appliance when it is
in use.
- Unplug the appliance after use and when you clean it or fit or remove accessories.
- Do not use the appliance if it is not working correctly or if it has been damaged. In
this case contact an approved Moulinex service centre (see list in service booklet).
- Any servicing other than cleaning and normal upkeep by the customer must be
carried out by an approved service centre.
- Do not use the appliance if the power lead is damaged. To avoid all possible danger,
have it replaced at an approved service centre (see list in the service booklet).
- Never place the appliance, the power cord or the plug in water or any other liquid.
- Keep the power lead out of the reach of children.
- The power lead should never touch hot surfaces, or be placed near heat sources
or sharp edges.
- For your own safety, only use Moulinex accessories and spare parts which are
suitable for your appliance.
- Do not use the appliance for longer than 14 minutes.
SAFETY RECOMMENDATIONS:
2

- For your safety, this appliance complies with all applicable standards and
regulations:
• Low voltage directive
• Electro-magnetic compatibility
• Environmental regulations
• Regulations regarding materials in contact with foodstuffs.
Wash all accessories inwarm water and washing up liquid. Rinse and dry carefully.
The screen and blades must be kept lubricated. Apply a little culinary oil to
them.
Do not run the appliance empty if the screen has not been oiled.
WARNING! Handle the drums carefully as the blades are extremely sharp.
MINCER HEAD ASSEMBLY (A) :
Assembling the mincer head (figures 1.1 and 1.2)
Hold section A1 by the hopper with the wider opening at the top. Insert the screw
feeder (A2) (long shaft first) in the head assembly A1.
Fit the stainless steel blades (A3) on the short shaft of the screw feeder (A2), so
that the cutting edges face outward. Fit the screen of your choice over the blades
(A3) ensuring that the pin fits into the notch on the assembly (A1).
Tighten the locking nut A5 (do not apply excessive pressure).
Fitting the mincer head to the appliance (diagram 2):
• The motor unit (H) must be unplugged. Position the mincer head in front of the
unit with the hopper tilted to the right. Fit the two pins on the mincer head into
the two notches on the motor unit.
Push the mincer head firmly into the motor unit (H) and then turn the hopper to
the left until it locks into position (the hopper should be vertical).
• Fit the removable tray (B) onto the pins of the hopper.
Plug the appliance in. It is now ready for use.
Use:
Prepare all the food you wish to mince, removing any bones, cartilage or nerves. Thaw
frozen food completely before mincing
Cut the meat into pieces (approximately 2 cm x 2 cm).
Place a container under the mincer head.
Press the On / Off switch (F) to start the appliance.
Place the pieces of meat on the tray (B) and use the pusher (C) to push them into
the hopper one by one.
USING THE APPLIANCE:
BEFORE USING THE APPLIANCE FOR THE FIRST TIME:
3

Never use your fingers or any other object to push the meat into the hopper.
To make extra fine Kebbe or Kefta mince, pass the meat through the mincer 2 or 3
times until it has the right consistency.
Tip:
When you have finished mincing put a few pieces of bread through the mincer to
push out all the meat.
What to do if the mincer is blocked (diagram 3)
Turn off the mincer by pressing the On / Off switch (F).
Press the Reverse button (G) for a few seconds to clear the blockage.
Press the On / Off switch (F) to continue mincing.
Important : wait until the appliance stops completely before you use the On (F) or
Reverse (G) buttons.
KEBBE ACCESSORY (I)
Kebbe are fried Lebanese meat balls. A bulgar wheat mixture, or minced meat and
bulgar wheat mixture, is squeezed out into a hollow tube by the kebbe accessory.
The inside is often filled with vegetables or minced meat.
Assembly (diagram 4):
Fit the screw feeder (A2) into the mincer head assembly (A1). Insert the ring fitting
(I1) in the head assembly (A1), so that the pin fits into the notch.
Place the ring (I2) over the ring fitting and then secure them by tightening the
locking nut (A5).
When assembled, fit the mincer head to the motor unit (H).
Note: this accessory is used without a screen or blades.
BISCUIT MAKER (J) (availability depends on model)
Assembly (diagram 5):
Fit the screw feeder (A2) into the mincer head assembly (A1). Fit the nozzle (J2)
onto the ring (J1) aligning the pin with the notch on the head assembly (A1).
Secure it by tightening the locking nut (A5) on the head assembly (do not apply
excessive pressure).
Fit the head assembly to the motor unit (H).
NB : this accessory is used without a screen or blades.
Use:
Prepare the dough. Results will be better if the dough is not too stiff.
Choose the design by pointing the arrow to the shape you want.
Keep adding dough until you have made the desired number of biscuits.
SAUSAGE NOZZLE (K)
This accessory can be fitted to the mincer head so that you can make all kinds of
sausages, flavouring them to your own taste.
4

Assembly (diagram 6) :
Fit the screw feeder (A2) into the mincer head assembly (A1). Fit the nozzle (K1)
and secure it by tightening the locking nut (A5). When assembled, fit the mincer
head to the motor unit (H).
NB : this accessory is used without a screen or blades.
Use:
Important: this accessory should only be used after you have minced the meat,
added seasoning and mixed the preparation thoroughly.
Soak the sausage casing in warm water to soften it and slide all of it onto nozzle
(K1) leaving about 5 cm of casing over hanging at the end.
Fill the hopper (A1) on the head assembly (A) with mince, turn the appliance on
and push down with the pusher (C) until the mince reaches the end of the nozzle.
Turn off the appliance.
Tie a knot in the 5 cm length of free casing. Slide the knot up to the end of the
nozzle so that air is not trapped in the casing.
Turn the appliance on again and continue to add mince. Ease the casing along as it
fills. Do not overfill the sausages as this will stretch the casing.
NB : this operation is easier if two people do it together, one feeding the mince
into the mincer and the other holding the casing in position as it fills.
Make sausages of the desired length by pinching the casing and twisting it where
appropriate.
For the best results take care to prevent air becoming trapped in the casing during
filling and make sausages 10 cm to 15 cm in length (separate the sausages by tying
a knot round the casing).
VEGETABLE CUTTER (L)
Assembly (diagram 7):
The motor unit must be unplugged. Position the vegetable cutting unit (L1) in front
of the motor unit tilted to the right so that the lugs are aligned with the notches in
the motor unit (H). Insert the shaft of the unit in the centre hole of of the motor
unit (H). Turn the hopper to the left until the unit (L1) clicks home with the hopper
in the upright position.
Use:
• Select the drum you wish to use.
• Fit the drum into the opening at the front of the vegetable cutter (L1), ensuring
that it is pushed firmly home (Fig. 8).
• Plug in the appliance.
• Press the On / Off button (F) once or twice to lock the drum into position (Fig. 9).
• Start the appliance and feed the vegetables into the hopper (L1) (Fig. 10), pushing
them down with the pusher (L2) (Fig. 11).
• To change the drum, wait for the appliance to stop completely and then press the
Reverse button (G) for 1 second. The drum will be released automatically (Fig. 12).
5

Dicer assembly:
• Fit the dicer drum into the opening at the front of the vegetable chopper (L1),
ensuring that it is pushed firmly home (Fig. 13).
• Position the dicer attachment with the safety catch open aligning the catch with
the hopper (Fig. 13).
• Check that the ring of the dicer accessory is clipped firmly to the lower part of
the opening (Fig.14).
• Close the safety catch over the opening in the chopper.
• Dice food by feeding it into the hopper.
• To remove the dicer attachment pull the lug at the top of the safety catch.
Tip: to release the safety catch (L3e) more easily push it upward with your
finger as you pull the lug towards you (Fig 15).
Use the right drum for each type of food:
Recommendations for the best results:
For best results the ingredients you use should be firm. Do not allow food remains
6
L3a
Shredder
L3b
Slicer
L3c
Grater
L3d / L3e
Dicing
drum and
attachment
Carrots
• • •
Courgettes
• • •
Potatoes
• • • (raw only)
Cucumber
• • •
Pepper
• •
Onions
• •
Beetroot
• •
Cabbage (white/red)
•
Apples
• •
Black radish Mooli
• • •
Celeriac
• •
Banana
• •
Parmesan
•
Gruyère
• • •
Chocolate
• •
Dry bread/biscuits
•
Hazelnuts/walnuts/almonds
•
Coconut •

to build up inside the unit. Do not use the appliance to grate or mince substances
which are too hard, such as sugar or large pieces of meat. Cut food into small pieces
so that it can be fed easily into the hopper.
COULIS ACCESSORY (depending on model)
This accessory, which is fitted to the top of the mincer, will allow you to make coulis
(red fruit, tomatoes) and juice (apple, pear, orange, etc.).
Fitting (diagram 16):
Position screw M2 in place on the body A1 of the top of the mincer A. Put the coulis
filter into position according to the selected use (mixed-hole filter for coulis M3
or small-hole filter for juice M4. Then position the screw A5 and screw it in place
tightly. Place the top of the mincer fitted with this assembly onto the motor drive
H. Then position the juice guide M5 under the filter fitted into position (M3 or M4).
Note: this accessory is not for use with a grille or a knife.
Use:
Coulis: Use the M3 filter, which has 2 filter hole diameters for better extraction. To
make coulis, it is essential to only use fresh fruit. Depending on the season
and the quality of the fruit, it is advisable to sieve the pulp twice to extract
the maximum amount of coulis.
Juice: Use the M4 filter, which has only one filter hole diameter. Place a dish to
collect the juice under the juice guide M5 and another at the end of the filter
to collect the waste.
• Always unplug the appliance before cleaning the motor unit (H).
• Do not put the motor unit in water or hold it under a running tap. Clean the
motor unit with a damp cloth and dry it carefully.
1) Mincer accessories:
- Release the head or accessory by pressing button E.
- Turn the mincer head unit (A) to the right and pull it towards you to remove it
from the motor unit (H).
- To remove the head unit (A), lift off the pusher (C) and the tray (B), unscrew the
locking nut (A5), remove the screen (A4), the blades (A3) and the screw feeder (A2).
- Take special care when handling sharp components.
- Wash all pieces in warm water and washing up liquid, rinse and dry carefully.
Do not put any parts of the head unit (A) in the dishwasher (main body (A1),
screw feeder (A2), blades (A3), screens (A4), locking nut (A5)).
2) Vegetable cutter and other accessories:
- The drum holder (L1), the pusher (L2), the drums (L3a, L3b, L3c, L3d) and the
dicer attachment (L3e) can be washed in the dishwasher in the top tray only using
CLEANING:
7

the ECONOMY or QUICK WASH settings.
- Handle the drums carefully as the blades are extremely sharp.
- If the plastic parts become stained by foods such as carrots, rub the discoloured
areas with a cloth soaked in vegetable oil and then clean as normal.
All other accessories can be washed in the dishwasher.
STORAGE:
The screens, the blades, the screw feeder centring plate, the Kebbe and sausage
accessories (I1, I2, J1, J2, K1) can be stored in the compartment (D) at the back
of the appliance.
3) Coulis accessory
- The 2 filters of the coulis accessory are easy to clean using the brush.
- Important: do not clean these accessories in the dishwasher.
Check that it is correctly connected to the power supply.
If the problem persists, contact an approved Moulinex service centre (see list in service
booklet).
WHAT DO I DO IF THE APPLIANCE DOESN’T WORK?
8

Благодарим за покупку прибора серии Moulinex.
A
Съемная головка мясорубки
A1
Алюминиевый корпус
A2
Винт
A3
Самозатачивающийся нож из нержавеющей стали
A4
Решетка
A4a
Мелкая решетка (Для очень мелкой рубки)
A4b
Средняя решетка (Для мелкой рубки)
A4c
Широкая решетка (Для крупной рубки)
A5
Алюминиевая гайка
B
Съемный поддон
C
Толкатель мяса
D
Чехол для аксессуаров
E
Кнопка для снятия головки мясорубки
F
Кнопка запуска/остановки (0-1)
G
Кнопка «Реверс» (движение тотчас меняется на противоположное)
H
Блок мотора
I
Аксессуар КЕББЕ
I1
Фильерная насадка
I2
Кольцевое уплотнение
J
Фильерная насадка для бисквитов
J1
Подставка
J2
Форма
K
Насадка для колбасок (в зависимости от модели)
K1
Воронка
L
Овощерезка
L1
Конусный корпус с загрузочной горловиной
L2
Толкатель
L3
Конусы
L3a
Конус-терка
L3b
Конус для резки тонкими ломтиками
L3c
Конус для скобления
L3d
Конус для резки кубиками
L3e
Насадка для резки кубиками
9
RU

M
Вспомогательная насадка для приготовления фруктового или овощного
пюре (в зависимости от модели)
M1
Герметичный уплотнитель
M2
Винт
M3
Насадка с отверстиями разной величины для приготовления
фруктового или овощного пюре
M4
Насадка с маленькими отверстиями для приготовления соков
M5
Сливной носик для соков
M6
Щётка для чистки
- Напряжение питания вашего прибора должно соответствовать напряжению
вашей сети.
- Прибор предназначен только для домашнего использования.
- Используйте прибор только на ровной, чистой и сухой поверхности.
- Не оставляйте неубранными длинные волосы, шарф или галстук над
работающим прибором.
- Следует отключить прибор от питания, как только вы прекратили работу,
кроме того, отключаете прибор когда моете его и или убираете аксессуары
или убираете аксессуары.
- Не используйте прибор, если он работает неправильно или поврежден. В этом
случае, следует обратиться в сервисный центр Moulinex (см.список в брошюре
по обслуживанию).
- Все действия по обслуживанию, за исключением очистки и ухода,
осуществляемых пользователем, должны выполняться сотрудниками
сервисного центра Moulinex.
- Если провод поврежден, не используйте прибор. Для устранения опасности
обратитесь для замены в сервисный центр Moulinex (см.список в брошюре по
обслуживанию).
- Не кладите прибор, провод питания или штепсель в воду или другую
жидкость.
10

- Убирайте провод питания от детей.
- Провод питания не должен находиться вблизи или в контакте с
нагревающимися элементами, источником тепла или острым углом.
- Для вашей безопасности следует использовать только аксессуары и запасные
части Moulinex, отвечающие требованиям вашего прибора.
- Не писпользуете прибор дольше 14 мин.
- Для вашей безопасности данный прибор отвечает действующим нормам и
правилам :
• Директива низкого напряжения
• Электромагнитная совместимость
• Окружающая среда
• Материалы, контактирующие с продуктами питания.
Вымойте все аксессуары водой с мылом. Сполосните и тщательно вытрите.
Необходимо взять корпус A1 за загрузочную горловину, направив самое
широкое отверстие к верху. Затем вставьте винт A2 (длинную ось сначала) в
корпус A1.
Вставьте нож из нержавеющей стали A3 на короткую ось, которая выходит за
винт A2, режущими гранями к себе. Любую решетку по вашему выбору наденьте
на нож A3, выступ должен попасть в паз корпуса A1.
Закрутите (не блокируйте) гайку A5
• Перед отключенным от питания блоком мотора H держите головку мясорубки,
загрузочная горловина направлена вправо. Состыкуйте 2 байонетных
соединения головки мясорубки и 2 паза блока мотора.
Голову мясорубки вставьте в блок мотора H , загрузочную горловину поверните
затем влево до метки (загрузочная горловина должна занять вертикальное
положение).
• Установите съемный поддон B на выступы загрузочной горловины мясорубки.
Включите прибор в сеть, он готов к эксплуатации.
11

Приготовьте необходимое для рубки количество продуктов, удалите кости,
хрящи и сухожилия.
Нарежьте мясо кусками (приблизительно 2 см X 2 см).
Под головку мясорубки поставьте емкость.
Нажмите на положение «I» кнопки запуска/остановки F , чтобы включить
прибор.
Положите куски мяса на поддон B и по одному опускайте в отверстие с помощью
толкателя C.
Чтобы получить мягкое тесто Киббе или Кефта, пропустите мясо 2 - 3 раза через
мясорубку до получения массы желаемой консистенции.
В конце работы вы можете пропустить несколько кусков хлеба, чтобы вышли
остатки рубленого мяса.
Выключите мясорубку, нажав на положение «0» кнопки запуска/остановки F.
Затем несколько секунд держите нажатой кнопку «Реверс» G , чтобы освободить
застрявшие продукты.
Нажмите на положение «I» кнопки запуска/остановки F , чтобы продолжить
работу.
дождитесь окончательной остановки прибора перед тем, как
активировать команду «Пуск» F или команду «Реверс»
Вставьте винт A2 в корпус A1 головки мясорубки. Установите фильерную
насадку I1 так, чтобы
выступ попал в паз корпуса A1. Наденьте кольцевое уплотнение I2 на фильерную
насадку и закрутите гайку A5 до конца.
Собранную таким образом головку установите на блок мотора Н.
данный аксессуар используется без решетки и без ножа.
Вставьте винт A2 в корпус A1. Установите затем форму J2 на подставку J1 так,
чтобы выступ попал в паз корпуса A1. Закрутите до конца, не блокируя, гайку
A5 корпуса A1. Установите головку мясорубки собранную таким образом на
блок мотора Н.
12

Приготовьте тесто. Лучший результат получится с тестом слегка мягким.
Выберите чертеж, стрелка должна соответствовать выбранной форме.
Пропускайте тесто пока не получите желаемое количество бисквитов.
Данный аксессуар, прикрепляемый к головке мясорубки, позволит делать
любые колбаски, которые вам останется только приправить по своему вкусу.
Вставьте винт A2 в корпус A1 головки мясорубки. Установите воронку K1,
закрутите гайку A5 до конца. Установите головку мясорубки собранную таким
образом на блок мотора H.
данный аксессуар следует использовать только после того, как мясо
было порублено, специи добавлены и масса хорошо перемешана.
Предварительно вымоченную в теплой воде колбасную оболочку, ставшую
снова эластичной, наденьте на воронку K1 , оставив приблизительно 5 см.
Рубленое мясо поместите в загрузочную горловину корпуса A1 головки
мясорубки A, включите и толкайте толкателем C так, чтобы рубленое мясо
вышло на край воронки.
Выключите прибор.
Сделайте узел с оставленных 5 см колбасной оболочки. Передвиньте узел к
краю воронки, чтобы не блокировать воздух в колбасной оболочке.
Включите прибор и продолжайте накладывать рубленое мясо. Следите за
колбасной оболочкой, пока она не наполнится. Чтобы сильно не растягивать
оболочку, не делайте слишком толстых колбасок.
Колбаски можно делать любой желаемой длины, сжимая и поворачивая
оболочку.
Чтобы получить качественные колбаски, необходимо следить за тем, чтобы при
наполнении воздух не собирался внутри, рекомендуем делать колбаски длиной
10-15 см (отделяйте колбаски, оставляя кусок оболочки для формирования
узла).
13

Напротив отключенного от питания блока мотора установите корпус L1 ,
наклоненный вправо, ушки корпуса должны войти в отверстия блока мотора
H. Установите стержень, выходящий из корпуса L1 ,в ось блока мотора H.
Загрузочную горловину корпуса L1 поверните влево до метки.
● Выберите конус, соответствующий желаемому использованию.
● Вставьте выбранный конус в отверстие, находящееся в передней части
корпуса L1, конус должен занимать правильное положение внутри несущего
элемента (рис. 8).
● Подключите прибор к питанию.
● Нажмите один или два раза на кнопку запуска/остановки F , чтобы блокировать
конус (рис. 9),
● Включите прибор, затем через загрузочную горловину корпуса накладывайте
продукты L1 (рис. 10) и проталкивайте их с помощью толкателя L2 (рис. 11).
● Чтобы заменить конус, необходимо дождаться полной остановки конуса.
Удерживайте нажатой в течение 1 секунды кнопку G Реверс, конус выйдет
автоматически (рис. 12).
● Вставьте конус для резки кубиками в отверстие, находящееся в передней
части корпуса L1, конус должен занимать правильное положение внутри
несущего элемента (рис. 13).
● Затем установите для резки кубиками с открытым замком безопасности,
располагая замок безопасности в центре загрузочной горловины конусного
корпуса (рис. 13).
● Проверьте, чтобы кольцо для резки кубиками было хорошо зажато у
основания конусного корпуса (рис. 14
● Закройте замок безопасности на конусном корпусе.
● Начинайте резку кубиками, опуская продукты в загрузочную горловину
конусного корпуса.
● Чтобы вынуть насадку для резки кубиками, достаточно потянуть за язычок,
находящийся сверху замка безопасности.
:
L3e,
14

15
Чтобы получить удовлетворительный результат и предотвратить застревание
продуктов в корпусе, используемые ингредиенты должны быть крепкими. Не
используйте прибор, чтобы тереть или резать ломтиками продукты слишком
жесткие такие, как сахар или куски мяса. Разрезайте продукты, чтобы их было
проще проталкивать в горловину корпуса.
Эта вспомогательная насадка, которая крепится в верхней части мясорубки,
позволит Вам приготовить пюре (из спелых фруктов, помидор) и соки (из яблок,
груш, апельсинов и т.п.)
Конус-терка
L3a
Конус для
резки
тонкими
ломтиками L3b
Конус для
скобления L3c
Конус и
насадка
для резки
кубиками
L3d и L3e
Морковь • • •
Кабачки • • •
Картофель • • • (только сырые)
Огурец • • •
Перец • •
Лук • •
Свекла • •
Капуста (белая/красная)
•
Яблоки • •
Редька черная • • •
Корневой сельдерей • •
Бананы • •
Пармезан •
Грюйер • •
Шоколад • •
Сухой хлеб/сухари •
Лесной орех/грецкий
орех/миндаль •
Кокосовый орех •

Поместите винт на место в корпусе в верхней части мясорубки .
Установите фильтр для пюре в зависимости от того, что Вы собираетесь
готовить (фильтр с отверстиями разной величины для приготовления пюре M3
или фильтр с маленькими отверстиями для соков . Затем устаносите гайку
A5 и закрутите её до конца. Установите верхнюю часть мясорубки на моторный
блок H. Затем установите сливной носик для соков под установленным
фильтром ().
Используйте фильтр с 2 диаметрами фильтрующих
отверстий для наилучшей экстракции. Для приготовления пюре используйте
только свежие фрукты. В зависимости от времени года и качества фруктов,
желательно повторно пропустить мякоть через мясорубку для получения
максимального количества пюре
Используйте фильтр с одним диаметром отверстий для фильтрации.
Установите ёмкость для сбора сока под сливной носик и другую ёмкость под
фильтром для сбора отходов.
•
● Не погружайте блок мотора в воду, не подставляйте его под воду. Чистите
блок мотора влажной тряпкой. После чистки следует полностью высушить.
- Снимите блокировку головки или аксессуара овощерезки, нажав на кнопку
E.
- Поверните головку мясорубки A вправо и потяните на себя, чтобы
разъединить блок мотора H.
- Чтобы снять головку овощерезки A, выньте толкатель C и снимите поддон B,
отвинтите гайку A5, снимите решетку A4, нож A3 и винт A2.
-
- Вымойте все запчасти под горячей водой с мылом, сполосните и тщательно
вытрите.
- Не мойте головку мясорубки A в посудомоечной машине (то есть корпус A1,
винт A2, гайку A5, нож A3 и решетки A4).
● Корпус (L1), толкатель (L2), конусы (L3a, L3b, L3c, L3d) и аксессуар для резки
кубиками L3е можно мыть в посудомоечной машине в корзине, используя
программу «ЭКО» или «НЕ СИЛЬНО ГРЯЗНОЕ».
16
Other manuals for LS-123456
4
Table of contents
Languages:
Other Moulinex Meat Grinder manuals

Moulinex
Moulinex ME6051 User manual

Moulinex
Moulinex ME301132 User manual

Moulinex
Moulinex HV7 PLUS User manual

Moulinex
Moulinex ME4581 User manual

Moulinex
Moulinex HV3 User manual

Moulinex
Moulinex hv4 User manual

Moulinex
Moulinex HV4 ME4061 User manual

Moulinex
Moulinex HV8 ME6 Series User manual

Moulinex
Moulinex ME41513E User manual

Moulinex
Moulinex ME60614A User manual