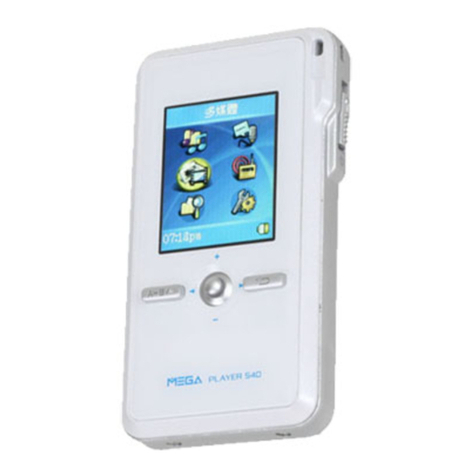
MSI P580 User manual

MSI P580
User’s Manual

1
Preface
Thank you for buying MSI P580. We wish you enjoy using it.
Please read and retain all the operating instructions before operating the unit, we do not assume
any liability arising out of improper operation or incidental damages.
For better services, the content of this operation manual may be changed.
If the actual setup and usage of the unit are different from this operation manual, please view the
website of our company to inquire about the latest product information.
Dear Customer:
The player can store 170 files in the root directory of the disk if the player is defaulted
as FAT format. If you want to store more files in the player, please built a new folder
and place the files in the new built folder.
Notice: The SD socket of P580 is deeper than ordinary ones; you can pull out SD card
by using a hard and sharp object.

2
I. Features:
2.8-inch 320x240 dot matrix color TFT display
Support MP3 /WMA/WAV playback. Support LRC lyric display.
Support MPEG-4(AVI) video formats
Support JPEG picture viewing
FM tuner (optional)
Game function
Support T-Flash card
Built-in microphone, high quality voice recording
Several EQ modes
Built-in Speaker
Support several languages
Firmware upgradeable
No driver needed under Windows 2000/XP/ME

3
II. Note:
1. Do not use the unit in places that are extremely hot, cold, dusty, or humid.
2. Avoid the unit being dropped.
3. The battery service life may differ under different usage conditions and different models
4. Please charge the unit when any of the following cases occur:
A. The battery indicator informs low battery
B. The player turns off automatically, and turns off again after rebooting.
C. The keys become inactive
5. Do not disconnect the player while it is formatting or uploading/downloading, or the
procedures may lead to errors
6. While using as mobile storage disk, please store and derived documents as per proper
documents managing operation, or the documents might loose.
7. The player is charged while connected with PC via USB, no matter it is power on or not.
8. Do not disassemble.Any doubt please contacts the dealer.
9. Specifications are subject to change and improvement without notice
10.Avoid water or foreign objects enter the player.

4
III. Introduction of cover:
<: Previous/REW
>: Next/FF
V+: Volume increase
V-: Volume decrease
M: main menu/return
OK: Power on/off/Play/Pause/Stop

5
IV. Main Interface
In the main interface, press “<”/ “>” button to select the menus, and press “M” button to
enter.
V. Audio playback
Select “Music” in the main menu, and press “M” button to enter. The player starts playback
automatically.
Operation on buttons:
Press “<”/“>” button to select files.
Press “V+” / “V-” to adjust the volume.
Press “OK” button to pause.
Functions:
1. Adjust Volume
Press “V+” or “V-” button to increase or decrease the volume.
2. Play list
Press “M” button to enter the audio file play list, and press “M” button to play the selected
file.

6
3. EQ selection
Press and hold “M” button to return to the main menu, and select “Music” in the “Settings”
menu. And then select “EQ selection” and press “M” button to enter. select “Normal”, “3D”,
“Rock”, “Pop”, “Classic”, “Bazz”, “Jazz” or “User EQ” by “<”/“>” button, and press “M”
button to confirm.
4. FF/REW
Press and hold “<”/“>” button to FF or REW.
5. Lyrics Display
While playing music files, if there is a lyric file which has the same name with the music
file, and is placed in the folder of the playing music file, the player will display the lyrics
directly. Press and hold “V-” button to shift the display mode.
6.A-B repeat
While playing music, press and hold “V+” button to enter the A-B repeat mode. The left
upper corner of the LCD displays the A-B repeat icon “A”, and the start point of the repeat
section is set. Press “V+” button again, icon “B” appears, and the end point is set. The
“A-B” icon is fixed, and the player starts to repeat the section. Press “V+” button the third
time to cancel A-B repeat.
VI. Video playback
Select “Video” in the main menu, and press “M” button, the player enters the video file list

7
first. (If the T-flash card is inserted, the player will display two folders “Card” and “Flash
memory”. Select one and enter to operate”.
Operation on buttons:
Press “<”/“>” button to select files. And press “M” button to start playback.
Press “M” button to return to the previous menu.
While playing, press “M” button to return to the previous file list; press and hold the “M”
button to return to the main interface.
Functions:
1. FF/REW
Press and hold “<”/“>” button to FF or REW while playing.
2. Play list
Press “M” button to enter the video file play list, press “<”/“>” button to select the file you
want. Press and hold “M” button to return to the main interface.
3. Adjust Volume
Press V+ or V- button to increase or decrease the volume.
VII. FM tuner (optional)
Select “Radio” in the main interface, and press “M” button to enter.
1. Searching for stations
Press “M” button to enter the FM submenu, and then select “Manual” to search for the
station manually. Press and hold “<”/“>” button to search for stations from low/high
frequency. There will be no voice while searching for stations. It will stop searching until it
searched for the next station. Press “<”/“>” button momentarily, the frequency will be

8
decreased or increased 0.05MHz every time.
2. Store stations
Under the FM submenu, select “mem” and press “M” button to enter, and then press
“<”/“>” button to select the position of saving the station: CH1, CH2…. Press “OK” button,
and then press “<”/“>” button to select “Yes” or “No” to save to cancel.
3. Preset stations
Press “<”/“>” button to select “prese” under the FM menu, and press “M” button to confirm.
Press “<”/“>” button to select the preset stations.
4. Auto searching:
press “M” button to enter the FM menu first, press “<”/“>” button to select “auto” and then
press “M” button to confirm, it starts to search for stations automatically from low
frequency to high frequency. There will be no response on the buttons during searching for
stations, but you can press and hold “<”/“>” button to stop searching.
5. Delete stations
Press “<”/“>” button to select and enter “del” under the FM submenu, Press “<”/“>” button
to select the station you want to delete: CH1, CH2…. Press “OK” button, and then press
“<”/“>” button to select “Yes” or “No” to save to cancel.
6. Adjust volume
Press “V+” and “V-” to adjust the volume.
VIII. Picture viewing

9
Select “Photo” in the main menu, and press “M” button to enter. The player enters the file
list first.
Operation on buttons:
Press “<”/“>” button to select files.
Press “M” button to return or browse.
Press “OK” button to auto-view or pause.
Press and hold the “M” button to return to the main menu.
IX. E-book
Select “Ebook” in the main menu, and press “M” button to enter. The player enters the file
list first.
Operation on buttons:
Press “V-” button to return to the previous menu.
Press “<”/“>” button to select files.
Press “M” button to start reading after selected the file.
Press “M” button to return to the previous e-book file list after entering.
Press and hold the “M” button to return to the main menu.
1. Press “OK” button to enter the E-book reading interface.

10
2. Press “<”/“>” button to skip to the previous or next page.
3. Press and hold “V+” button to save the bookmark list. Press “<”/“>” button to select the
bookmark, and then press the “M” button to save it.
4. Press and hold “V-” button to display the “load bookmark” list. Press “<”/“>” button to
select the bookmark, and then press the “M” button to load it.
5. Press “V+” or “V-” to move to the next or previous line.
Note: The bookmark is only available to the current file, and has to be re-set while
reading other files.
X. Recording
Select “Record” in the main menu, and press “M” button to enter.
Operation
Recording:
1. Press “OK” button to start recording.
2. Press “OK” button to pause.
3. Press and hold “OK” button to save the recorded file.
4. Press and hold “M” button to save the recorded file and return to the main interface.
(Recorded files will be saved to local disk of P580 due to main chip’s default setting.)
Playing recorded file
1. Select “Music” in the main interface.
2. Press “M” button to enter the explorer, and then press “<”/“>” button to select “VOICE”
folder.
3. Press “M” button to enter, and then press “<”/“>” button to select the file you want to
play, and press “M” button to start playback.

11
4. Volume adjustment is as same as music playback.
XI. Browser
Select “Browser” in the main menu, and press “M” button to enter. (If the T-flash card is
inserted, the player will display two folders “Card” and “Flash memory”. Select one and
enter to operate”.) There list all of the files in the player.
1. Select files
Press “<”/“>” button to select files and press “M” button to enter.
Press “M” button to enter the corresponding playback interface after the selected files. If
the file is not been recognized, there will be no response after you pressed the buttons.
Press and hold “M” button to return to the main interface.
2. Delete files
If you want to delete the file, press and hold “V+” button after you selected it.Adialog box
pops up. Press “<”/“>” button to select “Yes” or “No” and press “M” button to confirm.
3. After the file is deleted, the playing music will stops playback.
XII. Games
Select “Game” in the main menu, and press “M” button to enter.

12
Operations: (Fighting Space)
1. Start and pause
Press “M” button to star the game. Press “OK” button to pause.
2. How to play
Press “<”/“>” button to move to left or right. Press “V+” or “V-” button to up and down.
“M” button is for death-attack.
3. Quit
Press “OK” button and then press “V+” or “V-” to select “QUIT” and then press “M”
button to confirm.
Select “Exit Game” and press “M” button to exit.
XIII. Settings
Select “SETTINGS”option in the main menu,and press “M” key to enter the setting
interface. Then press “<”/ “>” key to select a setting item, and press “M” key to enter the
item.
Notes: In this menu, press “V-” key to return the previous menu.
1.Music Playback setting
In this setting interface, there are four options to be selected: repeat mode,play mode,EQ
select and user EQ set . Here, press “</>” key to select a setting, or press “M” key to enter
the secondary menu. In these two options, press “</>” key to select a relevant setting,and
then press “M” key to save the setting and return the previous directory.
①Repeat mode
In this menu, there are seven options to be selected: once, repeat one, folder once, folder
repeat, All once, All repeat and Intro.
②Play mode

13
In this menu, there are two options to be selected: order and shuffle.
③EQ selection
In this menu, there are eight options to be selected: Normal/3D/ Rock/Pop/ Classic/ Bass/
Jazz/ User EQ.
④User EQ setting:
In this menu, there are five kinds of frequency,and there are 6 levels in every frequency for
user to adjust.
2.Radio setting
In this menu there are two options: stereo switch, FM region. Here press “</>” key to select
a setting item, or press “M” key to enter secondary menu. In these two options, press “</>”
key to select relevant setting,and then press “M” key to save the setting and return the
previous directory.
①stereo switch.
In this menu, there are two options: On and Off.
②Listening area
In this menu there are four options: China, Europe, Japan, and the U.S.A.
3.Record setting
In this setting there are two options: record quality, record volume. Here press “</>” key to
select a setting item or press “M” key to enter the secondary menu. In these two options,
press “</>” key to select a relevant setting item,and then press “M” key to save the setting
and return the previous directory.
①Record quality
In this menu, there are two options: High quality,Normal quality.(This function is only
available for MIC recording.)
②Record volume
In this menu, there are five options to be selected: +1, +2, +3, +4, +5. The higher the level
is,the bigger the record volume will be.

14
4.Display setting
In this menu there are three options: Backlight time, lum, and Backlight mode. Here, press
“</>” key to enter the secondary menu. In these three options, press “</>” key to select
relevant setting item,and then press “M” key to save the setting and return the previous
directory.
①Backlight time
In this menu there are 6 options to be selected: 5 seconds, 10 seconds, 15 seconds,
20seconds, 30 seconds, always on.
②Lum
In this menu, there are five options:1, 2, 3, 4 and 5. The lower the level is, the darker the
brightness will be.
③Backlight mode
In this menu, there are two options: Normal and Power save.
5.Auto Play Set
To set the time of autoplaying while viewing pictures or texts. In these two options, press
“</>” key to select relevant setting item,and then press “M” key to save the setting and
return the previous directory.
①Text
In this menu, there are five options: 1second, 2 seconds, 3 seconds, 4 seconds and 5
seconds.
②Jpeg
In this menu, there are five options: 1second, 2 seconds, 3 seconds, 4 seconds and 5
seconds.
6. System setting
In this menu, there are three options to be selected: Language, about and upgrade. Here,
press “</>” key to select setting or press “M” key to enter secondary menu. In these 3
options, press “</>” key to select the relevant setting,and then press “M” key to save the

15
setting and return the previous directory.
1). Language selection
Press “M” key to enter language setting menu. In this menu, there is many languages to
select, press “M” key to save and return the previous directory.
2). About
Press “M” key, the following information is displayed:this machine storage capability,
remaining capability, system software version, which is read only.
Press “M” key to exit.
3). Firmware upgrade
In this menu pop up dialog box,press “</>”key to select “Yes”or“Cancel”,and press “M”
key to confirm upgrade firmware.
7.Power off time
In this menu, there are many options to be selected as follows: OFF, 10 minutes, 15 minutes,
30 minutes, 60minutes and 120 minutes.
8. Default set
In this manu, pop up dialog box, press “</>” key to select “Yes” or “Cancel”, and press
“M” key to confirm whether to restore the system default or not.
XIV Converting a Video File
AVI is one of the most popular video formats in the portable media player right now. It is
very popular in the internet. It adopts XviD/DivX format to code the video file. The quality
of the video file is so higher,while the video file is so small. In the quality aspect ratio,for
the video file effect, you can adopt XviD/DivX format to code nothing less than adopt
WMV or RMVB format to code.
Support convertingAVI, MPG, MPEG, RM, RMVB, WMV, DAT and so on format to AVI
format in high speed and high quality.
System requirements

16
A. The Converter software needs the basic configuration as follows:
CPU:Intel or AMD kern , Intel Pentium 3 or above,including Intel Celeron series
Operation steps:
1. Run convert tools in the attached disc, and install A Converter V3.0;
2. After the installation completes, run the AV Converter in the start menu;
3. Show the interface.
Operation steps:
①Add a converted file, and select source file path, as shown in the picture below:
②Select the target file path, and press the key in the right of the target file.
③Select the convert quality and aspect ratio.
④After set each parameter,press “Save” key and continue to add a converted file,or
press “End” key to return previous interface, convert the current file.
5 Press to start convert:
After the convert progress attains 100%,it shows that the file is converted successfully, and
then please use the USB cable to transfer the file to portable media player. In this way, you
can watch the video in the player.
源文件按钮
输出文件路
径

17
XV. System Upgrade
1. The first time to upgrade the firmware on your PC, put the enclosed CD into the
CD-ROM, and then connects the player with the PC. (Press
and hold “<” button before connect the player with PC until the following installation
interface appears.)
2. Click “Next” as per the promotion on the dialog box. In the “browsing” option of the
fourth dialog box, select the “upgrade fool” folder of the enclosed CD, and click “OK” to
confirm.
3. Operate according to the promotion on the dialog box until finished.
1. After the installation finished, select and run the upgrade tool in the CD
“Consumer_enc.exe”, and then select *rfw firmware file in the “open” option.

18
2. Connect the player to PC via USB cable; click “Burn Firmware” to start upgrading.
NOTE: firmware upgrading is to improve the performance of the player; it will not
influence the normal working of the player if you do not upgrade the firmware. But
improper operation on firmware upgrading would cause abnormal of the player. The
upgrading firmware does not apply to other series players.

19
XV. Troubleshooting
1. Failure to start/No response on buttons/ player freezes
·Check if the POWER SWITCH is on the position of “ON” , and check the power of
battery;
·Connect with the power adapter and check again;
·Push the power switch to the direction of OFF and push it to ON again. Press OK button to
turn on the player.
·If it still fails to start after charge,please contact our customer service center.
2 No voice in the earphone
·Please check the volume is 0 or not;
·Please check the connection of the earphone.
3. Serious noise
·Please check whether the pin of the earphone is dirty or not,as the disorders could cause
noise.
·Please check whether the music file is broken or not.You could try to play another music
file. If the file is damaged, it could cause serious noise or pause.
4. No voice in the loudspeaker
·Check if the setting of the loudspeaker is set as CLOSE. Set the speaker in
“Settings-Speaker” menu.
5. Display clobber on the screen
·Please check whether the language is properly selected or not, and please enter
<Setting>\<system setting>\<language selection> to set the language.
6. Download file failure
·Be sure the connection between computer and player is properly arranged;
·Check whether the memory is used up or not;
·Check whether the USB cable is broken or not.
7. Do not support WMAformat music
The player dose not support WMA format music files which bit rate lower than 64kbps.
Other MSI MP3 Player manuals

MSI
MSI Mega Player 536 User manual

MSI
MSI P500 User manual

MSI
MSI MEGA STICK 527 User manual
MSI
MSI P650 User manual

MSI
MSI Mega Player 533 User manual

MSI
MSI Mega Player P310 512MB User manual

MSI
MSI MegaStick 520 User manual

MSI
MSI Mega Player 515 Lite User manual
MSI
MSI MEGA Stick 1 User manual

MSI
MSI P560 User manual

MSI
MSI P230 User manual

MSI
MSI MEGA STICK 528 User manual

MSI
MSI Mega Player 540 User manual

MSI
MSI Mega Player 516 User manual

MSI
MSI Mega Player 515 Lite User manual
MSI
MSI Mega Player 538 User manual

MSI
MSI P640 User manual

MSI
MSI MEGA Stick 256 User manual

MSI
MSI Mega Player 521 256MB User manual

MSI
MSI Mega Player 522 User manual